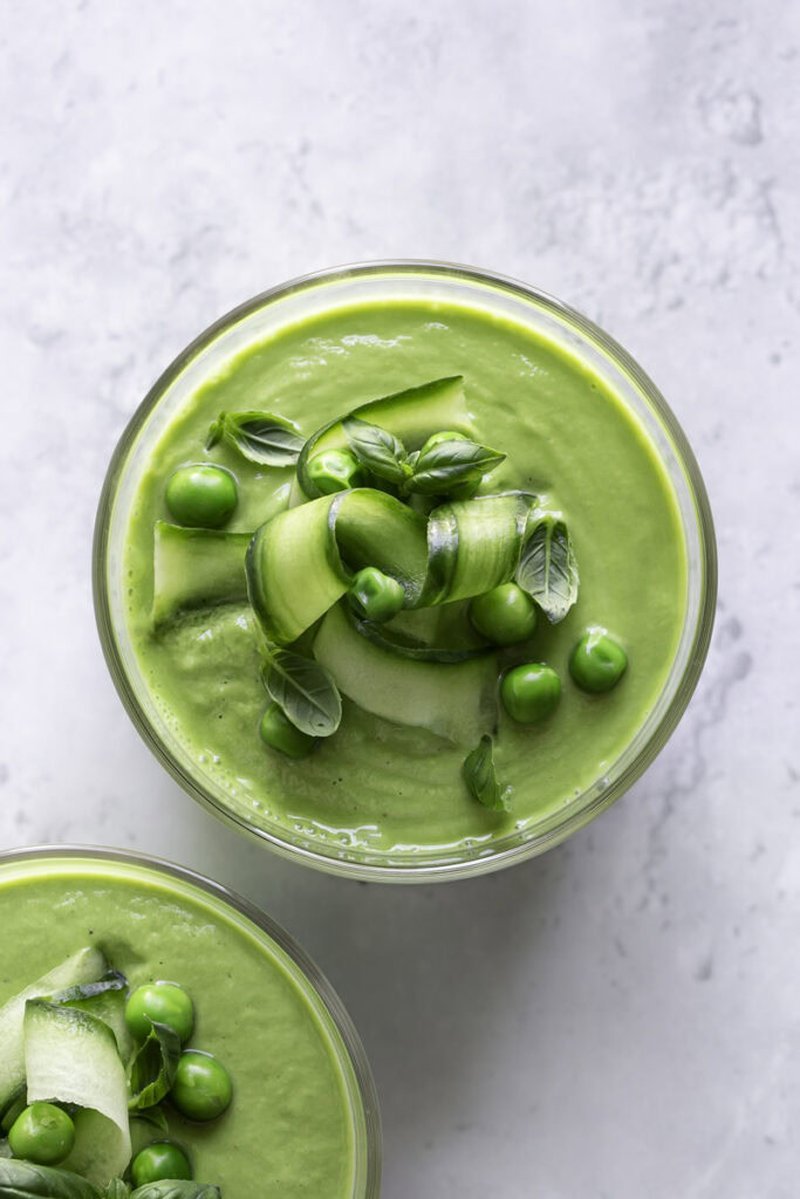
分类: Recipes

  • The Honey Mustard Dipping Sauce I Kept Re-Making for Years

    The Honey Mustard Dipping Sauce I Kept Re-Making for Years

    There’s a jar in my fridge that has outlived three batch cook sessions, two school dinners, and one very questionable takeout order. It’s honey mustard. Not the flat, sugary stuff from the bottle, but the proper creamy kind, the sort I’ve been chasing since I was a kid.

    Creamy honey mustard dipping sauce in a ceramic bowl with a wooden spoon lifting a dripping dollop

    I’m not a Jersey girl, but the diner honey mustard I grew up loving in Brighton chippy queues and family chip shops was always the same idea. Thick, sweet, tangy, and best eaten dripping off something fried. So when I found a recipe that nailed it, I tested it until my kitchen counter looked like a mustard factory. It may just end your search too.

    Why this works

    Here’s the secret nobody tells you: the backbone of a good honey mustard is mayonnaise, not mustard or honey. That’s what gives it body and creaminess, and it mellows out the sharpness of the mustard and the sweetness of the honey. Once you understand that, you stop reaching for more honey and start reaching for the mayo.
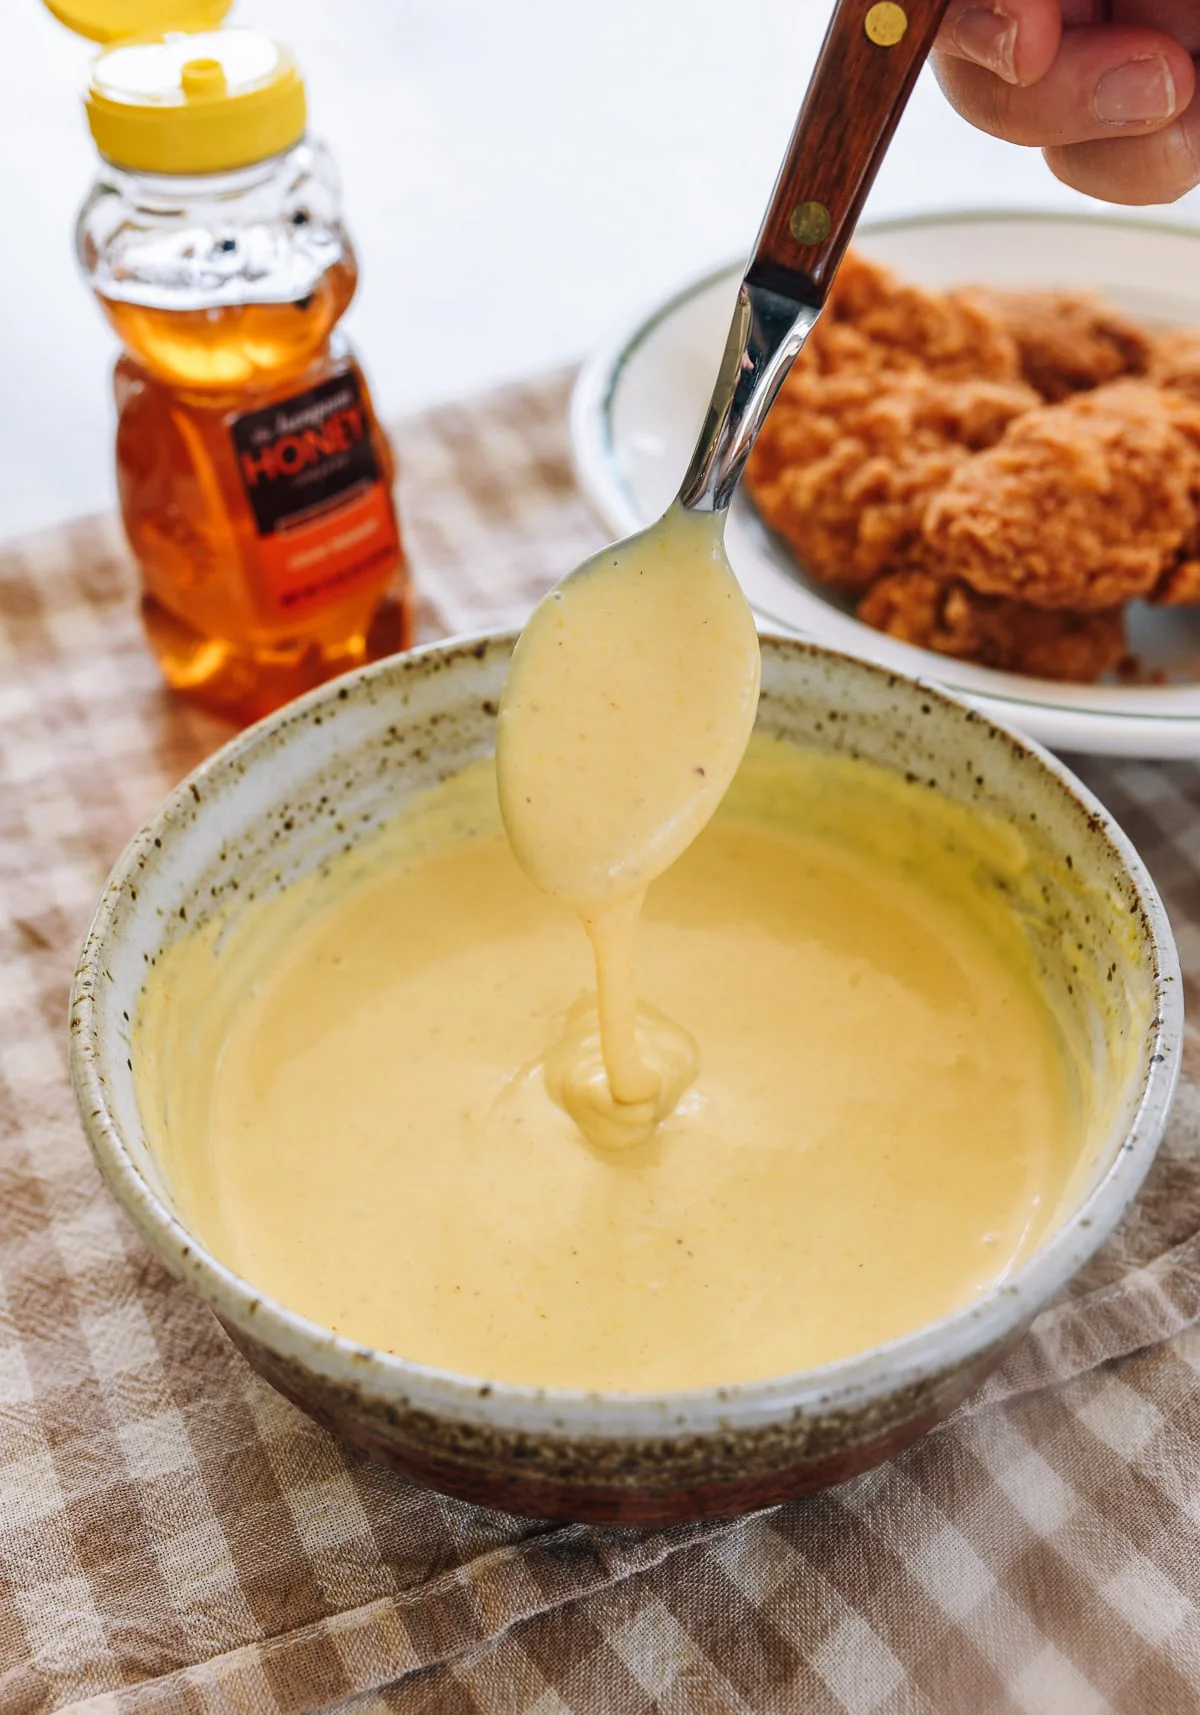
    Bowl of thick honey mustard sauce beside fried chicken and a honey bottle

    It takes 2 minutes, start to finish, and it serves 10. I keep a batch in the fridge all the time because it keeps for 1–2 weeks in an airtight container, as long as you dip with a clean utensil each time.

    What you’ll need

    The recipe uses two kinds of mustard, and that’s where most home versions fall flat. You want a proper Dijon mustard for the sharp, spicy base, plus a deli-style mustard, the smooth, bright-yellow kind that’s different from the darker brown mustard most people reach for. That second jar is what gives the sauce its rounded, diner-style tang instead of a flat one-note flavor.

    • ½ cup mayonnaise (any decent full-fat mayo you like)
    • 2½ tablespoons Dijon mustard
    • 1 tablespoon deli-style mustard (the smooth, bright-yellow kind)
    • 1½ tablespoons honey (up to 2 tablespoons if you like it sweeter)
    • ⅛ teaspoon salt
    • 1 pinch white pepper

    How to make it

    1. Add the mayonnaise, Dijon mustard, deli-style mustard, honey, salt, and white pepper to a medium bowl.

    2. Stir to combine. That’s it. If you like your honey mustard sweeter, add another ½ to 1½ teaspoons of honey until it’s right for you.
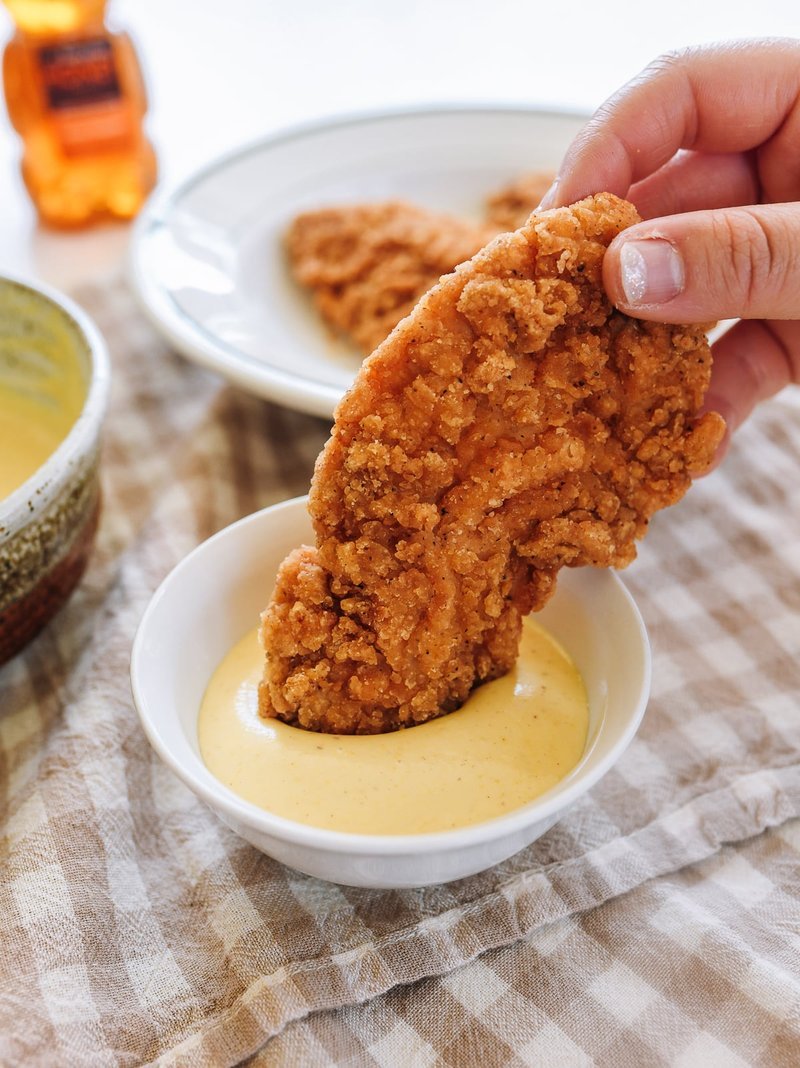
    Hand dipping a golden fried chicken cutlet into honey mustard sauce

    White pepper is the quiet hero here. It adds depth without turning the color brown or stealing the show from the honey and mustard. I keep it in the pantry and forget about it until a recipe calls for it, which is exactly when you need it.

    What to dip it with

    The obvious: french fries, chicken tenders, tofu nuggets, sweet potato fries, roasted potatoes, soft pretzels, fried fish or fish sticks, onion rings.

    Breaded chicken piece being dipped into creamy honey mustard sauce in a white bowl

    Less obvious: veggie sticks, sandwiches, wraps. And if you’re feeling fancy, it works as a sauce for seared salmon, grilled chicken, pork tenderloin, or pork chops. It’s great on turkey too, which is useful if you have leftovers from a holiday meal and are still trying to figure out what to do with them.

    Turn it into a salad dressing

    This is my favorite lazy hack. Thin the sauce with ½ cup of extra virgin olive oil, add a generous pinch of extra salt, and a splash of white wine vinegar to taste. You’ve got a creamy, sweet-tangy dressing for about 30 seconds of work.

    Bowl with mayonnaise, mustard, and honey unmixed, ready to be stirred together

    Stir well, taste, adjust, done. I use it on whatever salad is in the fridge, usually the one that’s been there since Monday and is starting to look a little tired.

    Nutrition per serving

    89 calories, 3g carbohydrates, 0.3g protein, 9g fat (1g saturated), 158mg sodium. These are estimates, not gospel. Brands vary, honey varies, your kitchen varies. Use them as a guide, not a diagnosis.

    Finished mixed honey mustard sauce in a ceramic bowl with a wooden spatula

    Trade-It Tip

    No deli-style mustard? Use a smooth, bright-yellow prepared mustard. The whole point is that second jar of tang, so grab the one that’s smooth and yellow, not the dark brown one. If you’re stuck with only Dijon, add a tiny pinch of extra salt and a splash of vinegar to fake out the depth. It won’t be identical, but it’ll be good enough to eat.

    If it doesn’t fit a Tuesday night, it doesn’t get published.

    Keep Reading

  • The Summer Herb That Makes Everything Taste Fresh

    The Summer Herb That Makes Everything Taste Fresh

    There’s a jar on my counter that used to be a pickle jar. Now it holds a bunch of fresh basil, leaves and stems, and every night this week it’s been quietly rescuing my dinner.

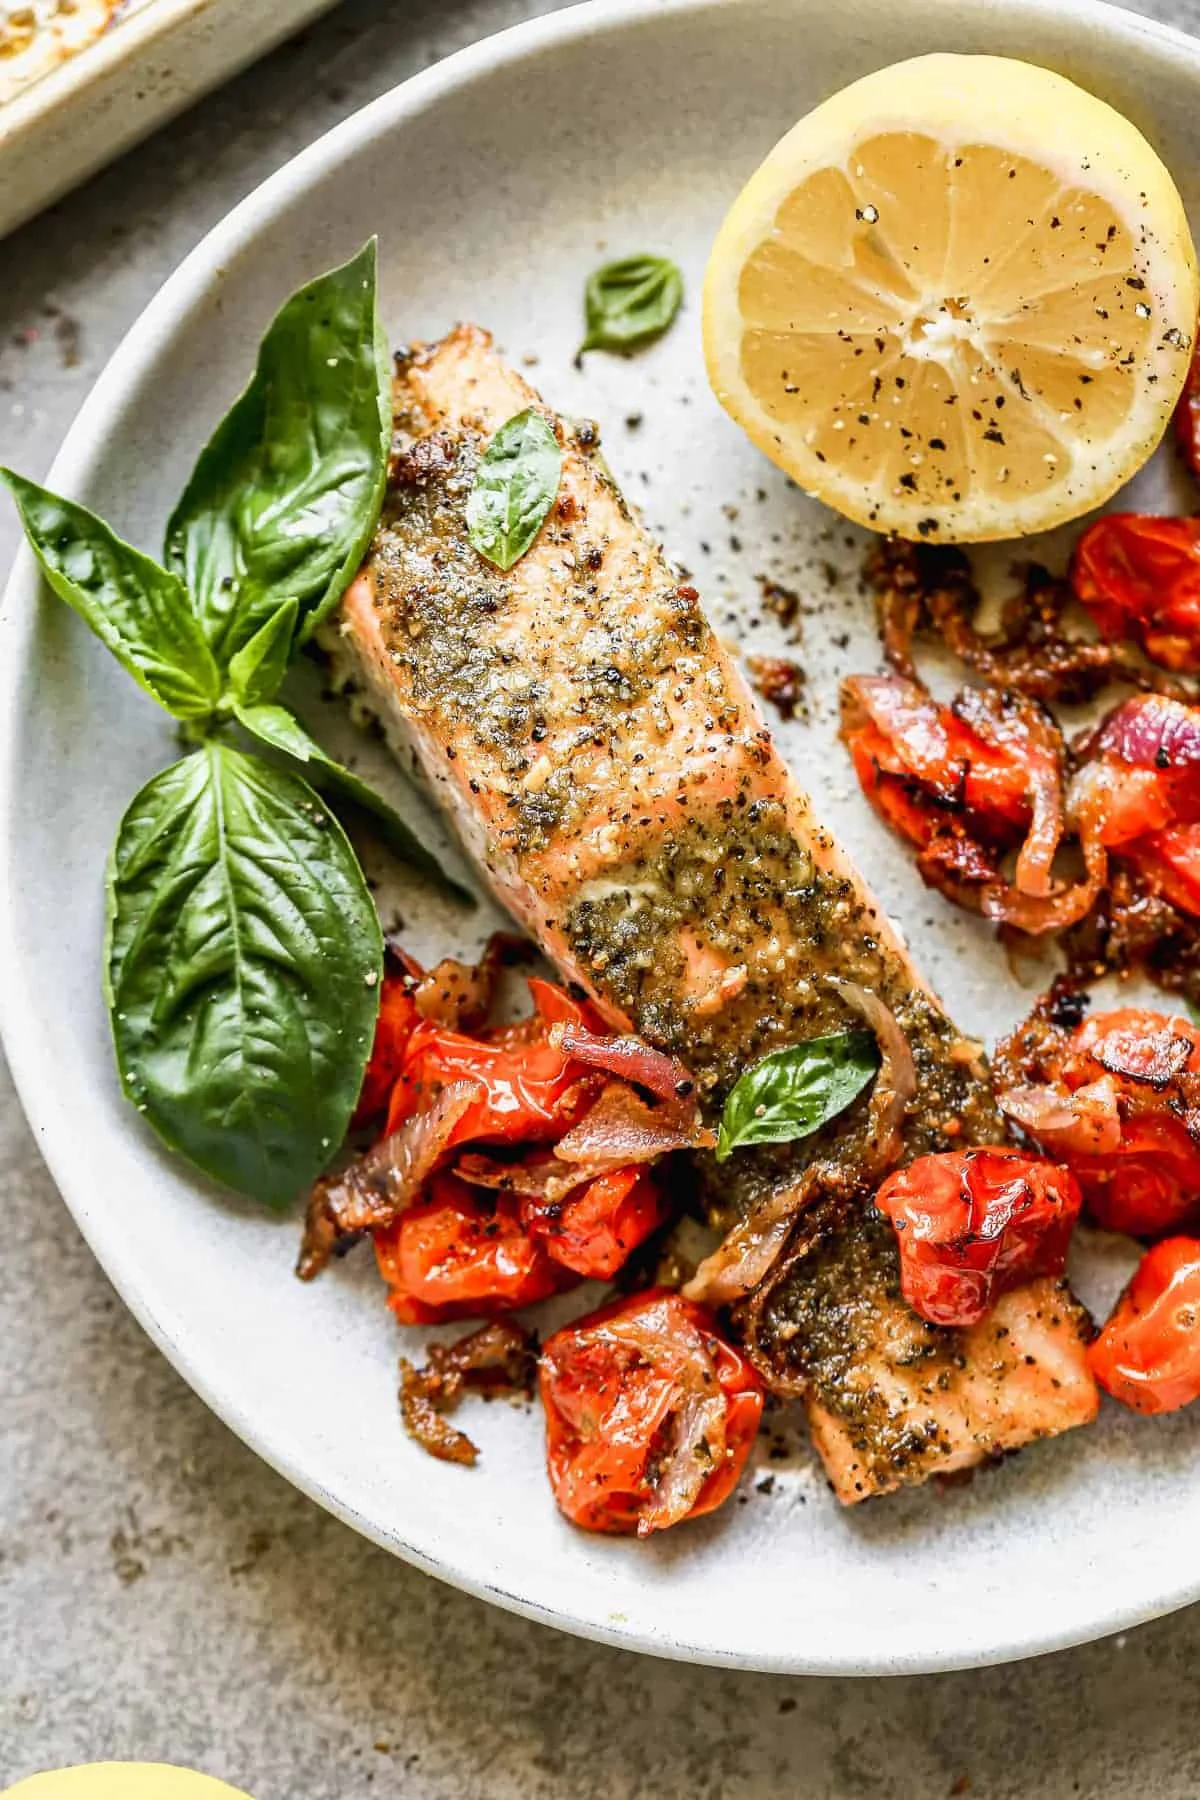
    Sheet pan pesto salmon with fresh basil on top

    One bunch of basil goes a long way. Layer it into a sandwich, shave ribbons of it over a pan of lasagna, or blitz it into a jar of pesto — either way, whatever’s in it starts to taste a little more summery. A little more fresh.

    I’m not talking about the tomatoes and the corn and the peaches everyone’s already counting the days for. Summer herbs fly under the radar, and I think that’s a shame, because one of them is genuinely doing more for my kitchen than anything else on the shelf right now. It’s basil.

    Why basil does so much

    It’s the good kind of simple. Here’s what I’ve noticed after a week of cooking with it:

    It goes with almost everything. We think of basil as an Italian ingredient, but it’s a favorite in Greek, French, Thai, and Mediterranean cooking too. It goes with nearly any vegetable and most proteins I’ve thrown at it.

    It cuts through richness. Creamy sauces, melted cheese, grilled meat — all of it can get heavy. A handful of torn basil over the top makes the whole plate taste lighter. It’s the fix for a lot of my Tuesday nights.

    You can grow it yourself. Fresh herbs are expensive in the grocery store, and basil is one of the easiest to keep alive. A small pot on a sunny windowsill or the patio can give you enough for weeks of cooking.

    Which basil to get

    If the shop only has one kind, it’ll be the big-leaf green one — that’s Genovese, the workhorse. It’s the classic for pesto and for anything you’ll be cooking with. If you also see Thai basil, it’s thinner, more anise-forward, and made for stir-fries and curries. And purple basil — pretty, peppery, mostly for salads and garnishing, but genuinely lovely over a plate of orzo.

    Buy what you’ll actually use. A small bunch beats a big one that wilts before you get to it.

    How to keep fresh basil alive (a 30-second tip)

    Here’s what I do with every bunch I bring home, and it’s changed my results completely:

    • Treat it like flowers, not herbs. Trim the stems, and stand the bunch upright in a jar with an inch of water, like a small bouquet.
    • Loose cover, fridge. Drape a loose bag over the jar — don’t seal it, or the leaves get clammy. Fridge until you need it.
    • Never wash until the last minute. Wet basil wilts fast. Dry leaves keep for days; wet ones don’t.

    A bunch that would have gone sad in a bag by Thursday now lasts me most of the week.

    Seven ways I’m using it right now

    All of these are in my regular rotation this summer. They’re the recipes I’d make again, the ones where basil does the heavy lifting.

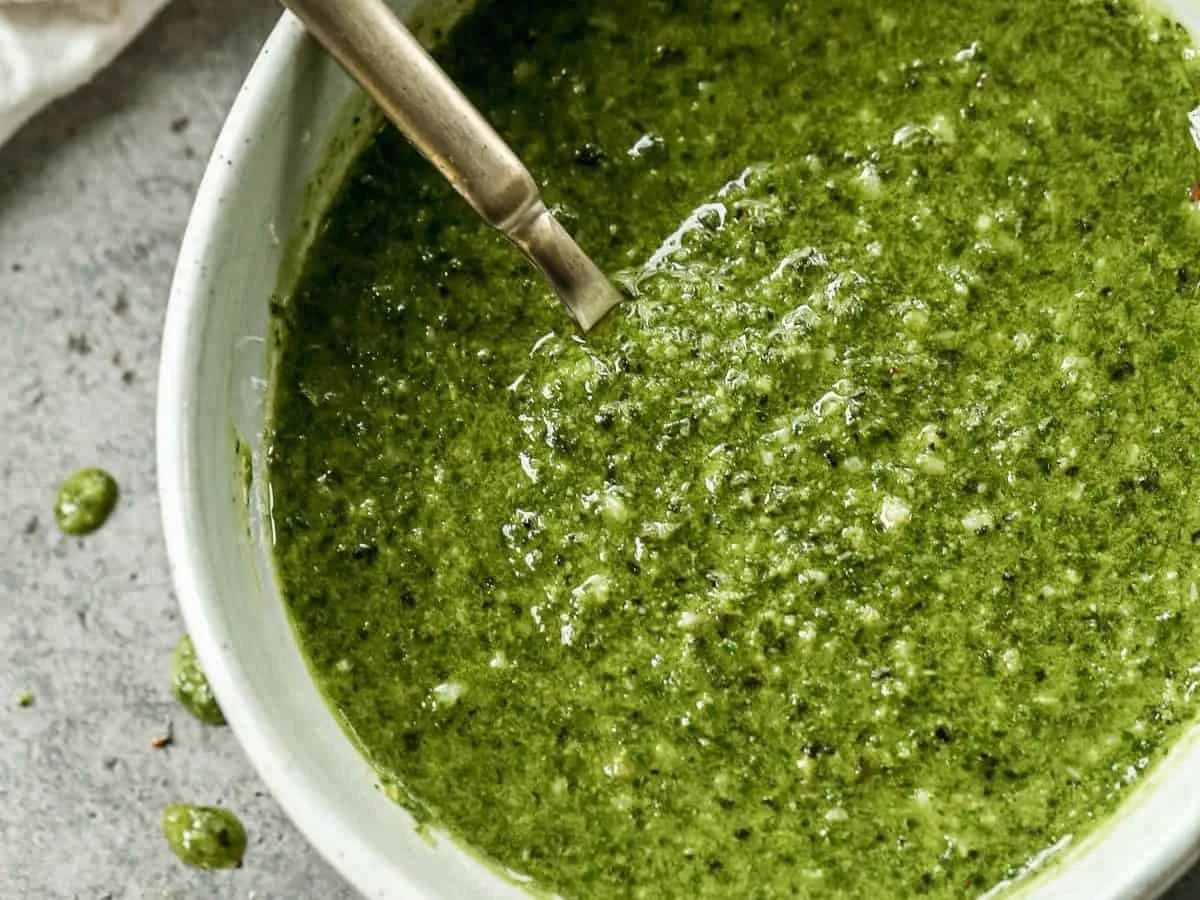
    Basil pesto

    When your basil starts to bolt and you need to use a lot of it in a short window, this is the move. Pesto captures the herb at its peak and gives you a sauce you’ll want to spread on sandwiches, toss with pasta, or spoon over grilled vegetables for the rest of the week. Make a double batch and freeze some in ice cube trays — future-you will be grateful.

    Bright green fresh basil pesto in a glass jar

    See the pesto recipe

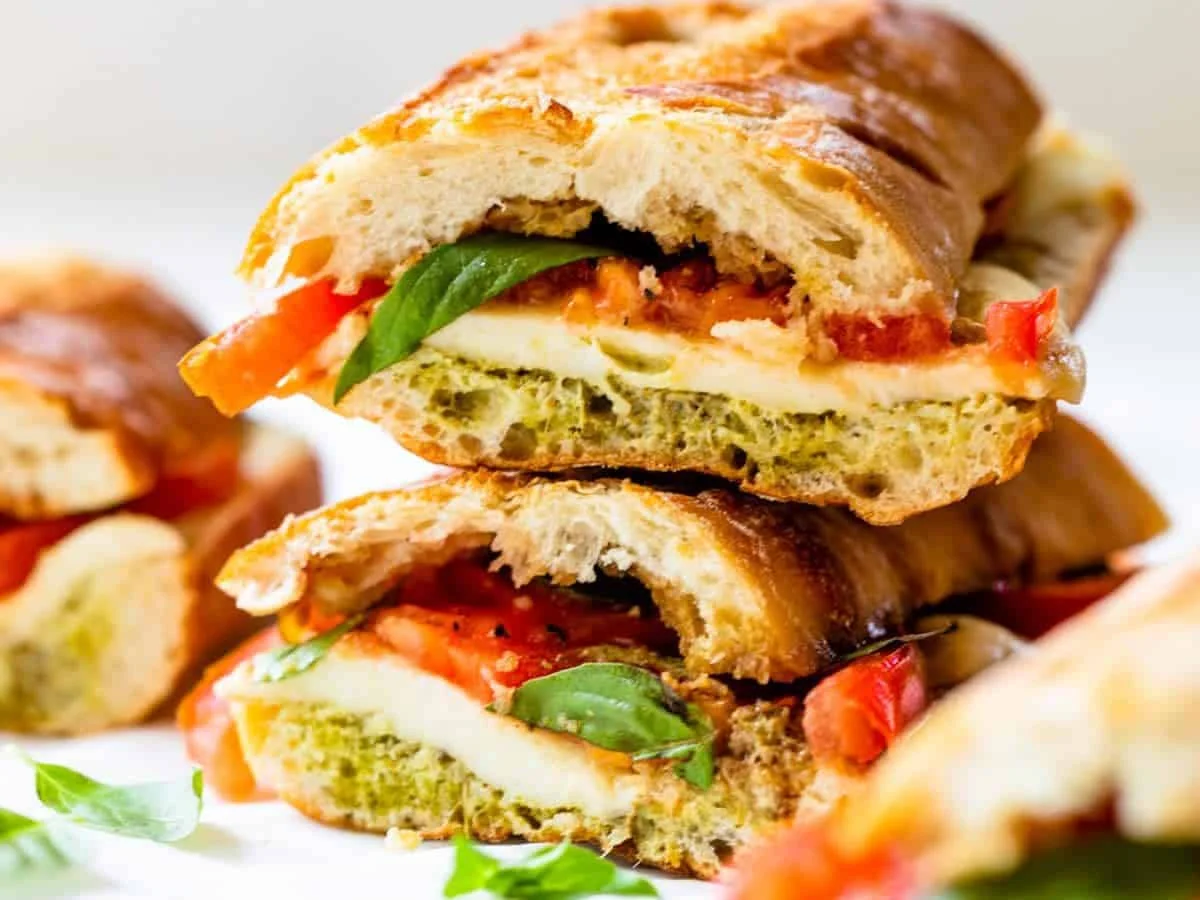
    Caprese sandwich

    There are few better showcases for fresh basil than a caprese. Ripe tomatoes, fresh mozzarella, and a few torn leaves — the basil gives it that peppery freshness that makes the whole sandwich come alive. Toast the bread, skip the mayonnaise, and you’re done. This is the one I make when I want summer to taste like summer without spending an hour in the kitchen.

    Caprese sandwich with fresh basil, tomato, and mozzarella

    See the caprese sandwich recipe

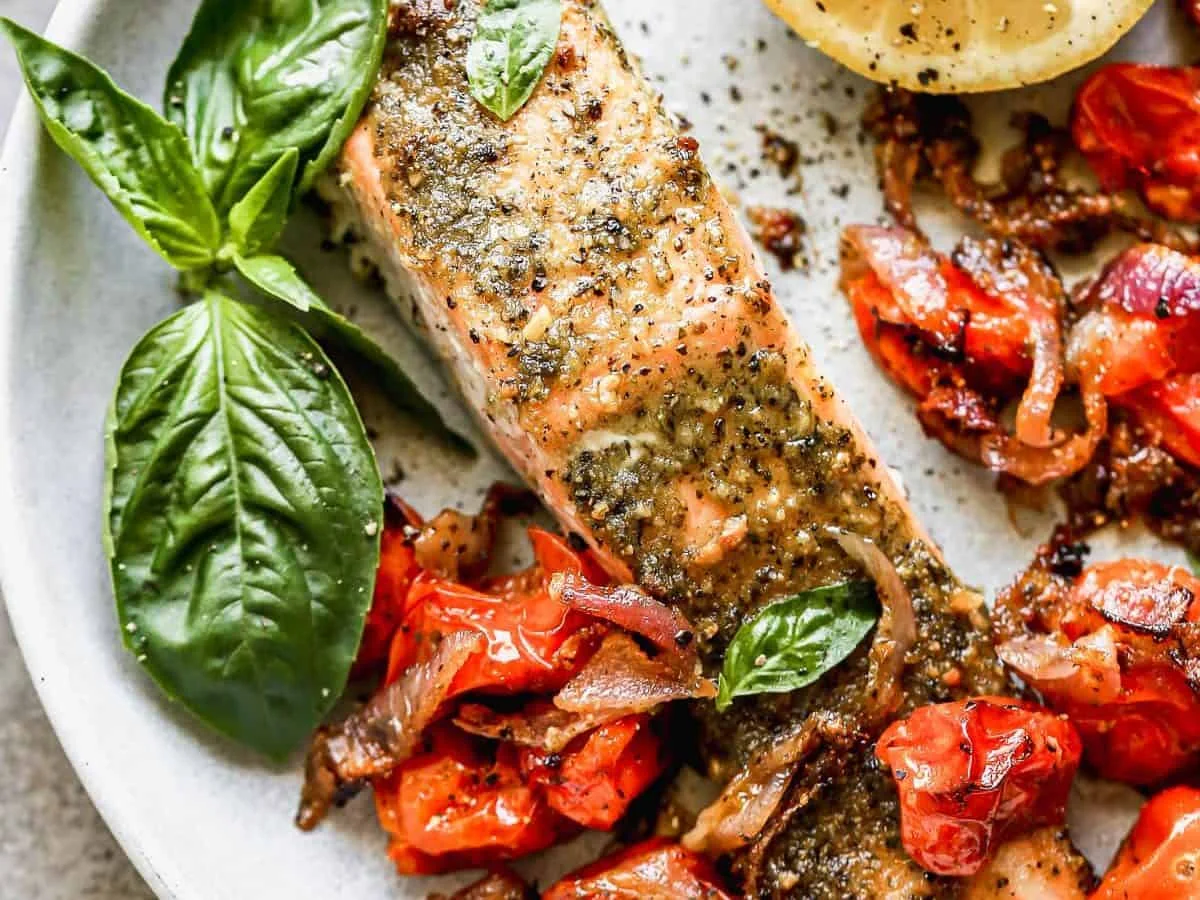
    Pesto salmon

    Salmon and basil are an underrated pairing. The pesto keeps the fish moist while adding a bright, herby flavor that plays well against the richness. It’s a sheet-pan kind of dinner — salmon on one side, roasted vegetables on the other, pesto smeared on top, and you’re out. Back when I worked the line, we’d do exactly this for a quick protein that didn’t require babysitting.

    Sheet pan pesto salmon with roasted vegetables

    See the pesto salmon recipe

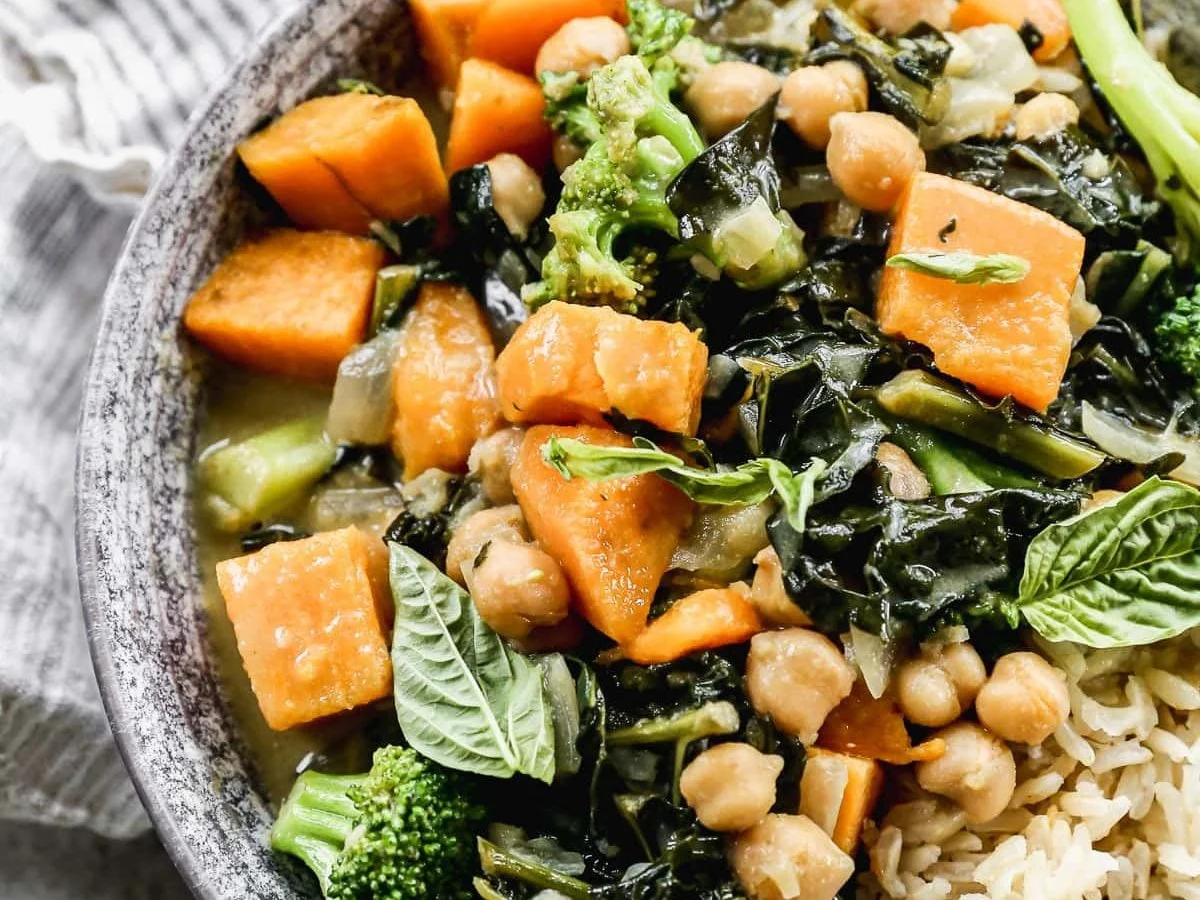
    Green curry

    Fresh basil in a green curry is what gives it that fragrant, lifted finish — it balances the creamy coconut milk and the warm spices in a way pre-chopped frozen basil just can’t. It’s one of those ingredients that makes the finished dish taste brighter and more complete. Tear the leaves in at the very end, off the heat, so they keep their color and their perfume.

    Green chickpea curry topped with fresh basil leaves

    See the green curry recipe

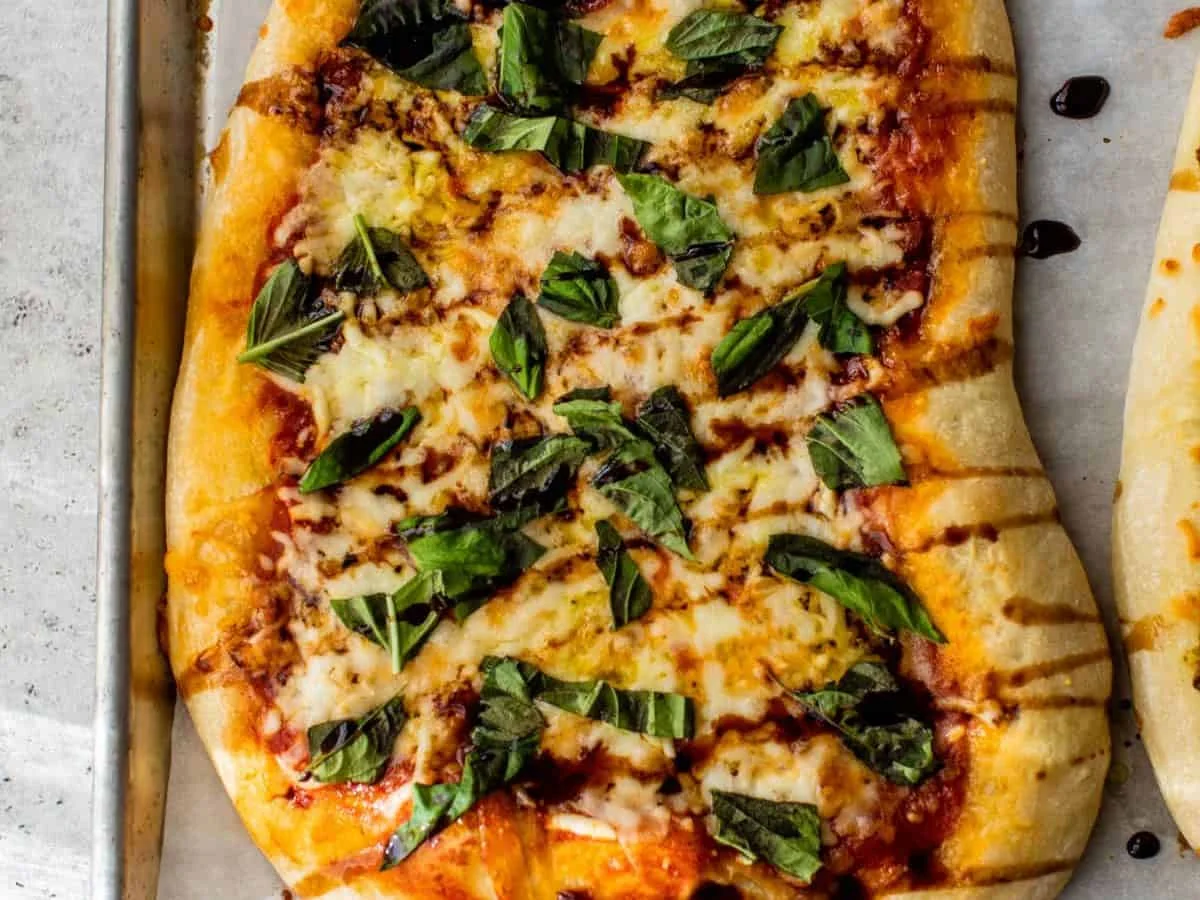
    Flatbread pizza

    Here’s the trick I wish I’d known sooner: scatter the fresh basil over the flatbread after it comes out of the oven, not before. The residual heat softens the leaves just enough while keeping their fresh flavor and that bright green color. Bake first, basil second. The difference is real.

    Flatbread pizza topped with fresh basil leaves

    See the flatbread pizza recipe

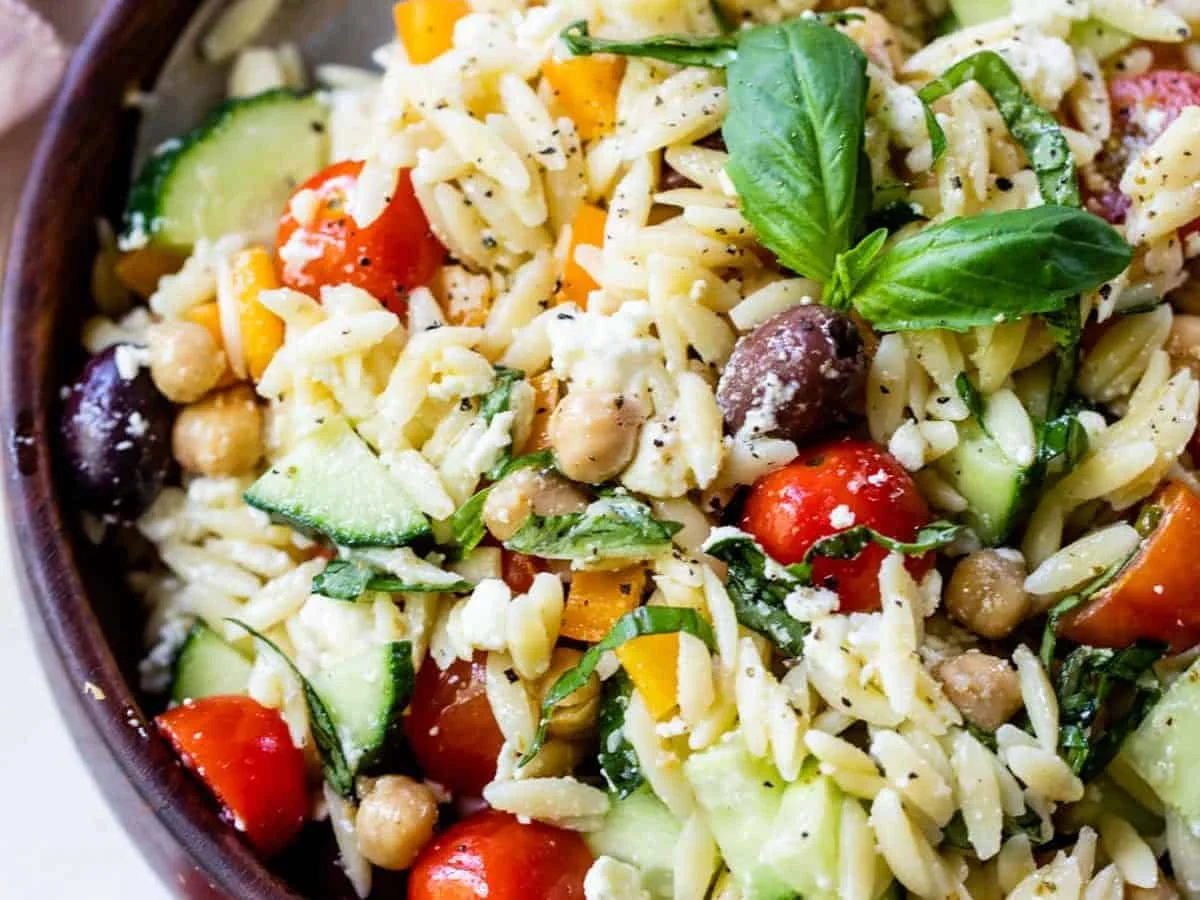
    Orzo pasta salad

    This is the dish that makes a pasta salad taste unmistakably like summer. The basil pairs with the vegetables and the dressing while keeping the whole thing light and refreshing. It holds up well, so it’s a good one for meal-prepping on a Sunday — it tastes better the next day, which is rare for a salad.

    Orzo pasta salad with fresh basil and vegetables

    See the orzo pasta salad recipe

    Grilled pesto chicken skewers

    This is the proof that pesto isn’t just a pasta thing. It brings freshness to smoky grilled chicken, and the skewers are just as at home at a backyard cookout as they are on a weeknight dinner plate. Grill, rest, plate, go. It’s the kind of recipe that makes people ask for the sauce, and then the sauce turns out to be pesto, and then everyone wants the recipe.

    See the pesto chicken skewer recipe

    Trade-It Tip

    No fresh basil? Dried basil works in a pinch — but use a third of the amount the recipe calls for, and add it toward the end of cooking, not at the start. It’s a different flavor, and it won’t fool anyone who grew up with fresh — but it’s still a step up from nothing, and it keeps the dish tasting herbal rather than musty.

    If it doesn’t fit a Tuesday night, it doesn’t get published. — Grace
    Keep Reading

  • Creamy Tuna Pasta Salad with Lemon and Capers

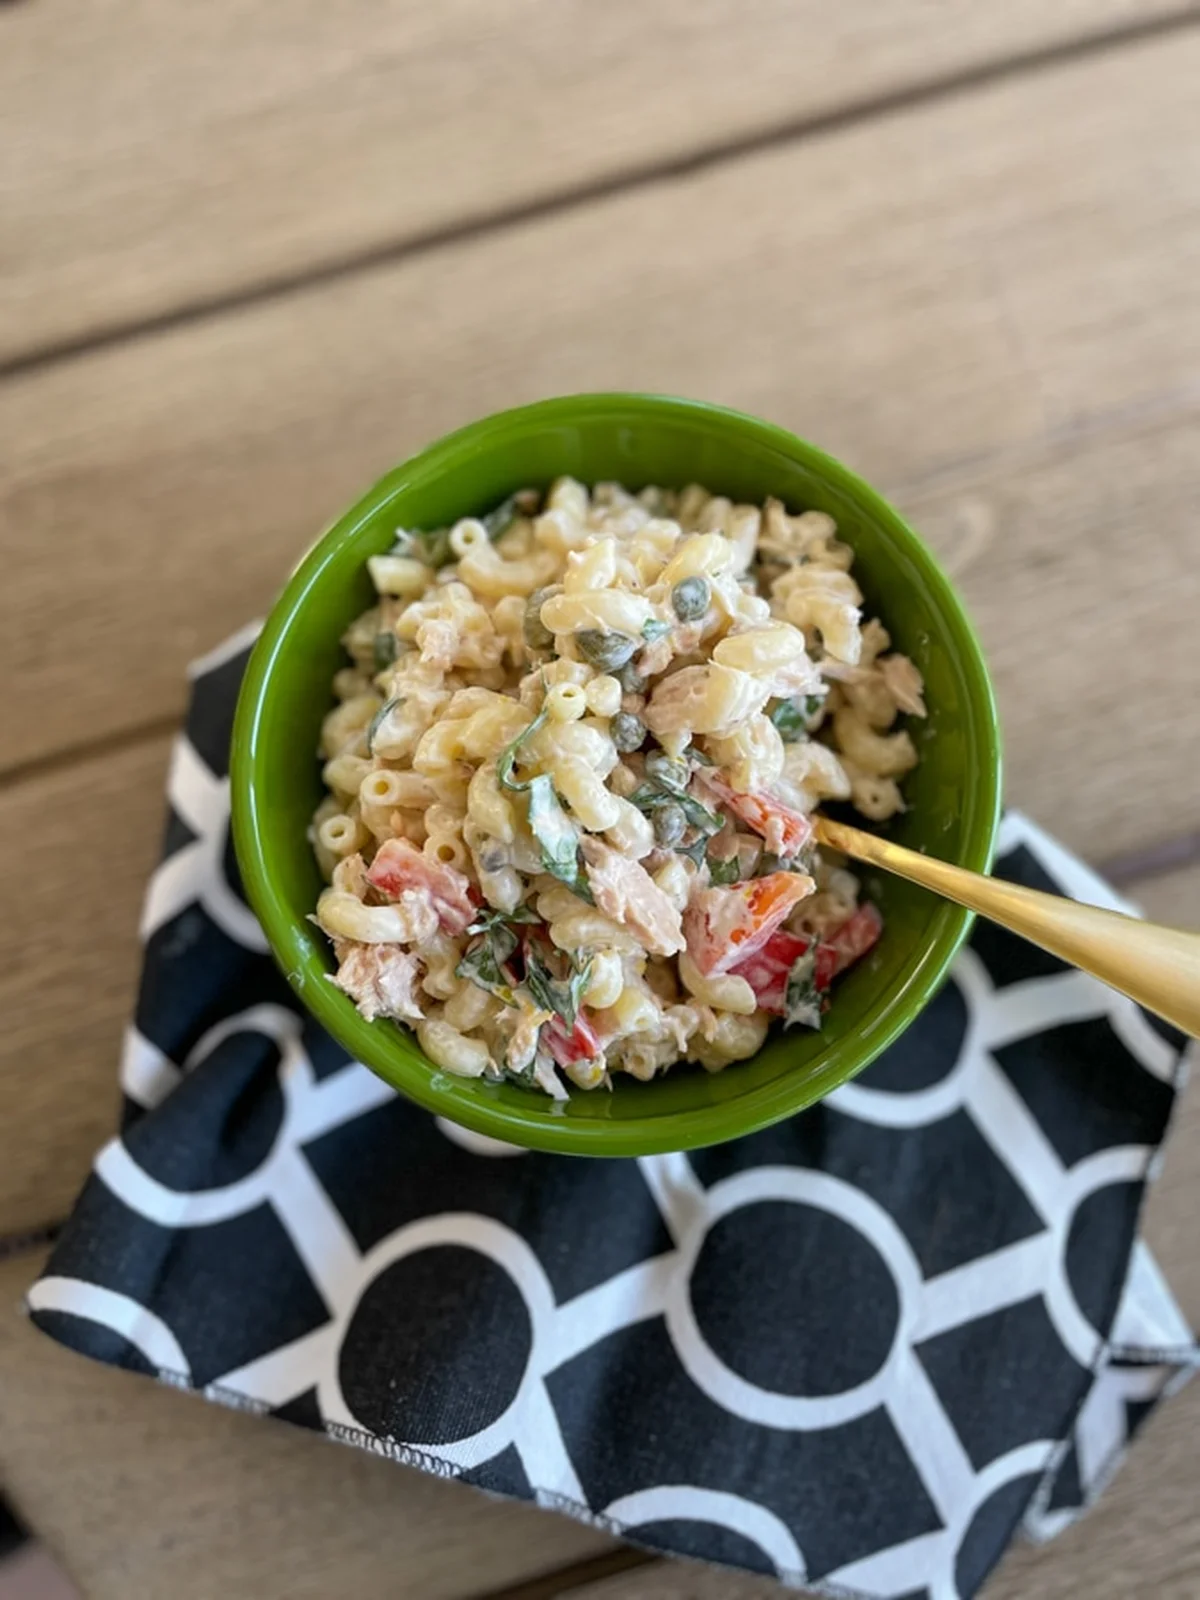
    Creamy Tuna Pasta Salad with Lemon and Capers

    Most pasta salad recipes are basically pasta and a mountain of mayo. Mine has two cans of tuna in it. That’s the whole pitch.

    This creamy tuna pasta salad comes together in about 20 minutes, start to finish. Red bell pepper, capers, a handful of fresh herbs, and a dressing of Greek yogurt, lemon, and mayo. It’s the good kind of simple: pantry and fridge staples, one pot, one bowl.

    Creamy tuna pasta salad in a green bowl with a spoon

    The best part is what happens on Thursday. You’re making lunch, you grab a container, and it tastes even better than it did on day one. The flavors settle in while the pasta soaks up the dressing. One batch, about 6 servings, and your week of lunches is basically done.

    Why this works

    Classic pasta salads are mostly carbs. Here, flaky albacore tuna does the protein work, and the Greek yogurt in the dressing keeps it creamy without feeling like you’re eating a cup of mayo. Lemon does the rest: the zest and the juice cut right through the richness, so every bite lands bright instead of heavy. Think of it as a grown-up, make-ahead cousin of the tuna noodle casseroles we grew up with.

    What you’ll need

    Everything below lives in the fridge or the pantry. I used elbow macaroni as a nod to casseroles, and two cans of albacore tuna. I like to grab tuna with a sustainability label on it. Fishwife and Wild Planet are my favorite brands, but any flaky, firm canned tuna will do. Any standard mayonnaise works in the dressing, no hunting for a specific brand required.

    Pasta salad

    • 16 ounces elbow macaroni (or any pasta shape you like)
    • 2 cans albacore tuna, drained and flaked (canned salmon or chunk light tuna work too)
    • 1 red bell pepper, chopped (or peas or corn instead)
    • 1/2 cup chopped fresh herbs – parsley, basil, and dill in my case. Use whatever mix you have
    • 2 ounce jar of capers, drained

    Dressing

    • 1 cup full-fat Greek yogurt
    • 2 tablespoons mayonnaise (any brand you already own)
    • 1 lemon, zested and juiced
    • Salt and pepper

    How to make it

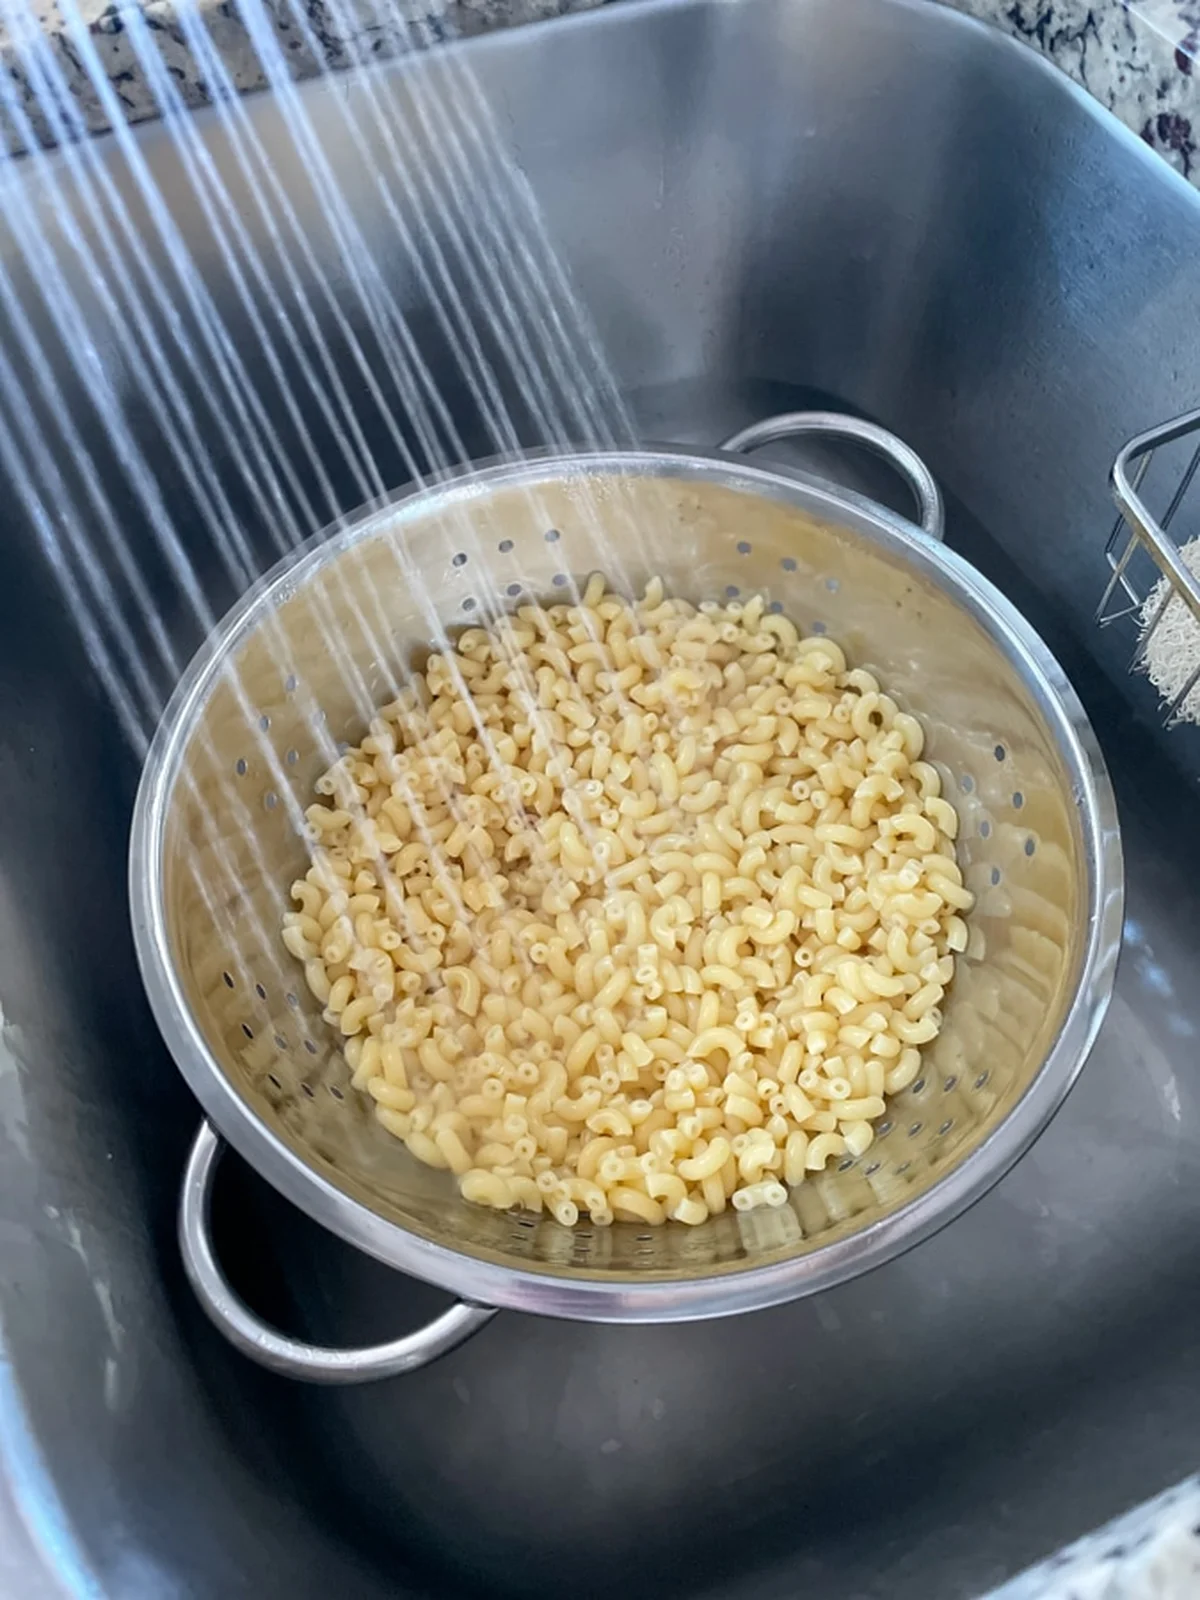
    1. Cook the pasta. Bring a large pot of salted water to a boil and cook the macaroni until al dente, following the package. Drain it, rinse it cold, and set it back in the pot or a big bowl.

    Cooked elbow macaroni rinsed in a colander under running water

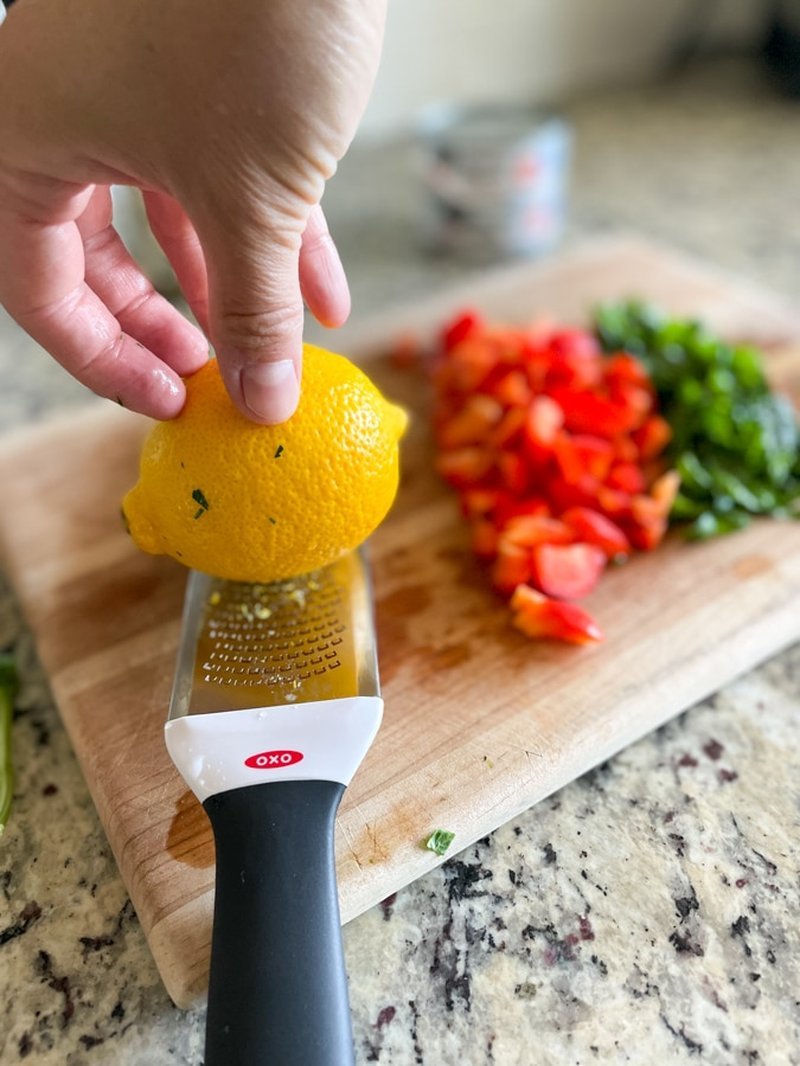
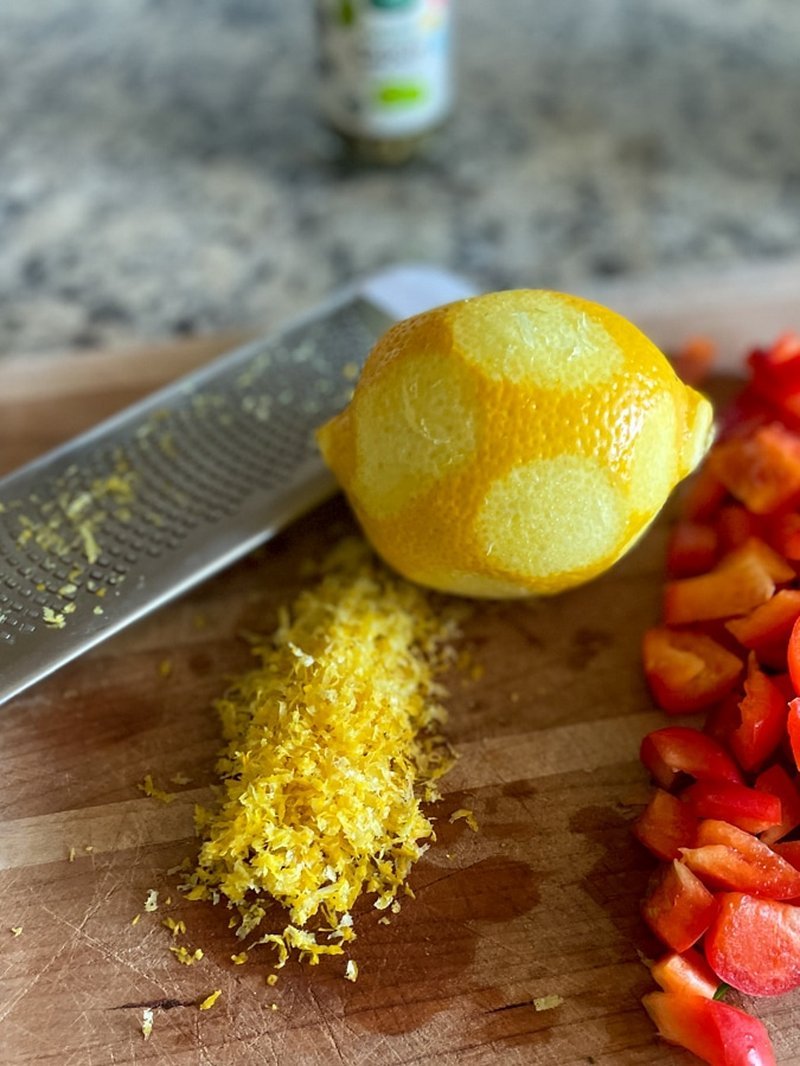
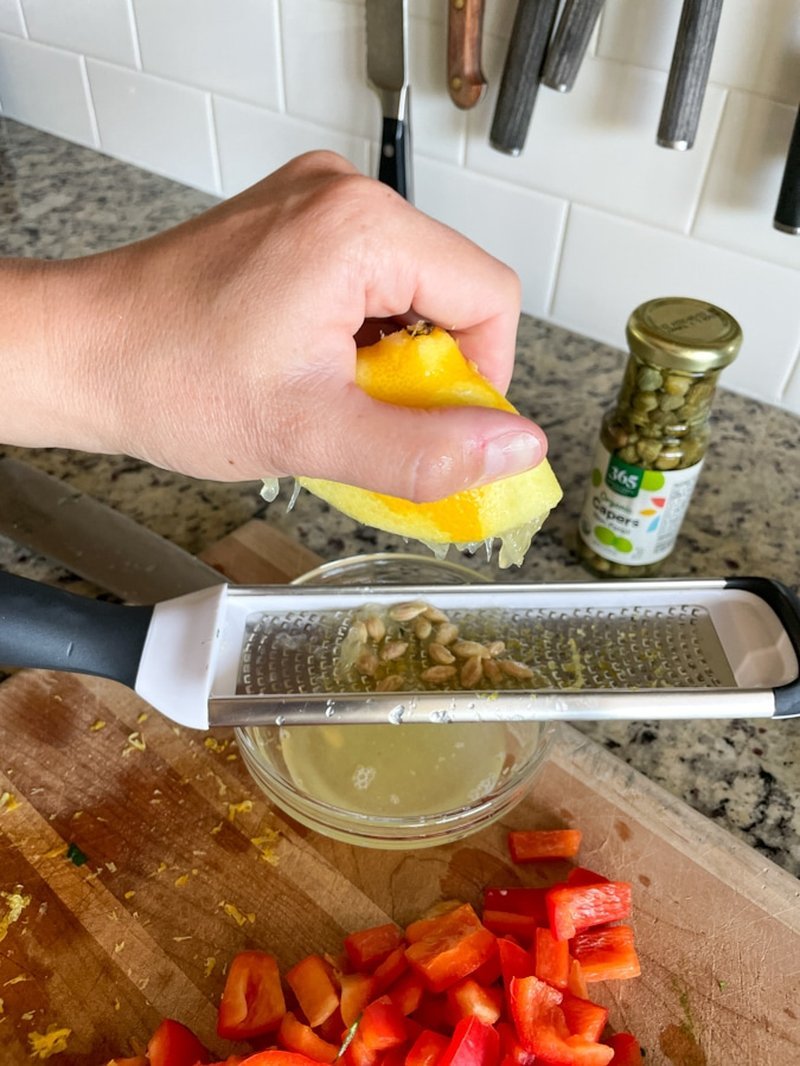
    2. Prep while the pasta cooks. Chop the bell pepper and the herbs. Drain the capers. Zest the lemon, then juice it. I flip my microplane over and use the flat side to catch the seeds while I squeeze. From one lemon you’ll get about 1.5 tablespoons of zest and 3 tablespoons of juice.

    Zesting a lemon over a cutting board with chopped pepper and herbs

    3. Flake the tuna. Drain the cans well – really squeeze out what you can – and break the tuna apart with a fork.

    4. Whisk the dressing. In a bowl, whisk together the yogurt, mayonnaise, lemon juice, zest, salt, and pepper until it’s smooth.

    Zested lemon with zester and diced red bell pepper on cutting board

    5. Toss it together. Add the pepper, herbs, and capers to the cooked pasta, then the tuna. Stir. Then add three-quarters of the dressing and stir until everything is coated. The rest stays in the bowl. You’ll use it later.

    Squeezing lemon juice over a glass bowl of prepared ingredients

    6. Serve, or pack it up. Eat it as a main lunch, a light dinner, or a side at a picnic. It’s just as happy in a container as it is in a bowl.

    Storage

    Keep it in an airtight container in the fridge for up to 4 days. The pasta absorbs the dressing as it sits, so on day three or four it can look a little dry. A squeeze of lemon juice or an extra spoonful of the held-back dressing fixes it. Don’t freeze it – the yogurt dressing separates after thawing and the pasta goes soft.

    Tuna pasta salad, your questions answered

    Can I make it ahead? Yes, and honestly, the flavors are better after a few hours in the fridge once everything has had time to mingle.

    How long does it keep? Up to 4 days in the fridge, airtight. That’s what makes it a meal prep lunch and not just a one-time dinner.

    Which tuna is best? I stick with albacore for the firm texture and stronger flavor. Chunk light tuna and canned salmon both work, even sardines if you’re feeling brave. Whatever you use, drain it thoroughly.

    Can I make it lighter? The yogurt dressing is already doing that job – more protein, less mayo. Want it even more? Load up on extra vegetables like peas, celery, spinach, or cucumber.

    What goes with it? Nothing. A bowl of this is a complete lunch. If you’re stretching it into a bigger plate, sliced tomatoes, a green salad, or a few crackers round it out.

    Can I freeze it? I wouldn’t. The dressing separates and the pasta loses its bite once it thaws.

    Make it yours

    This recipe is a starting point, not a rulebook. I keep a red bell pepper in the fridge at all times, so that’s what goes in, but frozen peas, corn off the cob, chopped celery, or red onion all bring welcome crunch. Want a Mediterranean lean? Crumbled feta, some cheddar, or a handful of olives alongside the capers.

    Trade-It Tip: No fresh herbs? A generous handful of baby spinach in their place keeps the color and adds a little green to your day. Capers doing your head in? Chopped olives fill the same briny slot.

    Twenty minutes, one pot, and a container that’ll be empty by the middle of the week. If it doesn’t fit a Tuesday night, it doesn’t get published.
    Keep Reading

  • Lemony Zucchini Pasta

    Lemony Zucchini Pasta

    I used to think a proper summer pasta meant three pots, a spiralizer, and a sink full of dishes. Then I discovered spaghetti alla Nerano — a pasta made with little more than zucchini and cheese — and my whole idea of ‘healthy dinner’ changed.

    It started years ago, back when Stanley Tucci was raving about it and everyone (myself included) wanted to know how zucchini and Parmesan could possibly be that good. The hype was justified. It’s been on repeat at our table every summer since, and my version has wandered in its own direction: Parmesan, fresh basil, red pepper flakes, and a whole lot of lemon. That’s what this recipe is. The good kind of simple — the kind where one pot of pasta and a deep skillet do all the work.

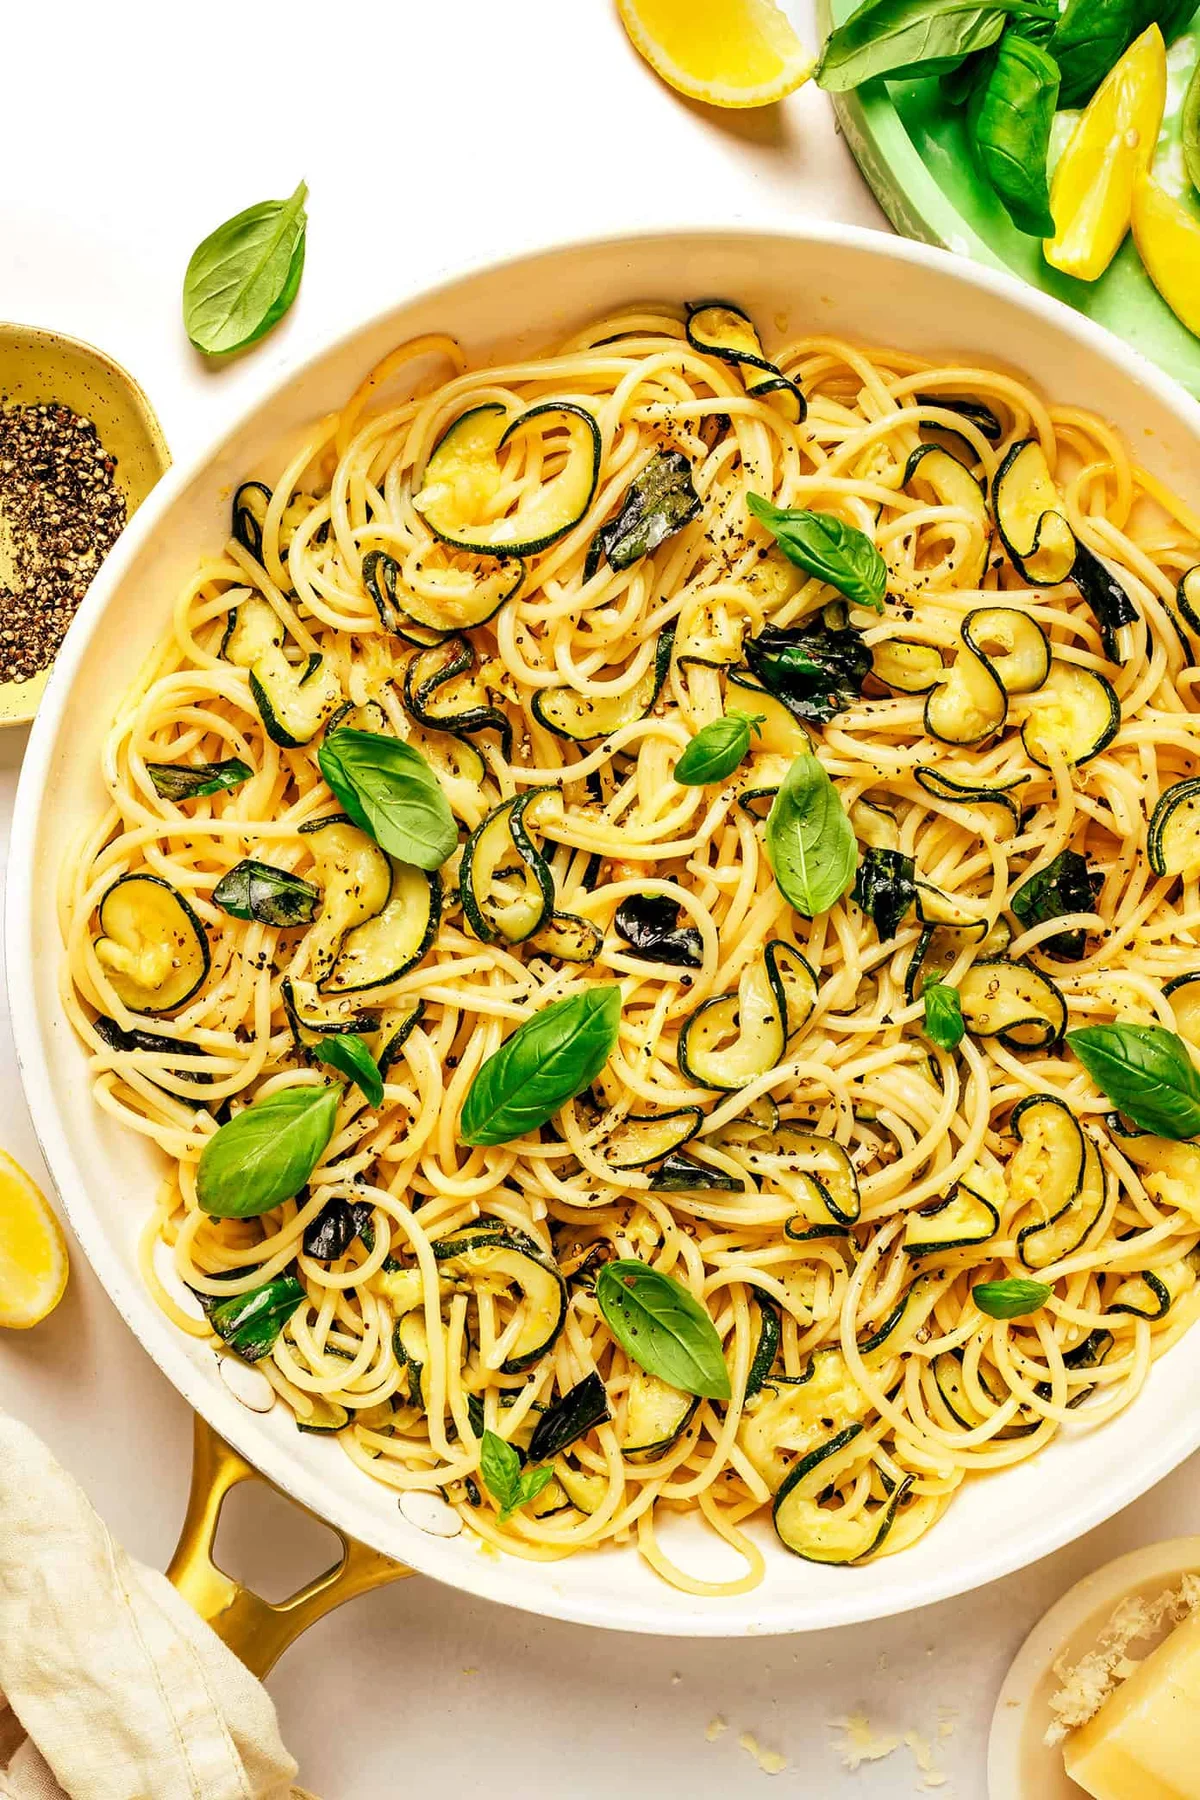
    Lemony fried zucchini pasta with silky Parmesan sauce, torn basil, and lemon zest

    Why this works

    Frying is what makes zucchini go deeply golden, sweet, and almost jammy — that’s the flavor no sauté can give you. Then the fried slices hit the starchy pasta water and Parmesan and literally melt into a silky sauce. It takes about 20 minutes at the stove with a slotted spoon, and it’s the difference between a fine zucchini pasta and one you’ll be thinking about for days.

    Golden fried zucchini slices on a plate ready to become the sauce

    Equipment

    • Mandoline

    Ingredients

    • 8 ounces spaghetti
    • 3 medium zucchini (~20 ounces), very thinly sliced
    • 1 ½ cups neutral oil or olive oil, for frying
    • 2 tablespoons extra-virgin olive oil
    • 2 large cloves garlic, peeled and lightly smashed
    • ¼ teaspoon crushed red pepper flakes, or more to taste
    • 1 teaspoon lemon zest + 2 tablespoons freshly-squeezed lemon juice
    • ⅔ cup freshly-grated Parmesan, plus extra for serving
    • ¼ cup fresh basil leaves, torn, plus extra for serving
    • fine sea salt and freshly-ground black pepper

    Instructions

    1. Slice the zucchini. Cut the zucchini into very thin rounds, about ⅛-inch thick or slightly thinner. A mandoline is very helpful here so the slices cook evenly.
    2. Heat the oil. Add the frying oil to a large sauté pan or skillet — you want enough to coat the bottom of the pan by about ½ inch. Heat over medium to medium-high until the oil reaches 350°F to 365°F. No thermometer? Drop in one slice: it should sizzle right away.
    3. Fry the zucchini. Working in batches so the pan isn’t crowded, add a single layer of slices to the hot oil. Fry for 2 to 4 minutes, flipping occasionally, until tender and lightly golden. Some slices will go deeper gold than others — that’s great — but avoid dark brown, which turns bitter.
    4. Drain and season. Lift the zucchini out with a slotted spoon and set it on a paper-towel-lined plate. Sprinkle lightly with salt. Repeat with the remaining zucchini, keeping the oil around 350°F and adding a little more oil if the pan gets too dry.
    5. Let the zucchini rest. This step is optional but very helpful: let the fried zucchini sit for at least 30 minutes, or refrigerate it for a few hours. It softens as it rests, which is what helps it melt beautifully into the sauce. You can fry the zucchini up to one day ahead.
    6. Cook the pasta. Bring a large pot of generously-salted water to a boil and cook the spaghetti until just shy of al dente. Before draining, reserve at least 1 cup of the starchy pasta water.
    7. Infuse the oil. While the pasta cooks, heat the extra-virgin olive oil in a large skillet or Dutch oven over medium heat. Add the smashed garlic and cook for 1 to 2 minutes, until fragrant. Add the red pepper flakes and cook for 30 seconds, then fish out and discard the garlic.
    8. Build the sauce. Add the fried zucchini to the skillet with a generous splash of the starchy pasta water. Once the spaghetti is just barely al dente, add it to the skillet along with the lemon zest, lemon juice, Parmesan, and basil. Toss quickly and continuously, splashing in more pasta water as needed, until the cheese melts into a silky sauce. Season with black pepper and extra salt, lemon juice, or red pepper flakes to taste.
    9. Serve. Plate it up with extra basil, Parmesan, black pepper, and a final sprinkle of lemon zest. Eat it immediately — this is a Tuesday-night recipe, not a wait-and-see.

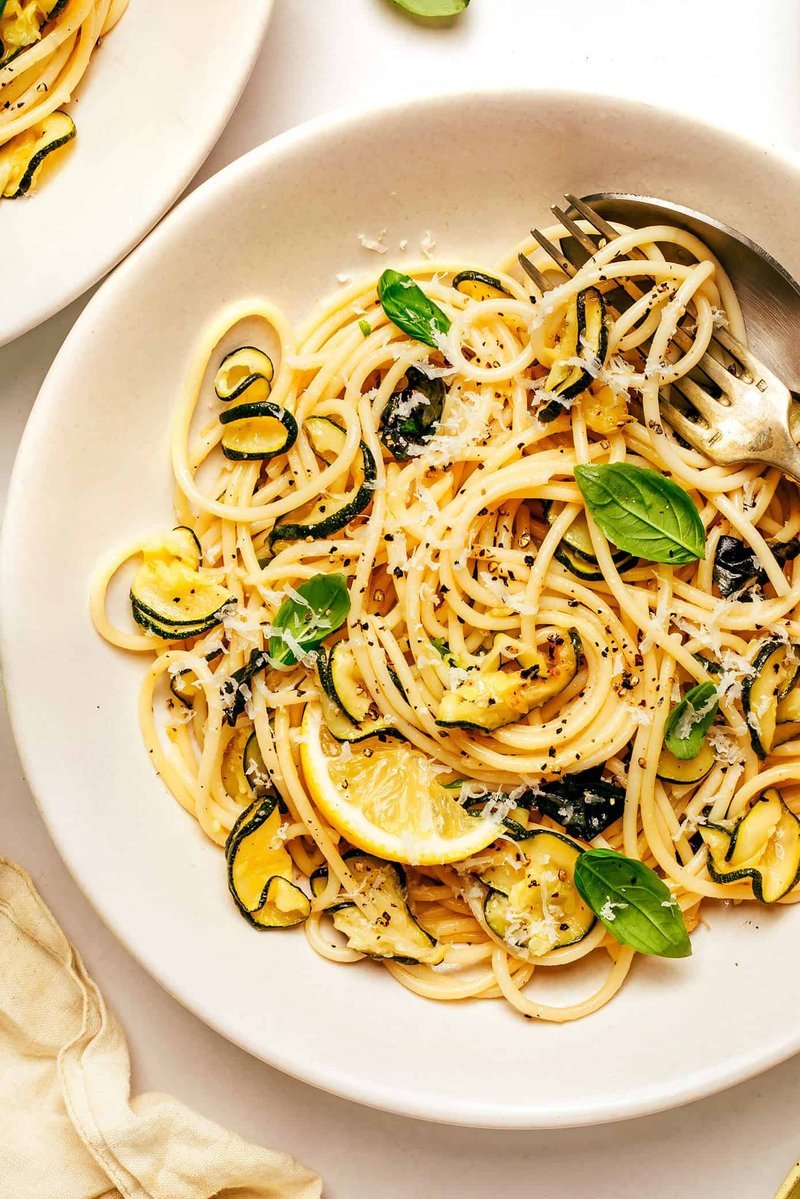
    Finished lemy zucchini pasta bowl topped with Parmesan, basil, and red pepper flakes

    Recipe tips

    A few small details make a big difference here, especially with the zucchini and that silky Parmesan sauce.

    • Slice thin and even. A mandoline is your best friend here. Hand-slicing works too, just take your time.
    • Don’t crowd the pan. It’s tempting to dump it all in at once, but frying in batches keeps the oil hot and gives you golden slices instead of soggy, oil-logged ones.
    • Watch the oil. You’re aiming for 350°F to 365°F. If a test slice sizzles right away, you’re good to go. If it sits there quietly, wait a bit longer.
    • Save more pasta water than you think you need. At least a cup. That starchy water is what turns the Parmesan into a silky sauce instead of a clumpy mess — and you’ll want extra splashes as you toss.
    • Undercook the spaghetti slightly. It finishes cooking in the skillet with the sauce, so pull it just shy of al dente and it’ll be perfect by the time it hits your plate.

    Make it your own

    Feel free to wander. A few ideas that work:

    • Classic Nerano-style: Swap the Parmesan for grated provolone del Monaco (or a mix of provolone and Parm) and skip the lemon and red pepper flakes for the traditional version.
    • Add burrata: Tear a ball over each serving for an extra-creamy finish.
    • Add protein: Toss in grilled shrimp or chicken for something heartier.
    • Make it spicier: Double the red pepper flakes, or drizzle a little Calabrian chili oil over the top before serving.
    • Swap the herbs: Fresh mint instead of basil is so good with zucchini — or do a mix of both.
    • Add crunch: Sprinkle garlicky toasted panko over each bowl.

    FAQ

    Do I really have to fry the zucchini? For this recipe, yes — the frying is what gives the zucchini that deep, sweet, golden flavor that makes the sauce special. If you’d rather skip it, sauté the zucchini in a few tablespoons of olive oil until very soft and golden. The sauce won’t be quite as rich, but it’s still tasty.

    Can I make any of this ahead? Yes, and the fried zucchini actually benefits from it. Fry it up to a day in advance, store it covered in the fridge, and let it come toward room temp before building the sauce.

    What do I do with the leftover frying oil? Once it’s fully cooled, strain it through a fine-mesh sieve and store it in a jar. You can reuse it once or twice for frying or sautéing vegetables.

    My sauce turned clumpy instead of silky. What happened? Usually the pan was too hot when the cheese went in, or there wasn’t enough pasta water. Keep the heat at medium or lower when tossing, add the cheese gradually, and keep splashing in pasta water while tossing continuously until everything comes together.

    Trade-It Tip: No mandoline? A very sharp knife and a steady hand work — just slice as evenly as you can so everything fries at the same rate.

    If it doesn’t fit a Tuesday night, it doesn’t get published.
    — Grace

    Keep Reading

  • Harissa Chicken That’s Ready for a Weeknight

    Harissa Chicken That’s Ready for a Weeknight

    Back when I worked the line, the trick to a fast dish was never speed. It was depth of flavor in something you could throw together without thinking. Harissa chicken is that dish at home. A jar of harissa paste, a little oil, some garlic, and chicken thighs. The marinade does the heavy lifting, so the cooking part is almost boring. That’s a compliment.

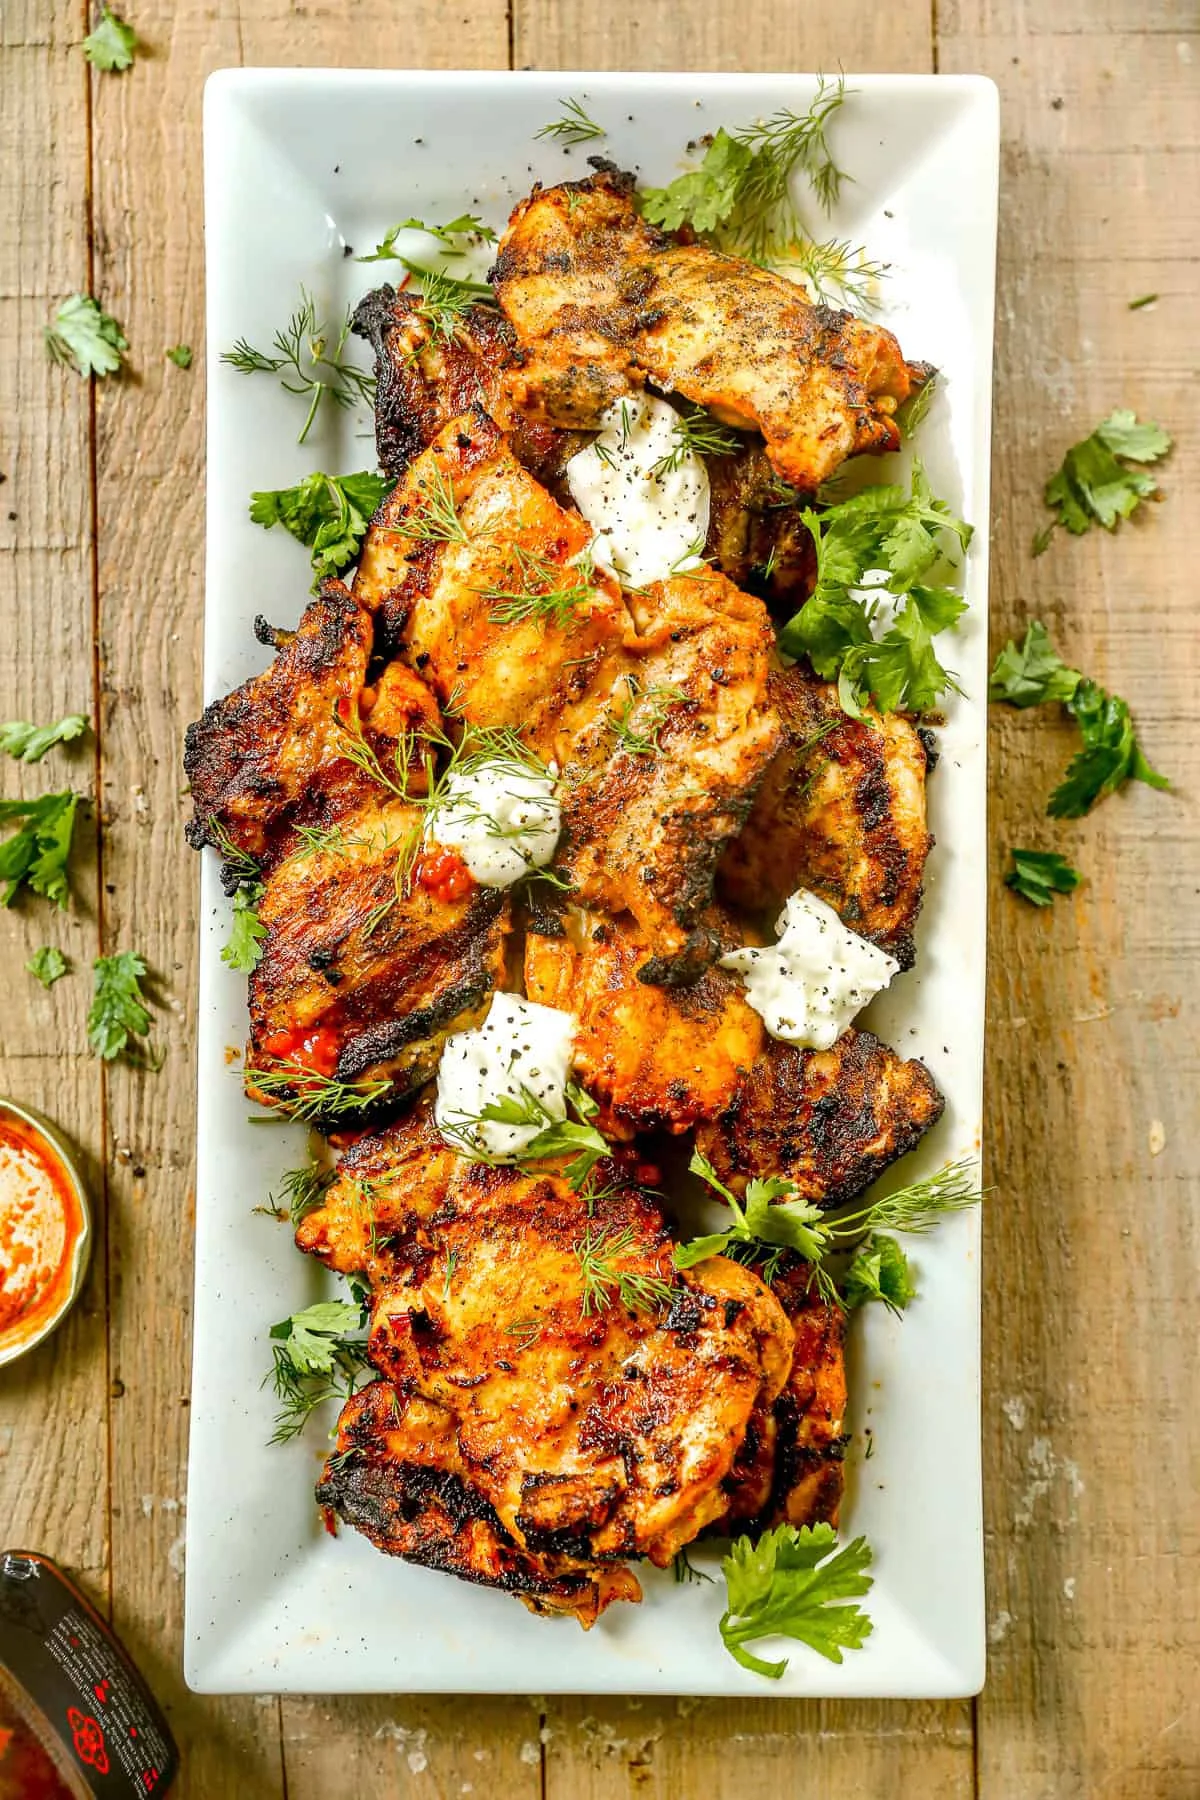
    Harissa chicken thighs with charred edges on a serving platter

    Harissa is spicy, but not necessarily hot. A mild version brings roasted peppers, garlic, warm spices, and a subtle smokiness, with just a whisper of heat. If you like it properly hot, grab the spicy jar instead. Chicken thighs are the best match for it. Their richness stands up to the bold flavor, and they stay juicier than breasts. They’re also forgiving if they cook a minute or two longer than planned, which, let’s be honest, happens.

    Why this works

    Harissa already carries a lot of flavor on its own. You don’t need to pile on more. Olive oil helps the marinade soak in, garlic and cumin add warmth, and that’s genuinely all. The good kind of simple.

    Harissa chicken plated with herbs and a side of yogurt

    Ingredients and swaps

    • Boneless, skinless chicken thighs. Trim away any large pieces of excess fat before marinating. Thighs out-breathe breasts, every time.
    • Harissa paste. Get the jarred mild version for this recipe. It lets the other flavors come through while still giving the dish personality. Spicy works if you’re after more heat.
    • Olive oil. No need for fancy extra-virgin here. A good cooking olive oil is perfect.
    • Garlic. Mince it first, then measure. You should end up with about a tablespoon. Clove sizes vary, so go by the spoon, not the count.
    • Seasonings. Kosher salt, ground cumin, and black pepper. That’s the whole list.
    • Fresh herbs. Cilantro, parsley, or dill all work for serving.
    • Greek yogurt. A dollop of plain Greek yogurt on the side cools the heat from the harissa. It’s the difference between spicy and interesting.

    How to make it

    Prep takes about 10 minutes. Cook time is 15 to 25 minutes depending on how you’re cooking it. Total: 55 minutes, which includes a 30-minute minimum marinate if you’re starting from scratch.

    1. Pat the chicken dry. Use paper towels, and trim off any large pieces of extra fat. Dry chicken browns better than wet chicken, so don’t skip this step. It’s the only step that’s actually boring.
    2. Mix the marinade. In a large bowl, stir together the harissa, olive oil, garlic, salt, cumin, and pepper. Add the chicken thighs and toss until every piece is evenly coated. Let it sit for at least 30 minutes, or refrigerate for up to 24 hours. If it’s been in the fridge, let it come to room temperature before cooking.
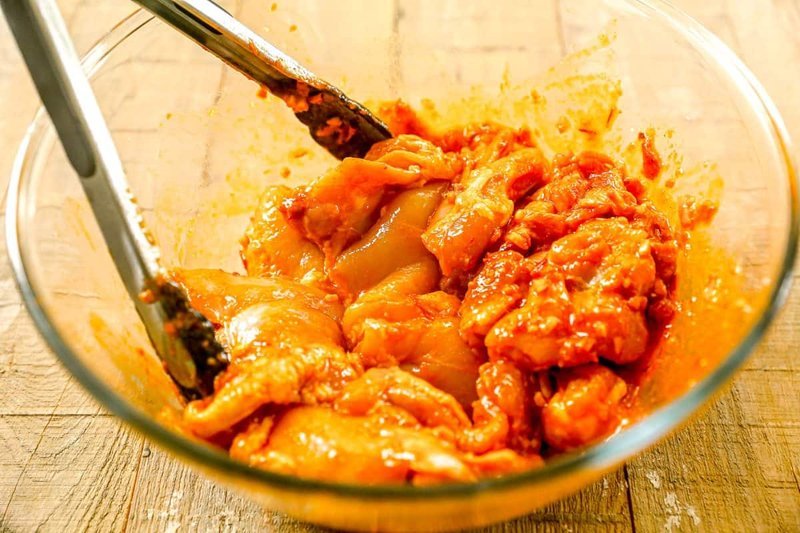
      Raw chicken thighs coated in harissa marinade in a glass bowl
    3. Cook it your way. Pick one method below.
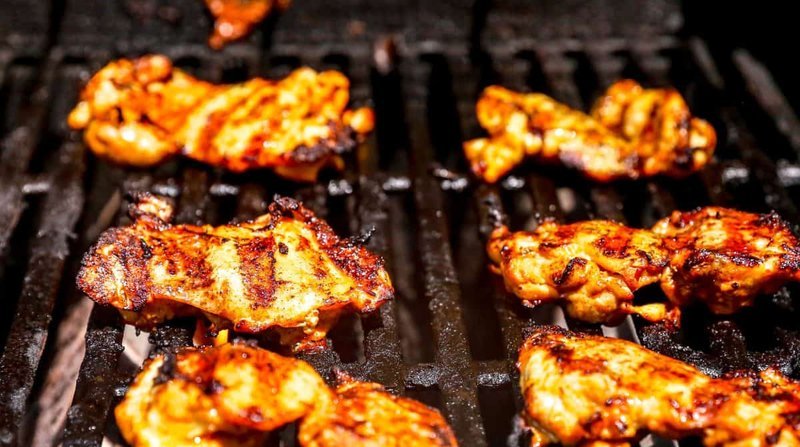
      Marinated harissa chicken grilling with visible grill marks
    4. Rest and serve. Let the chicken rest for 5 to 10 minutes before slicing, then serve with fresh herbs and a big spoonful of Greek yogurt.

    Three ways to cook it

    To grill

    Preheat the grill to medium-high heat, about 400°F. Scrub the grates clean first. Grill the chicken smooth-side down for 8 to 12 minutes, flipping once halfway through, or until an instant-read thermometer reads 165°F at the thickest part. Transfer to a plate or cutting board, cover loosely, and rest for 5 to 10 minutes.

    To bake

    Preheat the oven to 425°F. Line a baking dish with foil or parchment. Arrange the chicken in a single layer, making sure the pieces aren’t touching. Bake until the internal temperature reaches 165°F, about 15 to 25 minutes depending on your oven and the size of the thighs. Cover and rest for 5 to 10 minutes before serving.

    To air fry

    Preheat the air fryer to 380°F. Add the chicken smooth-side down. Cook for 8 to 10 minutes, flipping halfway, until it reaches 165°F on an instant-read thermometer. Rest for 5 to 10 minutes, then serve warm.

    How to serve it

    • Over grains. Couscous, turmeric rice, or quinoa all work beautifully here.
    • With North African-inspired sides. A Moroccan chickpea salad or a simple couscous rounds out the plate without a lot of fuss.
    • With vegetable sides. Sautéed green beans or roasted cauliflower keep it simple and fast.
    • In wraps and pitas. Slice the chicken and stuff it into pita with crisp vegetables and a homemade tzatziki. This is the version that disappears fastest at our house.
    • In salads. I love making extra and adding sliced chicken to salad greens for easy weekday lunches. This is where the meal prep angle really pays off.

    Storage and reheating

    • Refrigerate cooked chicken in an airtight container for up to 4 days.
    • Freeze cooked chicken for up to 3 months.
    • Reheat gently in the microwave or in a covered skillet over low heat until warmed through.

    One note before you cook

    Buy the jarred harissa sauce, not the concentrated paste. The paste is much stronger, and your chicken will end up significantly spicier than you intended. If you want more heat, that’s fine. Use the spicy version on purpose. The difference between the two is the difference between ‘flavorful’ and ‘why did I eat this again.’

    Nutrition, per serving (1 of 6): 236 calories, 30g protein, 3g carbs, 11g fat.

    Trade-It Tip: No Greek yogurt? Sour cream works in a pinch. Same tang, same texture, and it keeps the heat in check without changing the dish.

    Harissa chicken is the kind of recipe that makes you wonder why you didn’t try it sooner. It’s bold without being fussy, and it doesn’t care if you grill it, bake it, or air fry it. The chicken comes out juicy and full of smoky, warm flavor, and the whole thing comes together before you’ve finished cleaning up the kitchen.

    If it doesn’t fit a Tuesday night, it doesn’t get published.
    — Grace

    Keep Reading

  • Greek Chicken Meatballs with Tzatziki

    Greek Chicken Meatballs with Tzatziki

    I used to think “healthy dinner” meant three separate pans and a sink full of dishes. These Greek chicken meatballs took about 25 minutes start to finish, and the kitchen barely noticed.

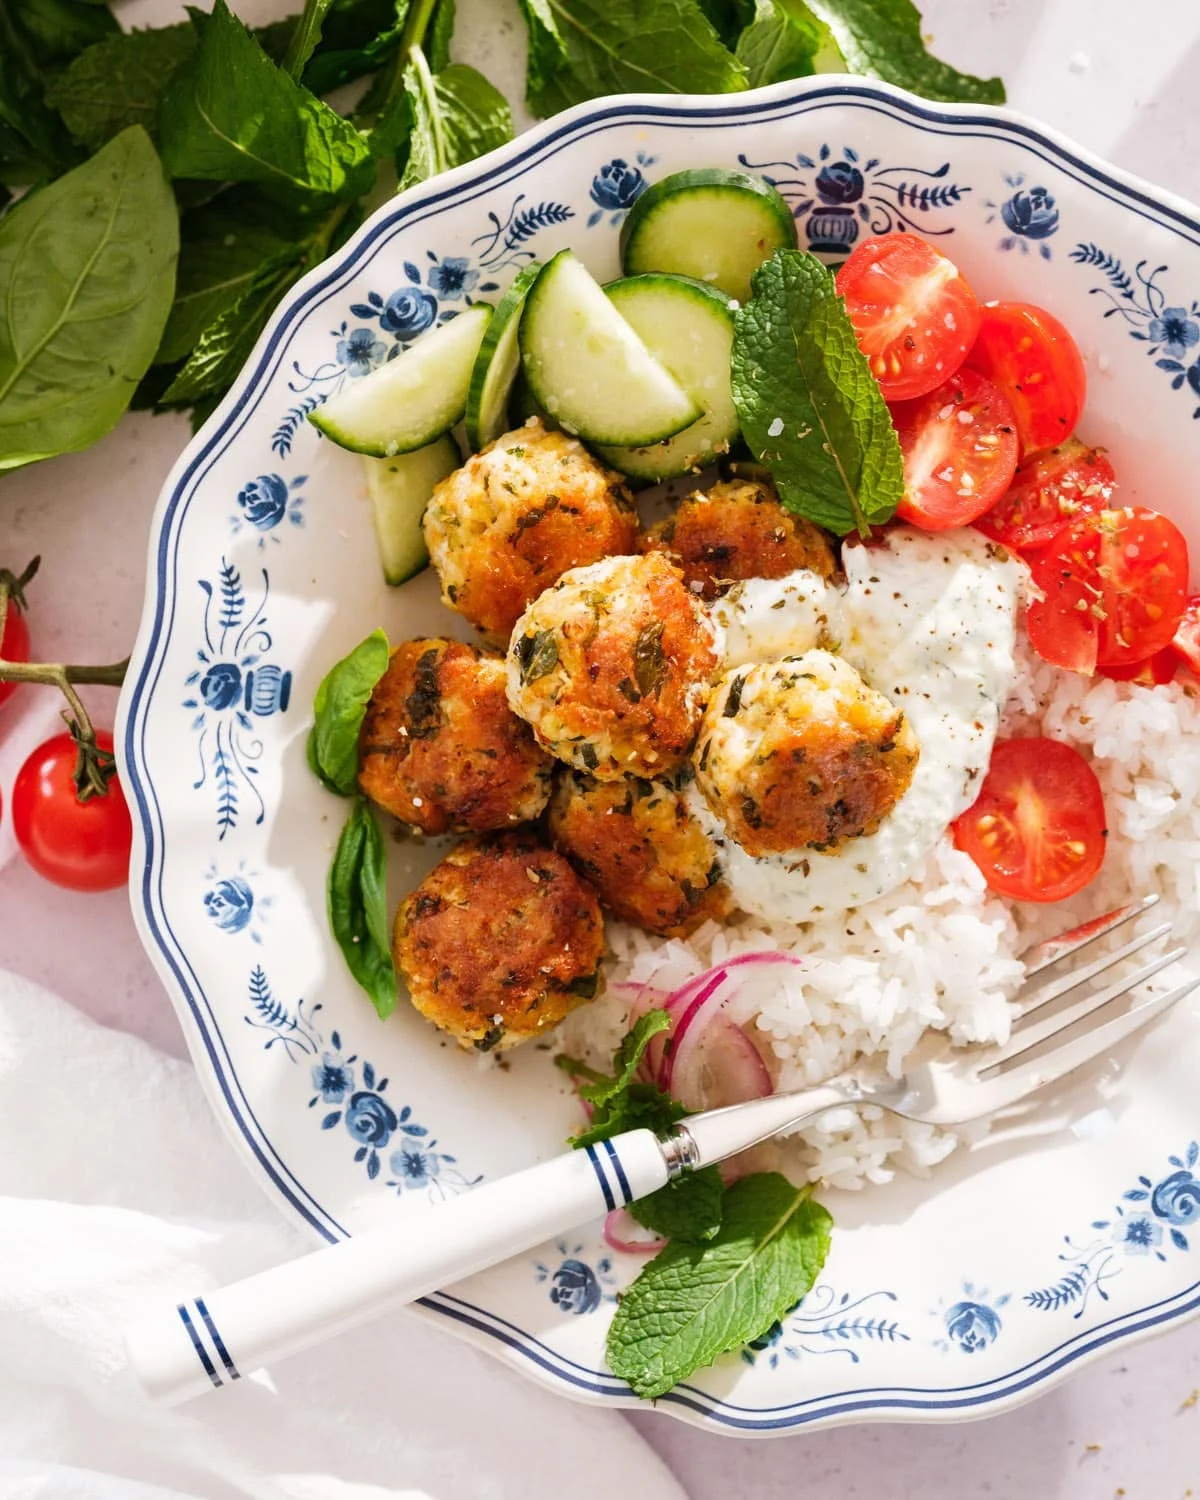
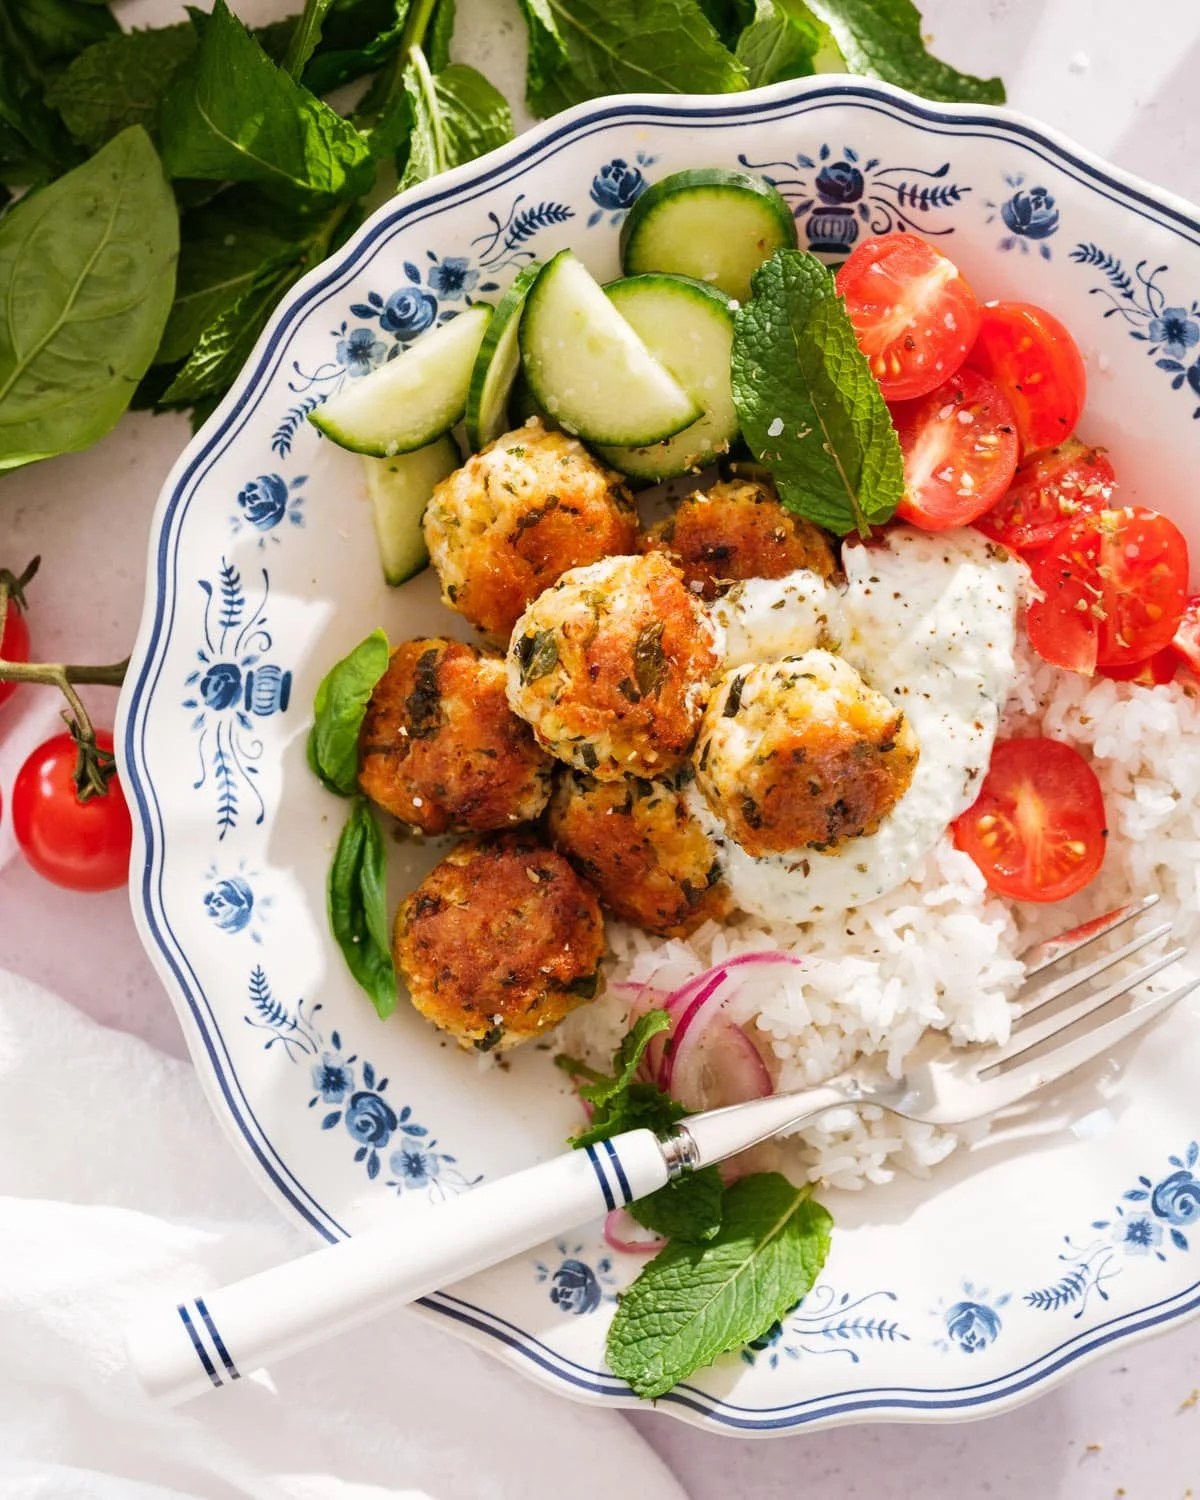
    Baked Greek chicken meatballs over rice with tzatziki and fresh vegetables

    They’re the good kind of simple. Herbed, juicy, and herby enough that the house smells like a Greek island for an hour. Serve them over rice with a big spoonful of tzatziki and you’ve got a Mediterranean plate that doesn’t ask much of you.

    Why this works: the panko keeps the meatballs tender instead of dense, and the cold-skillet sear builds a little crust before the oven finishes them. That crust is what makes them taste restaurant-made instead of “homemade but sad”.

    What you’ll need

    • Ground chicken — a budget-friendly swap for breast meat. If your store only has breasts, pulse them in a food processor until finely ground and you’re set.
    • One egg — the binder that keeps everything together.
    • Panko breadcrumbs — helps with binding and keeps things juicy. Swap in gluten-free panko to make it gluten-free.
    • Fresh mint — the cooling, Mediterranean note. If you can’t be bothered to spring for fresh, Italian parsley works too.
    • The usual pantry spices: oregano, garlic powder, onion powder, smoked paprika.

    How to make them

    1. Preheat the oven to 400°F and set out a cold ovenproof skillet. Swirl it with 2 tablespoons of olive oil.
    2. In a large bowl, whisk the egg, then stir in the ground chicken, 1 tablespoon olive oil, panko, chopped mint, oregano, garlic powder, onion powder, smoked paprika, kosher salt, and a few grinds of black pepper. Mix gently until just combined, then shape into 20 to 22 balls, about 1½ inches wide. A size-40 cookie scoop makes this painless.
    3. Drop each meatball into the cold skillet as you form it. Once they’re all in, turn the heat to medium-high and sear for about 3 minutes until browned on the bottom. That cold-start is the trick — you get a proper sear without burning the bottom while you’re still rolling.
    4. Move the skillet straight into the oven and bake 8 to 10 minutes, until the internal temperature reaches 165°F.
    5. Plate with rice, sliced cucumbers and tomatoes, and a big spoonful of tzatziki. Pickled red onions make a nice finishing touch, and a few salt-and-oil-dressed chickpeas add fiber if you want it.

    25 minutes, start to finish — including the rolling. No extra pan to wash, because the skillet goes from stove to oven to table.

    Ways to serve them

    • Over white rice, brown rice (for more fiber), or farro.
    • In a Mediterranean bowl: rice, cucumber, tomato, olives, a big spoonful of tzatziki, and some olive-oil-seasoned chickpeas.
    • Tucked into warm pita, the way you’d build a proper pita sandwich.
    • With a Greek salad or a quick tomato-cucumber salad.
    • As a starter: out the tzatziki with toothpicks and let people graze.

    Storage and make-ahead

    These are great for meal prep, though the mint hits hardest when they’re fresh out of the oven. Store leftovers in an airtight container in the fridge for up to 4 days. Reheat gently in a 350°F oven or a covered skillet with a splash of water.

    You could likely freeze them for up to 3 months, but I’ve personally not tried it — they disappear too fast here to find out.

    Make it plant-based

    If you’re cooking for a vegetarian at the table, batch these alongside some chickpea meatballs. The chickpea version is a little drier, more falafel-textured, but it holds up fine over rice with tzatziki. You could probably bake them in the same oven at 400°F and pull them a few minutes early — I haven’t tried it personally, so tell me if it works.

    Trade-It Tip: No Greek yogurt for tzatziki? Sour cream works — same tang, same texture, nobody will know.

    If it doesn’t fit a Tuesday night, it doesn’t get published.
    Keep Reading

  • Garlic Toast: 15-Minute Crispy Edges, 5 Ingredients, Zero Fancy Steps

    Garlic Toast: 15-Minute Crispy Edges, 5 Ingredients, Zero Fancy Steps

    I used to think garlic toast was the kind of thing you ordered at a restaurant, not the kind of thing you made at home. Back when I worked the line, we made it all day long — and honestly, the secret is that it takes almost no effort. About 15 minutes, start to finish, with 5 ingredients. If you’ve got stale bread sitting in the bag, this is your sign.

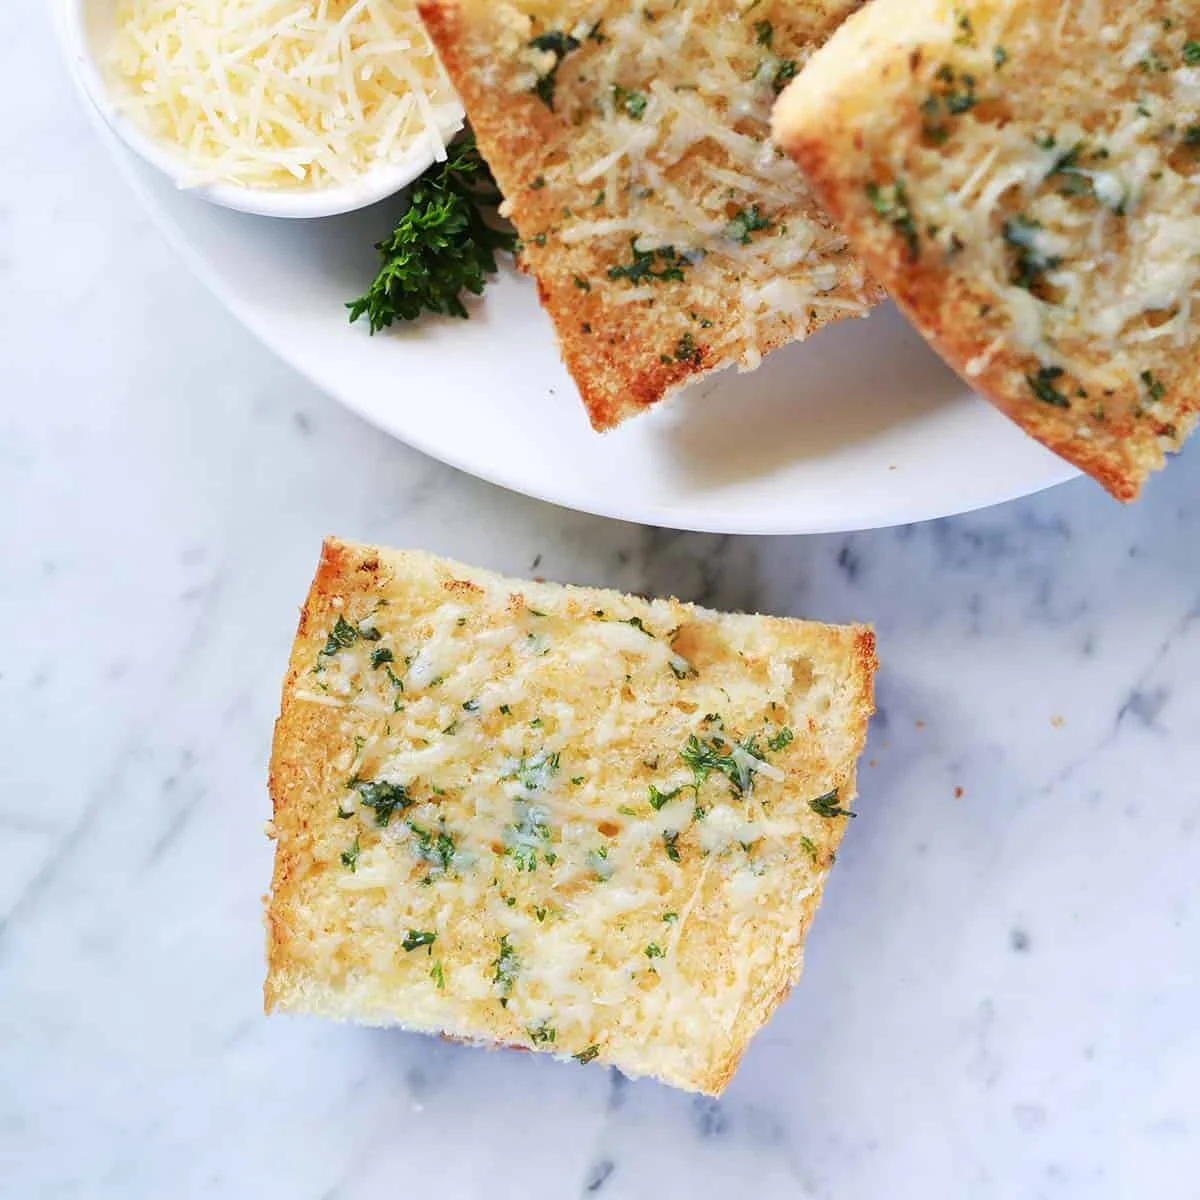
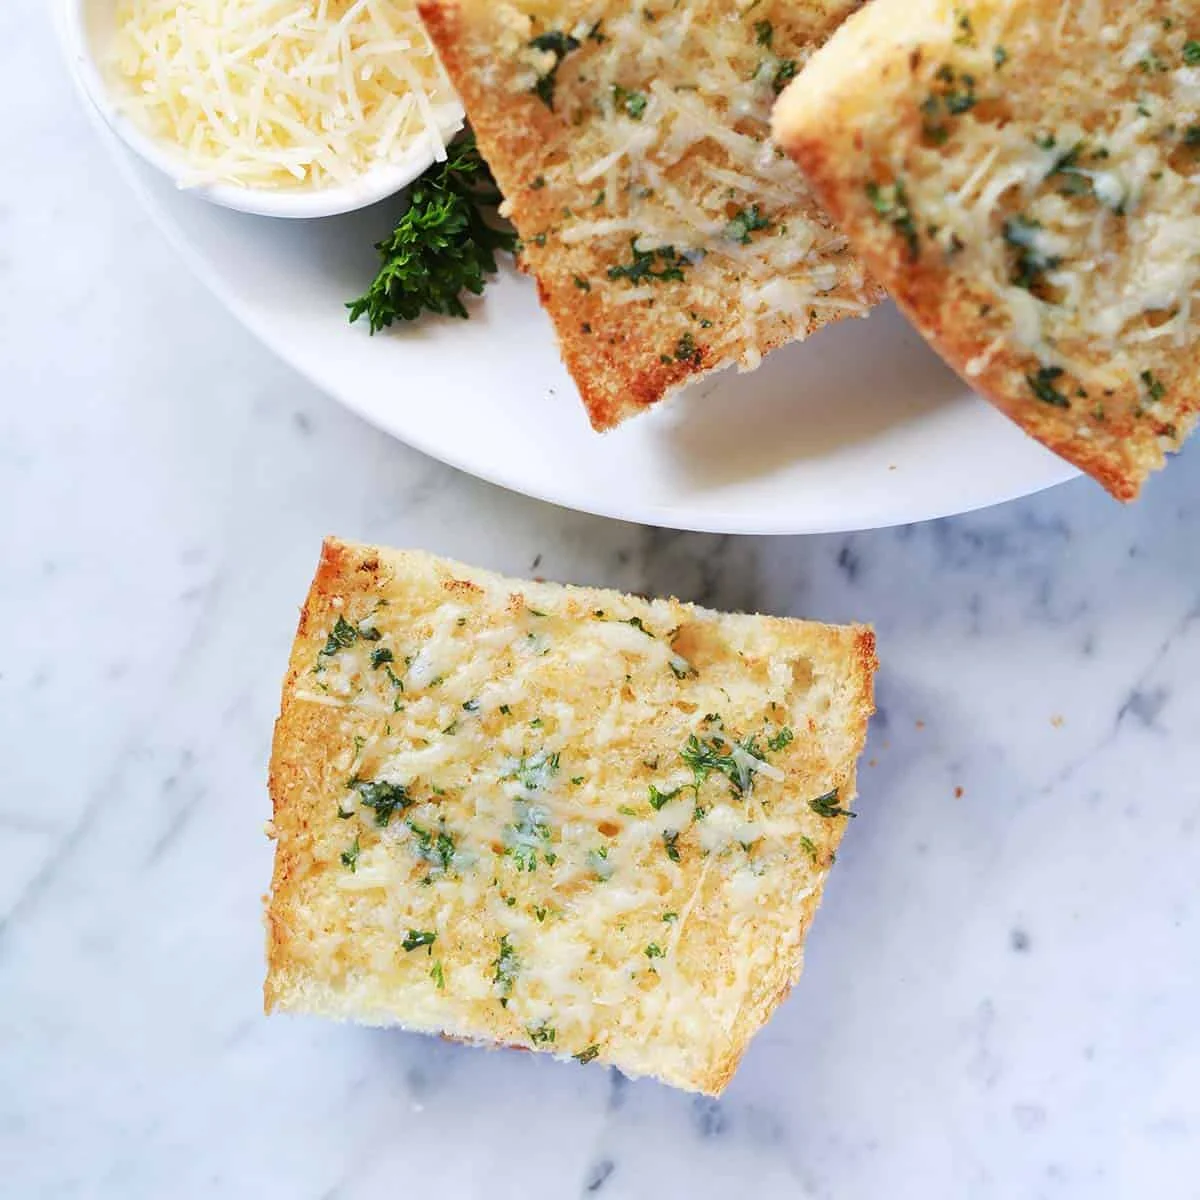
    Golden garlic toast slices topped with melted parmesan and parsley

    It’s my go-to alongside soup, chili, meatballs in marinara, or a pasta dish like lasagna or manicotti. It’s the good kind of simple — the kind where nothing can really go wrong.

    Why this works: spreading the garlic butter over cut bread (instead of brushing a whole loaf) gives you more exposed edges, and edges are where the crisp happens. More cut sides means more golden, shatter-crispy bits per bite.

    What you need

    • 1 loaf French bread (stale is perfect)
    • 1/2 cup unsalted butter, softened
    • 1/2 cup Parmesan cheese, grated
    • 1 tablespoon fresh parsley, chopped
    • 1 teaspoon garlic powder
    • Salt and pepper to taste
    Garlic toast cooling on a plate after baking

    How to make it

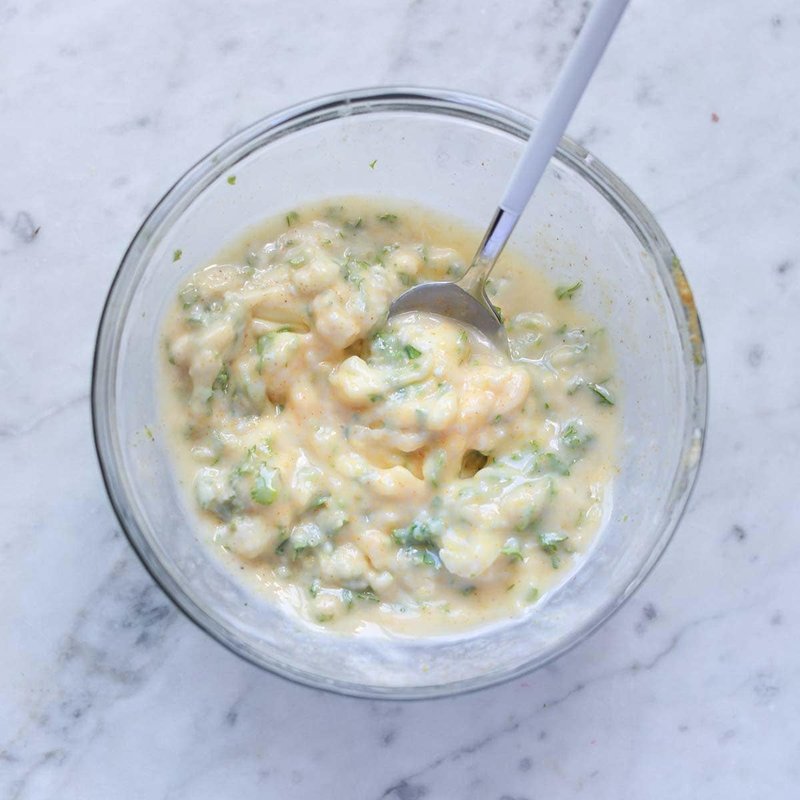
    1. In a small bowl, mix together the softened butter, Parmesan, chopped parsley, and garlic powder. If your butter isn’t soft yet, nuke it for 30 seconds or less in the microwave. You want it very soft, not melted into a liquid.
    2. Cut the French loaf in half lengthwise, as if you were going to make a giant sandwich. Then cut off the ends and slice into individual pieces — more cut sides, more crispy edges. (Not necessary, but I like it.) You could also just leave it in two big halves.
    3. Spread the garlic butter mixture evenly over the bread.
    4. Sprinkle with salt and pepper.
    5. Bake at 425°F for 8–10 minutes, until the edges are golden and the cheese is bubbling.
    Bowl of garlic butter mixture ready to spread on bread

    Swaps and shortcuts

    Any bread works. I like French bread for this, but sourdough, focaccia, or even sandwich bread will do. If your bread is thinner, you may need to shorten the baking time — watch it rather than trust the timer.

    Salted butter? Fine — just hold off on the added salt until after baking. Taste a corner first, then add more only if it needs it.

    No fresh parsley? Italian seasoning works in its place. Same garlicky-herby job, less chopping.

    Trade-It Tip: No Parmesan? Mozzarella gets you the same melty, stretchy top — different flavor, same function. It’s a swap I do all the time when the cheese drawer runs dry.

    That’s it. One loaf, one bowl, one pan. Pull it out when the edges are properly crisp and the middle is still soft — that contrast is the whole point. Pair it with something soupy, tear off a piece with your hands, and call dinner a success.

    If it doesn’t fit a Tuesday night, it doesn’t get published.
    — Grace

    Keep Reading

  • Sourdough Banana Bread That Stays Moist (Easy Starter-Scraper Recipe)

    Sourdough Banana Bread That Stays Moist (Easy Starter-Scraper Recipe)

    My counter is currently a museum of banana decay. Three bananas, brown as toast, doing their best to look intentional. Next to them sits a jar of sourdough discard that has been patiently waiting for a job. This is the recipe that finally employs both of them.

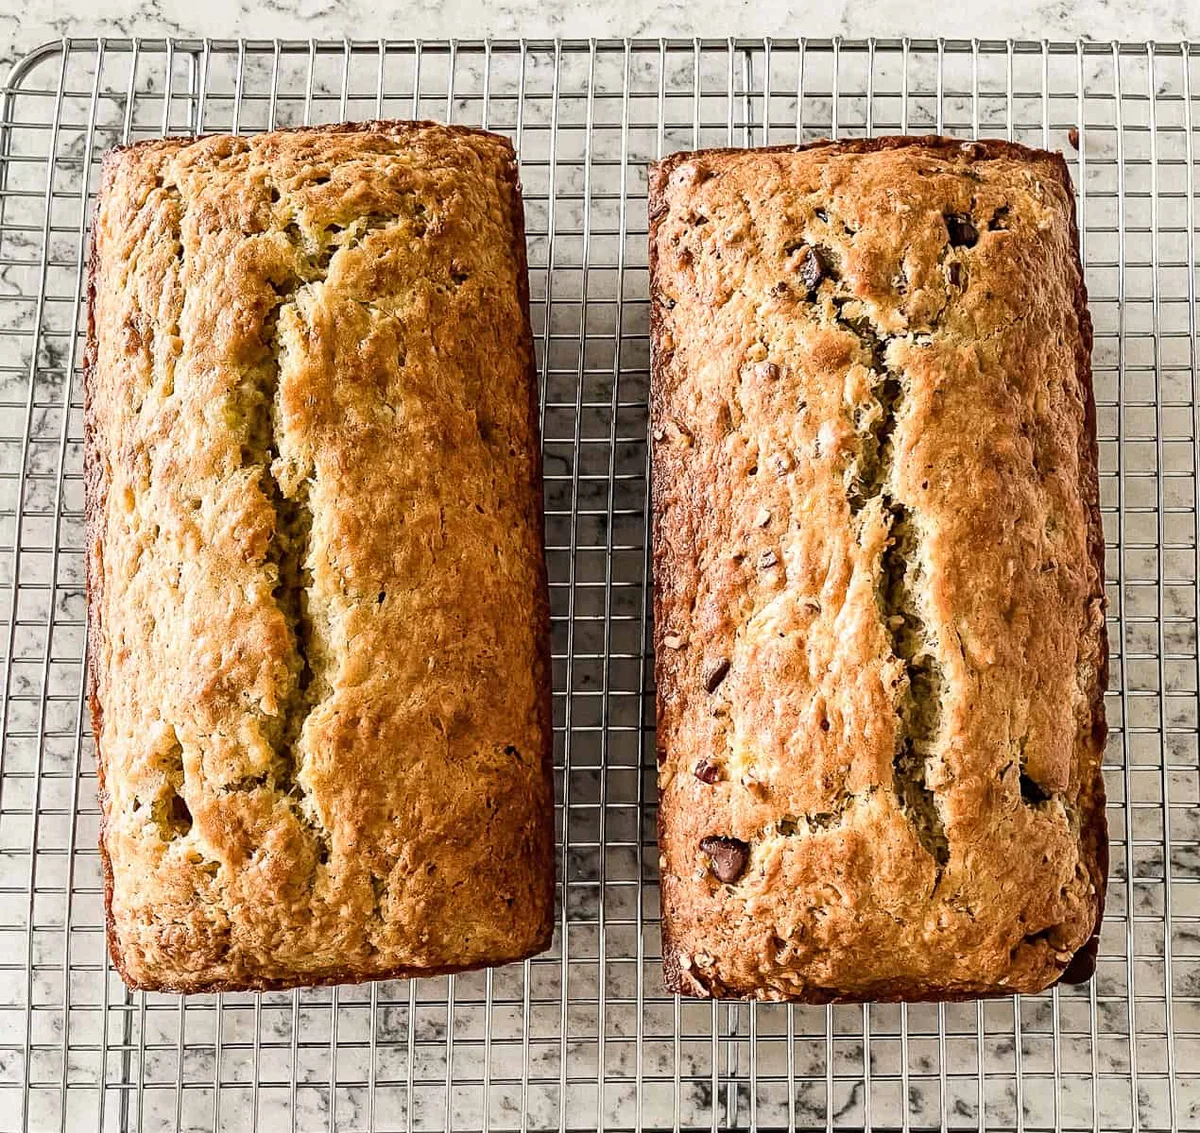
    1 hour start to finish — and it makes two loaves. One to keep, one to share (or freeze, which is what I always actually do).

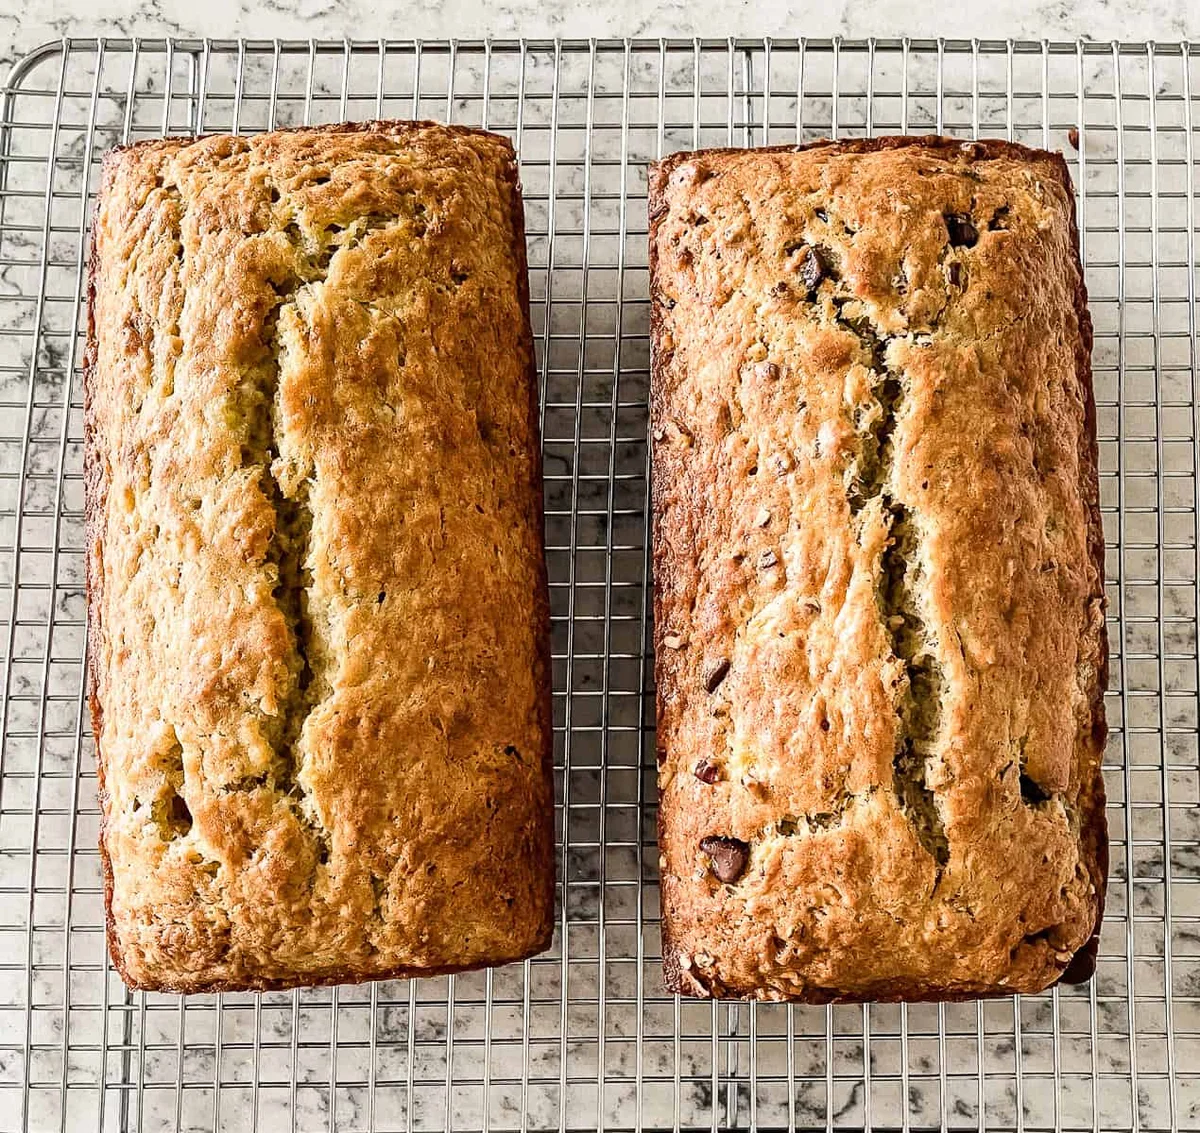
    Two golden loaves of sourdough banana bread cooling on a wire rack

    Why this works

    Sourdough discard does two things in banana bread: it adds moisture and a gentle tang that takes the edge off the sweetness. You don’t need to feed a starter or wait on a rise — this is a quick bread, so there’s no kneading and no 12-hour ferment. If you can mash a banana, you can make this. That’s the good kind of simple.

    What you need

    No special tools beyond what’s already in your kitchen. Two standard loaf pans, a hand mixer or a strong arm, and a toothpick for the doneness check.

    Ingredients

    • 115 g (½ cup) salted butter, softened
    • 200 g (1 cup) white sugar
    • 140 g (½ cup) sourdough discard — straight from the fridge is fine
    • 280 g (1½ cups) mashed overripe bananas (3 large or 4 small)
    • 5 ml (1 tsp) vanilla extract
    • 2 large eggs
    • 250 g (2 cups) all-purpose flour
    • 3 g (½ tsp) salt
    • 5 g (1 tsp) baking soda
    • 2 g (½ tsp) baking powder

    Method

    1. Preheat the oven to 175°C (350°F). Spray two 21×11 cm (8×5 inch) loaf pans with nonstick spray and line the bottoms with parchment paper.
    2. Mash the bananas with a fork until there are no large lumps. Leave the little flecks — that’s flavour.
    3. Beat the butter and sugar for 2–3 minutes until pale and creamy, scraping the bowl down once or twice. This softens the sugar crystals, which is why the crumb ends up soft instead of crumbly.
    4. Add the discard, mashed bananas, vanilla, and eggs. Beat until smooth.
    5. Whisk the flour, salt, baking soda, and baking powder together in a separate bowl.
    6. Sourdough banana bread batter being stirred with chopped pecans
    7. Stir the dry ingredients into the wet mixture, along with any mix-ins you’ve chosen. Stop stirring the moment no flour streaks are left. Overmixing is the number one way to end up with a dense loaf, so give it a lazy final mix and let it be.
    8. Divide the batter evenly between the two pans. Bake for 40–45 minutes, until a toothpick comes out with only a few moist crumbs — no wet batter.
    9. Raw and baked sourdough banana bread loaves side by side
    10. Let the bread cool in the pans for about 10 minutes, then turn it out onto a wire rack. Warm slices are the best kind, but it cuts cleanest once completely cool.

    Tips I learned the hard way

    The first time I made this, I packed the flour down into my measuring cup and the loaf came out like a brick. Spoon it in, level it off, or weigh it. I weigh mine now.

    • Use bananas that are properly brown-spotted. The darker, the sweeter, the better this bakes.
    • Don’t rush the creaming step. It’s the only part of this recipe where patience pays.
    • Trust the toothpick, not the clock. The moment it comes out clean, pull the pans.
    • It keeps well: wrapped, it stays fresh for 3–4 days on the counter, and frozen it lasts 4–5 months.

    Make it yours

    • Banana nut: stir in 240 ml (1 cup) of toasted pecans or walnuts.
    • Chocolate chip: stir in 240 ml (1 cup) of chocolate chips. That’s the loaf I always keep for myself.
    • Berry: fold in 240 ml (1 cup) of blueberries, chopped strawberries, or raspberries.
    • Cinnamon swirl: spread half the batter in one pan, sprinkle with cinnamon sugar, top with the rest, and drag a knife through in a swirl.
    • Tropical: add 120 ml (½ cup) toasted coconut and 120 ml (½ cup) very well-drained pineapple.
    • Peanut butter: stir in 160 ml (⅔ cup) of peanut butter chips and layer the batter with swirls of peanut butter.

    Can I make it differently?

    Active starter instead of discard? Yes — both work. I’ve never once regretted using whatever was in the jar.

    Muffins instead of loaves? Absolutely. Divide the batter among 18–20 prepared muffin cups and bake at 175°C (350°F) for 18–20 minutes, until a skewer comes out clean.

    One big pan? You can fit this into a single 23×12 cm (9×5 inch) pan, but bake for 55–65 minutes and skip the mix-ins — it tends to overflow with them.

    And if it comes out dense? It’s almost always one of two things: overmixed batter, or packed flour. Both are fixable next time.

    How we serve it

    At our house it goes three ways: fresh from the oven with a proper slab of butter; toasted the next morning with peanut butter (the kids’ vote); and on the rare fancy afternoon, spread with cream cheese. It’s also a fine thing to just eat standing at the counter while it cools, which is how most of it disappears.

    Trade-It Tip

    No sourdough on hand? Plain yogurt works in a pinch — about 140 g (½ cup) — for similar moisture and a mild tang. It won’t taste exactly the same, but it gets the job done.

    If it doesn’t fit a Tuesday night, it doesn’t get published.
    Keep Reading

  • Cucumber and Yogurt Crostinis: 10-Minute Summer Appetizers That Taste Like a Vacation

    Cucumber and Yogurt Crostinis: 10-Minute Summer Appetizers That Taste Like a Vacation

    My father-in-law makes these every single summer, and I used to stand at his counter watching him toss cucumbers into a bowl with Greek yogurt and dill like it was nothing. No recipe card, no kitchen timer, no one asking him for measurements. I always thought I’d never get that close to the taste — until I realized the whole trick was the bread.

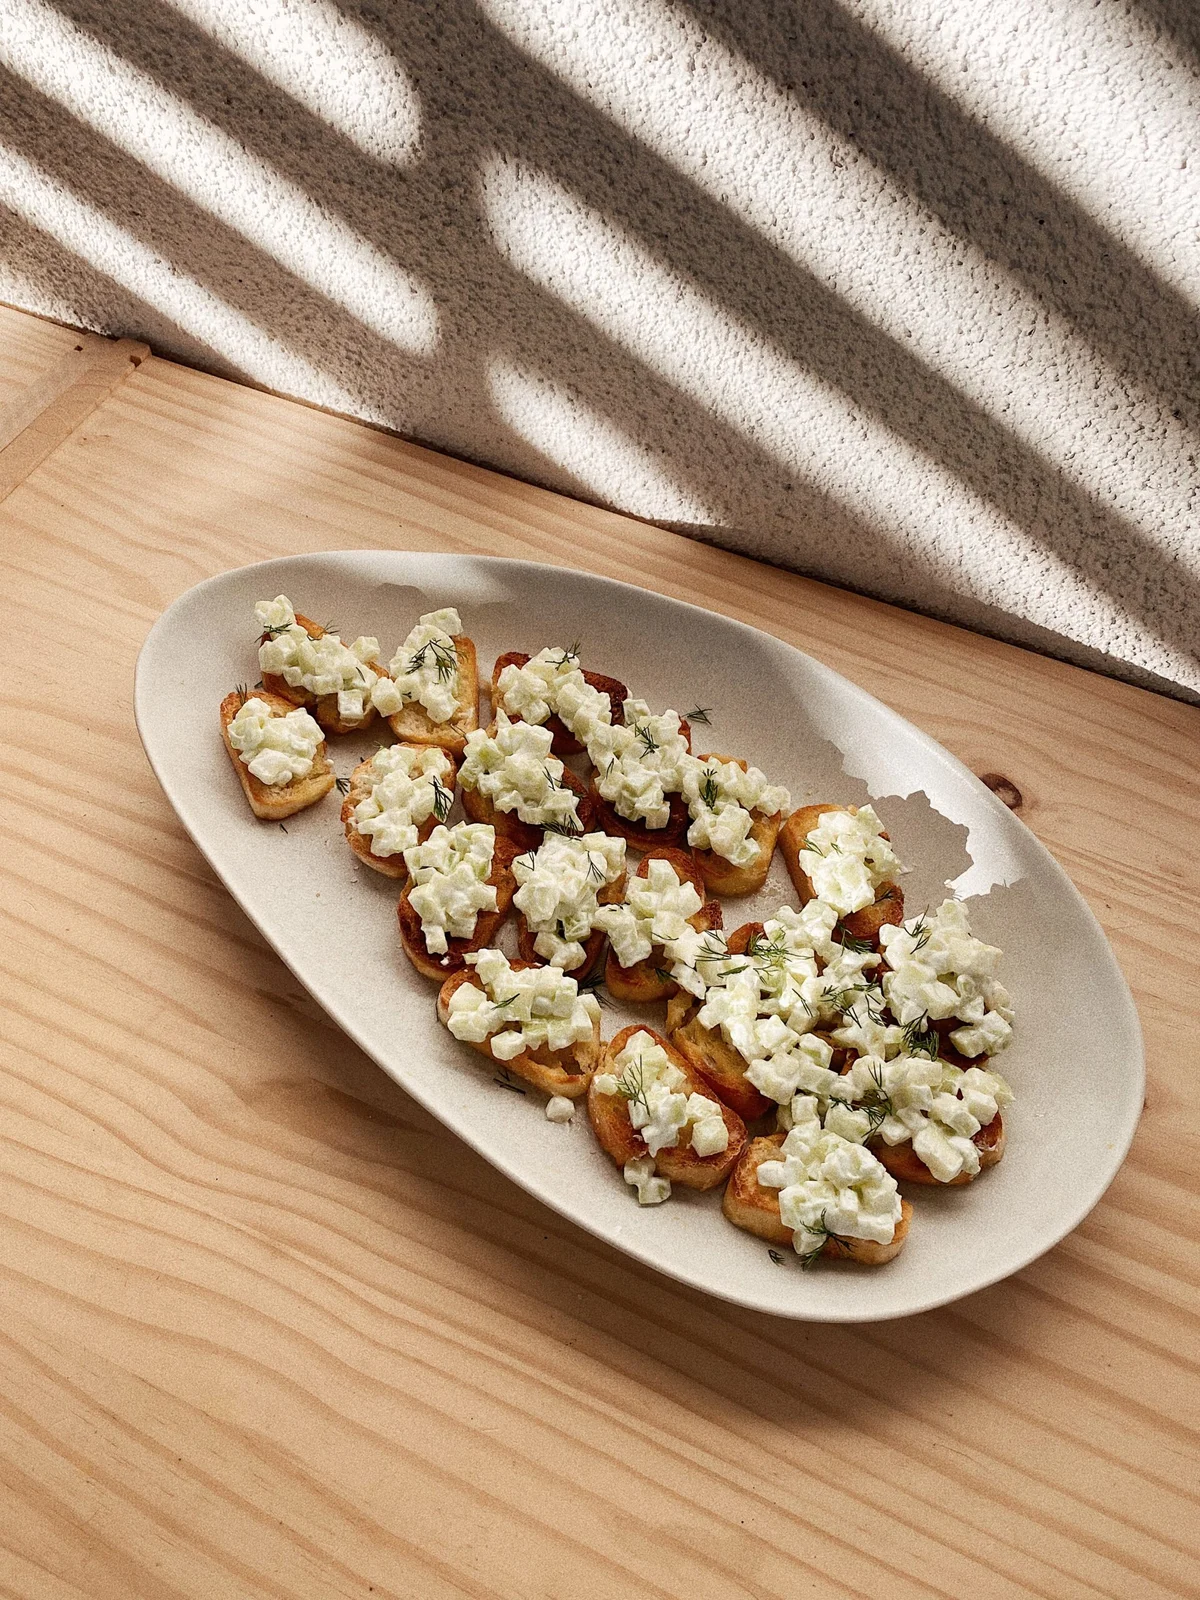
    Crostini topped with creamy cucumber yogurt dip and fresh dill on a ceramic plate

    These are basically tzatziki on toast, and they’re the kind of thing your guests ask about before they’ve even had their second one. Not the “oh that’s lovely” kind of compliment. The “wait, what’s in that?” kind.

    Why this works

    The cucumbers release their water when you dice them and let them sit, so by the time you’re serving the yogurt has that clean, bright edge instead of a soggy pool. The bread does the heavy lifting here — any toast you already have or can make in two minutes. My version uses a baguette, but honestly, if your cupboard has something with a crust, you’re in business.

    What you’ll need

    • 1 baguette (or equivalent crusty bread, about 4 to 6 slices)
    • 1 to 2 large cucumbers, or a handful of English cucumbers
    • 1 to 2 tablespoons full-fat Greek yogurt
    • Coarse sea salt
    • Fresh dill, a few sprigs for the top
    • Olive oil, just enough for the bread

    No chamomile, no fancy equipment, no second pot. That’s the whole deal.

    Step by step

    1. Finely dice the cucumbers and set them in a bowl. Let them sit while you get the bread ready. This is the one non-negotiable step — the sitting gives the flavor room to settle in.
    2. Brush the bread with olive oil and toast it however you prefer — grill, pan-fry, bake, or a proper toaster if you’ve got one. I use the toaster with the strongest setting and check it after a minute so it doesn’t turn to a coal. Golden brown is the target; slightly darker is fine, dark enough to make you say “huh” is not.
    3. When the bread is ready, fold the yogurt into the cucumbers. Start with a tablespoon, mix it in, then add another if you want it creamier. You want it thick enough to hold on the bread but not so wet it drips down your fingers.
    4. Spoon the cucumber-yogurt mixture over each piece of toast. Sprinkle with coarse sea salt and a few torn sprigs of fresh dill on top. Done.

    That’s it. From start to finish, probably ten minutes if your bread is in the toaster while the cucumbers sit. If your kids ask “can I make them too?” — the answer is yes, and they should, because chopping cucumbers and spooning yogurt onto toast is a skill that comes in under ten years old.

    Ingredient swaps that work

    No Greek yogurt? Plain yogurt works. You’ll lose a little tang but the texture holds up. Low-fat yogurt is an option if that’s what you have — it’ll be a bit thinner, so go easy on the salt.

    No dill? Fresh chives are a fine swap. If you’re out of both, a pinch of dried dill is worth half the flavor of fresh, so that’s the lesser evil if it’s all you’ve got.

    No baguette? Any crusty white bread works. Whole wheat is good here if you want a little more chew. Pita bread, half-sliced, also makes a great base if you’re going the casual route.

    Want it a bit sharper? A teaspoon of lemon juice stirred into the yogurt before you spoon it over the bread brightens the whole thing without making it taste like a salad.

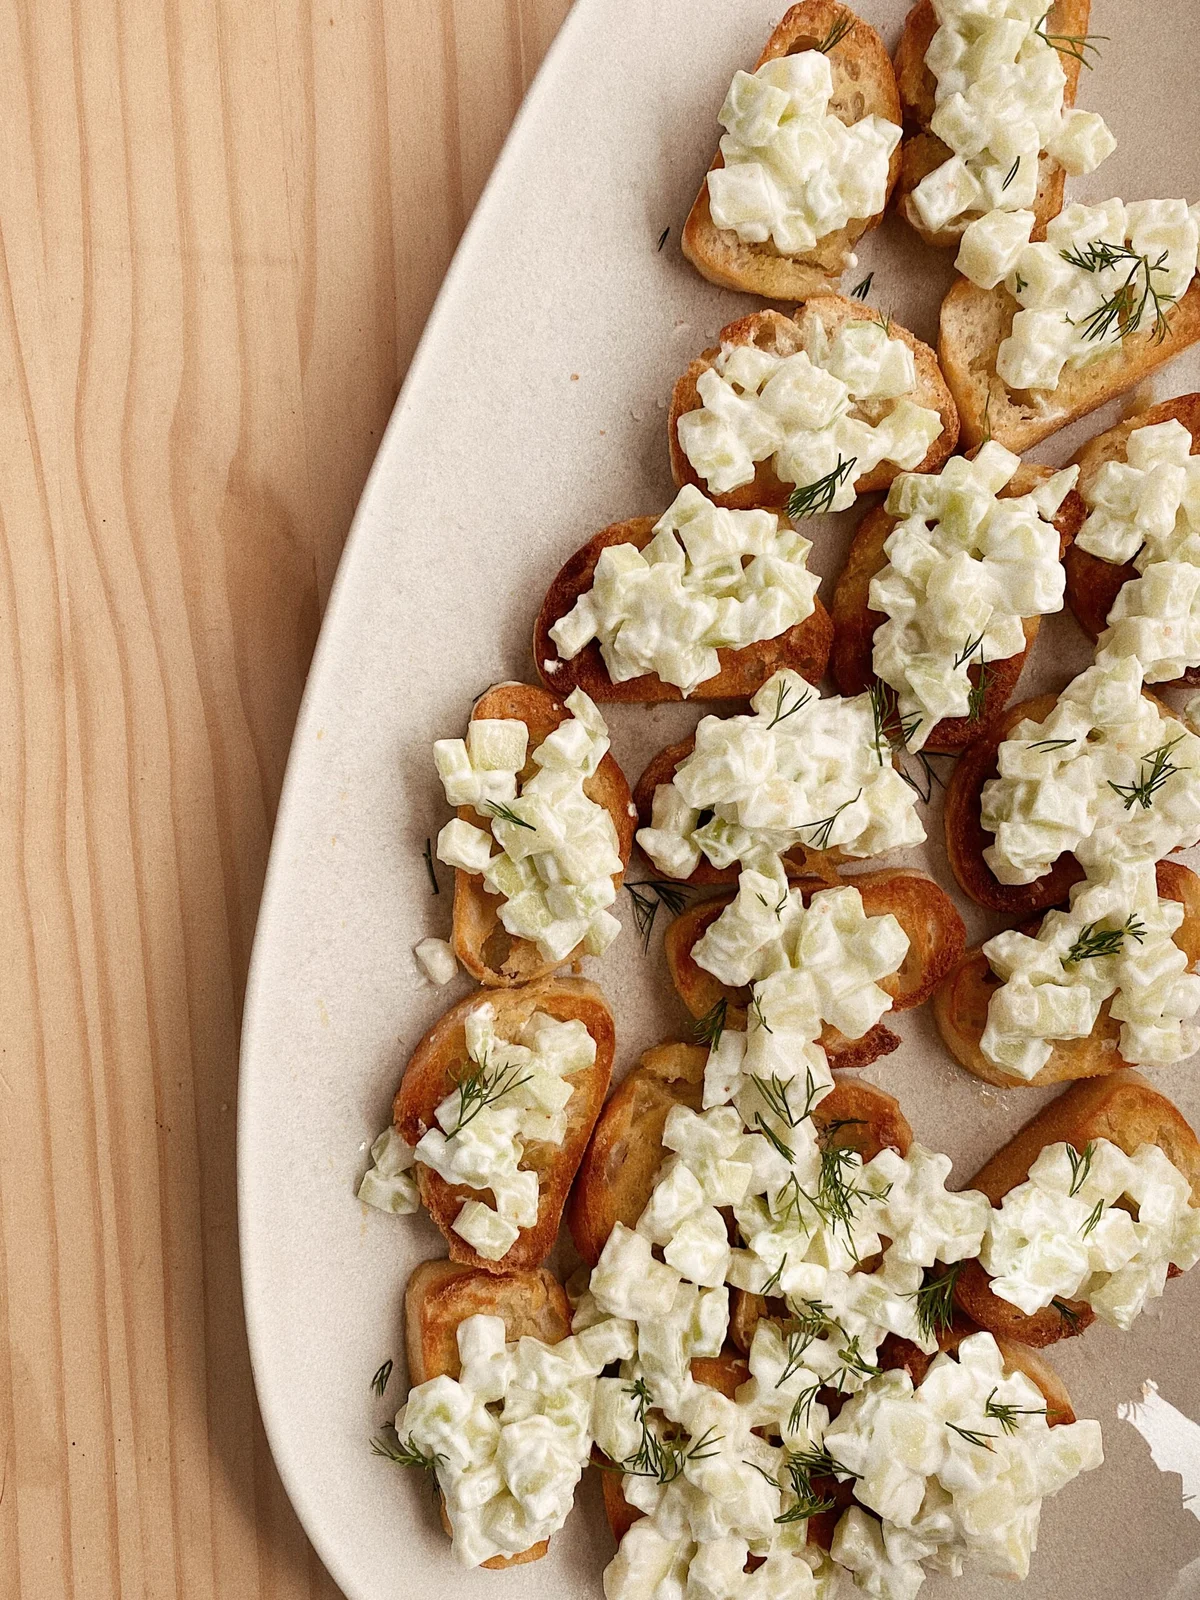
    I made these for a dinner last month and a guest asked if I’d “French-fried the bread.” I laughed. Told her I toasted it. She laughed too, but I think she actually meant it. The one thing I want you to see is the way the yogurt clings to the bread — that’s the difference between a soggy dollop and something that actually holds together when you pick it up.

    Top-down view of cucumber and yogurt crostini on a rustic wooden board

    Here’s what the top should look like when you get it right — a little salt, a few torn dill sprigs, and the kind of plating that takes thirty seconds but earns you a second helping.

    Close-up of spooned cucumber yogurt topping with fresh dill garnish

    That’s the kind of dish that earns a phone number. Serve them with a salad and some roasted something, and you’re done for the evening.

    If it doesn’t fit a Tuesday night, it doesn’t get published.

    Keep Reading

  • Creamy Green Gazpacho with Avocado and Fresh Greens (10 Minutes, No Stove)

    Creamy Green Gazpacho with Avocado and Fresh Greens (10 Minutes, No Stove)

    The other week the heat came straight through the kitchen window and about half my dinner ideas died on that spot — anything with an oven standing a chance of surviving. So here’s the one that did win: a blender, a bowl, and a pot of something cold and green.

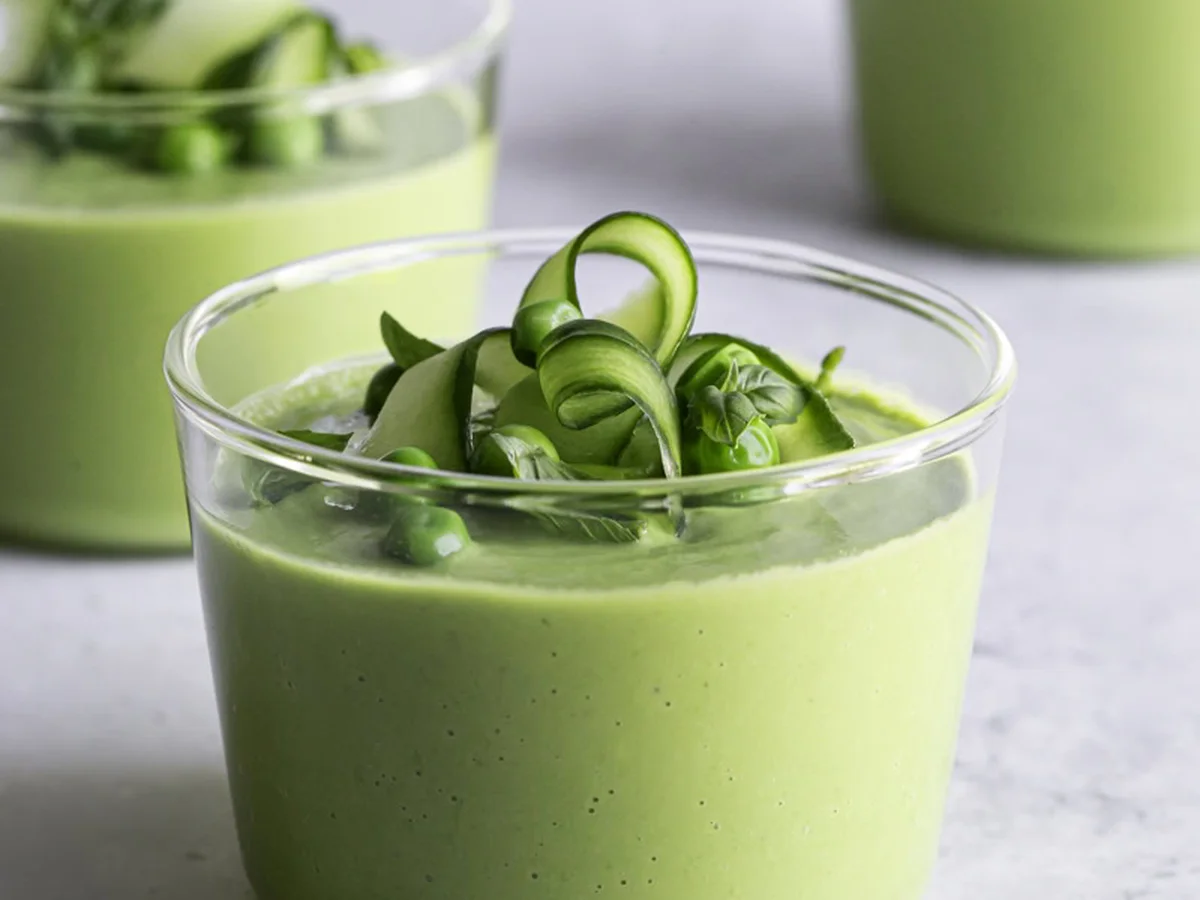
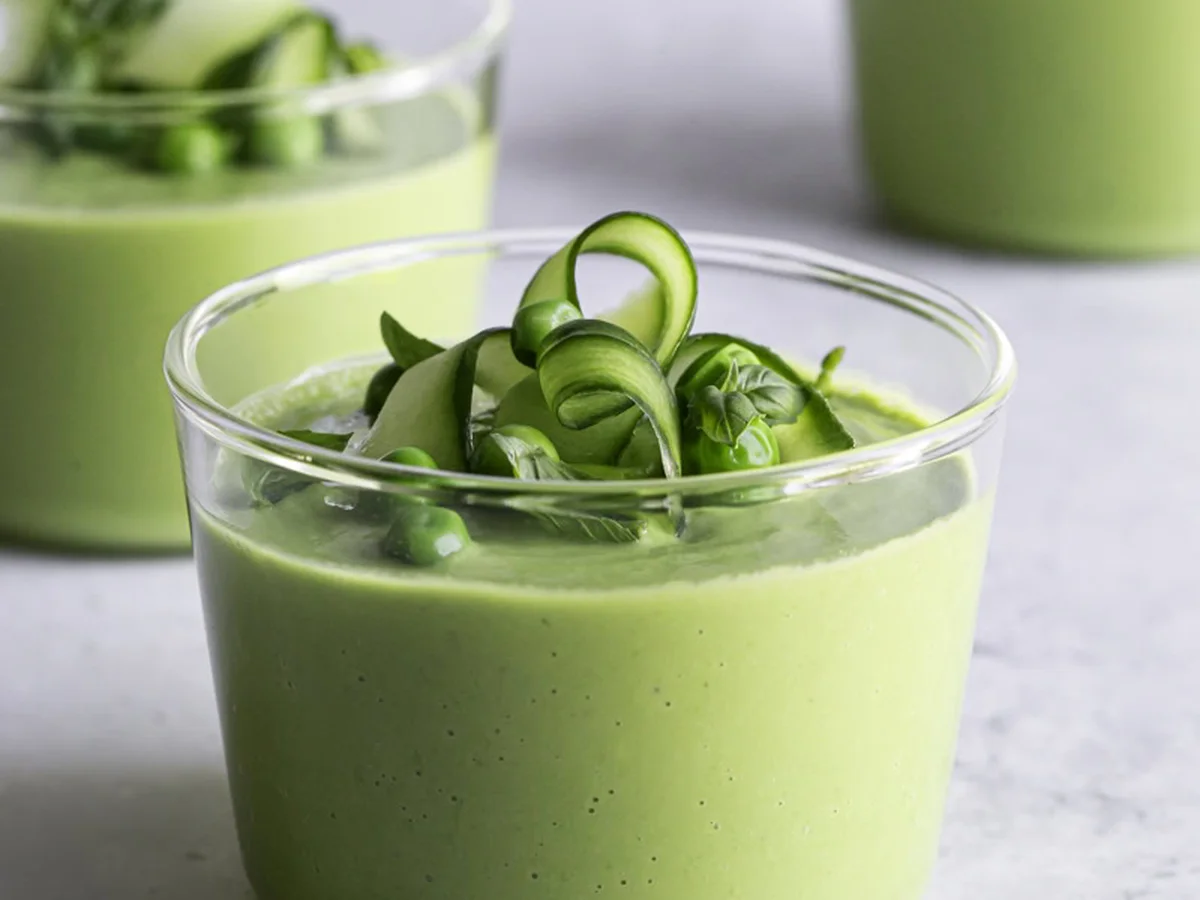
    Glass of creamy green avocado gazpacho garnished with cucumber ribbons

    Green gazpacho is the chilled cousin of that tomato soup from Spain. Swap the tomatoes for cucumber, spinach and basil, and instead of a thick red you get something bright, herbaceous and genuinely cooling — which is exactly what a soup should be when the window’s open and the temp’s up.

    This one is 10 minutes start to finish, and the stove never even turns on. If that sounds like a lie, keep reading — the whole thing is in a blender and the fridge does the last bit.

    Why this works

    Avocado and coconut milk do what cream does in other soups — they carry the whole thing into a smooth, thick texture, no dairy required. Lime and garlic put in the counterbalance so it never tips to being a sweet pea soup, and the cucumber keeps the whole bowl light and hydrating.

    Ingredients

    Everything here is a shelf, a fridge or a frozen drawer a norm. Nothing you’ll have to stretch for:

    • 1 cup cold water
    • 1 cup coconut milk (the solid part)
    • 1 large avocado
    • 2 mini cucumbers, cut into large pieces (more for garnish, if desired)
    • 2 cups (12 oz) frozen peas, cooked/thawed
    • 1 cup fresh spinach leaves, packed
    • 1/2 cup fresh basil leaves, packed
    • 2 tablespoons avocado oil (or extra virgin olive oil)
    • 3 tablespoons lime juice
    • 1 teaspoon minced garlic
    • 1 teaspoon sea salt (more to taste)
    • A pinch of black pepper
    Close-up of green gazpacho served in glass with cucumber garnish

    How to make it

    Steps to do it:

    1. Chop the cucumber. Leave the avocado with its skin on, or in halves. Pull the spinach and basil out, and measure everything else in front of you.
    2. Put the water and coconut milk into the blender. Add the cucumber, avocado and everything else:
    3. Blend until smooth. If it’s a little thick, a bit more water — you want it pourable, not heavy.
    4. Taste, then salt and pepper to your taste.
    5. Put it into a glass and let it sit in the fridge for at least 30 minutes. This is the step nobody wants to skip, and it’s the only one worth the wait. Garnish with extra basil, a few peas, and — if you’re feeling fancy — a ribbon of cucumber from a peeler.
    Bowls of green gazpacho topped with cucumber rosette and peas

    How to serve it

    Prep, lunch, or a starter at a dinner — it doesn’t pick. Serve cold in small glasses with a chunk of gluten-free bread on the side, or just straight out of a bowl where it’s thick enough to eat with a spoon.

    Your questions, answered

    Can I make it in advance?

    Yes. Pour it into jars, seal the lids, and let it sit in the fridge for up to 24 hours. Garnish right before serving.

    Can I freeze it?

    You can, but the avocado doesn’t always survive the thaw. Leftover in the fridge, eaten within a day, is better on texture.

    Can I switch out the herbs?

    Go for it. Mint, cilantro, parsley — anything fresh and green with flavour. Mix and match to whatever you have.

    What can I use instead of coconut milk?

    Oat, cashew, soy, almond — anything dairy-free that holds a bit of body. It will change the flavour a little, but that’s the point of a swap.

    Do I need a fancy blender?

    Any decent blender will get you there. A high-speed one gives you the smoothest result, but you’re not forced to spend something on one — just expect a little texture in the glass.

    The fine print, honestly

    Yes, coconut milk is dairy-free, vegan and gluten-free. Yes, pea protein is not a joke. This is light soup with actual flavour, not a shake. I’ve made it twice this summer and it’s become the default on days the heat doesn’t let me turn the stove on.

    Trade-It Tip

    No sea salt? Kosher salt works — you’ll use a pinch more. Frozen peas in a hurry? Just thaw in the microwave for a minute, they break down in the blender even if not fully soft.

    If it doesn’t fit a Tuesday night, it doesn’t get published. — Grace
    Keep Reading