分类: Recipes

  • Ground Beef Stir Fry (30-Minute, One Skillet)

    Ground Beef Stir Fry (30-Minute, One Skillet)

    I used to think ‘healthy dinner’ meant three pans, a pot of rice, and a sink full of dishes before I’d even eaten. Then one tired weeknight I threw ground beef, whatever vegetables were in the crisper, and a quick homemade sauce into a single skillet. That was the night stir fry became my default answer to ‘what’s for dinner.’

    This ground beef stir fry takes 30 minutes, start to finish — chopping included — and it’s the good kind of simple: lean beef, crisp vegetables, and a savory sauce that tastes better than the takeout it replaces. I serve it over rice for family dinners, and the leftovers are genuinely better for lunch the next day.

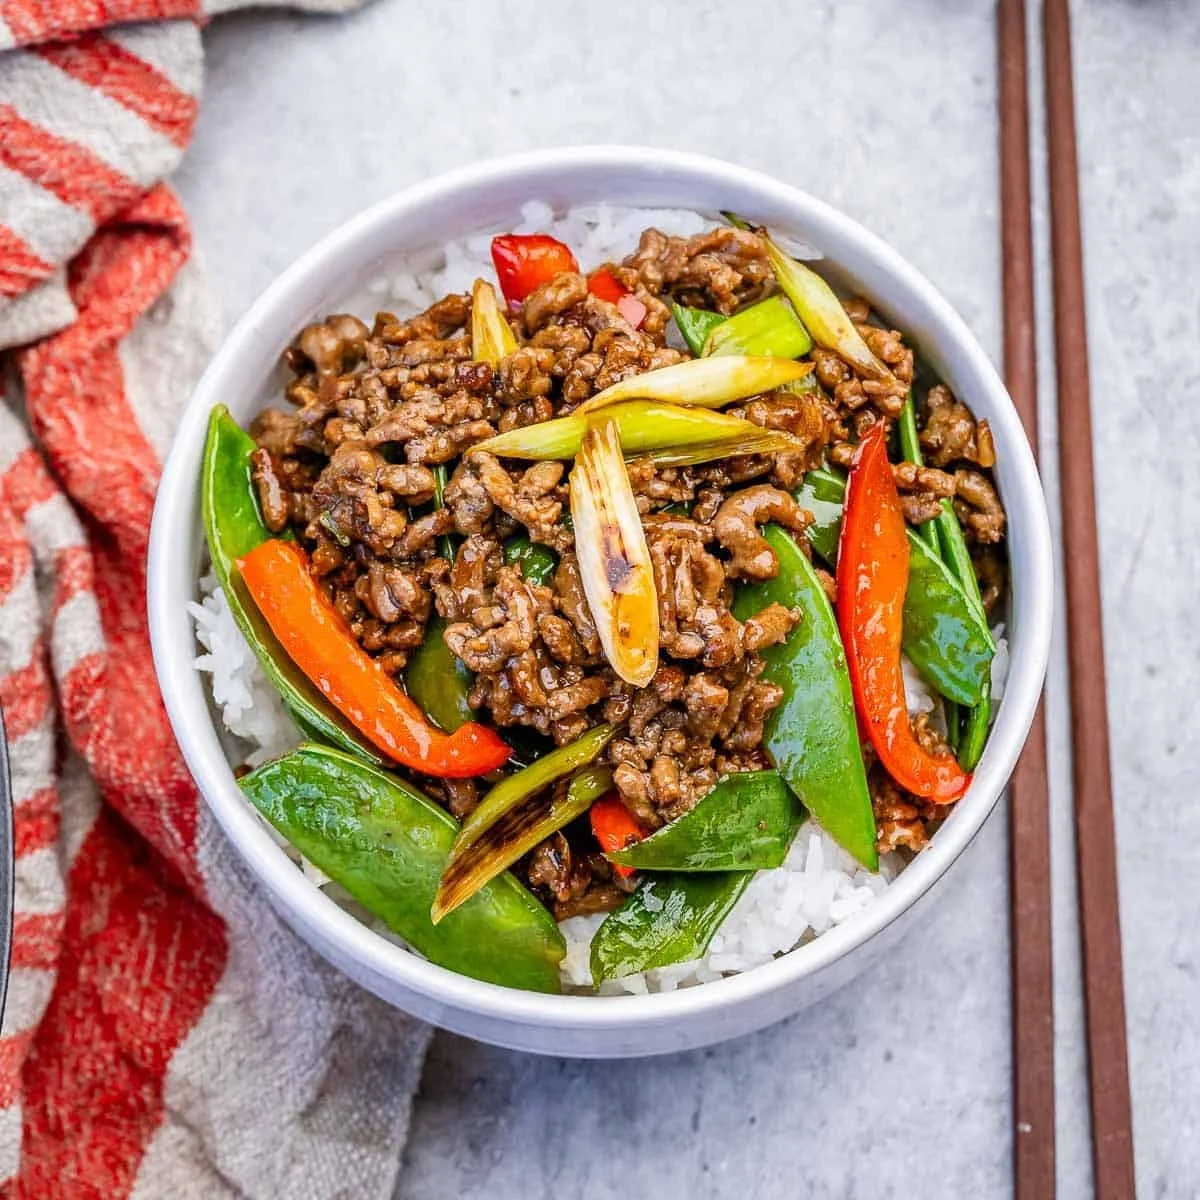
    Ground beef stir fry with snow peas and rice in a bowl

    Why this works

    Browning the beef first builds flavor at the base of the dish, and the vegetables spend only a few minutes in the pan, so they stay crisp-tender instead of turning soft and watery. The sauce is a five-ingredient job: whisk, pour, thicken. No roux, no cream, no second pan.

    Ground beef stir fry, the short version

    • Skill level: intermediate (mostly heat management)
    • Prep: 15 minutes
    • Cook: 15 minutes
    • Total: 30 minutes
    • Servings: 4

    Ingredients

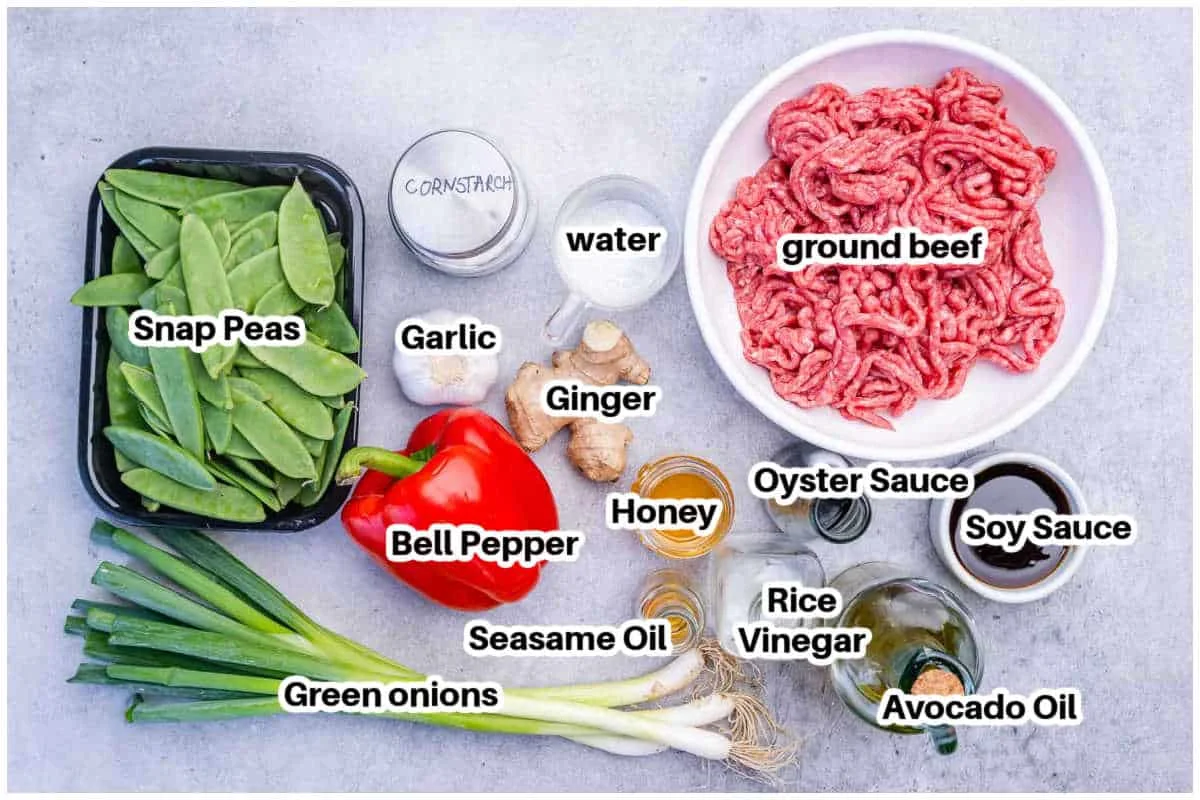
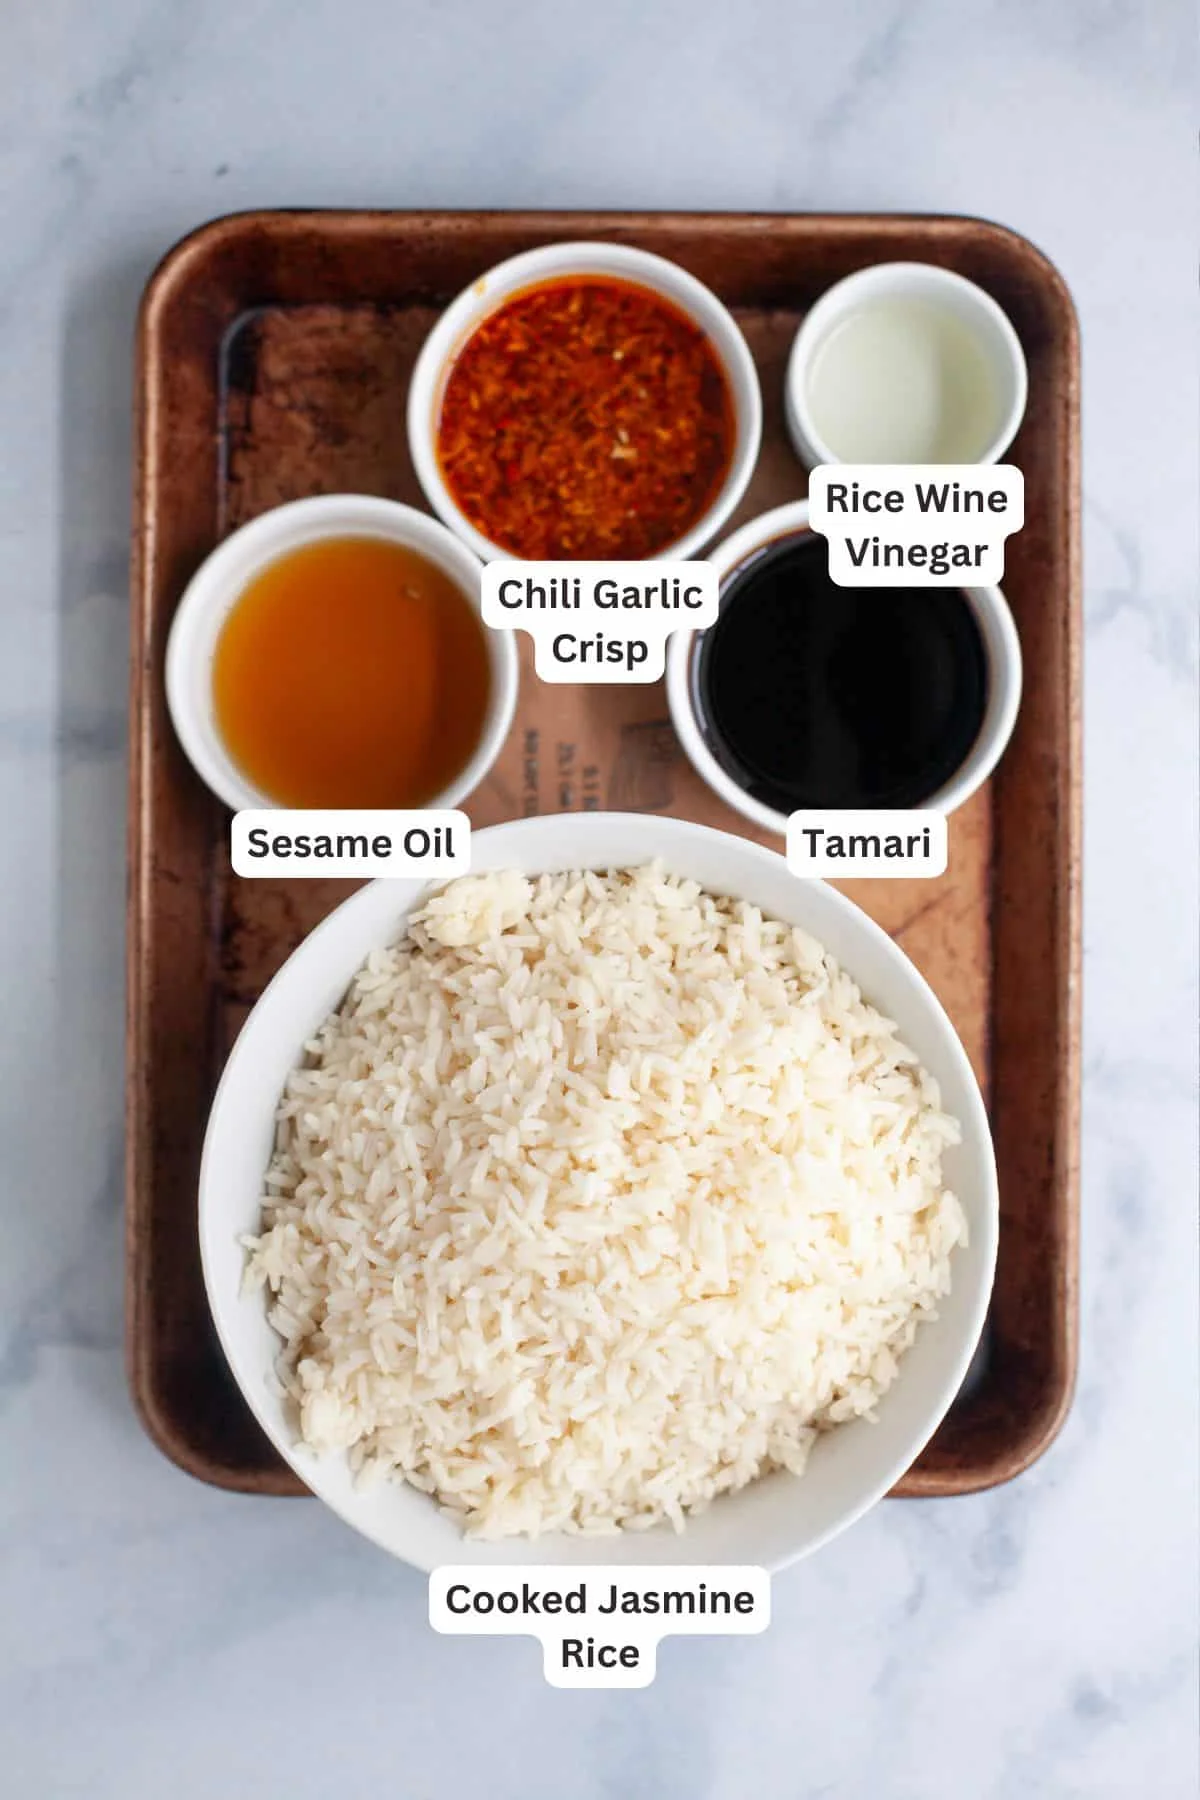
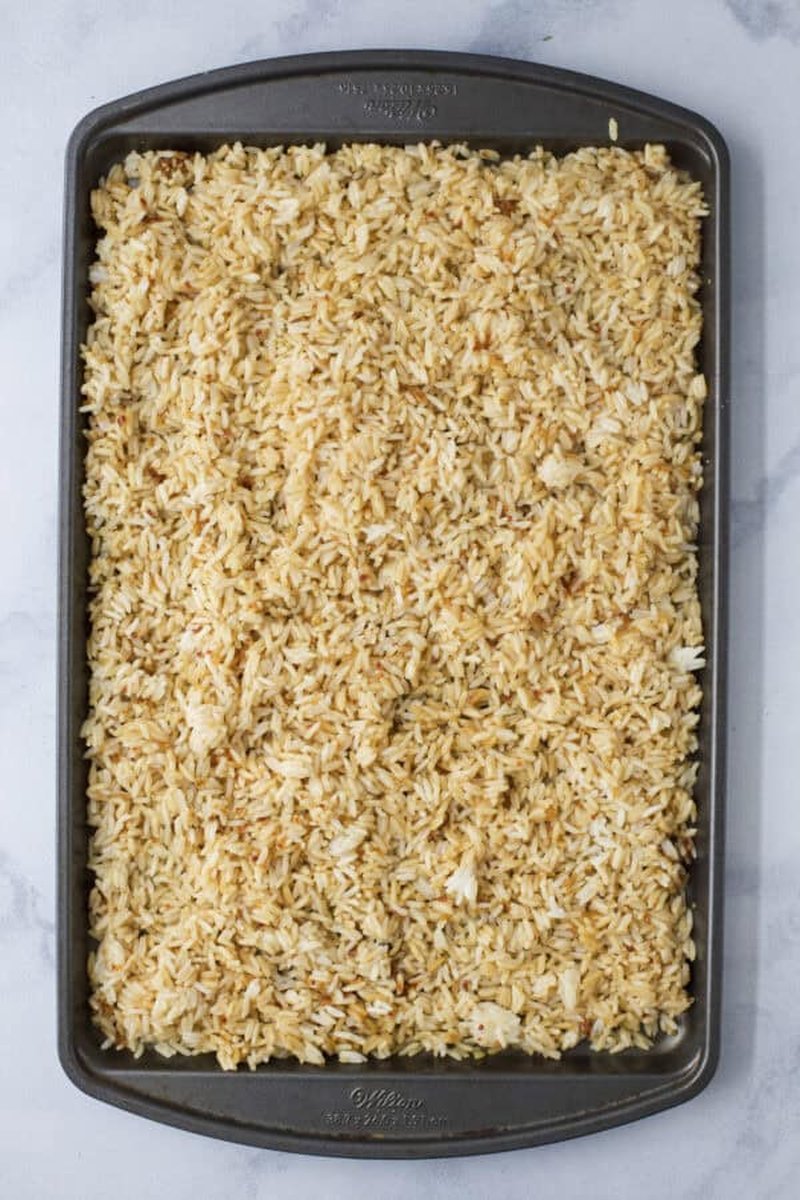
    Ingredients for a one-skillet ground beef vegetable stir fry

    You don’t need much, and it’s all the kind of stuff that keeps a pantry and fridge from feeling empty:

    • 1 pound lean ground beef — I use 90/10 or 93/7. Plenty of flavor, not a slick of grease.
    • 1 tablespoon avocado oil (or olive oil)
    • 1/2 pound snow peas — crisp and ready in a couple of minutes. Fresh green peas work in a pinch.
    • 1 red bell pepper, thinly sliced — natural sweetness and color. Any color works.
    • 4 green onions, thinly sliced on the diagonal — whites go in early, greens at the end.
    • 3 cloves garlic, minced
    • 2 teaspoons fresh ginger, grated

    For the stir fry sauce:

    • 1/4 cup low-sodium soy sauce — keeps it savory without the salt overload
    • 2 tablespoons oyster sauce — the deep, savory backbone. If it’s unfamiliar, it’s a dark, thick condiment in most supermarkets. Hoisin is a close-enough stand-in.
    • 1 tablespoon rice vinegar — the bright note that balances the sweet
    • 1 tablespoon honey
    • 1 teaspoon sesame oil
    • 1 tablespoon cornstarch — thickens the sauce so it coats every bite
    • 2 tablespoons water

    To finish: sesame seeds and extra sliced green onions.

    Before you start

    Stir fries move fast, so prep everything before the pan hits the burner. Beef browned, pepper sliced, onions divided, garlic and ginger ready, sauce whisked. That’s the whole trick.

    • Brown the beef well before the vegetables go in. That’s where the flavor lives.
    • Cut the bell pepper into similar-sized slices so it cooks evenly.
    • Keep the vegetables crisp-tender. The moment they look bright green, they’re done.
    • Whisk the sauce until the cornstarch is fully dissolved — and give it another whisk just before pouring, because cornstarch settles.

    How to make it

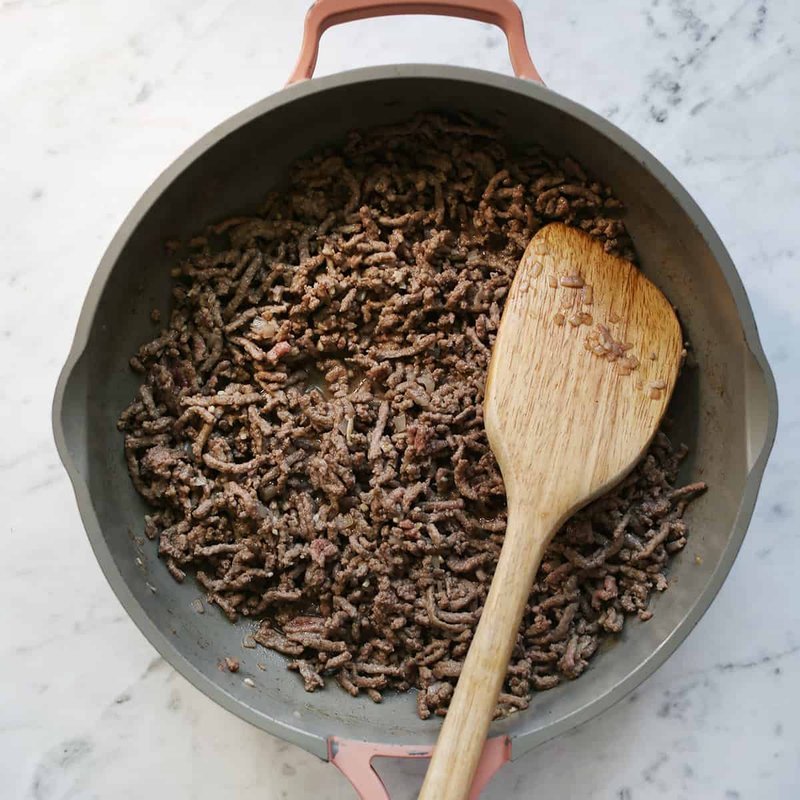
    Step 1 — Brown the beef. Heat the 1 tablespoon avocado oil in a large skillet or wok over medium-high heat. Add the 1 pound ground beef and cook for 5 to 6 minutes, breaking it into small crumbles as it goes. Let it sit undisturbed for a minute or two before stirring — that’s what builds the browned crust. If there’s excess grease, drain it, leaving about a tablespoon in the pan for flavor.

    Step 2 — Bloom the aromatics. Stir in the minced garlic and grated ginger. Cook for about 30 seconds, keeping them moving — garlic and ginger burn fast, and you want them fragrant, not bitter.

    Step 3 — Cook the vegetables. Add the sliced bell pepper and the white parts of the green onions. Cook for 3 to 4 minutes, stirring occasionally, until crisp-tender. Then add the snow peas and the green parts of the onions. One to 2 minutes more, until bright green and just tender. Resist the urge to keep cooking.

    Step 4 — Make the sauce. While the vegetables cook, whisk together the low-sodium soy sauce, oyster sauce, rice vinegar, honey, sesame oil, cornstarch, and water in a small bowl until smooth.
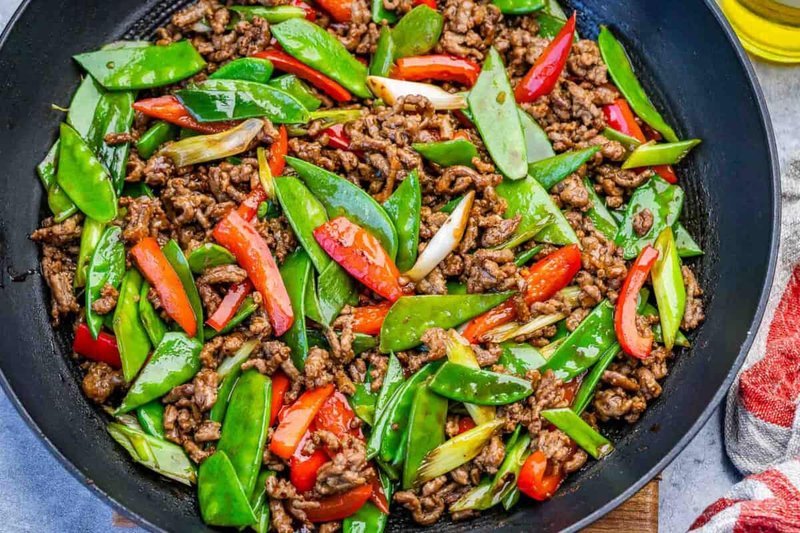
    Glossy ground beef stir fry coated in sauce in a skillet

    Step 5 — Finish the stir fry. Whisk the sauce one last time, pour it into the skillet, and stir continuously for 1 to 2 minutes until it thickens into a glossy coating that clings to the beef and vegetables.

    Step 6 — Serve. Remove from the heat, scatter over sesame seeds and extra green onions, and serve immediately over steamed jasmine rice, brown rice, quinoa, cauliflower rice, or your favorite noodles. A squeeze of fresh lime or a drizzle of sriracha is a good way to finish it if you like.

    Trade-It Tip

    Trade-It Tip: No oyster sauce? Use the same amount of hoisin — it’s sweeter and a little thicker, so the sauce comes out milder and stickier, which is honestly fine. And if you’re out of honey, maple syrup swaps in at the same amount.

    Make it your own

    • Swap the ground beef for ground turkey or ground chicken.
    • Change the vegetables: broccoli florets, mushrooms, carrots, zucchini, snap peas, cabbage, or baby corn all work. Water chestnuts add extra crunch.
    • Add sriracha or red pepper flakes to the sauce for heat.
    • Use tamari or coconut aminos in place of soy sauce. With gluten-free tamari and a gluten-free oyster sauce, the dish goes gluten-free.

    What to serve with it

    It pairs well with almost any grain or noodle: steamed jasmine rice, brown rice, quinoa, cauliflower rice, rice noodles, zucchini noodles, or lo mein noodles. A side of steamed broccoli, sautéed green beans, or an Asian cucumber salad rounds it out into a proper dinner.

    Storage and meal prep

    • Storing: Leftovers keep in an airtight container in the refrigerator for up to 4 days.
    • Freezing: Freeze the cooled stir fry in a freezer-safe container for up to 3 months. Thaw overnight in the refrigerator before reheating. The vegetables will soften a little — the flavor holds up.
    • Reheating: Warm in a skillet over medium heat until heated through, adding a splash of water if the sauce has thickened. Individual portions microwave for 1 to 2 minutes.

    Questions I get asked

    Can I use frozen vegetables? Yes. Frozen stir-fry vegetables go straight into the skillet without thawing. They may need an extra minute or two to cook through.

    Can I make it ahead? Absolutely. It’s one of my better meal prep recipes — it reheats well right through the week.

    Can I use different vegetables? Broccoli, mushrooms, carrots, zucchini, cabbage, snap peas, bok choy, asparagus, and baby corn all work in this stir fry.

    Is it gluten-free? It can be — use gluten-free tamari in place of soy sauce and check that your oyster sauce is gluten-free.

    Can I make it spicy? Stir sriracha, chili-garlic sauce, sambal oelek, or crushed red pepper flakes into the sauce.

    Mistakes I’ve made (so you don’t have to)

    • Using high-fat ground beef and not draining the grease — the vegetables end up stewing in it.
    • Overcooking the vegetables until they’re soft. Bright green is the finish line.
    • Adding the sauce before the vegetables are nearly done, which dulls the color.
    • Skipping the final whisk on the sauce and getting lumpy clumps of cornstarch.
    • Cooking over low heat, which skips the browning step entirely. Medium-high is non-negotiable.
    • Skipping the fresh garlic and ginger. They’re what makes it taste like a stir fry and not a sauce accident.

    This recipe is one I’ve cooked more times than I can count, and I’ve been burned by the low-heat version once. If you try it, I’d love to hear how it went.

    If it doesn’t fit a Tuesday night, it doesn’t get published.

    Keep Reading

  • Peanut Chicken Ramen Salad

    Peanut Chicken Ramen Salad

    My Aunt Katie is the reason I trust a no-cook salad with a capital S.

    I didn’t get enough time with her, but every single memory I have of her is a happy one — usually around a summer campfire, on a ski hill, or tucked away at our family’s cabin in Western New York for New Year’s. There was always a roaring fire, cinnamon rolls every morning, tamales for dinner on New Year’s Eve, and my mum’s cookie pie for dessert.

    Not enough memories, I know. But I’ve realised almost all of my favourite ones centred around food. In the summer our families were together all the time. Backyard BBQs at our house overlooking Lake Erie, the fire pit going, simple summer food on the grill. If we weren’t at our place, we were at Clifton Beach. Looking back, those are some of the most treasured memories I have. We ate so many burgers, grilled chicken, this peanut salad — and of course my mum’s Special K Bars, if you know, you know.

    Bowl of crunchy peanut chicken ramen salad with peanuts and herbs

    For years, both of my cousins, Maggie and Abby, have asked me to recreate it. I never knew exactly how Aunt Katie made it, but they both assured me it was the simplest salad on earth: a quick peanut dressing, uncooked ramen noodles, lots of shredded greens, handfuls of peanuts, and whatever fruit she happened to have on hand. It was a little different every single time she made it.

    I did my best to recreate that easy, toss-and-go salad. And I hope this one works its way into your own memories, the way it has in mine.

    Why this works

    The dressing does the heavy lifting. A little Thai red curry paste plus toasted sesame oil turns plain peanut butter into something savoury, sweet, and properly spicy — the same balance as a good satay, but faster. The uncooked ramen stays crunchy because nothing about it needs heat. Mix, toss, eat.

    What you’ll need

    For the dressing

    • 1/3 cup creamy peanut butter
    • 1/4 cup rice vinegar
    • 2 tablespoons tamari or soy sauce
    • 2 tablespoons toasted sesame oil
    • 2 tablespoons olive oil
    • 2 teaspoons honey or maple syrup
    • 2 teaspoons Thai red curry paste (or sambal oelek)

    For the salad

    • 4 cups napa cabbage, shredded
    • 1 bag (12 ounces) broccoli slaw
    • 2 to 3 squares ramen noodles, crushed (discard the seasoning packets — I use Lotus Foods noodles)
    • 2 cups cooked shredded chicken
    • 4 green onions, chopped
    • 1/2 cup chopped fresh cilantro
    • 1/2 cup chopped fresh basil
    • 1 cup roasted salted peanuts, chopped
    • 2 teaspoons sesame seeds
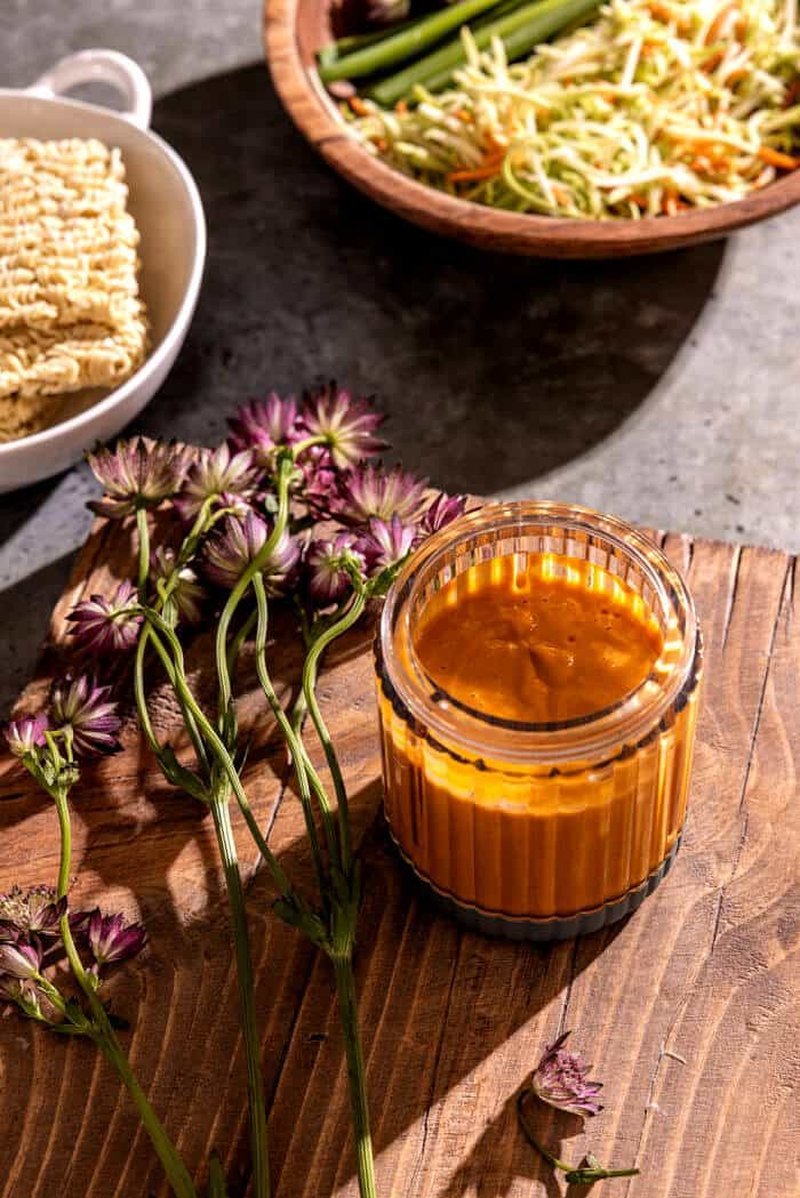
    Creamy red curry peanut dressing in a glass jar

    The steps

    1. Blend the dressing. Add the peanut butter, rice vinegar, tamari, sesame oil, olive oil, honey, and red curry paste to a blender. Blend until smooth and creamy, thinning with a splash of water until it’s pourable. Taste and add a pinch of salt if it needs it — I usually don’t. Any blender does the job, no fancy machine required.

    2. Toss the salad. In your biggest salad bowl, combine the cabbage, broccoli slaw, crushed ramen noodles, shredded chicken, green onions, cilantro, basil, peanuts, and sesame seeds. Pour over about half the dressing and toss really well. Add more until everything is coated the way you like it.

    3. Finish and serve. Top with another handful of fresh herbs — cilantro was always my aunt’s go-to — a sprinkle of sesame seeds, extra peanuts, and edible flowers if you happen to have them.

    Tossed peanut chicken ramen salad in a large bowl

    If you’re making this ahead, wait to add the ramen noodles until just before serving so they stay properly crunchy.

    The notes I wish someone had told me

    The dressing keeps. I love making it a day or two ahead — it saves time and the flavours only get better. I almost always blend a double batch, because it’s so good drizzled over grilled chicken, salmon, or roasted vegetables throughout the week.

    Make it yours. I love adding chopped mango or mandarin oranges when they’re in season — the best little pop of sweetness. My aunt always threw in whatever fruit she had on hand, and blueberries were one of her favourites here, so they’re delicious in this too. If you want to push the dressing further, add a clove of garlic, a little fresh ginger, or a spicy jalapeño.

    Ramen salad ingredients and peanut dressing arranged on a board

    Toasted or not. I’ll be honest — it kind of kills me that we’re not toasting the ramen noodles first. But after making this salad so many times, I really don’t think it’s necessary. It’s fresh, crunchy, and so good as it is. If you do want to take it up a notch, toast the crushed noodles in a skillet with sesame oil and butter until lightly golden, add a little garlic powder just before taking them out, and let them cool completely before tossing them in. It’s an extra step, but it adds even more flavour and crunch.

    Serving

    This is one of my favourite salads to put out at a summer BBQ or serve for an easy dinner. It goes with burgers, grilled chicken, steak, or really anything coming off the grill — and the leftovers are pretty great for lunch the next day.

    When I’m making this for dinner, I almost always cook and shred my own chicken instead of grabbing a rotisserie one. Then I toss the warm chicken into the salad just before serving. I actually prefer it this way: the warm chicken slightly softens the greens, the dressing coats everything beautifully, and the salad doesn’t feel quite so cold. Fresh, crunchy, just a little warm — my favourite way to eat it.

    Nutritional information is only an estimate (about 426 kcal per serving).

    Trade-It Tip: No tamari? Plain soy sauce works fine — same depth, same salt. And if your red curry paste is missing, sambal oelek is the swap, with a slightly spicier, less creamy result.

    If it doesn’t fit a Tuesday night, it doesn’t get published.

    — Grace

    Keep Reading

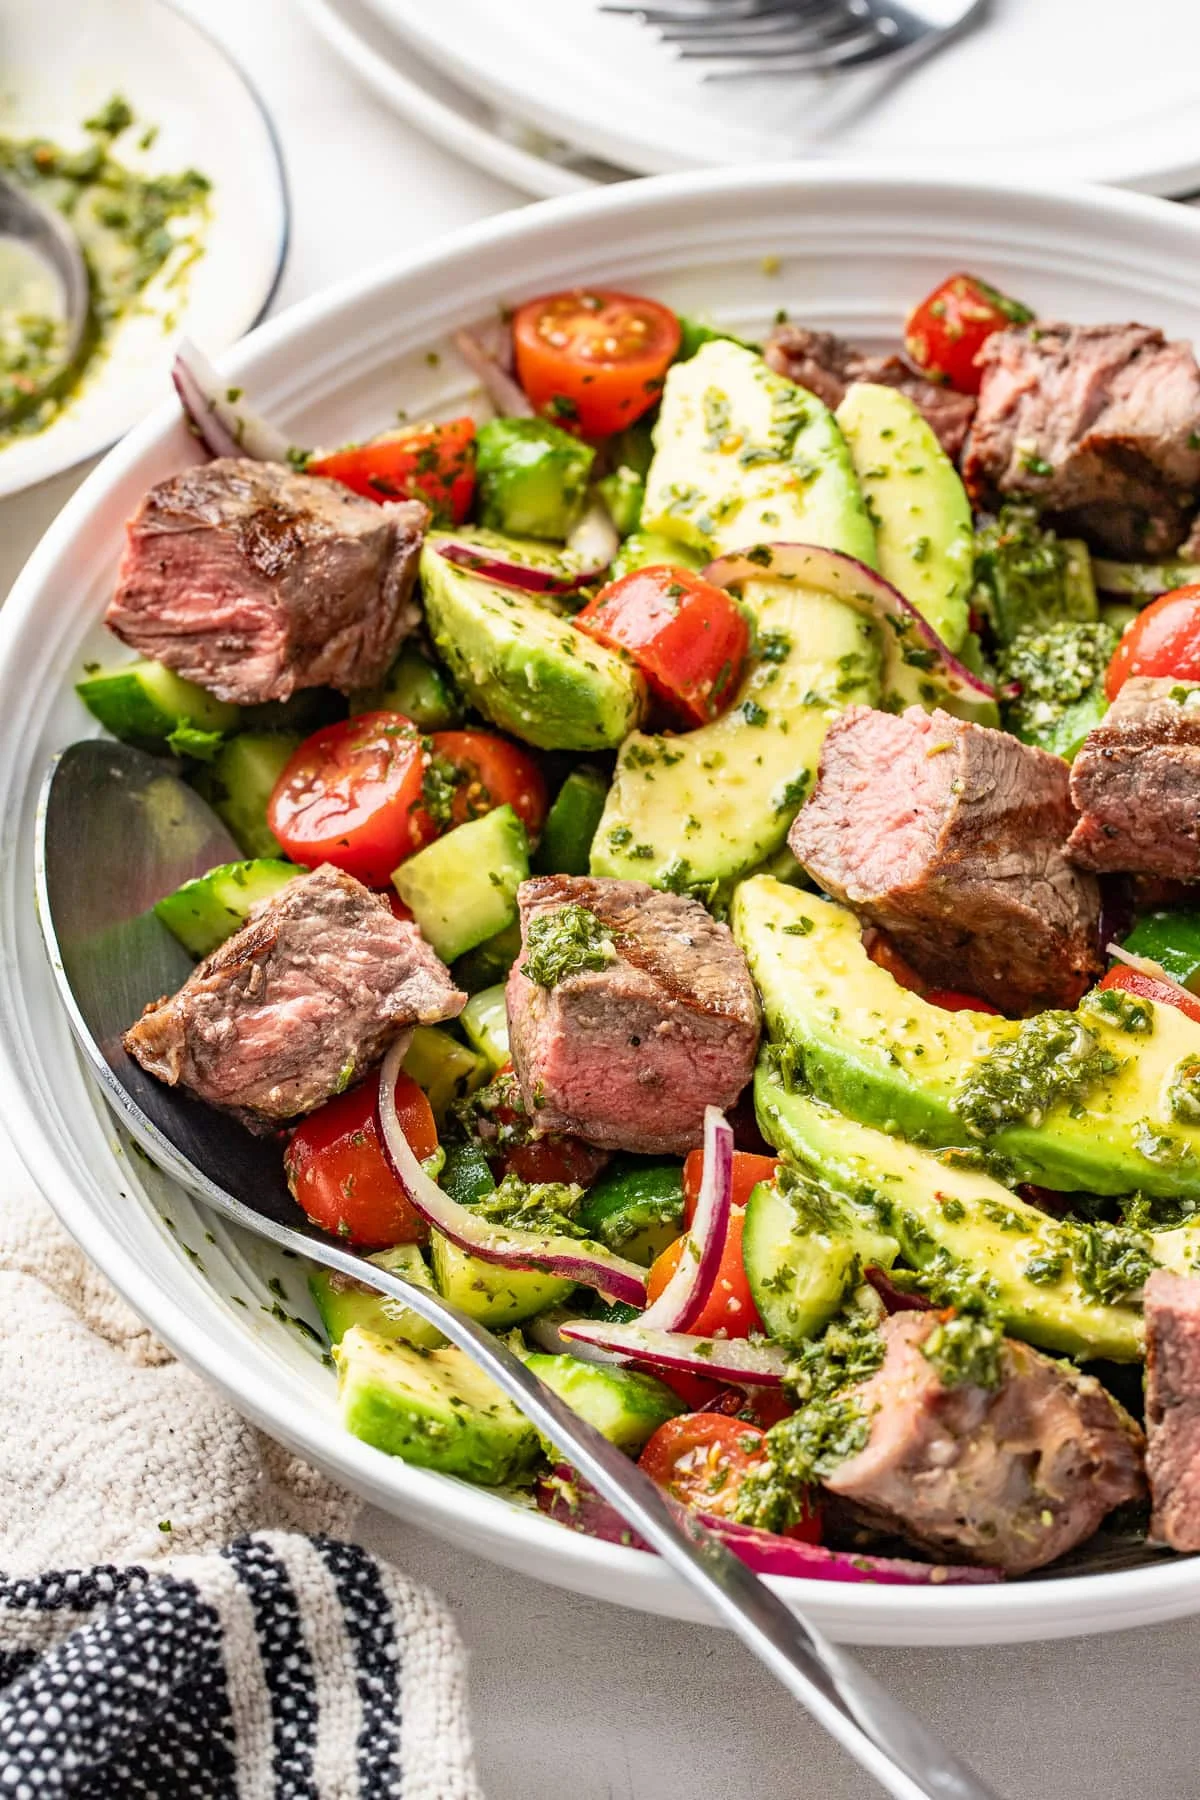
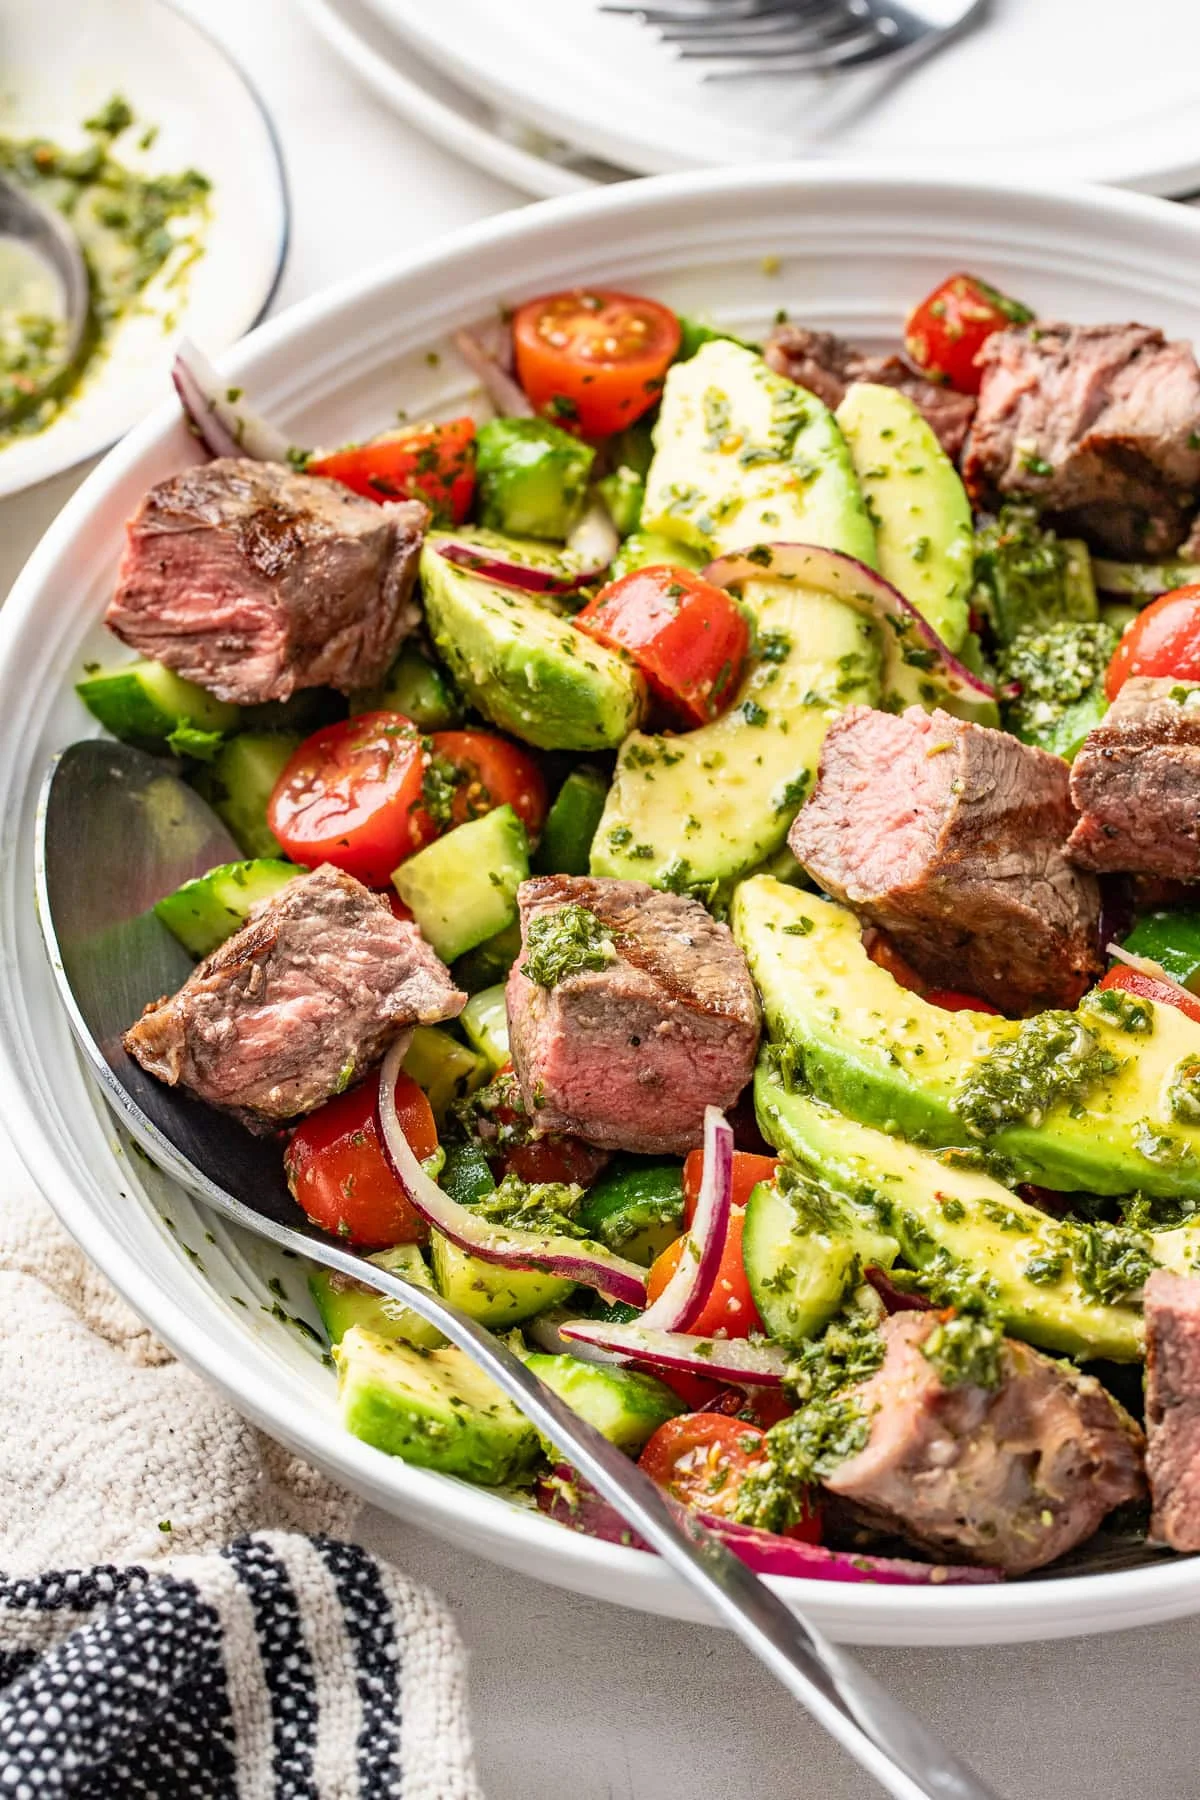
  • Chopped Chimichurri Steak Salad

    Chopped Chimichurri Steak Salad

    Back when I worked the line, “healthy salad” meant a sad bowl of prewashed greens that turned to soup by the time I got to table. So I built this one to be the opposite: a chopped steak salad with zero lettuce, and it still looks crisp at hour three.

    Chopped chimichurri steak salad with avocado and fresh herbs

    It’s my summer go-to right now. Diced grilled steak, baby cucumbers, cherry tomatoes, avocado, and a zingy chimichurri dressing that carries the whole bowl. And because there’s no leafy part to wilt, it’s the kind of salad you can build ahead and actually eat the next day.

    Why this works

    Chimichurri is a bold, herby sauce that comes out of Argentina and other South American countries. Cut the steak into small pieces instead of thin slices, and the dressing clings to every bite instead of pooling at the bottom of the bowl. That’s what makes it hold up.

    The good kind of simple: one pan or grill, one food processor, one bowl. 30 minutes, start to finish, including the chop.

    Close-up of chopped steak salad topped with chimichurri

    What you need

    • Steak — flank, sirloin, or strip steak, trimmed
    • Fresh parsley — the base of the chimichurri
    • Garlic, red wine vinegar, lemon juice, olive oil
    • Crushed red pepper flakes, kosher salt, black pepper
    • Mini cucumbers, cherry tomatoes, red onion, one large avocado (about 6 oz, roughly 170 g)

    Everything except the olive oil and the vegetables lives in the recipe card below.

    How to make it

    Step 1 — Take the steak out of the fridge and season both sides with salt and pepper. Let it sit at room temperature for 30 minutes while you get everything else ready. Cold steak from the fridge cooks unevenly; this one won’t.

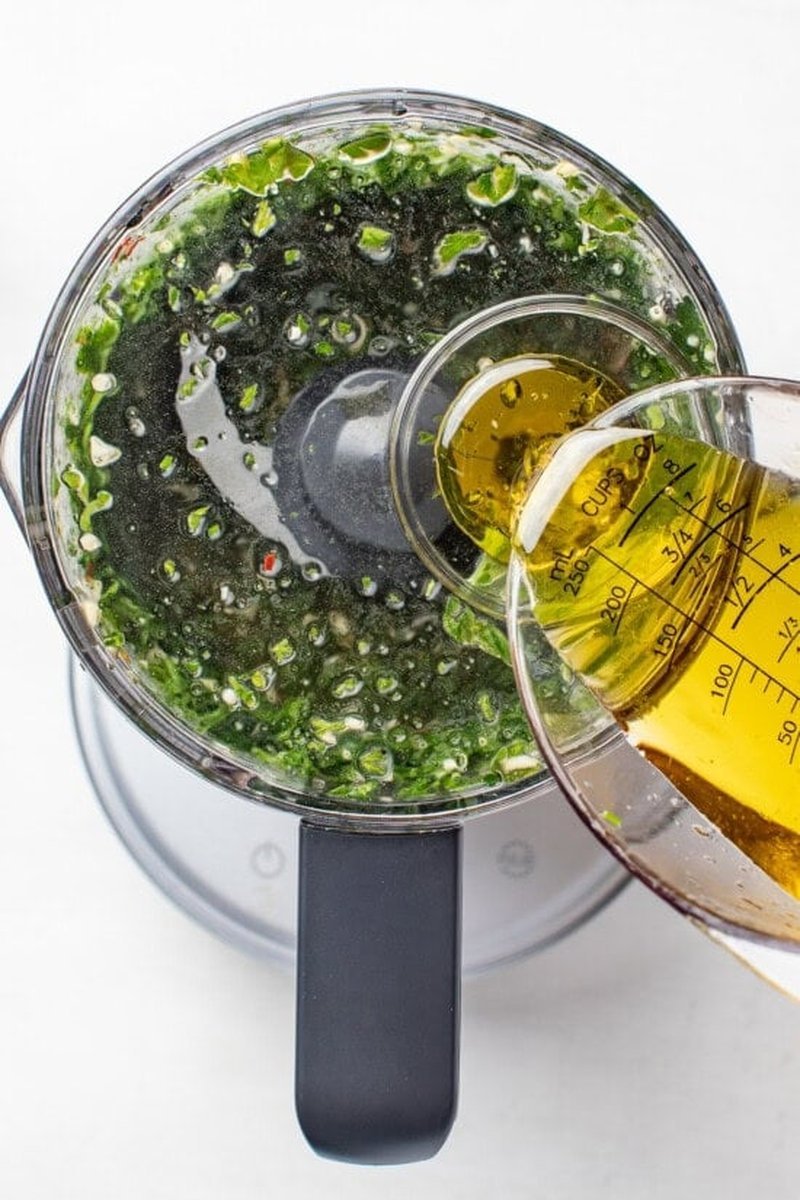
    Step 2 — Make the chimichurri. Put the parsley, garlic, red wine vinegar, lemon juice, red pepper flakes, salt, and pepper in a small food processor and pulse until finely chopped. With the processor running, drizzle in the olive oil slowly. You want it mostly smooth but still a little textured.

    Chimichurri dressing being blended in a food processor

    Step 3 — Grill the steak. Get a grill, grill pan, or cast-iron skillet hot over medium-high heat, give it a spray of oil, and cook the steak 5 to 6 minutes per side for medium-rare, or an extra minute or two per side for medium. An instant-read thermometer is your friend: the internal temperature will keep climbing about 5 degrees (about 3°C) while the steak rests.

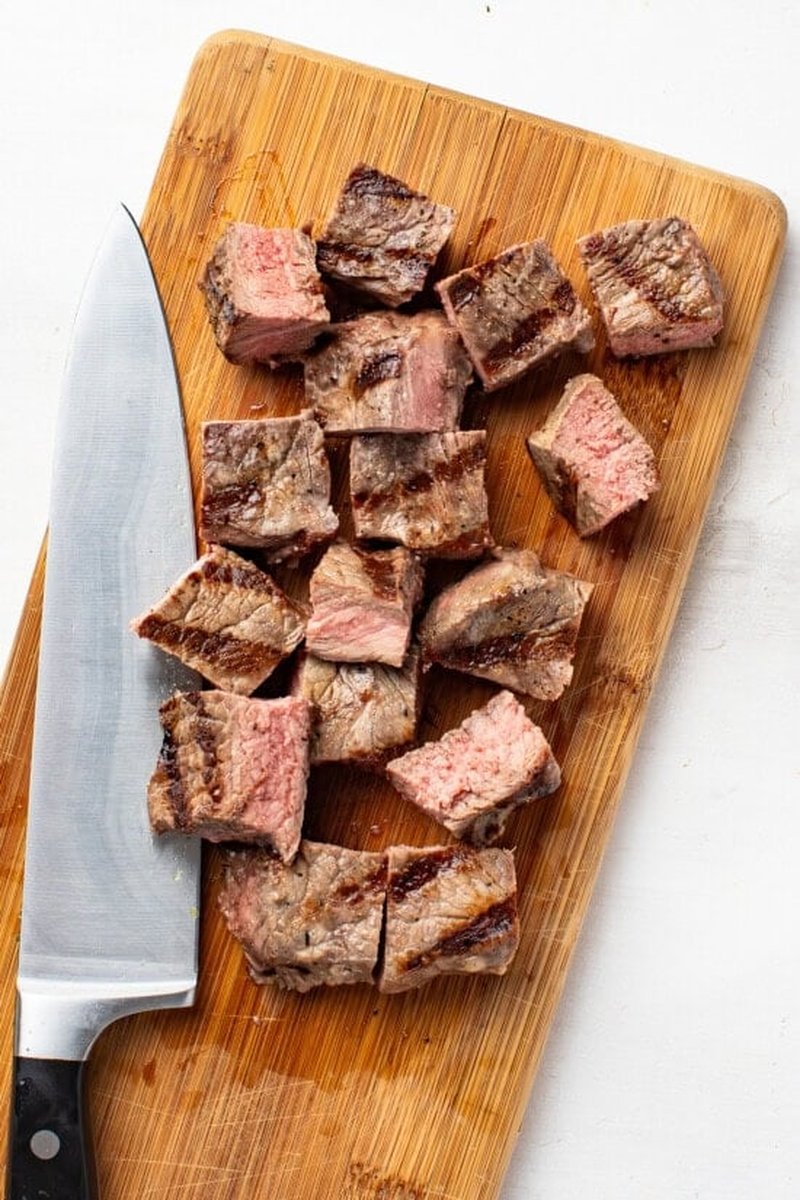
    Step 4 — Rest and chop. Let the steak rest 5 to 10 minutes, then cut it into cubes. Cutting against the grain makes the difference between tender and chewy — you’ll see the muscle fibers running in parallel, and you want to cut across them.

    Cubed grilled steak resting on a cutting board

    Step 5 — Build the salad. Toss the cucumbers, cherry tomatoes, red onion, and avocado with the salt and half of the chimichurri in a large bowl. Add the steak and the rest of the dressing, give it one more toss, and divide it over plates.

    Swaps and variations

    • No steak in the freezer? Grilled chicken or shrimp works the same way.
    • No mini cucumbers? Use an English cucumber — if you’re working with a regular one, peel it and scoop out the seeds first.
    • Herbs: half parsley and half cilantro is a fine trade.
    • Want something sharper? Crumbled feta or cotija goes in nicely.
    • Need more fiber? Toss in chickpeas or white beans.
    • Miss lettuce? Add arugula or romaine. I don’t, but you do you.

    Meal prep and storage

    Building it ahead? Make it exactly as written but leave out the avocado — slice it right before eating so it doesn’t turn brown. This keeps for 2 days in the fridge. Straight out of the fridge works, or let it sit at room temperature for about 30 minutes to take the chill off. The vegetables will drop a little liquid as they sit, and that’s normal.

    Trade-It Tip: No mini cucumbers? A peeled, seeded regular cucumber does the same job — same crunch, same job done.

    If it doesn’t fit a Tuesday night, it doesn’t get published.
    Keep Reading

  • PB&J Protein Breakfast Crumble

    PB&J Protein Breakfast Crumble

    Here’s the truth about healthy breakfasts I learned the hard way: they usually mean one of three things. A smoothie you blend at 6:40 a.m. while the kids are still in pyjamas. Overnight oats that only work if you’re the person who preps on Sunday. Or a ‘simple’ recipe that quietly needs five pans and a full morning. On school mornings, I have none of that luxury.

    So when this PB&J protein breakfast crumble came my way, I was suspicious. It promised to taste like a warm berry crisp with a peanut butter oat bar folded in — and to be ready in under 40 minutes, one pan, basically zero fuss. I made it twice before I believed it.

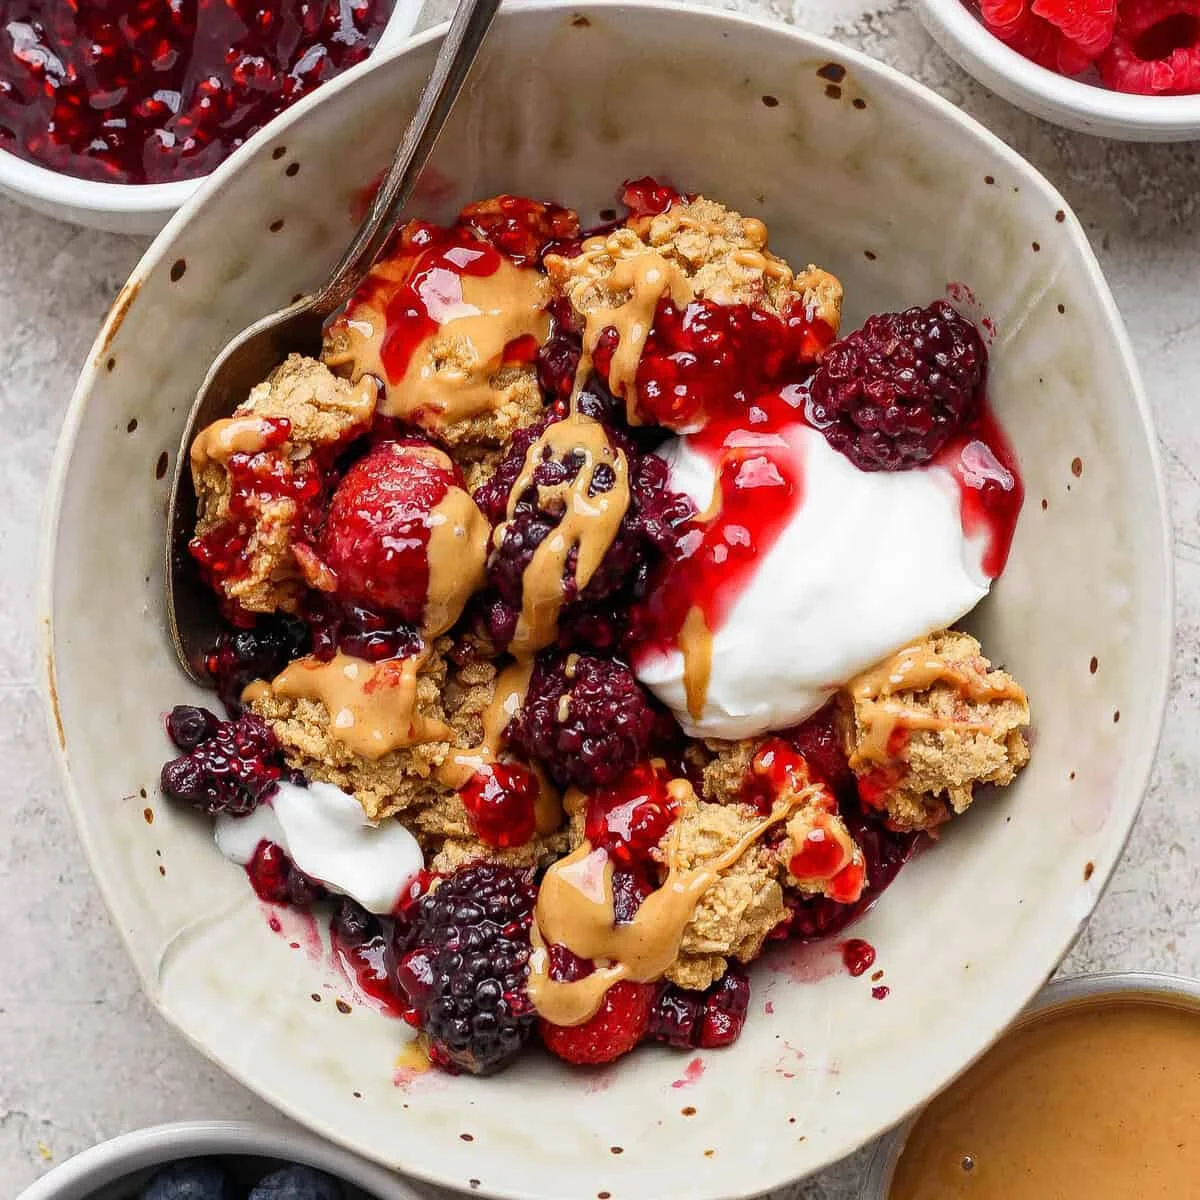
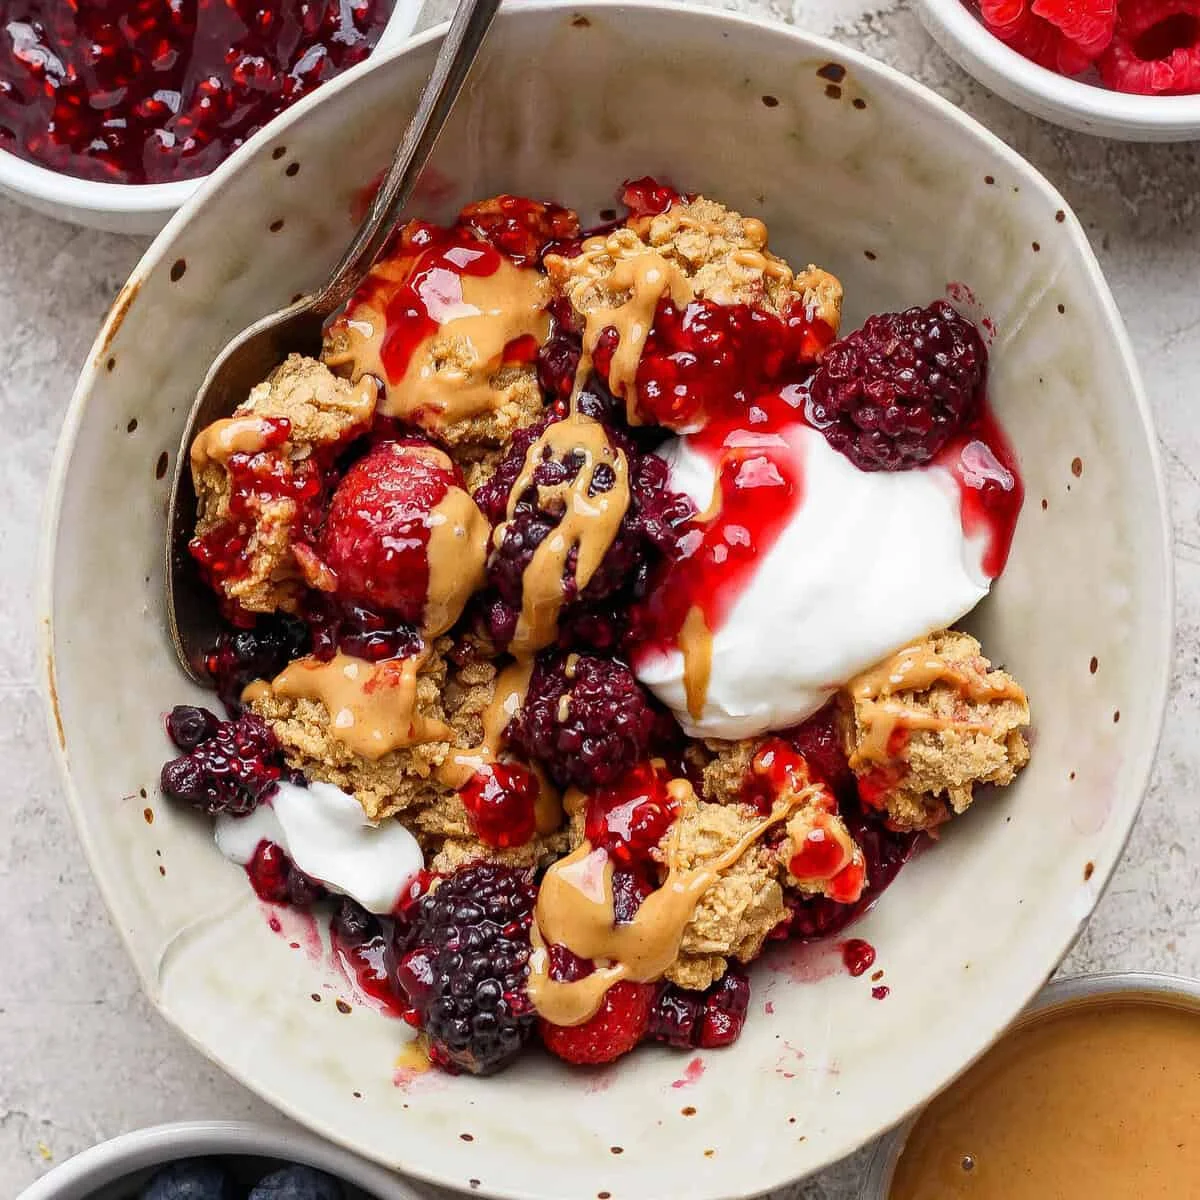
    Bowl of PB&J protein berry crumble with peanut butter drizzle

    It layers frozen mixed berries with chia seeds under a crumble of peanut butter, oats, maple syrup, and vanilla protein powder. It comes out warm and jammy, with enough protein to make it a proper breakfast rather than a fancy snack. Only 6 ingredients. Only one pan. I’ve made it a Sunday-night staple for the week ahead.

    Why this works

    Two things do the heavy lifting. The frozen berries release their juice as they bake, and the chia seeds soak it all up, turning the bottom layer into a thick, jammy filling instead of a watery mess. And the crumble binds together with no butter, no flour, no eggs — the peanut butter and syrup do the job, which is what makes it the good kind of simple.

    Why I keep coming back to it

    • 6 ingredients, 1 pan — frozen berries, chia seeds, peanut butter, oats, maple syrup, protein powder. That’s the whole list. No butter, no flour, no eggs.
    • Tastes like dessert, eats like breakfast — the PB&J flavour does the convincing, and the protein powder plus chia make it genuinely filling. The kids think it’s a treat. I know it’s breakfast.
    • Meal-prep friendly — I make it Sunday, portion it out, and reheat it through the week. It actually tastes better the next day, once the berries have soaked into the crumble.
    • A template you’ll riff on — swap the nut butter, change the berries, spoon it over yogurt. I’ve done all three.

    The ingredients, and the two that matter

    Frozen mixed berries — the jammy base of the whole thing. Don’t thaw them; they go straight into the pan and break down in the oven. I use a mix of strawberries, blueberries, and raspberries — it’s what makes the PB&J flavour land.

    Chia seeds — mixed into the berry layer, they drink up the fruit juices and thicken everything into a spoonable filling. Skipping them is how you end up with a puddle.

    The rest is pantry stuff. Use drippy peanut butter, not the stiff kind — if your jar is thick, microwave it for 20 seconds first. Quick-cooking oats give the topping its golden, crumbly, slightly chewy texture; quick oats bind with the peanut butter more evenly than rolled. A scoop of vanilla whey protein powder adds protein without changing the flavour at all — any vanilla whey or plant-based powder you already like will do. And maple syrup, just enough sweetness to balance the tart berries.

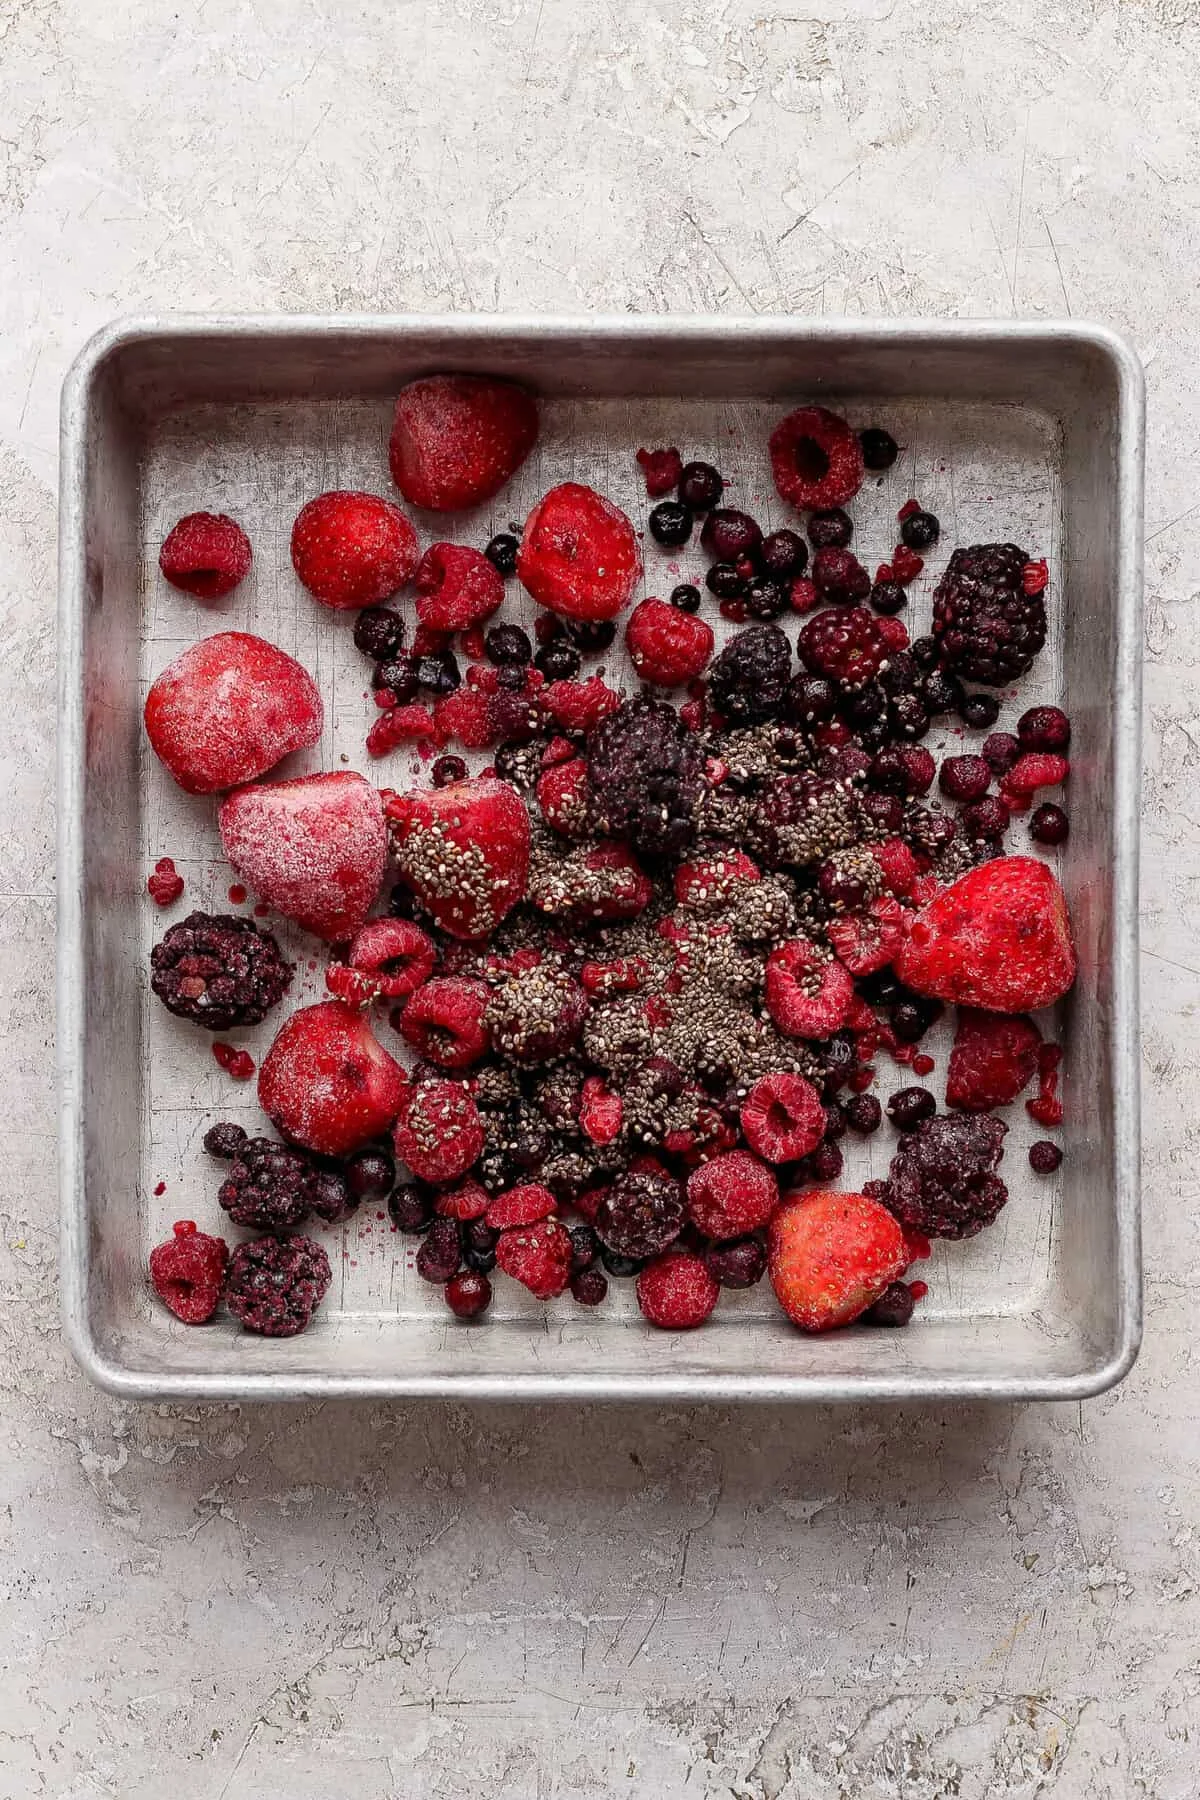
    Frozen berries and chia seeds spread in a baking dish

    How to make it

    40 minutes start to finish: 10 minutes prep, 30 minutes in the oven, plus 10 minutes of resting. Serves 4.

    1. Preheat the oven to 350°F (175°C) and lightly grease an 8×8-inch (20×20 cm) baking dish with cooking spray.
    2. Add the 3 cups (about 450 g) of frozen mixed berries and 2 tablespoons (15 g) of chia seeds to the dish. Toss to combine and spread into an even layer.
    3. In a medium bowl, combine the 1/3 cup (about 80 g) of peanut butter, 1 cup (90 g) of quick-cooking oats, 2 tablespoons (30 ml) of maple syrup, and 1/4 cup (about 35 g) of vanilla protein powder. Stir until it forms a crumbly mixture. If the peanut butter is too stiff to mix, microwave it for 20 seconds first.
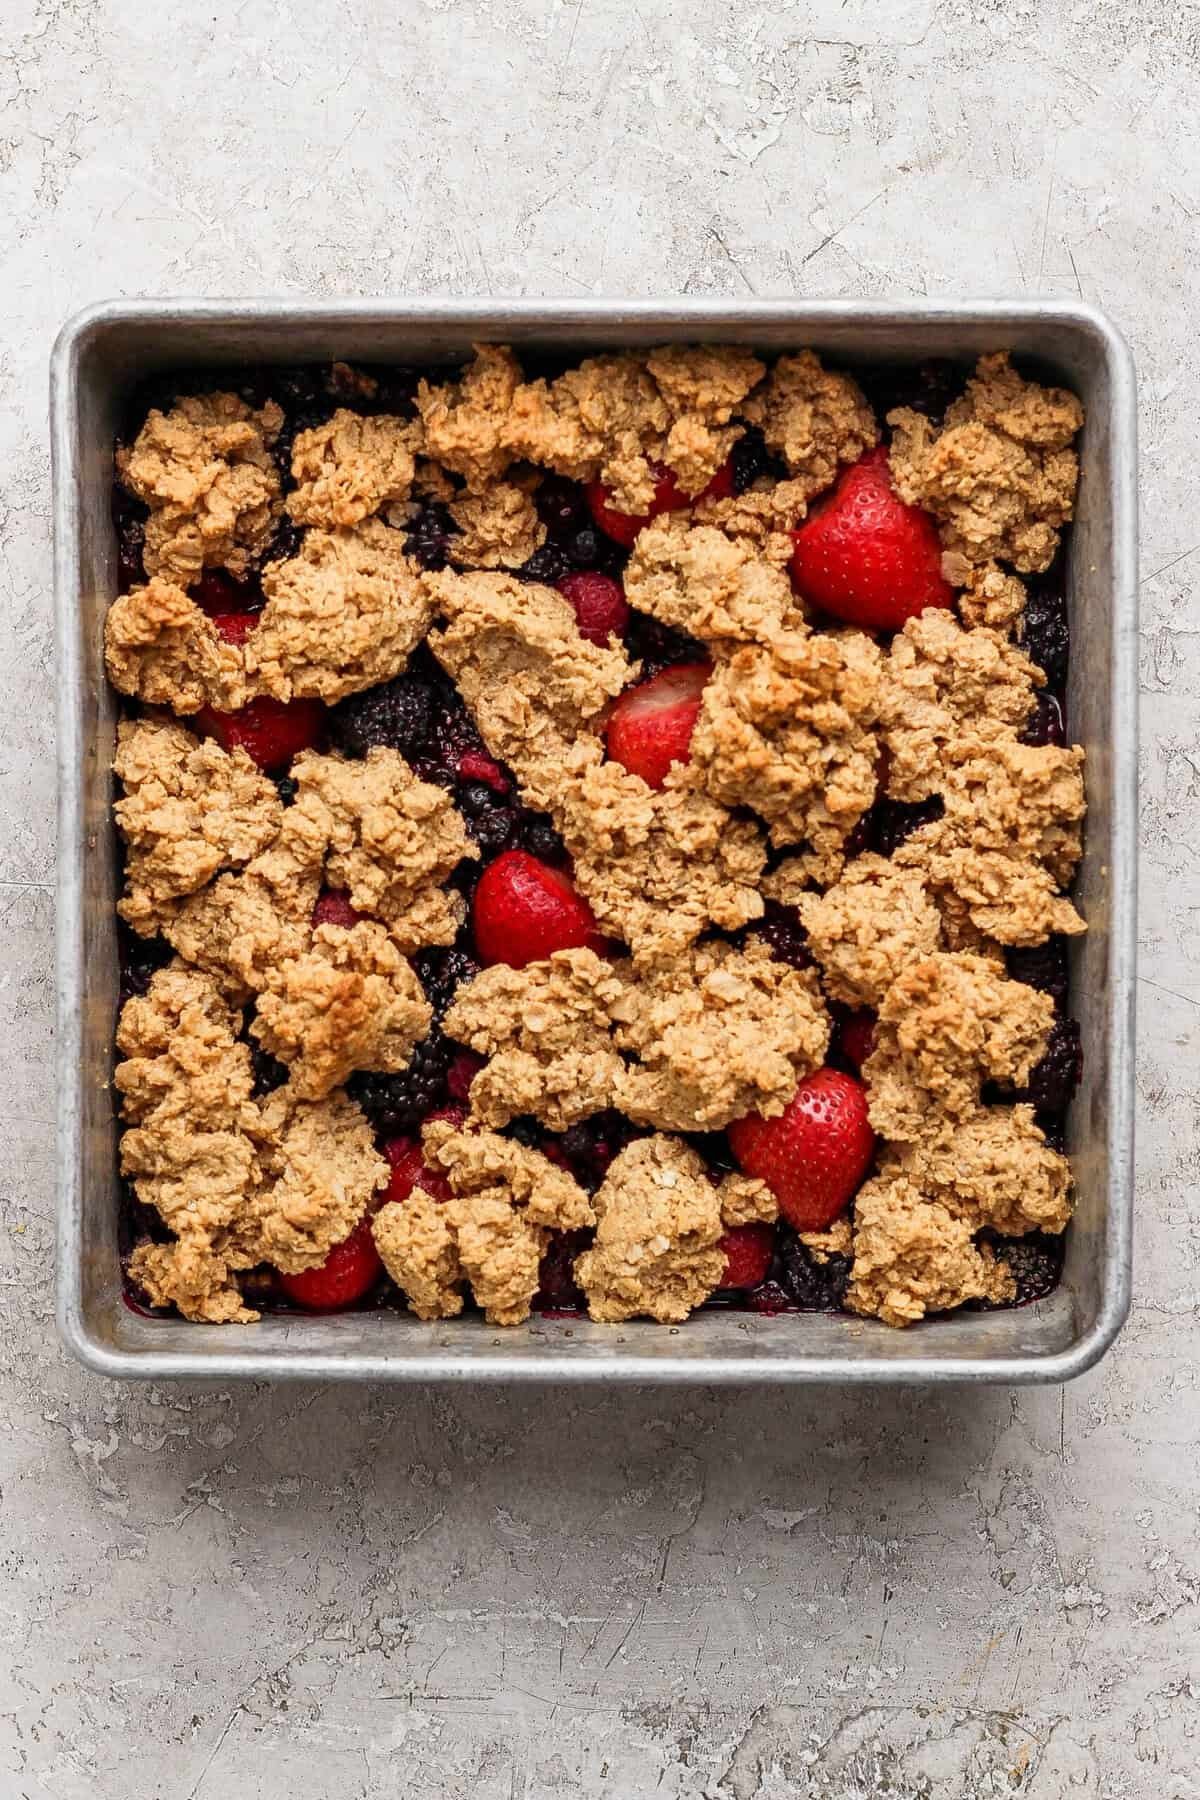
    4. Scatter the crumble evenly over the berries. Don’t press it down — you want it loose and crumbly for the best texture.
    5. Bake for 25–35 minutes, until the berries are bubbling around the edges and the topping is golden brown. Start checking at 25 minutes — peanut butter goes from golden to dark fast.
    6. Let it cool for 10 minutes, then drizzle with the remaining 1 tablespoon of melted peanut butter and 1 tablespoon of jam or jelly. Serve warm.
    Golden peanut butter-oat crumble baked over jammy berries

    Top tips from my kitchen

    • Use drippy peanut butter. Stiff, dry peanut butter won’t combine with the oats and powder properly. If your jar is thick, microwave it 20–30 seconds until it’s pourable.
    • Don’t thaw the berries. Frozen goes straight into the pan. Thawed berries release too much liquid and you get soup, not jam.
    • Watch the colour from 25 minutes. The peanut butter-oat topping can go from golden to dark in a hurry. Pull it when the berries bubble at the edges and the crumble is lightly browned.
    • Heat your drizzle. Melt the peanut butter until it’s thin enough to drizzle, and add a splash of water to the jam — you get a proper ribbon, not a gloopy blob.

    Trade-It Tips

    • Out of maple syrup? Honey works as a 1:1 swap. Just watch the oven — honey browns faster, so you may need to pull it a few minutes early.
    • No peanut butter? Almond butter, cashew butter, or sunflower seed butter all work in the crumble. Sunflower seed butter keeps it nut-free for school lunchboxes.
    • Wanted a plant-based version? Swap the whey for any plant-based vanilla protein powder — the texture stays the same.
    • Want it more PB&J? Use chocolate protein powder instead of vanilla for a chocolate-peanut-butter berry crumble.
    • Extra protein? Spoon the warm crumble over a bowl of Greek yogurt or cottage cheese.

    Make it once, eat it all week

    Fridge: leftovers keep in an airtight container for up to 5 days. Reheat individual portions in the microwave for 60–90 seconds. Freezer: wrap single portions tightly in plastic wrap, bag them up, and keep for up to 2 months. Thaw overnight in the fridge and reheat in the microwave.

    I make one batch every Sunday and portion it into containers before the kids even see it. Breakfast for the week, sorted in under 40 minutes. Per serving it works out to about 348 calories, 40 g carbs, 14 g protein, 17 g fat, 8 g fibre, and 22 g sugar — automatically calculated, so treat it as an approximation, not a lab result.

    FAQs

    Can I use fresh berries instead of frozen? Yes, but frozen works better here. They release more juice as they bake, which is what creates that thick, jammy filling. Fresh berries taste fine, but the filling won’t be as saucy — add an extra tablespoon of water to compensate.

    What protein powder should I use? Any vanilla whey or plant-based powder you already like. Avoid casein-heavy blends — they can make the crumble too dense and dry. The mix should feel slightly sandy and clumpy, not wet.

    What do the chia seeds actually do? They absorb the berry juices as it bakes and thicken the filling into something spoonable instead of watery. They also add fibre and omega-3s. Without them, the berry layer stays too liquidy.

    Can I swap honey for the maple syrup? Yes — 1:1. Just keep an eye on the oven, since honey browns faster and you may need to pull it a few minutes early.

    How should I serve it? Straight out of the pan, with the warm peanut butter and jam drizzle. It’s also great over yogurt or cottage cheese, and honestly, as dessert with vanilla ice cream, I’m not judging.

    If it doesn’t fit a Tuesday night, it doesn’t get published. This one’s been in the oven more than once a week — and that’s the highest compliment I know how to give a breakfast recipe.

    Keep Reading

  • Country Terrine: Rich French Pâté With Pork and Pistachios

    Country Terrine: Rich French Pâté With Pork and Pistachios

    I used to think ‘delicatessen food’ meant standing in a deli queue paying a fortune for a slab of something I could never name. Then I made a country terrine at home and realised how little effort the good kind of simple actually takes.

    A terrine is one of the great classics of French charcuterie. Think of it as a rustic country pâté: well-seasoned pork, gently cooked in a loaf tin until it’s tender enough to spread with a knife. The flavour is rich, the texture soft, and the whole thing is far easier to make than most people imagine. I’ve tested it enough times to say it holds its own against the terrines from very fancy French restaurants.

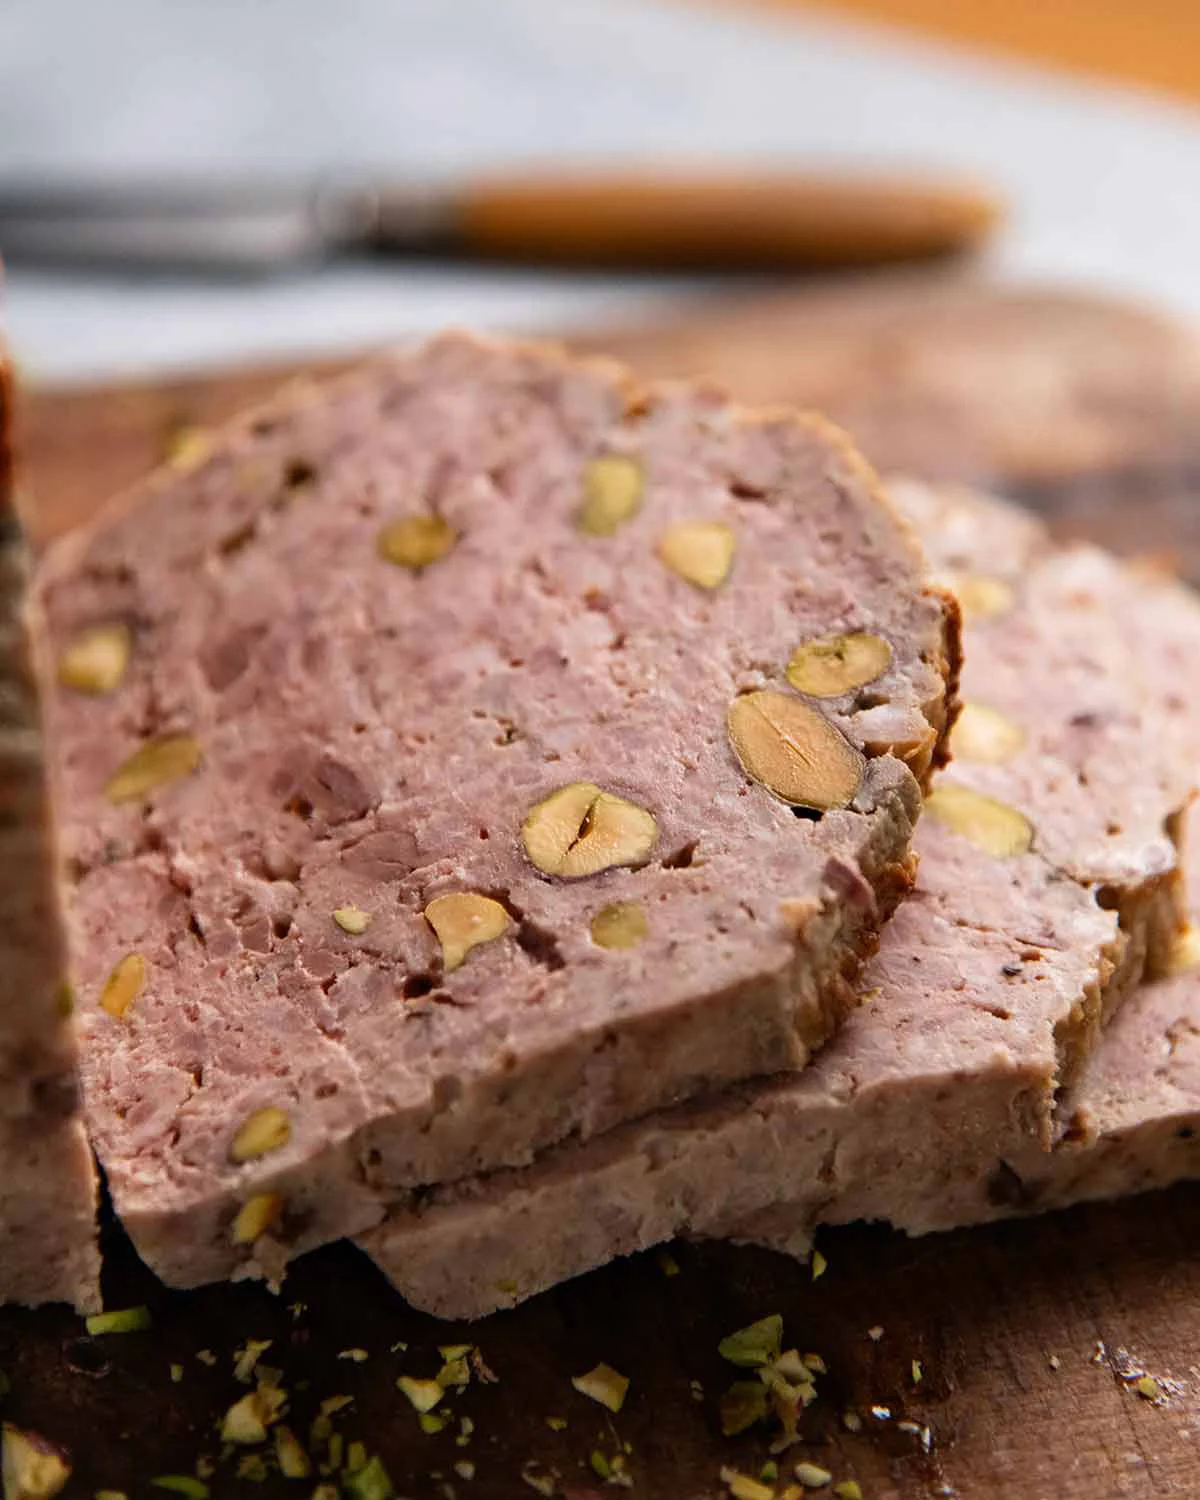
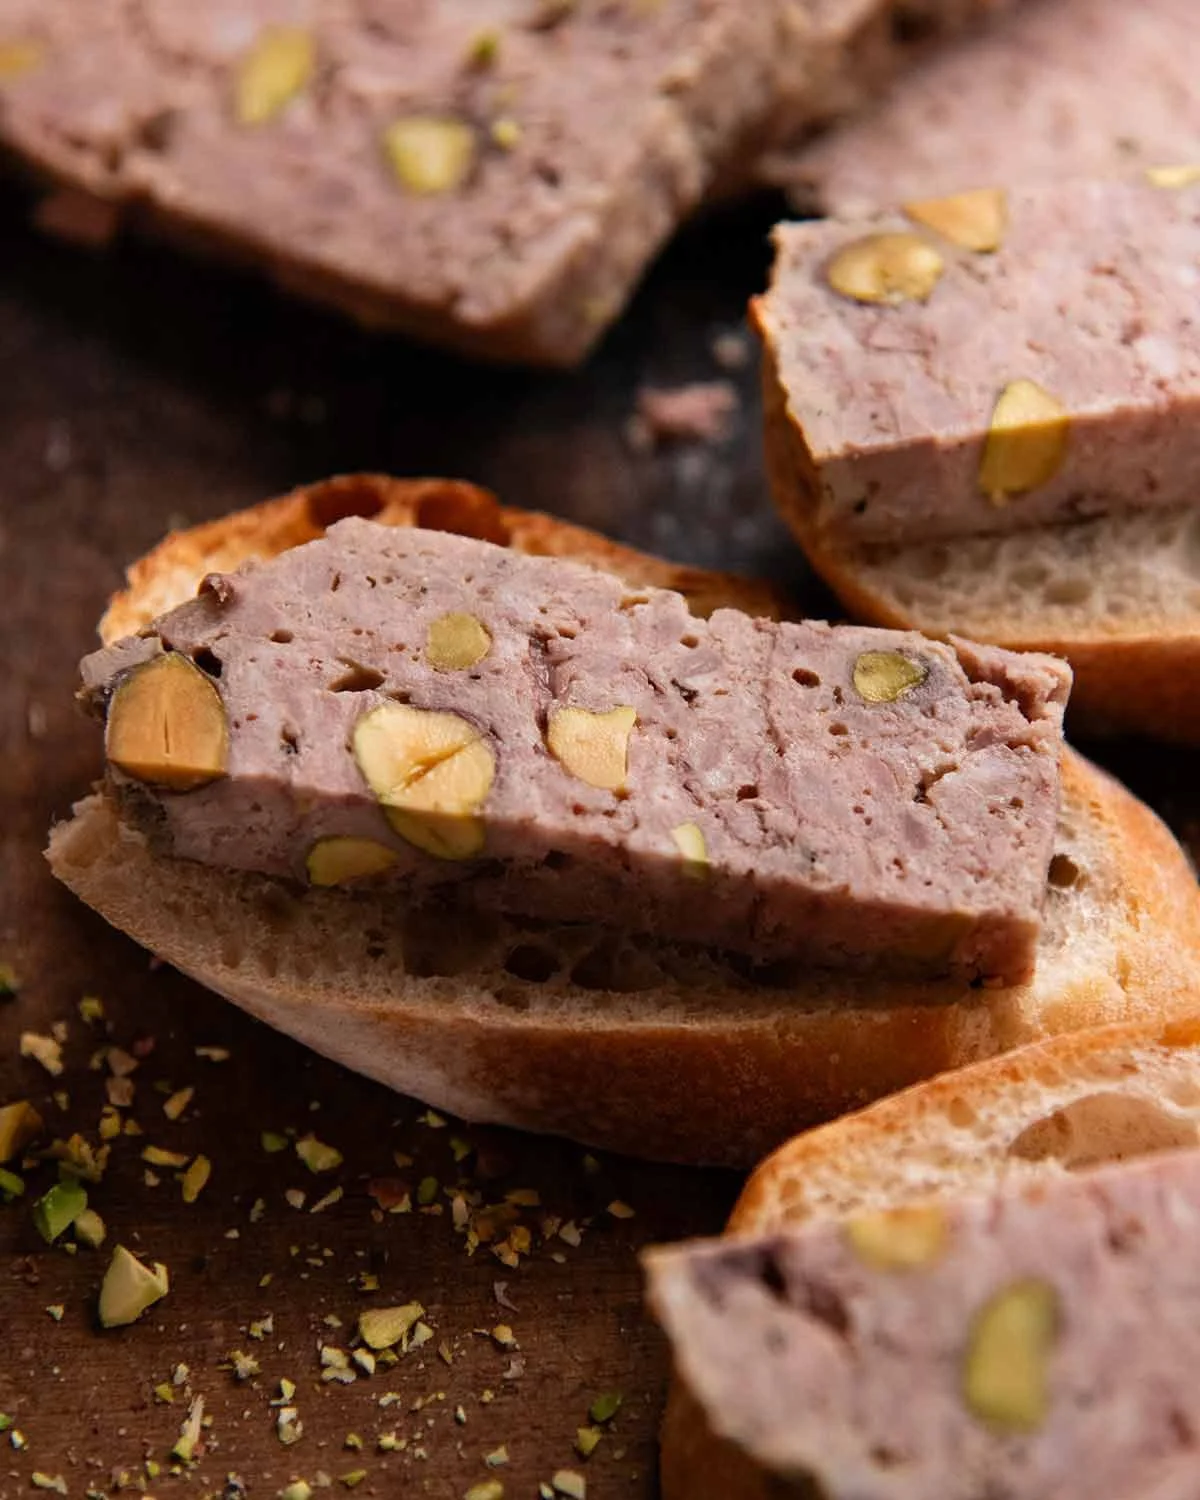
    Sliced country terrine with pistachios on a wooden board

    Why this works

    Fatty pork keeps the terrine tender and rich as it bakes, and a low, slow temperature in a water bath (bain-marie) stops the edges from drying out before the centre is done. The overnight marinating is what deepens the flavour — skip it and it’s still good, just not nearly as good.

    What you need

    A word on the name first. It’s called a terrine because it’s traditionally cooked in a deep, covered earthenware dish called a terrine. These days most home cooks — me included — just use an ordinary loaf pan, and the name has stuck.

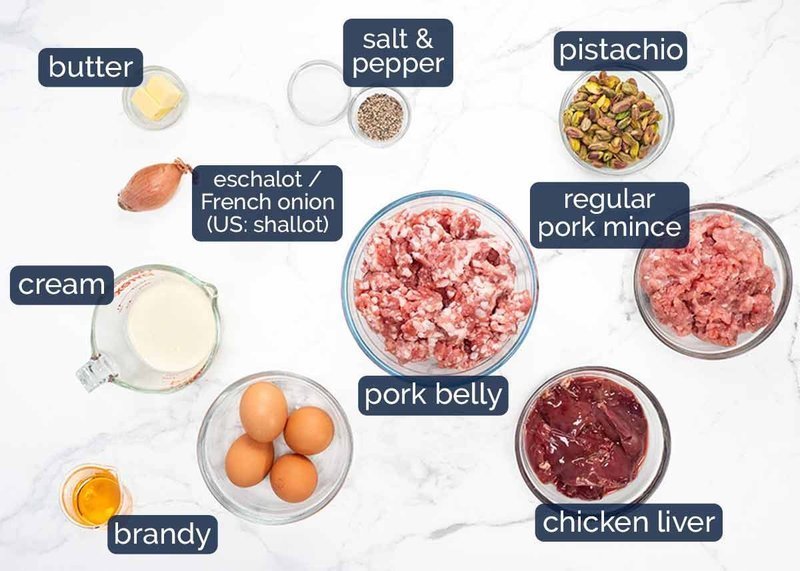
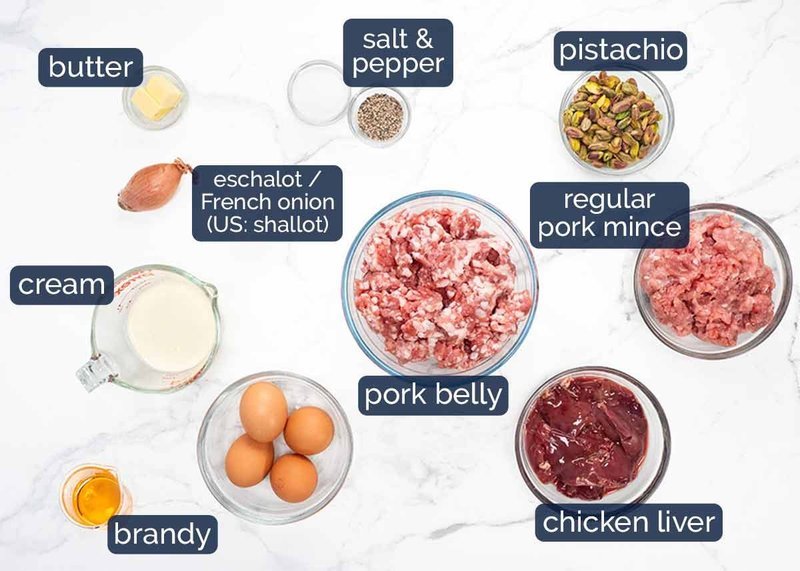
    Labeled terrine ingredients arranged on a white marble counter
    • Pork belly mince (800g / 28oz) — the fat is what makes a terrine a terrine and not a meatloaf. Ask your butcher to mince skinless pork belly for you, or buy pre-minced pork that’s very fatty — pale pink with plenty of white flecks of fat. It looks more crumbly than regular mince. During my testing I also bought very fatty pork mince made from offcuts at a local meat counter, and it worked just as well.
    • Regular pork mince (400g / 14oz) — balances the belly so it’s rich without being heavy, and gives the loaf a firmer, meatier bite. Around 15% fat (or lean, around 10%) works.
    • Chicken livers (250g / 9oz), cleaned and diced 1cm / 0.4 inch — they add a deep, rustic flavour without tasting strongly of liver; they melt into the mix as it cooks. Trim away any green or yellowish spots (they’re bitter) and obvious sinew. Small bits of membrane are fine — they soften in the oven.
    • 1/4 cup brandy — cognac is the classic French choice, but any inexpensive brandy works. No need to get fancy. Non-alcoholic swap: low-sodium chicken stock or a splash of non-alcoholic wine (it just won’t have that subtle depth).
    • 4 tsp cooking or kosher salt and 1 3/4 tsp black pepper
    • 1 tbsp unsalted butter and 1 eschalot (shallot in the US), finely diced — eschalots are the small onions that are purplish-white inside. They’re sweeter and more delicate than regular onions, and fine enough that they almost melt away in the bake. Don’t confuse them with spring onions, which some shops also call shallots.
    • 2 large eggs (55g / 2oz each in shell) and 2 egg yolks — the eggs bind it all together, the extra yolks add richness. Fridge cold is fine.
    • 1/2 cup thick cream (heavy cream) — keeps the texture tender; I tested with different amounts and the right one really does make a difference.
    • 1/2 heaped cup unsalted pistachios, no need to toast — the classic nut in French terrines. I’d rather leave them out than swap in another nut.
    • Optional: 1/8 tsp curing salt (Cure #1) — I don’t use it (see FAQ), but it keeps freshly sliced terrine pink and extends shelf life. The smallest bags are about 500g / 1lb and you only need about 1g, so it’s rather wasteful for one loaf.
    • To serve: baguette or crusty bread, Dijon mustard, cornichons or other pickles.

    Time, honestly: 30 minutes active, start to finish. But allow 2 days — one night to marinate, one night to chill after baking. The recipe card below does the maths for you.

    How to make it

    Step 1 — Marinate (do this the night before). Put both pork minces, the chicken livers, salt, pepper and brandy in a large bowl. Mix well with your hands until everything is evenly coated. Cover and refrigerate overnight. No time? You’ll still end up with a good terrine — just a less developed one. The marinade is what gives the flavour depth, so if you have the time, don’t skip it.

    Step 2 — Sauté the eschalot. Melt the butter in a small frying pan over medium heat, add the eschalot and cook for about 3 minutes, stirring, until softened but not golden. Set aside to cool slightly.

    Step 3 — Mix the terrine. Put the marinated meat in a stand mixer bowl. Add the sautéed eschalot (with the butter), eggs, yolks, cream and pistachios. Mix on low for 30 seconds, then medium for another 30 seconds, until well combined. You want mostly smooth with a slightly coarse texture — that’s what gives it the rustic look and a good bite. Not a stand mixer? Do it by hand in a large bowl: whisk the eggs, cream and eschalot together, add the meat and pistachios, and mix well with your hands. Just don’t use a food processor — it will puree the meat and you’ll get a giant meatball.

    Step 4 — Pack the loaf pan. Transfer the mixture into a 21.5 x 11.5 x 7 cm (4.5 x 8.5 x 2.75 inch) loaf pan, one handful at a time, slamming each handful down firmly before adding the next. This packs out air pockets, which is what stops holes and brown spots in the finished loaf. Give the pan a few firm taps on the bench so the mixture settles even more compact.

    Step 5 — First bake, in a water bath. Place the loaf pan in a roasting pan and pour in boiling water to come halfway up the sides of the loaf pan. Bake at 220°C / 430°F (200°C fan-forced) for 25 minutes. The gentle hot water bath stops the outside from overcooking while the centre catches up.

    Step 6 — Second bake. Reduce the oven to 170°C / 340°F (150°C fan-forced), loosely cover with foil, and cook until the centre reads 68°C / 155°F — about 75 minutes. I don’t recommend making this without a thermometer: take it out at the right temperature and it’s perfect; miss it and you have dry meatloaf. If you only have a regular meat thermometer, first check at 60 minutes.

    Step 7 — Rest 2 hours. Leave the terrine in the pan on the bench. You’ll see juices and fat pooling around the edge — the terrine drinks that back in during the rest, which is half the secret to the tender texture. The top will look pale when it comes out of the oven; it darkens as it cools. Don’t panic.

    Step 8 — Chill overnight. Wrap the terrine in cling film and refrigerate. As it firms up, the flavours meld — and honestly, it’s often better on the second or third day.

    Thick terrine slice on crusty bread with pickled garnish

    Step 9 — The big reveal. The chilled fat will have glued the terrine to the pan, so it won’t slide out on its own. Run a blowtorch over the outside of the pan to gently soften the fat around the edges, then invert and give it a gentle shake. No torch? Dip the outside of the pan in hot water for a few seconds, or warm it briefly over a low flame. Then slice to about 1cm / 0.4 inch thick. If the pink blush fades once you slice, that’s completely normal — the cut surface oxidises in the air. It still tastes just as good.

    Serving, storage, and what to expect

    Keep the whole loaf in the fridge and slice as you go — that’s how French delis do it. Serve it fridge-cold, or let it sit out a little if you prefer it softer. At our table, it’s usually the centrepiece: a baguette torn open, some Dijon and pickles on the side, and everyone helps themselves. It works as a light lunch with a simple green salad, a start, on a cheese board, as little canapés on toasted bread, or packed for a picnic. There’s really no wrong time to eat one.

    Storage: in an airtight container in the fridge for up to 5 days. It freezes well too — slice first, wrap the slices individually, and thaw only what you need for up to 3 months. Sliced terrine does lose a little of its silky texture after thawing, but it’s still good.

    And the money question: a good French-style terrine at a deli can cost around $15 for a 150g slice. This loaf costs less than $30 to make, weighs a generous 1.5kg, and serves 15 slices. That’s the 80% difference the shop doesn’t advertise.

    FAQ

    Where do I find fatty pork belly mince? It’s easier to find than you’d think — most butchers will mince skinless pork belly for you on request. I also found very fatty offcut pork mince that worked just as well and was surprisingly inexpensive.

    Can I use a different meat? You can, but don’t expect the same result. Pork has the right balance of flavour and fat for that rich, juicy texture. Other meats give you a leaner, firmer loaf — good, just not a country terrine.

    Can I skip the chicken livers? Yes, but it’ll be a little less rich and refined. The livers are what make a country terrine a country terrine. The rest of the recipe works fine without them.

    What is curing salt? A special salt (pink curing salt) charcuterie makers use to keep cured meats like ham, bacon, salami and terrines pink and to extend shelf life. Use Cure #1 for cooked charcuterie like this; Cure #2 is for dry-cured products like salami and isn’t right here. I skip it because this terrine is made to be eaten within a few days, and it still has a lovely blush pink centre when freshly sliced.

    Terrine, pâté, or pâté en croûte — what’s the difference? A terrine is a coarse, rustic mixture of meat cooked in a loaf-shaped mould, with visible pieces of meat, served cold or at room temperature in slices. A pâté is a broader term for many meat preparations, often much smoother because the meat is blended into a fine paste. A pâté en croûte takes things further: a terrine or rustic pâté baked inside a pastry crust, then finished with a savoury jelly for those signature beautiful slices. You’ll see them in French delis and charcuterie shops — and they’re genuinely stunning.

    A note from my kitchen

    I made this terrine more than 40 times before I was happy with it — different binders, different amounts of fat, different aromatics, different cook times. At one point I had so many in the fridge there was no room for anything else, and I started calling it The Terrine Fridge. This is the version I landed on: rich, full of flavour, and the good kind of simple. My only regret is that I can’t remember which of the 40 was my favourite — this one, apparently, since it’s the only one I’m writing down.

    Trade-It Tip: No brandy on hand? A splash of non-alcoholic wine or low-sodium chicken stock keeps the moisture without changing anything else. And if the pistachios are gone, leave them out rather than swapping in almonds — it’ll still be delicious.

    If it doesn’t fit a Tuesday night, it doesn’t get published. This one fits a weekend afternoon instead — and it keeps for 5 days, so the whole week gets the credit.

    Recipe card

    • Serves: 15 slices (1.5kg loaf)
    • Prep: 30 minutes
    • Cook: 1 hour 40 minutes
    • Marinating + resting: 2 days
    • Total: 2 days 2 hours 10 minutes
    • Type: Appetizer, party food, starter · French
    • Marinade: 800g / 28oz pork belly mince · 400g / 14oz regular pork mince · 250g / 9oz chicken livers, cleaned and diced 1cm / 0.4 inch · 4 tsp cooking or kosher salt · 1 3/4 tsp black pepper · 1/4 cup brandy (cognac preferred) · optional 1/8 tsp curing salt (Cure #1)
    • Terrine mixture: 1 tbsp unsalted butter · 1 eschalot (shallot), finely diced · 2 large eggs · 2 egg yolks · 1/2 cup thick (heavy) cream · 1/2 heaped cup unsalted pistachios
    • To serve: baguette or crusty bread · Dijon mustard · cornichons or pickles
    • Method (abbreviated): Marinate the meat overnight. Sauté the eschalot in butter for 3 minutes. Combine with the marinated meat, eggs, yolks, cream and pistachios; mix briefly. Pack into a loaf pan. Bake 25 minutes at 220°C / 430°F (200°C fan) in a water bath, then cover with foil, reduce to 170°C / 340°F (150°C fan) and cook until the centre reaches 68°C / 155°F (about 75 minutes). Rest 2 hours, chill overnight, then slice about 1cm / 0.4 inch thick.
    • Nutrition per slice: 428 cal · 1g carbs · 14g protein · 40g fat · 676mg sodium

    Don’t attempt this without a thermometer. Removing the terrine at exactly the right temperature is the key to the blushing pink centre and the perfect texture.

    Keep Reading

  • Tater Tot Casserole (The One That Feeds the Whole Family)

    Tater Tot Casserole (The One That Feeds the Whole Family)

    Back when I worked the line, the kitchen never ran out of tater tots. Frozen, stackable, and gone the moment the fryer hit temperature. So when I started making tater tot casserole at home, it felt like cheating — a diner-style bake from five things I already had in the cupboard.

    This is the version I make when the house is full. My kids pick it first, my husband picks it second, and I eat it third (I’m not proud).

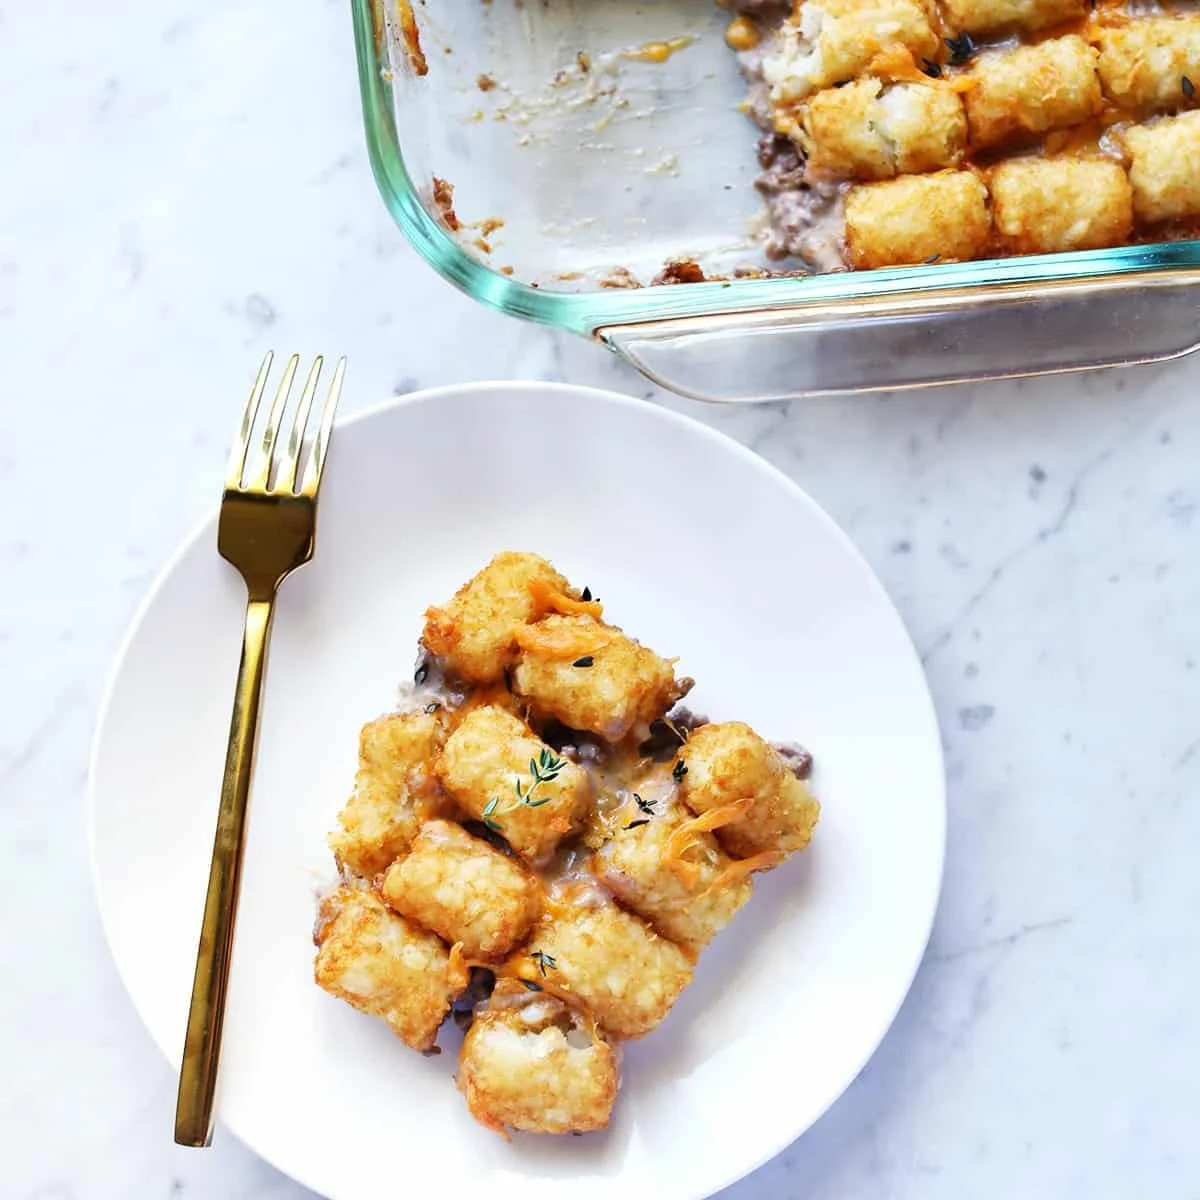
    Golden baked tater tot casserole in a 9x13 dish

    It works as a main, a side, or — and I know this sounds weird until you’ve tried it — a big family breakfast next to eggs and something sweet. I’ve also shipped it to potlucks where it vanished before the coffee got cold.

    Why this works

    Frozen tots crisp in the oven’s dry heat while the meat and soup below bubble into one creamy layer. You’re not managing anything after 10 minutes of prep. The good kind of simple.

    What you need

    • 1 pound lean ground beef
    • 5 cloves garlic, minced
    • 1 can cream of mushroom soup (cream of chicken works too)
    • 2 cups shredded cheddar
    • 25 ounces frozen tater tots (classic cylinders; crowns or stars work fine)
    • 2 tablespoons chives or green onions, optional
    • Salt and pepper
    • A 9×13 baking dish

    How to make it

    45 minutes, start to finish — including the chop, which is just garlic.

    1. Heat a large skillet over medium-high. Brown the ground beef with the minced garlic until there’s no pink left. Don’t fuss over it — it bakes another 35 minutes in the oven.
    2. Take the pan off the heat and stir in the whole can of soup. Season with a little salt and pepper.
    3. Lightly grease the 9×13 dish. Spread the meat mixture in, sprinkle the cheddar over it, then top with the frozen tater tots straight from the bag.
    4. Bake at 350°F (177°C) for 35–40 minutes, until the tots are golden and crispy and the middle is bubbling. Scatter chives over the top and serve straight from the dish.
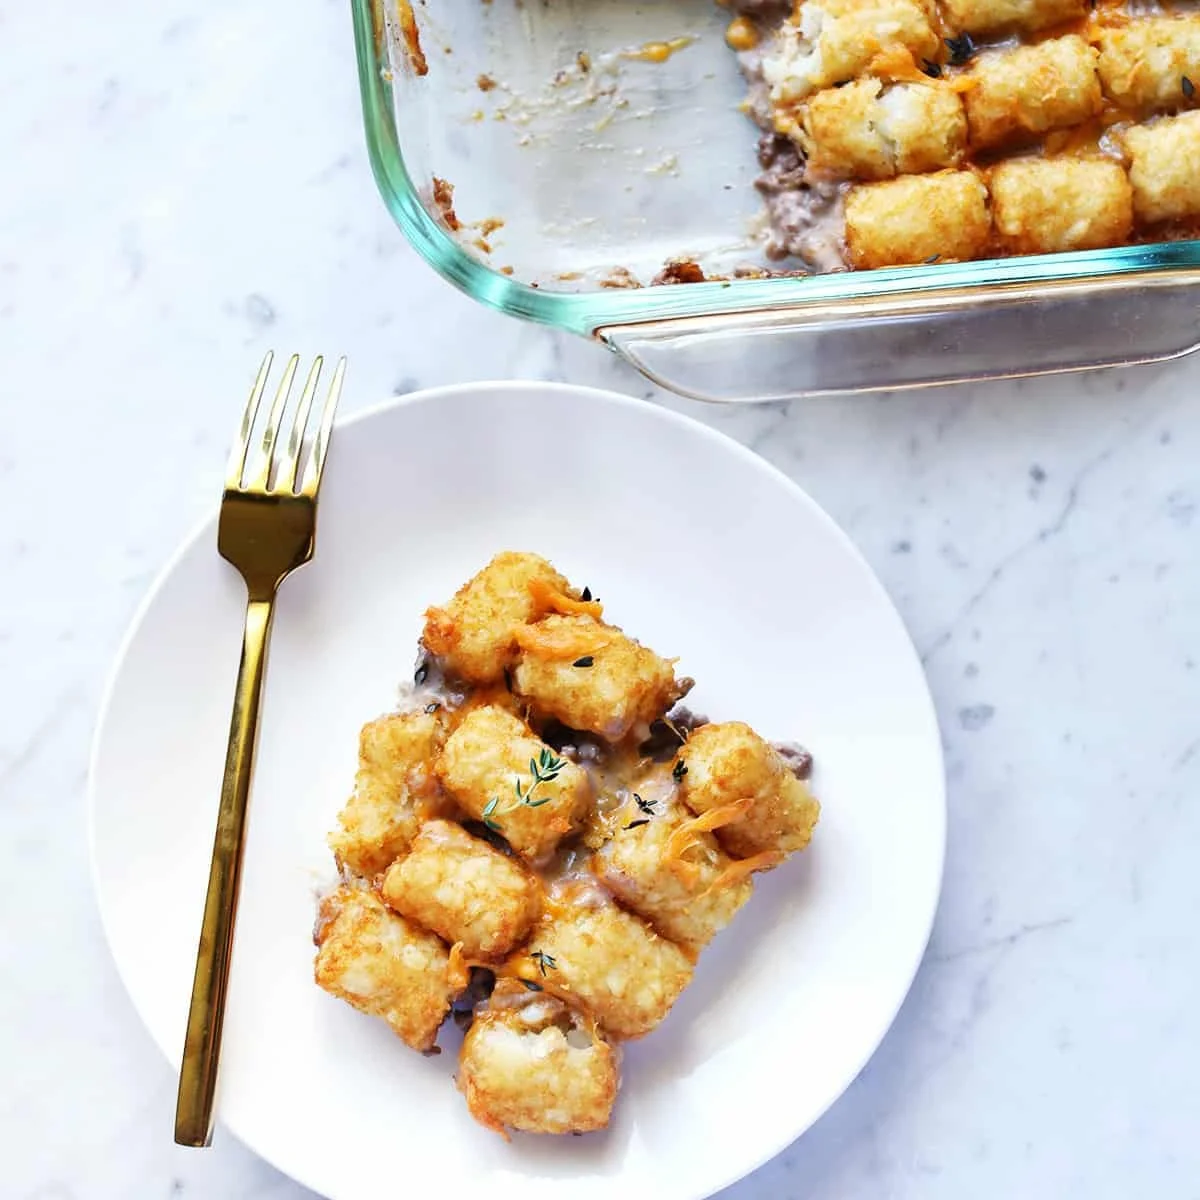
    Close-up of crispy tater tots bubbling on top of the casserole

    Ways I change it up

    • More heat: add chili powder, cayenne, Italian seasoning, or onion powder to the meat while it browns.
    • Lighter: swap the beef for ground turkey or chicken. Pork or sausage works if you don’t mind the extra fat.
    • Herbs on top: chives and green onions are my default. Cilantro if you’re feeling bold, or rosemary and thyme for a holiday table.
    • Morning-of: assemble everything, cover, and refrigerate overnight. Bake it in the morning and serve it as breakfast. Leftovers are great, too.
    Raw ingredients for tater tot casserole laid out on the counter

    Trade-It Tip: No cheddar on hand? Mozzarella gets you the same melty layer — it just won’t taste the same.

    It’s the kind of dish that disappears fast, so make it when you have company. If it doesn’t fit a Tuesday night, it doesn’t get published.
    Keep Reading

  • Cherry Tomato Gazpacho: A 10-Minute Blender Soup (No Cooking)

    Cherry Tomato Gazpacho: A 10-Minute Blender Soup (No Cooking)

    Summer dropped a pile of cherry tomatoes on my kitchen counter and I had no plan for any of them. That’s usually when I panic — but not this time. I grabbed the blender, and ten minutes later I had a cold soup that tastes like a proper restaurant starter, with zero cooking involved.

    This Cherry Tomato Gazpacho is made entirely in the blender. It’s vegan, naturally gluten-free, and the kind of light, fresh thing you reach for on a hot day when dinner feels like too much work. And because it’s just blended produce and a little olive oil, it’s honestly the easiest cold soup I make all year.

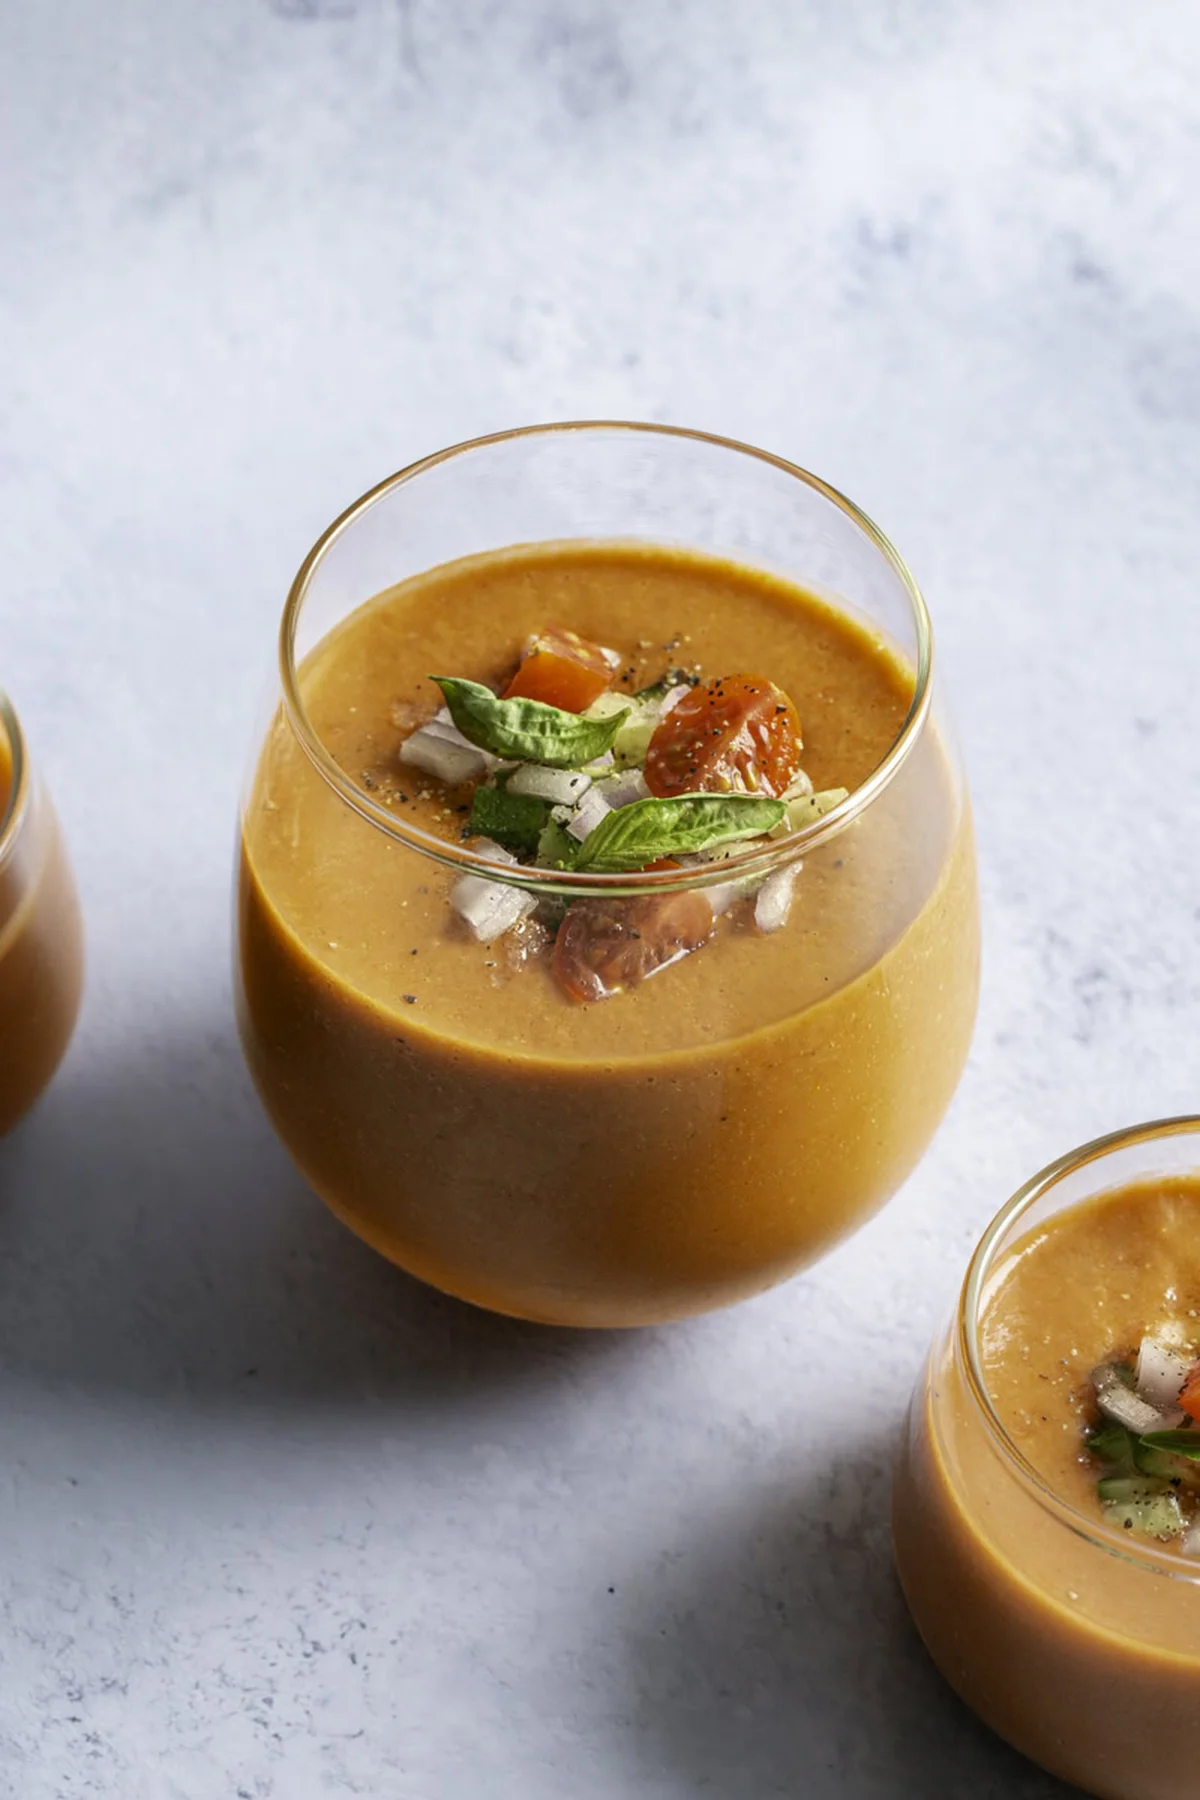
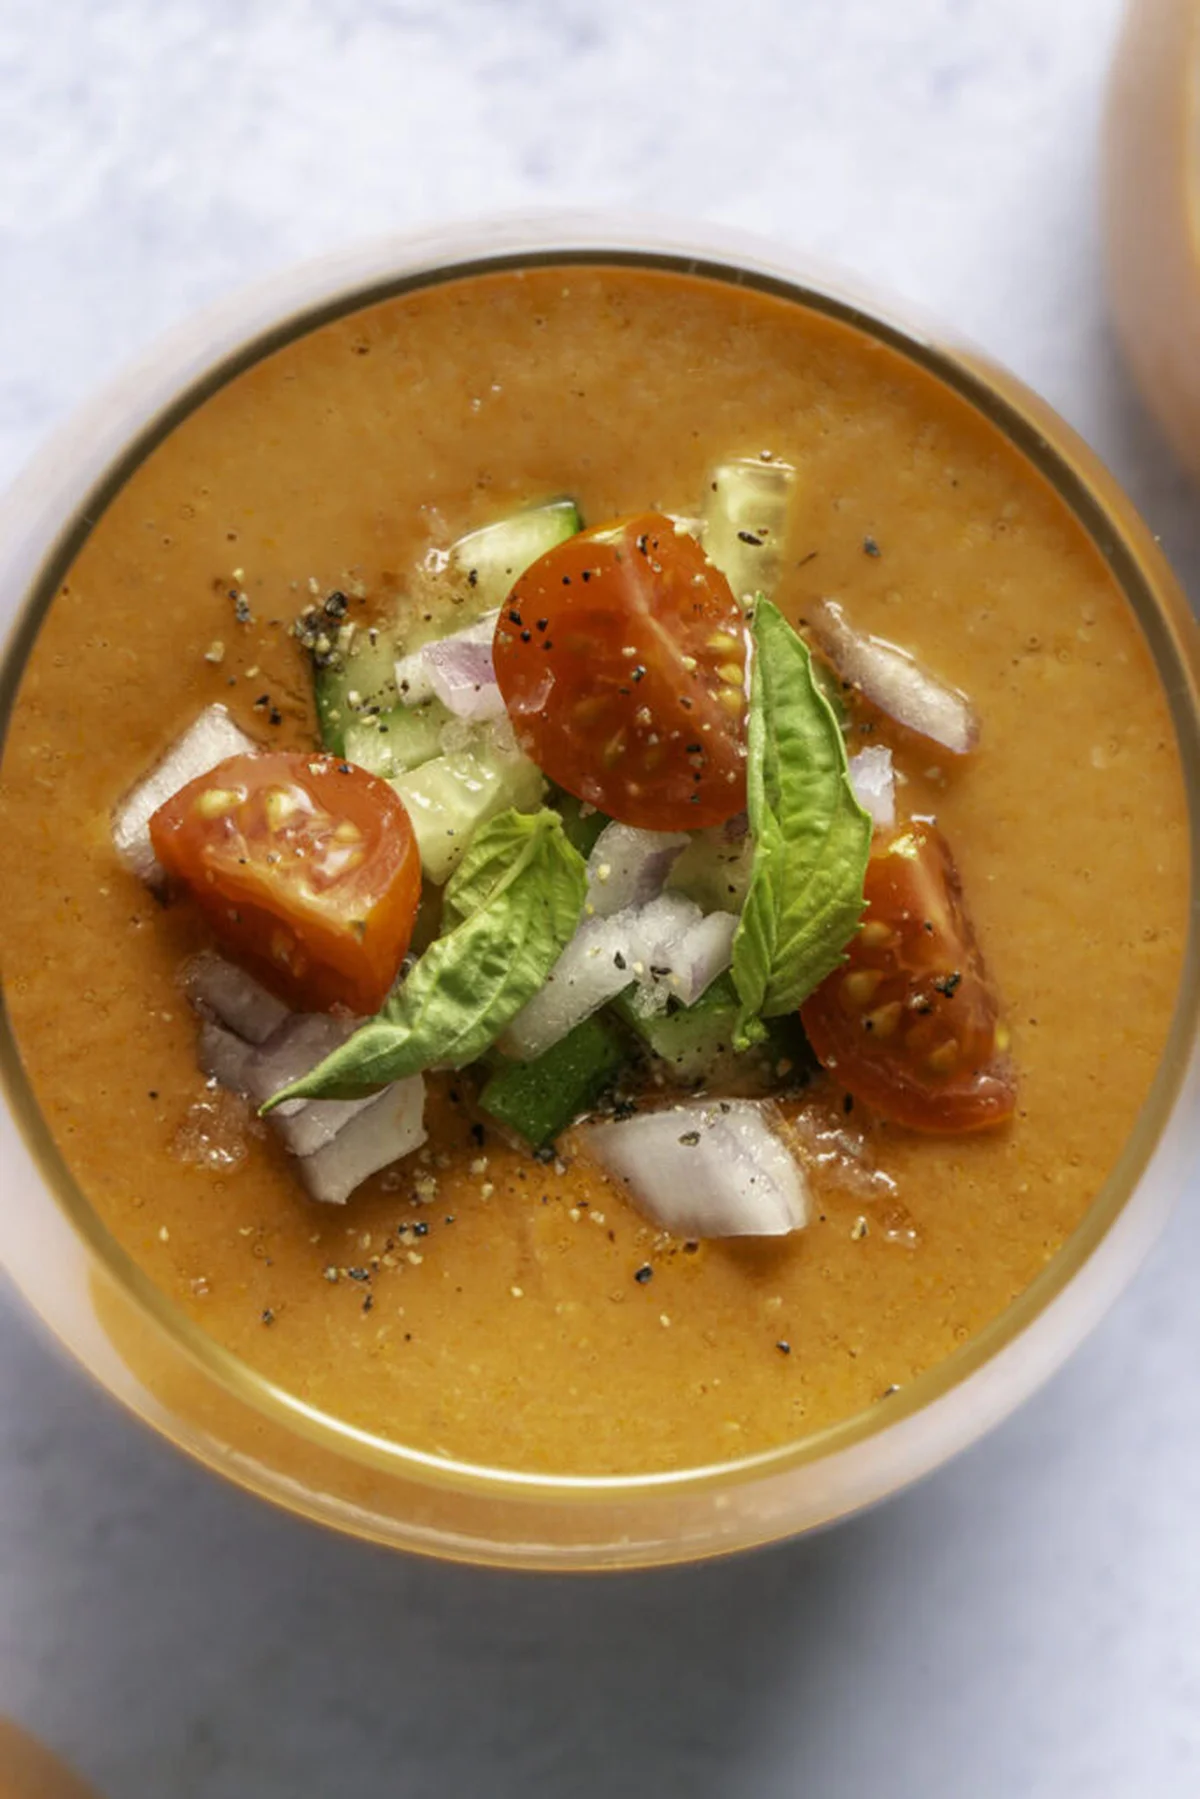
    Bowl of bright red cherry tomato gazpacho garnished with fresh basil

    Back when I worked the line, we used gazpacho as the “impressive but free” appetizer — guests saw the color and the cold bowl and assumed a lot of work. In my kitchen, the whole job is one blender and a patient wait in the fridge. That’s the good kind of simple.

    Why this works

    Cherry tomatoes are sweeter and less acidic than regular tomatoes, so the soup tastes like ripe fruit rather than vinegar. The olive oil is drizzled in while the blender is running, which folds it into the mixture and gives the soup that thick, creamy body — no dairy, no cream, no fuss.

    Ingredients

    Everything here is the kind of thing that’s already in your fridge or came out of the garden:

    • 4 cups (24 ounces) cherry tomatoes — the star. Sweet, juicy, and they blend into a smooth, vivid base.
    • 1 cup chopped cucumber (about 2 mini cucumbers) — adds that crisp, cool, hydrating element gazpacho is known for.
    • 1/2 red bell pepper — subtle sweetness that rounds out the tomatoes.
    • 2 tablespoons red onion, finely chopped — a little sharpness to keep it from tasting flat.
    • 1 small garlic clove — just enough for a warm background note, not a punch in the face.
    • 3 large strawberries — they deepen the sweetness and take the edge off the acidity. The soup doesn’t taste like fruit salad, I promise.
    • 2 tablespoons fresh basil, chopped — tomatoes and basil were practically invented for each other.
    • 2 tablespoons red wine vinegar — the lift. It brightens everything else in the blender.
    • 1/2 teaspoon salt and 1/4 teaspoon ground black pepper — brings the whole thing together.
    • 1/3 cup extra virgin olive oil — emulsifies in while the blender runs and gives the soup its silky, creamy texture. (A strong high-speed blender helps here — the Vitamix on my counter is an affiliate link, no extra cost to you.)
    Cherry tomatoes, cucumber, basil, and strawberries arranged on a cutting board

    How to make it (10 minutes, start to finish — including washing)

    1. Wash everything, then add the cherry tomatoes, cucumber, red bell pepper, red onion, garlic, strawberries, basil, red wine vinegar, salt, and pepper to a high-speed blender.
    2. Blend until completely smooth and no chunks remain. Blend longer than you think — the longer you go, the silkier it gets. (Strain it first if you want a perfectly refined, restaurant-style finish.)
    3. With the blender running, slowly drizzle in the olive oil until the mixture is fully emulsified and creamy.
    4. Transfer the gazpacho to glasses or a lidded container and refrigerate for at least 2–4 hours, until fully chilled and the flavors have had time to settle.
    Blender jar filled with blended red gazpacho mixture

    The 2–4 hours of chilling isn’t busywork. Cold gazpacho tastes completely different from room-temperature gazpacho — the chill is what makes it taste like summer. Stir it before serving, since some natural separation is normal.

    Serving

    Serve it cold, in a cold bowl if you have one, and top it with whatever’s on hand:

    • Finely diced cucumber
    • Halved cherry tomatoes
    • Diced red onion
    • Fresh basil leaves
    • A drizzle of olive oil
    • Flaky sea salt and cracked pepper

    It’s a great starter, a light lunch on its own, or the whole meal next to some crusty bread or crackers on a warm evening.

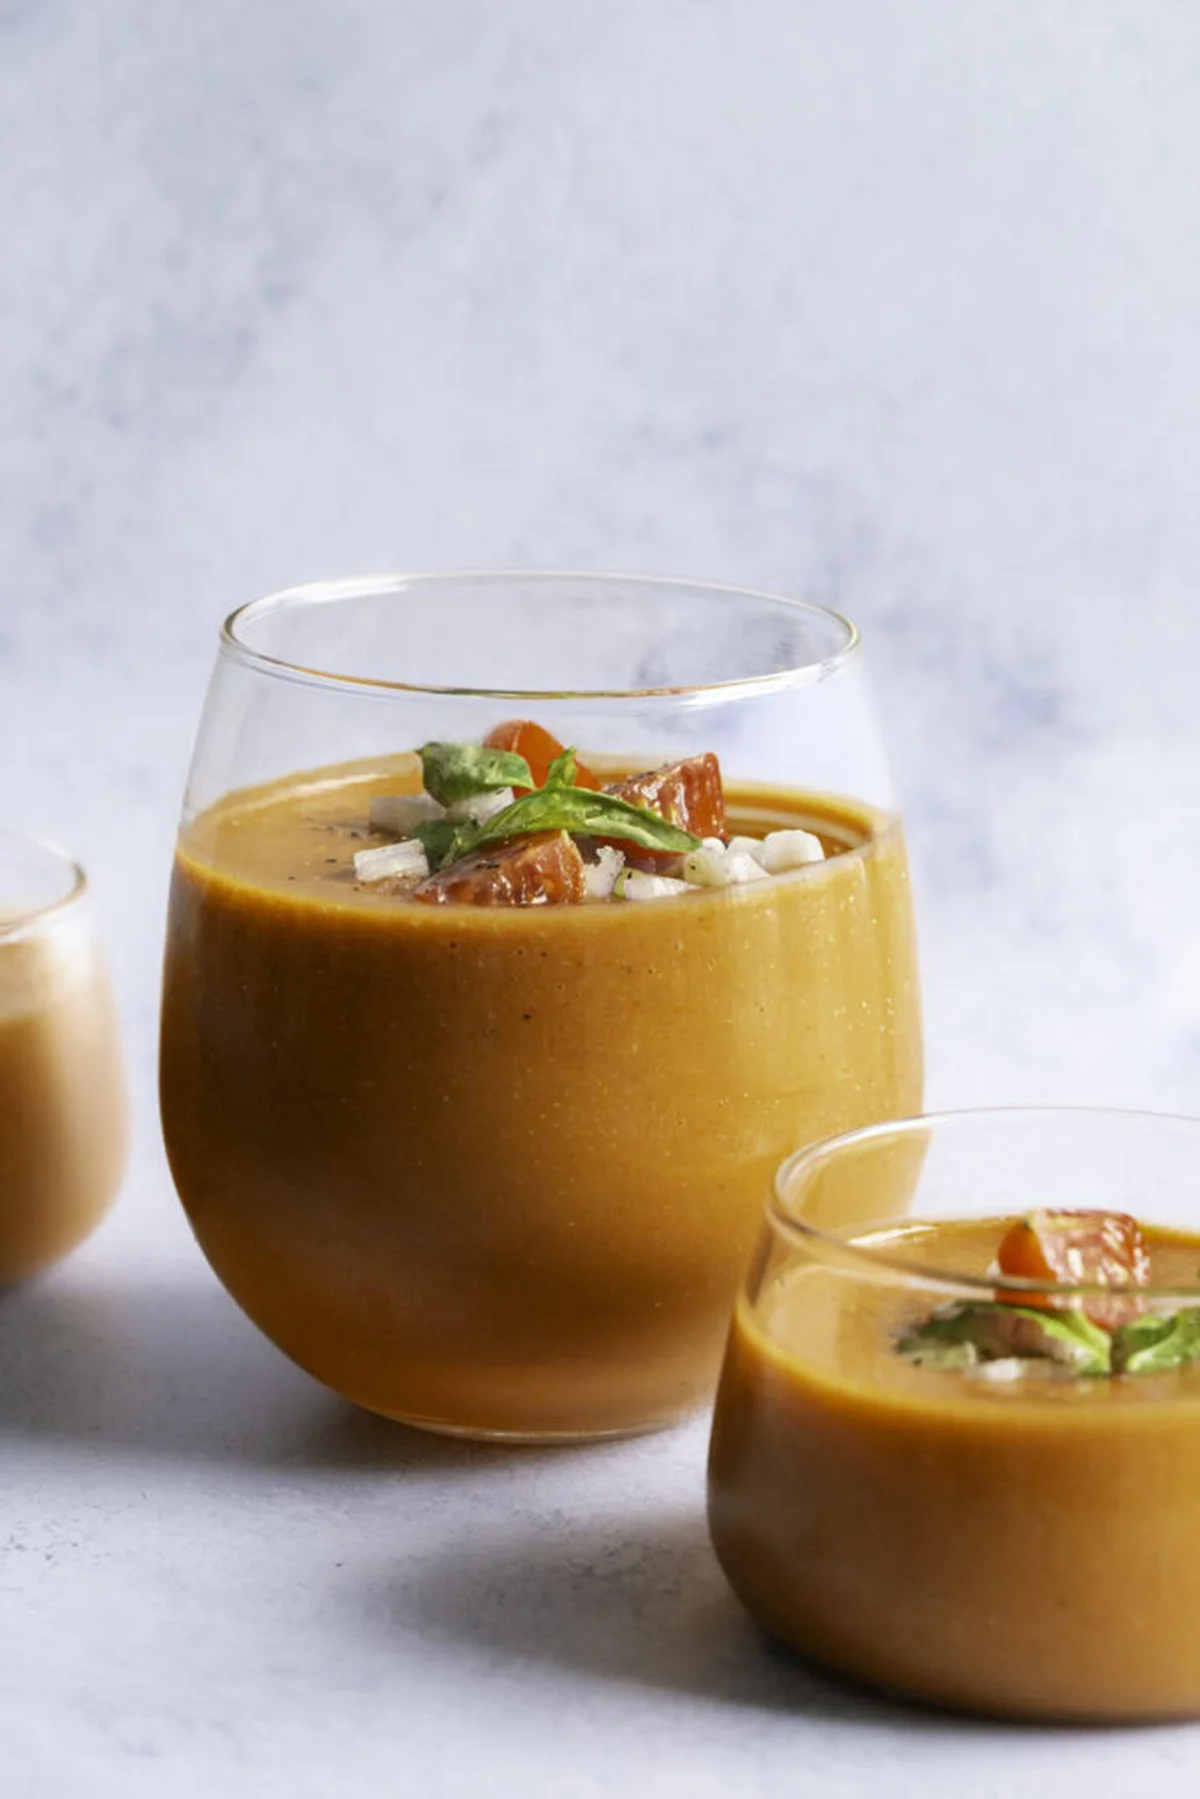
    Glasses of chilled cherry tomato gazpacho with fresh herb garnish

    Tips for the best gazpacho

    • Use ripe, in-season cherry tomatoes. If you’ve got a garden bin full of them, this is the recipe.
    • Chill it thoroughly. The taste difference is real.
    • Too thick? Add a splash of cold water while blending.
    • Blend longer than feels necessary. Smoothness is the whole point.
    • Want it silky-smooth and refined? Run it through a fine strainer — worth the 30 seconds.

    Trade-It Tips

    • No strawberries? A few more cherry tomatoes do the same sweetening job — the soup just loses a little depth.
    • No basil? Cilantro works too, and takes the whole thing in a completely different (very nice) direction.
    • Want it spicy? Blend in a small piece of jalapeño, seeds in if you’re feeling brave.
    • Want it creamier? Top each bowl with a few spoonfuls of diced avocado.

    Storage

    It keeps in an airtight container in the fridge for up to 3 days. Stir before serving — the oil and liquid separate a little, and that’s completely normal. Freezing works in a pinch, though the texture softens after thawing, so I always reach for fresh first.

    Questions I actually get asked

    Do I have to peel the tomatoes? No. Blended long enough, the skins break down completely.

    Is gazpacho supposed to be cold? Yes — that’s the point. It’s a summer soup by design.

    How long does it keep? 3 days in the fridge, in an airtight container.

    From my kitchen

    I’ve made this three or four times now, and it’s become the thing I make when the weather turns and I can’t be bothered with a stove. Ten minutes of active time, one blender to wash, and a bowl of cold red soup that makes the kitchen smell like July. If it doesn’t fit a Tuesday night, it doesn’t get published — and this one fits with room to spare.

    If you make it, I’d love to see your bowl.

    Keep Reading

  • Green Goddess Chicken Cobb Salad (Panera Copycat)

    Green Goddess Chicken Cobb Salad (Panera Copycat)

    I used to think a healthy dinner meant three separate pans and a sink full of dishes. Then a salad showed up that took 35 minutes, start to finish, and I’ve been making it every few weeks since.

    It started with Panera Bread — the US bakery-cafe chain that, for a long stretch of my life, was basically my second home. I built my college lunches around their salads, and whenever a new one hit the menu, I went in the same day. One bite of their green goddess chicken cobb salad and I knew I had to recreate it at home.

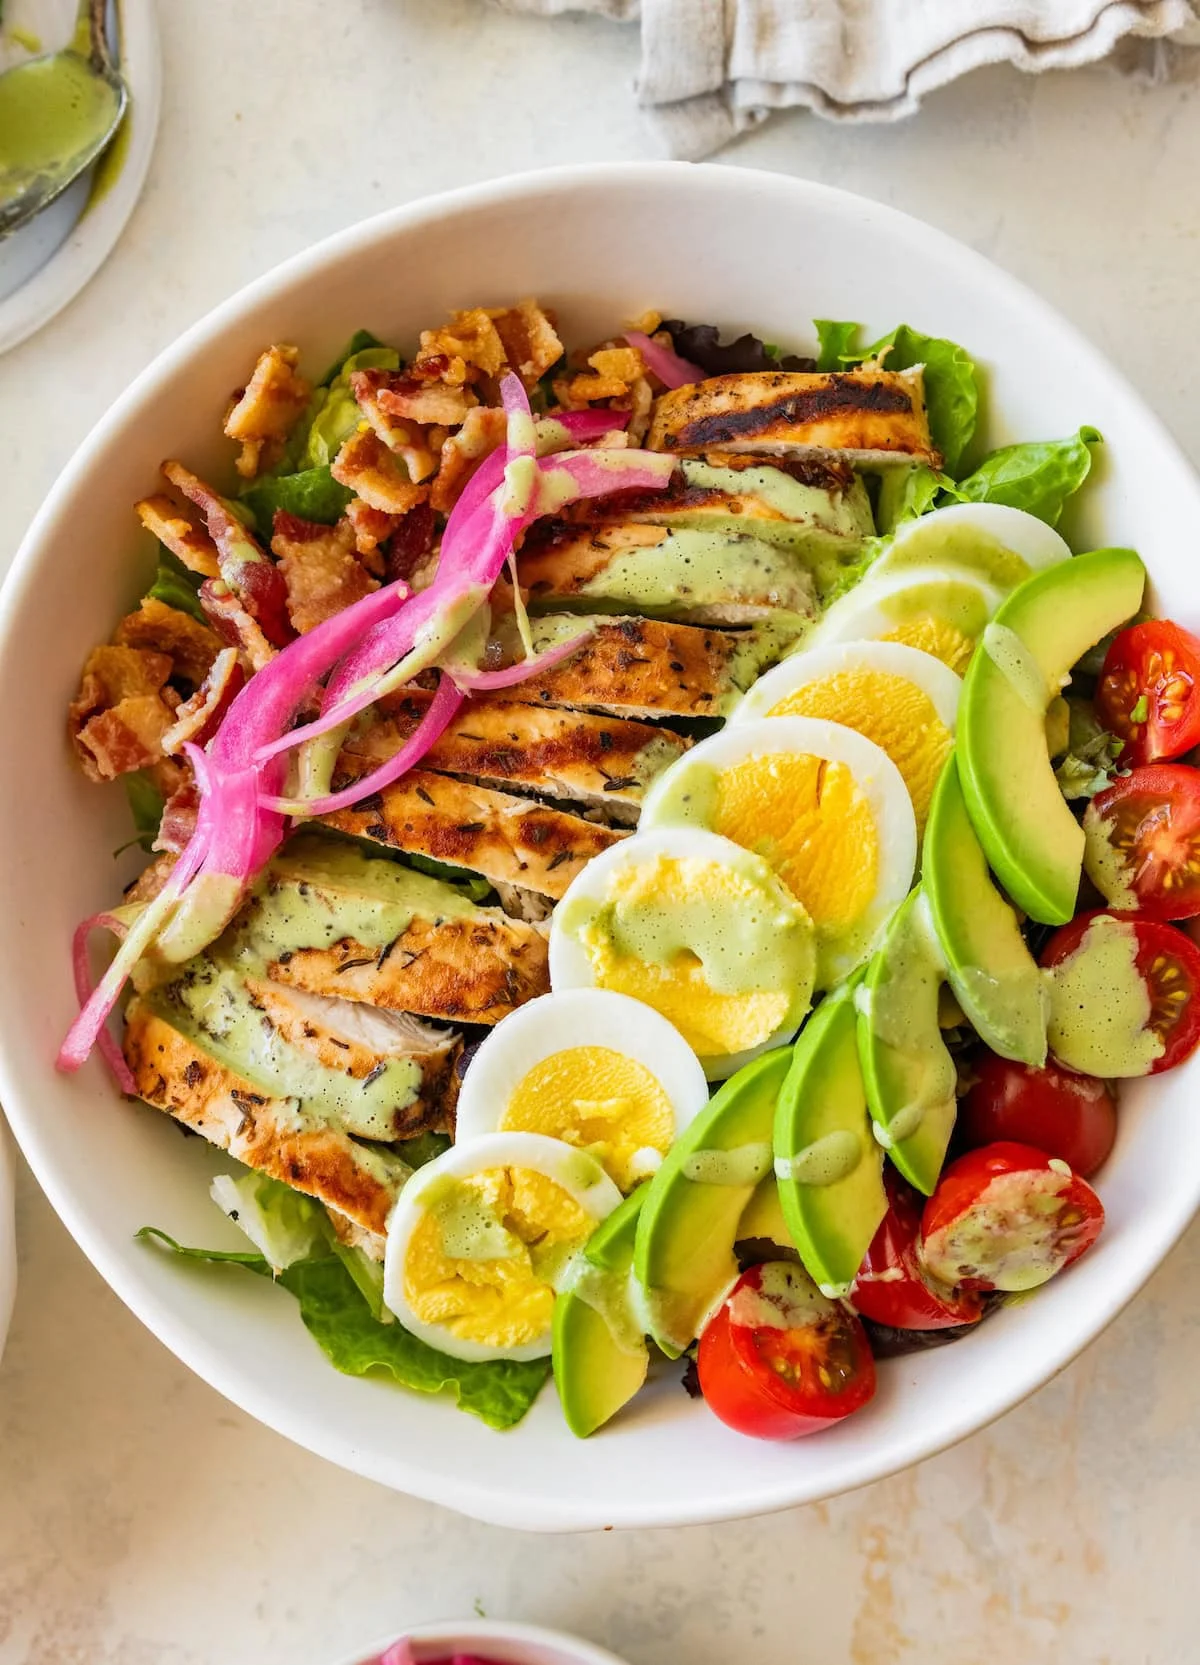
    Overhead view of loaded green goddess cobb salad bowls with chicken, avocado and green dressing

    Why this works

    The chicken isn’t plain grilled chicken — it’s marinated in red wine vinegar, olive oil, garlic and dried herbs first, which is the difference between ‘fine’ and ‘why didn’t I do this sooner.’ Then the homemade green goddess dressing: Greek yogurt, fresh basil and a spoonful of basil pesto, blended until smooth. It’s the good kind of simple — five minutes in a blender, and it makes everything on the plate taste intentional.

    The upgrades that actually matter

    Here’s what this copycat does differently, and why I love it:

    • Marinated, not plain. The herb marinade is the whole upgrade. Even 30 minutes makes a noticeable difference — I almost always start it the night before.
    • The dressing is the star. It comes together in 5 minutes, it keeps for up to 5 days, and it gets better as it sits. Use it on salads, sandwiches, as a veggie dip.
    • Packed with protein. Each serving has over 40 grams of protein and 14 grams of fiber. I eat one bowl and I’m done for hours.
    • Completely customizable. Turkey bacon instead of bacon, pickled onions instead of fresh, whatever greens are in the bag. This salad works with what you have.
    • Built for meal prep. Cook the chicken, make the dressing, prep the toppings — then assemble four bowls all week long. Four salads from one batch is also a lot friendlier to the wallet than ordering takeout four times.

    Ingredients you’ll need

    The full measurements are in the recipe card below. A few notes on the parts that matter:

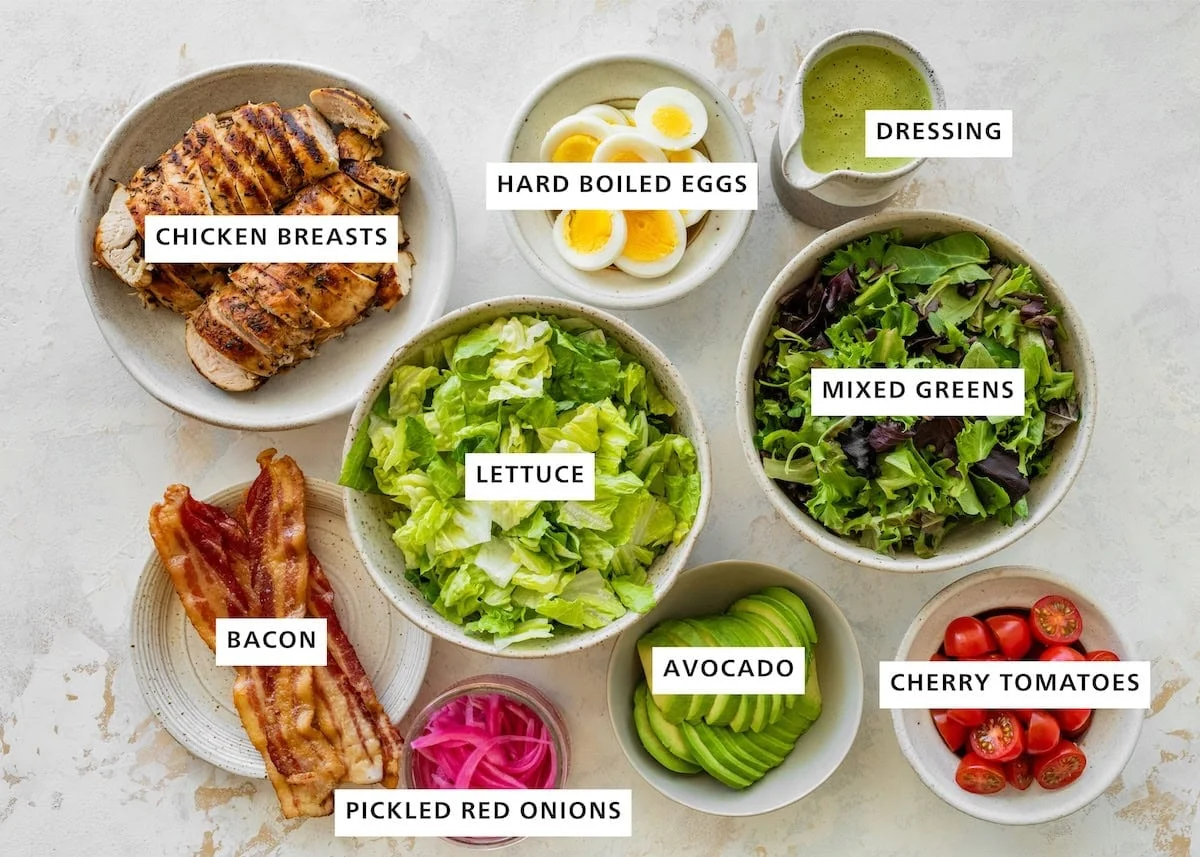
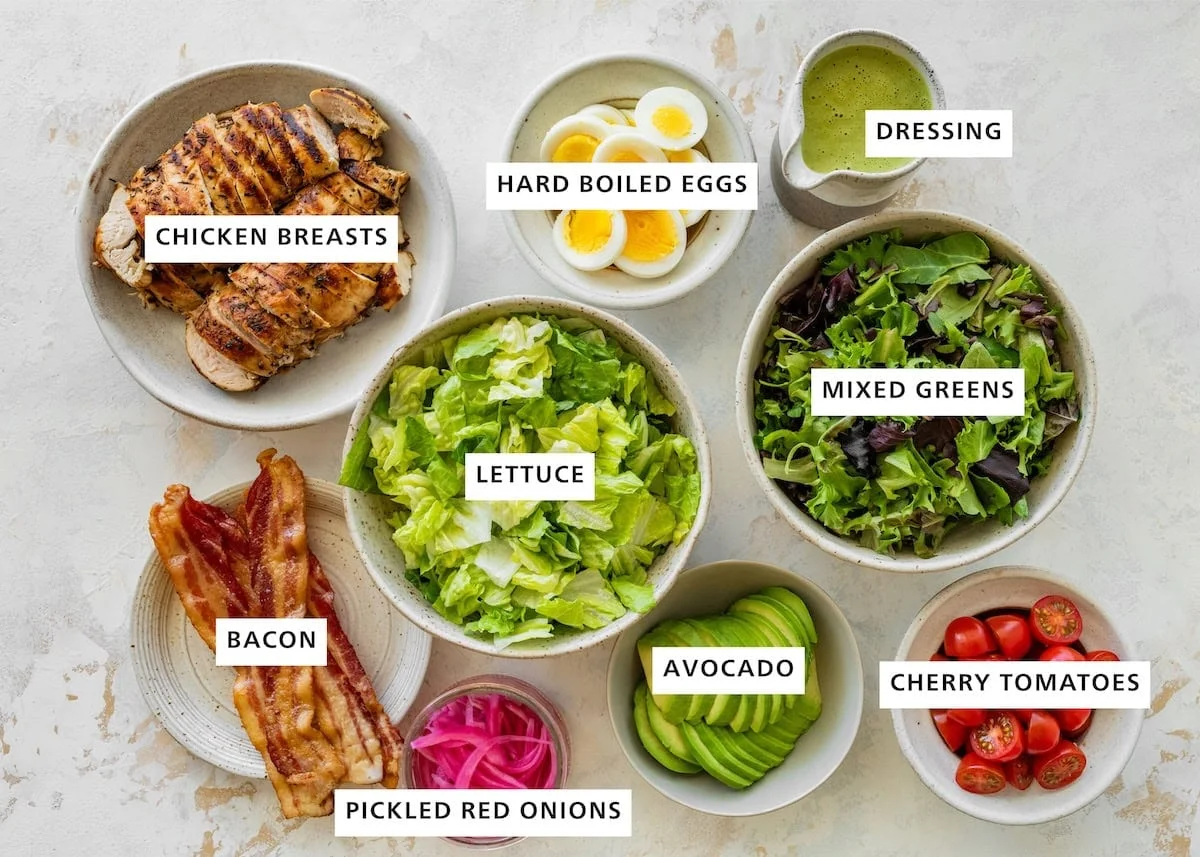
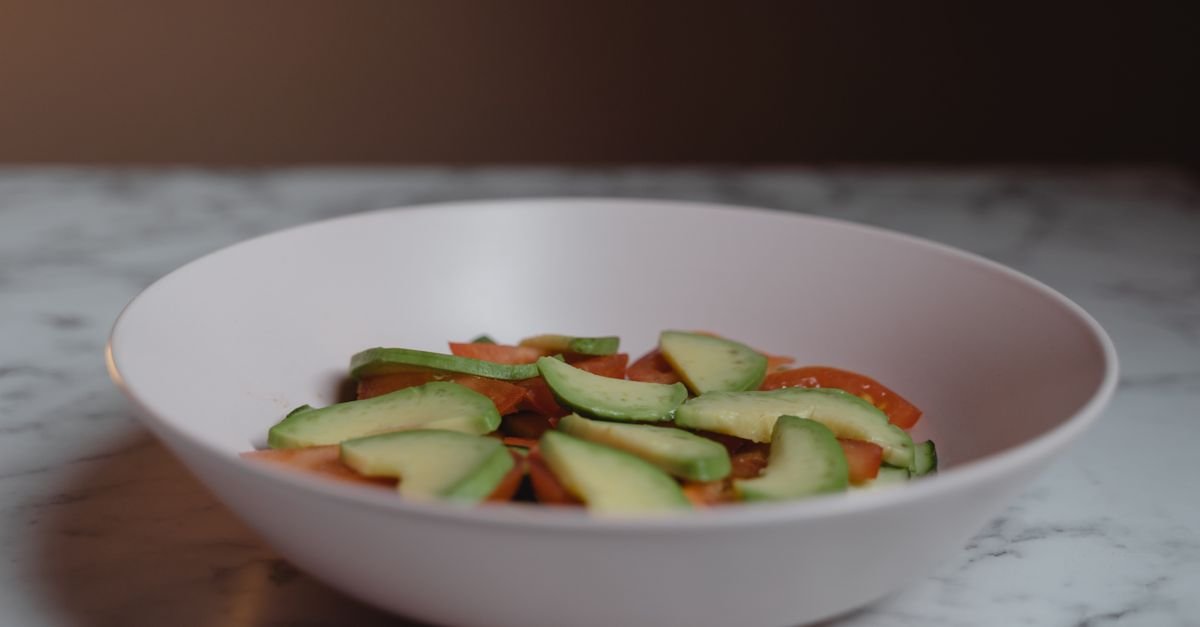
    For the chicken, boneless skinless breasts work best. Thighs work too — the salad just gets a bit richer. For the base, romaine brings the crunch and mixed greens bring the delicate, fresh flavor. Bacon is non-negotiable in a cobb, but turkey bacon keeps it a little lighter and I reach for that most weeks. The pickled red onions are my one strong preference — the tangy brightness works far better than raw onion next to that creamy dressing. And the avocado goes on last, sliced right before serving so it stays green.

    Flat-lay of salad ingredients in labeled bowls on a marble surface

    How to make it

    Marinade the chicken. Whisk together the red wine vinegar, olive oil, garlic powder, thyme, oregano, salt and pepper. Add the chicken, toss to coat, and refrigerate for at least 1 hour — or up to 12 hours if you’ve planned ahead, which you should have.

    Make the dressing while the chicken sits. Blend the basil, Greek yogurt, white wine vinegar, mayo, shallot, pesto, maple syrup, dijon, salt and pepper until smooth and creamy. Taste it. If it’s too thick, add a teaspoon or two of water. Refrigerate until you need it.

    Grill the chicken. Pull it out of the marinade, shake off the excess, and cook on a grill or grill pan over medium-high heat for about 5 minutes per side, until no longer pink — an internal temperature of 165F / 74C. Rest, then slice.

    Build the salad. Divide the romaine and mixed greens between four bowls. Layer on the bacon, sliced hard-boiled eggs, halved tomatoes and pickled onions, then the sliced chicken and avocado. Drizzle each bowl generously with the dressing — 2 to 3 tablespoons to start — and serve immediately.

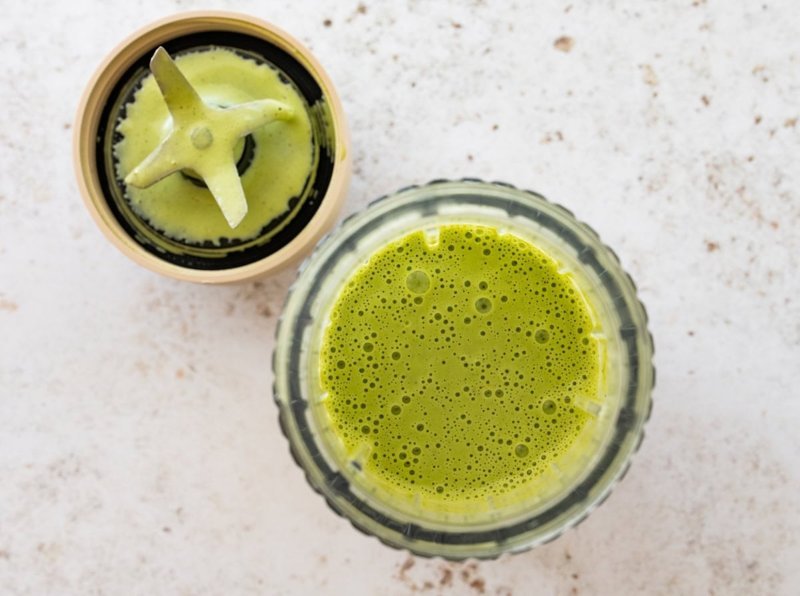
    Blender jar filled with freshly blended green goddess salad dressing

    My kitchen notes

    • Do not skip the marinade. I’ve made this with a rushed 30 minutes and a full overnight, and the overnight version is worth the patience.
    • Make the dressing at the start of the week. It keeps up to 5 days in a sealed jar and only gets better. That’s a whole week of salad dressing for the effort of one blender run.
    • Avocado goes on last, always. If you’re prepping the week ahead, store the avocado whole and slice it when you’re actually ready to eat.
    • Pickled onions over fresh. If you’ve got 10 minutes, a quick batch of pickled onions takes this salad to the next level — and they keep for weeks.
    • Want it dairy-free? Swap the Greek yogurt for a plain, unsweetened dairy-free yogurt. Same tang, same texture.

    Storing and meal prepping

    Store the components separately — that’s the whole trick. The chicken, bacon, hard-boiled eggs and toppings go in separate airtight containers in the fridge for up to 3 days. The dressing keeps in a sealed jar for up to 5 days. Keep the avocado whole and slice it just before serving. Assemble each bowl only when you’re ready to eat it, because dressed greens wilt fast.

    Questions I get about this salad

    What’s actually in Panera’s green goddess cobb salad? Grilled chicken, bacon, hard-boiled eggs, avocado and tomatoes, with a creamy green goddess dressing on a bed of romaine and mixed greens. This version keeps all of that, but the chicken is herb-marinated and the dressing is from scratch.

    Can I use store-bought green goddess dressing? You can. But it comes together in 5 minutes at home, and the fresh basil makes a huge difference — if you’re recreating this salad, homemade is the way to go.

    Can I make it ahead? Yes — marinate and cook the chicken, make the dressing, prep the toppings, store everything separately, and assemble just before serving. It’s one of my favorite meal prep lunches, and it’s the kind of thing that makes a Tuesday night feel easy.

    The recipe

    Green Goddess Chicken Cobb Salad — 35 minutes, start to finish (25 minutes prep, 10 minutes cook) · 4 servings · 591 calories, 43g protein, 14g fiber per serving (with turkey bacon; nutrition is an approximation)

    Chicken

    • 1–1¼ lb (450–550g) boneless, skinless chicken breasts
    • 2 tablespoons (30ml) red wine vinegar or lemon juice
    • ½ tablespoon (7.5ml) olive oil
    • ½ teaspoon (2.5ml) garlic powder
    • ½ teaspoon (2.5ml) dried thyme
    • ½ teaspoon (2.5ml) dried oregano
    • ¼ teaspoon (1.25ml) salt
    • ¼ teaspoon (1.25ml) pepper

    Salad

    • 4 cups (~600g) romaine lettuce, chopped
    • 4 cups (~400g) mixed greens, chopped
    • 4 slices cooked bacon or turkey bacon
    • 4 hard-boiled eggs, sliced
    • 1 cup (~150g) grape or cherry tomatoes, halved
    • ½ cup (~100g) pickled red onions or fresh red onions, sliced
    • 1 avocado, sliced

    Green goddess dressing

    • ¾ cup (~60g) fresh basil leaves, finely chopped, lightly packed
    • ½ cup (120ml) plain full-fat Greek yogurt
    • 2 tablespoons (30ml) white wine vinegar
    • 1 tablespoon (15ml) avocado oil mayo
    • 1 tablespoon (15g) diced shallot
    • 1 tablespoon (15g) basil pesto
    • 2 teaspoons (10ml) maple syrup or honey
    • 1 teaspoon (5ml) dijon mustard
    • ¼ teaspoon (1.25ml) sea salt, plus more to taste
    • ¼ teaspoon (1.25ml) black pepper

    Method

    1. Marinate. Whisk the vinegar, oil, garlic powder, thyme, oregano, salt and pepper in a small bowl. Place the chicken in a shallow dish or a 1-gallon (4L) sealable bag, add the marinade, toss to coat and refrigerate for at least 1 hour or up to 12 hours.
    2. Dress. While the chicken marinate, blend all the dressing ingredients until smooth and creamy. Taste, adjust the salt, and add 1–2 teaspoons of water if it’s too thick. Refrigerate until needed.
    3. Grill. Remove the chicken from the marinade and discard the marinade. Heat a grill or grill pan and cook the chicken about 5 minutes per side, until no longer pink and 165F / 74C internal. Rest, then slice.
    4. Build. Divide the greens between four bowls, then layer on the bacon, eggs, tomatoes and pickled onions, and top with sliced chicken and avocado.
    5. Serve. Drizzle each salad with 2–3 tablespoons of dressing, add more if you want, and eat it while it’s still fresh.

    Trade-It Tip: No Greek yogurt? Sour cream works — same tang, same texture, and the dressing still comes out creamy.

    If it doesn’t fit a Tuesday night, it doesn’t get published. — Grace
    Keep Reading

  • Avocado Pasta Salad That Tastes Like Summer (15 Minutes)

    Avocado Pasta Salad That Tastes Like Summer (15 Minutes)

    The other day I was standing in my kitchen on a Tuesday evening, holding an avocado that looked like it was one day from becoming a brown cloud, and I thought: this is the kind of dinner that used to scare me. Creamy, green, a little fussy. The kind of thing I’d associate with someone who owns more pans than I do.

    Turns out it’s not fussy. It’s a bowl, a pot of pasta, and a dressing that takes almost no time at all to make. I’ve made this cold pasta salad more times than I can count since I started cooking at home again, and it’s become the dish I reach for when I want something that feels a bit more special without actually being more work. The avocado brings all the creaminess, so there’s no heavy mayo-based dressing muddying it up. The olive oil and lemon juice keep everything bright, and the bacon adds just the right amount of salty crunch.

    Cold avocado pasta salad with bacon, tomato, basil, and parmesan

    Why this works

    Two things do the heavy lifting here. One: the pasta gets dressed while it’s still warm, so the olive oil and lemon cling to every noodle instead of sitting on top. Two: the avocado goes in last and gets folded in gently, so it keeps its shape and stays that vivid green instead of turning to mush in the bowl.

    What you need

    • 8 oz bowtie pasta
    • 2 avocados, peeled and diced
    • 2 roma tomatoes, diced
    • 1/4 cup fresh basil, chopped
    • 1/4 cup bacon pieces
    • 1 tsp minced garlic
    • Salt and pepper
    • 3-4 tbsp olive oil
    • 1 tbsp lemon juice
    • 2 tbsp shredded parmesan

    For the kitchen: a large pot, a colander, a cutting board, a knife, a large bowl, and a silicone spatula. That’s the whole toolkit.

    Makes 8 servings. 15 minutes of prep, 11-12 minutes of cook time, plus 1 hour of chill time. If you’re short on time, you can serve it after 20 or 30 minutes — it’s good warm-ish. But an hour in the fridge makes it noticeably better.

    How to make it

    1. While the pasta cooks, dice the avocado and tomato and chop the basil. Set them aside.
    2. Cook the bowtie pasta in a large pot of salted water according to the package directions. Drain it in the colander and run cold water over it for a few minutes until it’s cool enough to handle.
    3. Put the cooked pasta in a large bowl with the olive oil, lemon juice, minced garlic, and salt and pepper. Toss it well so every noodle is coated.
    4. Once the pasta is cooled, fold in the avocado, tomato, basil, and bacon. Use the spatula, go gently — you don’t want to crush the avocado.
    5. Cover the bowl and chill it for 1 hour, or until you’re ready to serve.
    6. Give it one last toss, top with the parmesan, and serve.

    Make it your own

    This is a flexible salad, and I change things up depending on what’s in the fridge:

    • Add mozzarella: fresh mozzarella pearls or cubes make it more filling and give it a caprese-pasta-salad feel.
    • Use cherry tomatoes instead: halved cherry or grape tomatoes hold their shape a little better if you don’t have romas on hand.
    • Toss in some corn: grilled or canned corn adds sweetness and pairs really well with the avocado and bacon.
    • Add grilled chicken: sliced grilled chicken or diced rotisserie chicken turns this from a side into a full meal.
    • Try a balsamic drizzle: a light drizzle of balsamic glaze right before serving adds a touch of sweetness that works nicely with the basil and tomatoes.
    • Use a different pasta: bowties look great, but rotini or penne work too — anything that holds onto the olive oil dressing.

    Leftovers and storage

    Store the leftovers in an airtight container in the refrigerator for up to 1-2 days. The avocado will start to brown as it sits, so this is best served the same day if you can. A squeeze of extra lemon juice over the top before storing helps slow the browning, and give it a good toss before you re-serve.

    My notes from the kitchen

    • Use ripe but firm avocados. You want them ripe enough to be creamy, but still holding their shape when diced. Too soft, and they turn to mush the moment you toss the salad.
    • Fold, don’t stir. A gentle fold with the silicone spatula keeps the avocado pieces intact. A spoon and a vigorous stir do not.
    • Dress the pasta first, then add the mix-ins. Tossing the noodles with the olive oil, lemon, and garlic before the softer ingredients go in means everything gets coated without the avocado getting mashed.
    • Use fresh basil, not dried. In a cold salad, dried basil just can’t match the bright, aromatic flavor of the fresh stuff.
    • Add the parmesan right before serving. It keeps the cheese fresh and gives the salad a nice finishing touch.
    • If you’re making it ahead, squeeze extra lemon juice over the diced avocado. The acid slows the browning so it still looks fresh when you serve it.

    Questions I actually get

    Can I make this ahead? You can prep the pasta, dressing, bacon, and tomatoes ahead of time, but I’d add the avocado and basil right before serving. The avocado browns and the basil wilts once they sit for too long.

    How do I keep the avocado from turning brown? Lemon juice is your best friend. The dressing already has lemon in it, which helps. If you’re making it ahead, squeeze a little extra lemon directly over the diced avocado before you fold it in.

    Can I use pre-cooked bacon bits? Yes. Store-bought bacon pieces work fine and save you a step. Real bacon pieces — not the shelf-stable imitation kind — give you the best flavor and texture.

    What olive oil should I use? Extra virgin. Since you’re not cooking it, you’ll really taste the olive oil, so use one you actually like.

    Is this good for potlucks? It’s a great potluck dish, but serve it soon after making it so the avocado stays green and fresh. If you’re transporting it, keep the avocado separate and fold it in right before serving.

    Can I skip the bacon to make it vegetarian? Absolutely. Without the bacon, the avocado, basil, garlic, and lemon still carry the flavor. If you miss the crunch, add toasted pine nuts in its place.

    Trade-It Tip

    No bacon on hand? Crispy chickpeas from a can work in a pinch — same crunch, a little less salt, and they keep the salad fully plant-based.

    If it doesn’t fit a Tuesday night, it doesn’t get published.

    Keep Reading

  • Sheet Pan Crispy Rice (The Viral TikTok Recipe, Kitchen-Tested)

    Sheet Pan Crispy Rice (The Viral TikTok Recipe, Kitchen-Tested)

    The other night I opened the fridge, found a tub of yesterday’s rice staring up at me, and felt that familiar wave of ‘I don’t actually want to reheat rice again.’ Instead of the usual sad microwaved leftovers, I did something a little chaotic: I coated it in a savoury sesame-chilli sauce, spread it on a sheet pan, and let the oven do the work. It came out golden, crisp at the edges, still a bit chewy in the middle — and my kids asked for it the next day. Twice.

    40 minutes start to finish. One pan. No frying, no babysitting, no third pot in the sink. If that’s not the good kind of simple, I don’t know what is.

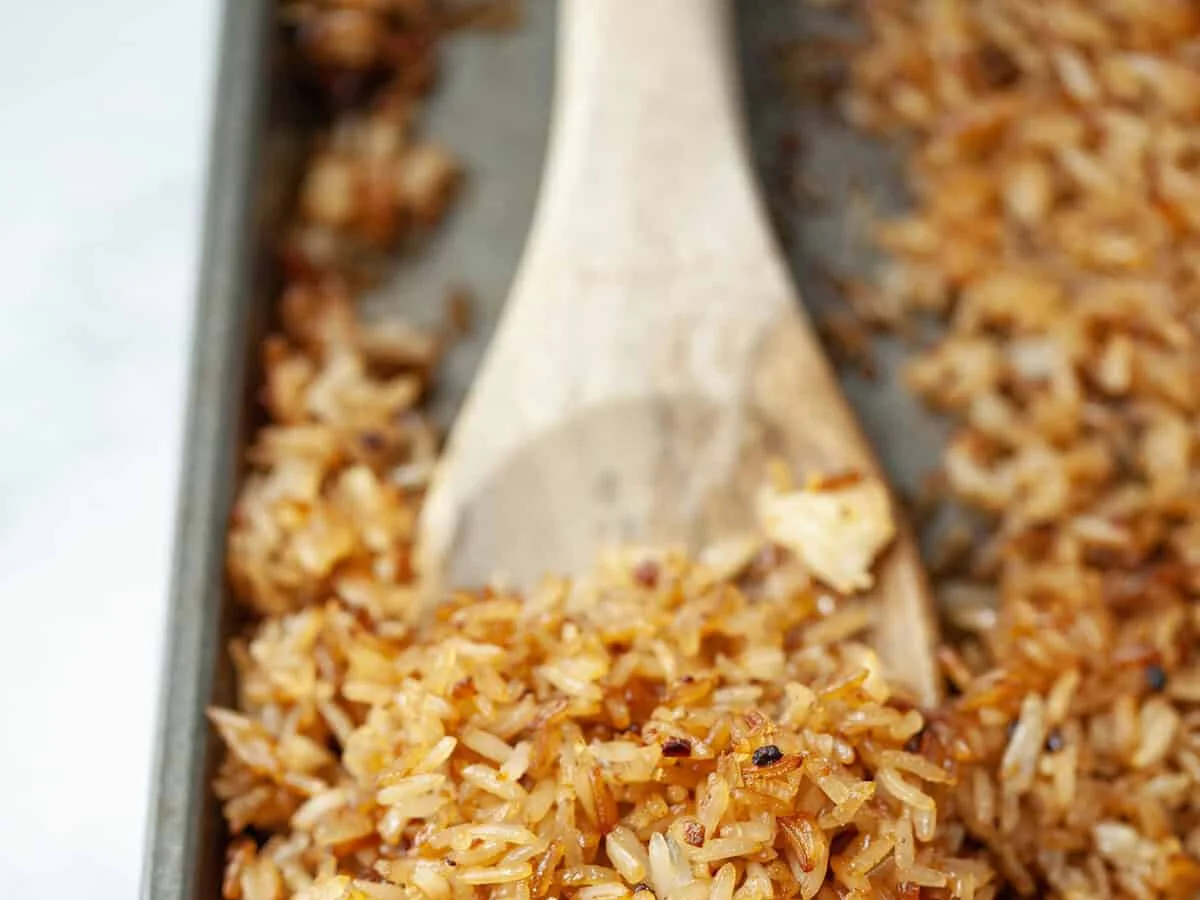
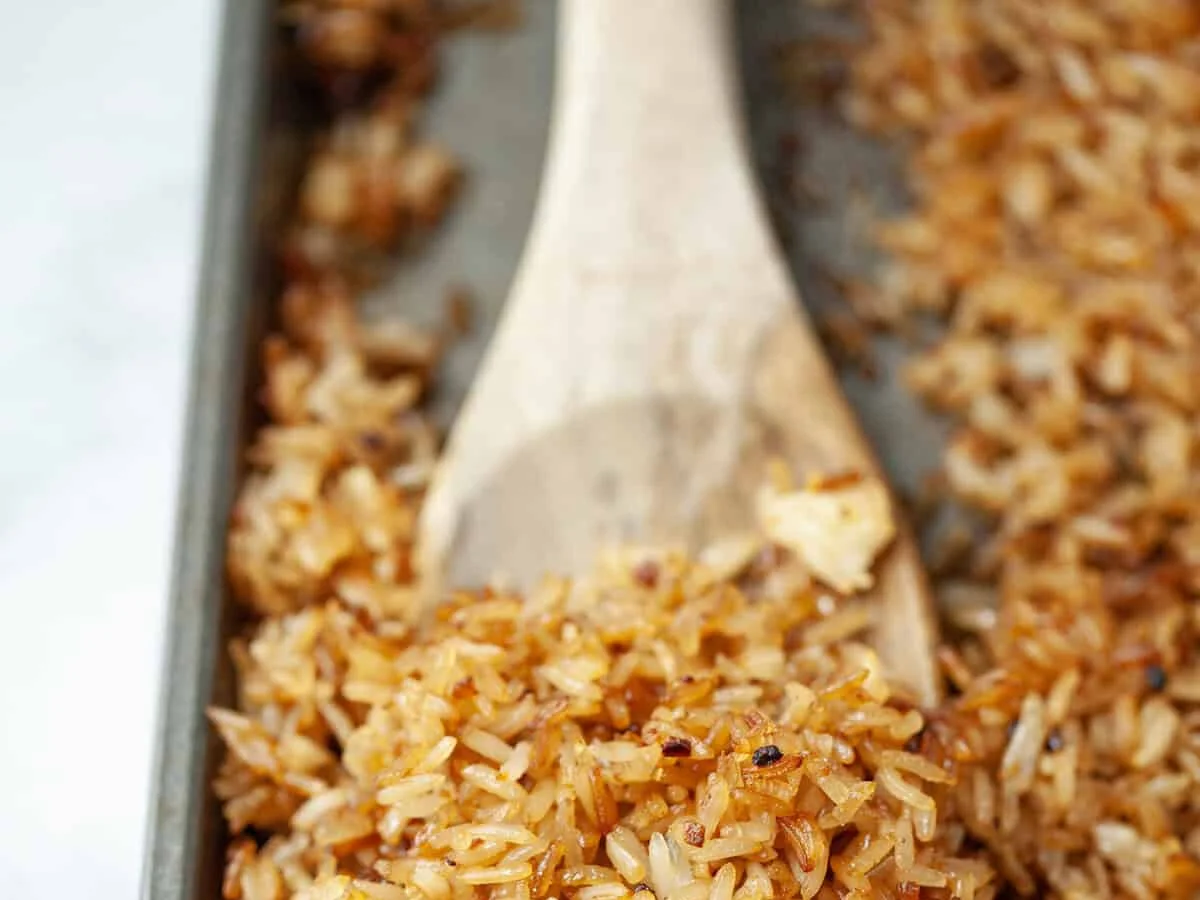
    Golden crispy rice on a baking sheet with wooden spoon

    Why this works

    Day-old rice is drier than fresh rice, so every grain crisps up instead of steaming in its own moisture. And a flat sheet pan gives the rice way more exposed surface than a pot ever could — more surface, more crunch. You just need to stir it a few times so it bakes evenly.

    What you need

    Five things, all the sort of stuff that’s probably already in your pantry:

    • Cooked jasmine rice — leftover from a day or two ago is the move. Day-old rice is drier and crisps up far better. (I keep a batch of my Instant Pot jasmine rice going for exactly this reason.)
    • Sesame oil — the rice needs oil to crisp, and this one adds a proper nutty depth.
    • Tamari — a gluten-free soy sauce. Plain soy sauce works just fine if gluten isn’t a thing in your household.
    • Chili garlic crisp — aka chilli crisp: fried chilli and garlic in oil, the stuff that makes everything taste like a takeout window. It adds heat and texture; adjust to your tolerance.
    • Rice wine vinegar — just a splash, for the tang that keeps it all bright.
    Crispy rice ingredients: rice, sesame oil, tamari, chili crisp, vinegar

    How to make it

    Preheat your oven to 200°C (400°F).

    1. Whisk the sauce. In a small bowl, stir together the sesame oil, tamari, chilli garlic crisp, and rice wine vinegar. That’s the whole ‘sauce’ — no cooking, no measuring obsession.

    2. Coat the rice. Tip the cooked rice into a big bowl, pour the sauce over the top, and toss until every grain is coated. A spoon works. So does your cleanest hand, if we’re being honest.

    3. Spread it out. Transfer the rice to a 13″ x 9″ (33cm x 23cm) baking sheet and spread it into an even layer. Big clumps are the enemy — they steam, they don’t crisp.

    4. Bake and stir. Roast for 30 to 37 minutes, stirring every 10 to 15 minutes, until the rice is properly crispy and the edges are golden. Yes, you have to open the oven a few times. It’s the price of crunch.

    5. Cool a few minutes. It keeps crisping up while it cools on the pan, so give it a little time before you pile it into bowls.

    How to get the crispest rice

    • Start with cold, day-old rice. Freshly cooked rice is too wet and will steam instead of crisp. A day or two old is the sweet spot.
    • Don’t skip the stirring. Tossing every 10 to 15 minutes is what gets every single grain crisp instead of half-burnt, half-mushy.
    • Keep the layer even. Anywhere you pile it up, you lose the crunch in that spot.
    • Let it rest. The rice firms up further as it cools — the version out of the oven is still doing its thing.
    Crispy rice spread in an even layer on a sheet pan

    What to do with it

    • Toss it into poke bowls or sushi-style bowls for the crunch layer.
    • Serve it beside grilled teriyaki chicken.
    • Swap it in for croutons on Asian-style salads, or use it as a base for stir fries.

    Storing and reheating

    It keeps in an airtight container in the fridge for up to 4 days. To reheat, bake at 190°C (375°F) for 5 to 8 minutes, or pop it in the air fryer until it’s crisp again. The microwave works in a pinch — but it won’t give you back the crunch, so manage your expectations.

    The recipe

    Sheet Pan Crispy Rice — 5 minutes prep, 35 minutes in the oven, 40 minutes start to finish, serves 8

    • 4 cups cooked jasmine rice (cooled; best if next-day)
    • 2 tablespoons sesame oil
    • 2½ tablespoons tamari (or soy sauce)
    • 2 tablespoons chilli garlic crisp
    • 1 tablespoon rice wine vinegar

    Preheat oven to 200°C (400°F). Whisk the sauce ingredients together in a small bowl. Add the rice to a large bowl, pour the sauce over, and toss until every grain is coated. Spread in an even layer on a 13″ x 9″ baking sheet. Bake 30–37 minutes, stirring every 10–15 minutes, until crispy. Cool a few minutes on the pan, then serve.

    Recipe credit: the original version lives over at Joyful Healthy Eats — I’ve kitchen-tested mine in my own oven and it behaves.

    Trade-It Tip

    No tamari? Regular soy sauce works — same depth, same salt. No chilli garlic crisp? A spoonful of chilli oil plus a minced clove of garlic gets you 80% of the way there.

    If it doesn’t fit a Tuesday night, it doesn’t get published. This one fits in the oven while the kids do homework, which is about as good as it gets.
    Keep Reading