I used to think a weekly meal plan meant a spreadsheet, a color-coded fridge, and a shopping list longer than the grocery store aisles. Then I got over it. A plan is just the good kind of simple: pick the week’s dinners in one sitting, buy the groceries, and let the leftovers do half the work for you.
This week’s menu: Thai coconut shrimp curry with a Thai quinoa salad, grilled steak tacos with corn and avocado salad, Mediterranean chicken over rice or pasta, pressed Italian sandwiches with a tortellini pasta salad, a BLT salad with peaches, and breakfast egg muffins. One daily main, mix-and-match sides, and nothing on here that can’t be done on a weeknight.
What’s on the menu
Thai coconut shrimp curry with Thai quinoa salad
Grilled steak tacos with corn and avocado salad
Mediterranean chicken over rice or pasta
Pressed Italian sandwiches with tortellini pasta salad
BLT salad with peaches
Breakfast egg muffins
Shopping, without the second trip
Before you head to the store, steal these shortcuts. They’re the difference between one calm trip and two.
Swap or add your favorite veggies in the shrimp curry, the Mediterranean chicken, and the side salads. If something’s on special, use it.
Fresh tortellini lives in the grocery store refrigerator section; frozen works fine from the freezer section. Either way, grab some.
Short on fresh corn for the corn salad? Canned or frozen is a fine stand-in.
Buy artichoke hearts packed in water, not oil.
Flat iron steak is a very affordable cut and totally delicious, especially after a relaxing dip in an acidic marinade.
Mix and match the meats and cheeses in the sandwiches however you like, but variety is key.
Mix up your greens with romaine, arugula, baby kale, little gem, and/or leaf lettuce.
I love thick-cut applewood smoked bacon for the BLT salad. It’s the one splurge worth keeping on the list.
The egg muffin recipe calls for ham and cheese, but use whatever you have leftover at the end of the week — the bacon from the BLT salad, the cheese from the sandwiches, whatever veggies are on hand. It’s a cleanup recipe by design.
One more thing: the original post comes with a printable shopping list. The source’s interactive shopping cart tool is gone, but you can still pull the list from the original meal plan — select the meals you want, adjust serving sizes, and print.
Meal prep and leftover tricks
Here’s where the plan actually saves you time. Every dish this week is built to carry forward.
Thai coconut shrimp curry. The curry lasts up to 5 days in the fridge. Reheat leftovers gently over medium heat or in the microwave — and go easy on the microwave, because shrimp goes dry and rubbery fast when you push it.
Grilled steak tacos. I normally marinate the meat overnight, or at least all day, for max flavor. But I’ve made these with just 1 hour of marinade time and they turned out just as smoky and adobo-flavored. In a rush? An hour is fine.
Mediterranean chicken. Serve the chicken and its sauce over a bed of pasta, rice, or couscous. Whatever you had in the pantry wins.
Pressed Italian sandwiches. Wrap the sandwiches in plastic wrap before pressing. It contains all the layers and makes for a cleaner bite — trust me on this.
BLT salad with peaches. For easy meal prep, make the dressing and the croutons ahead of time. If the croutons have gone soft, reheat them gently in a skillet, just to warm them back up.
Egg muffins. These will keep in an airtight container in the fridge for about 4 or 5 days, and in the freezer for about 3 months. The best breakfast you can start the week with is the one you didn’t have to make that morning.
Two sides, made easy
Grilled corn and avocado salad. Fresh summer corn is the cornerstone of this one, but canned or frozen works if you need it. The avocado does the heavy lifting either way.
Tortellini pasta salad. Choose spinach and cheese tortellini, or a mix of your favorite multi-color tortellini. Use diced or cubed fresh mozzarella, tiny mozzarella pearls, or a combination. Hothouse or English cucumbers work just as well as Persian cucumbers.
Why this works
Every main this week keeps for days, so you’re really cooking four dinners and eating six. The egg muffins stretch into lunch. The pasta salad and corn salad are the kind of sides you can make once and not think about. That’s the whole trick: less cooking, more eating, zero decisions at 6 p.m.
Trade-It Tip
No flat iron steak? A sirloin or skirt cut works in the same marinade. And if you’re out of Persian cucumbers, English or hothouse cucumbers are a like-for-like swap in the pasta salad.
If it doesn’t fit a Tuesday night, it doesn’t get published.
The sink in my kitchen has a rule I learned the hard way: healthy dinner should never mean three pans and a mountain of dishes. If a recipe needs four burners, it doesn’t survive my weeknights. This soup needs one pot, one blender, and a bag of greens that’s quietly wilting in the fridge.
I first met this recipe through a green pasta sauce that went viral back in 2023. Chef Caroline Chambers says she’d gotten something like a thousand messages from readers who kept eating the sauce “like soup.” So she made a hella green soup. It does the same trick as that sauce: it takes a whopping pile of vegetables and turns it into one harmonious, creamy spoonful. No prepping for hours. No fancy equipment. Just the good kind of simple.
Why this works: Steaming the greens first keeps them bright and tender instead of soggy, and blending them into a silky base means every spoonful tastes like the whole pile of vegetables — without any of the “I’m eating a salad” guilt. The cream rounds it out, but it’s a small amount, so it stays feeling like a clean dinner.
I made a double batch the first time. My kids demolished it in two days and asked for it back. Make a double. Trust me.
About 40 minutes, start to finish — including chopping and blending. Serves 4 (or 2 of us for two days, which is what actually happens in this house).
Hella Green Soup with Garlic Toasts
Recipe reprinted with permission from What to Cook When You Don’t Feel Like Cooking: Make it Fast, by Caroline Chambers.
Soup
1 pound fresh spinach
1 pound lacinato kale
1 large white or yellow onion
2 celery stalks
2 Yukon Gold potatoes (about 12 ounces)
3 garlic cloves
1/4 bunch mint
Extra-virgin olive oil
Kosher salt
1 tsp ground coriander
1 tsp ground cumin
4 cups low-sodium vegetable stock
1/2 to 1 cup heavy cream (see vegan note below)
Vegan version: skip the cream and use coconut milk, or add 1/2 cup raw unsalted cashews when you add the stock. Same texture, different label.
Garlic Toasts
1 small baguette, or 1/2 loaf crusty bread, sliced into 4 pieces
Extra-virgin olive oil
2 garlic cloves
Flaky sea salt
How to Make It
Set a rack in the center of the oven and turn the broiler to high. Trim the stems off the spinach and kale, rinse the leaves, and leave some water clinging to them — it becomes your steaming liquid.
Put the spinach and kale in a large pot. If you’re using pre-washed spinach, sprinkle in 2 to 3 tablespoons of water instead. Cover and cook over medium-high heat until the leaves are wilted and the stems are softening (3 to 4 minutes).
Use tongs to move the cooked greens straight into a high-powered blender. Repeat until all the greens are in. Blend on high until completely smooth (3 to 4 minutes). Pour the liquid back out of the pot and set the blender aside.
Dice the onion, celery, and potatoes. Mince the garlic. Roughly chop the mint leaves — you want about 1/2 cup.
Warm 2 tablespoons of olive oil in the same pot over medium heat. When it shimmers, add the onion, celery, and 1 teaspoon of kosher salt. Cook, stirring now and then, until softened but not browned (about 8 minutes).
Stir in the garlic and cook until fragrant (about 30 seconds). Add the coriander and cumin and cook another 30 to 60 seconds until the spices wake up.
Add the potatoes and the stock. Bring to a boil over medium-high, then lower to medium, partially cover, and simmer until the potatoes are very tender (15 to 20 minutes).
While the soup simmers, make the toasts. Lay the bread slices on a rimmed baking sheet and brush both sides with olive oil. Broil until golden brown (1 to 2 minutes per side). While they’re still warm, peel and halve the garlic cloves and rub each one over the surface of the toasts. Finish with flaky salt.
Stir the pureed greens and the chopped mint into the soup. Working in batches, blend the soup in the blender on medium-high until very smooth (about 1 minute). Return it to the pot.
Stir in 1/2 cup of the cream, or more if you like it richer. Taste and add more salt if it needs it.
Ladle into bowls. Serve the toasts whole, or break them into crouton-size pieces and float them on top. Bonus: for an extra-smooth, fancy bowl, strain the soup through a fine-mesh strainer and top with little dots of leftover cream.
Two Things That Save This Recipe
Use a real blender. A food processor or an immersion blender will struggle with this much green. I learned this the expensive way. If you’re blending hot liquid, never fill the blender more than halfway, and take the center cap off the lid before you start — cover the lid with a folded kitchen towel so the steam can escape instead of building up pressure that can blow the lid off.
Make a double. This freezes well, and a pot of this in the freezer is the difference between a Tuesday night dinner and takeout. I keep one in there at almost all times.
Trade-It Tip: No lacinato kale? Regular curly kale works — you’ll want to trim a bit more of the stems. No mint? A few leaves of basil get you close enough, and the soup still comes out great.
Caroline’s book, What to Cook When You Don’t Feel Like Cooking: Make it Fast, comes out August 11. You can pre-order it here if the title alone sells you, because it does.
If it doesn’t fit a Tuesday night, it doesn’t get published.
The turkey is for the adults. Everyone knows that. The part that wrecked me for years was the quiet second menu — the one I cobbled together in a panic because my kid would push everything else around the plate while someone across the table asked why he wouldn’t just try it.
These 27 dishes solve that without doubling your work. They live on the main table and the kids’ table at the same time. Mashed Potato Cups bake in a muffin tin so little hands can grab them, and the Mini Turkey Meatballs taste like breakfast sausage had a holiday. Most of them can be made the day before and just warmed up while you keep an eye on the bird.
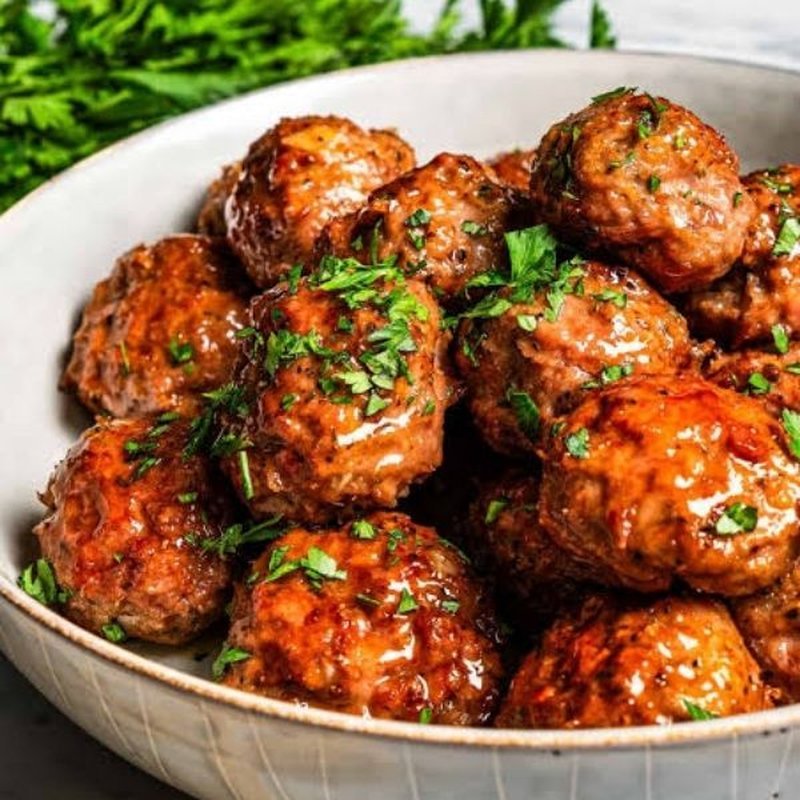
1. Mini Turkey Meatballs with Maple Glaze
These are the ones that vanish first, because they taste like breakfast sausage that met Thanksgiving. Mix ground turkey (about $6/lb) with breadcrumbs, a little sage, and maple syrup, then bake on a sheet pan for 20 minutes at 375°F. The glaze is just maple syrup warmed with a tiny bit of butter. You’re looking at roughly $8 for 30 meatballs, and they reheat the next day. Stick toothpicks in them so they feel fancy and the kids don’t need utensils.
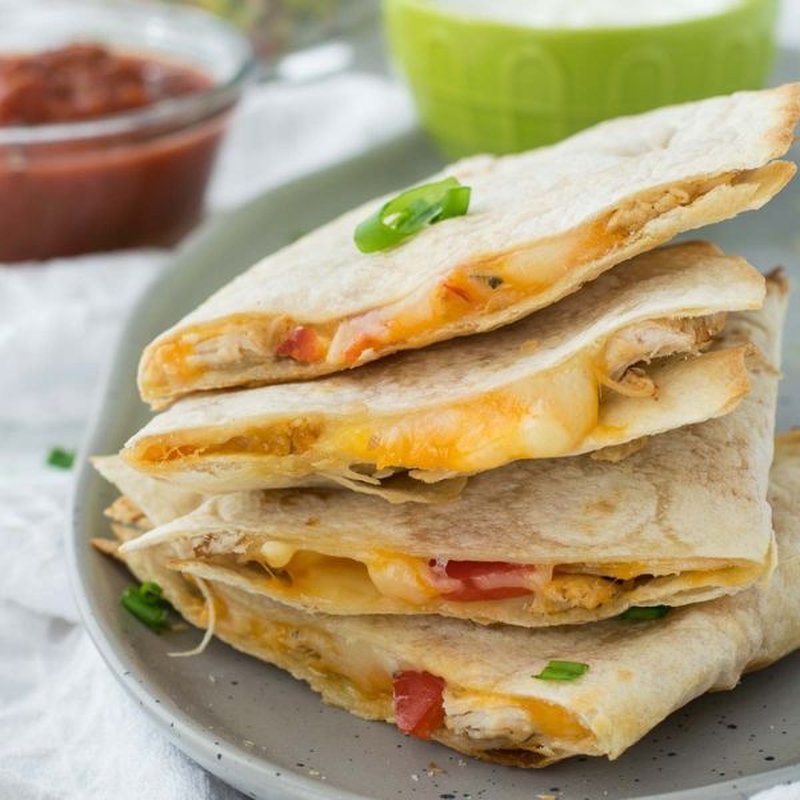
2. Cheese Quesadilla Triangles with Turkey Inside
When a kid sees a quesadilla, they stop panicking about Thanksgiving food they’ve never tasted. Use flour tortillas (about $3/pack), shredded cheddar ($3.50 for 8oz), and finely chopped leftover turkey. Cook in a pan until crispy, cut into triangles, and you’ve got a Thanksgiving meal a four-year-old will eat. The whole batch runs about $7 and takes maybe 10 minutes. Serve with a small bowl of gravy for dipping.
3. Mashed Potato Cups in a Muffin Tin
These become individual portions a kid can claim as “mine” without a fight over the serving spoon. Make your regular mashed potatoes (5 lbs of potatoes runs about $4; add butter and milk and you’re at maybe $7 total), scoop them into a greased muffin tin, top with shredded cheese, and bake at 375°F for 20 minutes until the edges turn crispy. You’ll get 12–18 cups depending on the tin. Press a little divot in the center before baking and it becomes a perfect gravy holder.
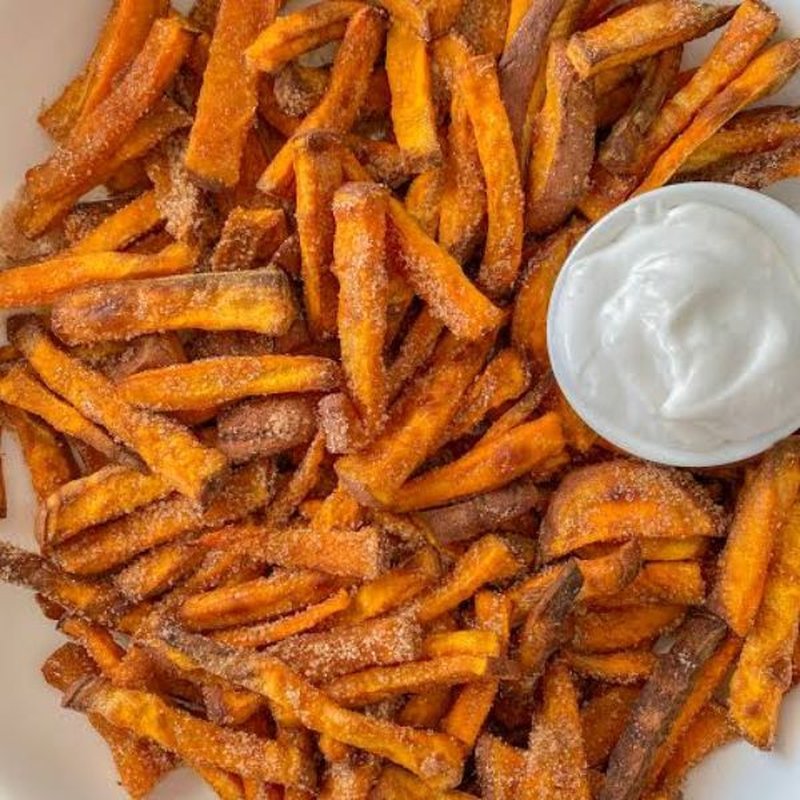
4. Sweet Potato Fries with Cinnamon Sugar
The kid who won’t touch sweet potato casserole will eat these, because they look like regular fries. Cut sweet potatoes into sticks (3 large ones cost about $3), toss with a little oil, and bake at 425°F for 25 minutes, flipping halfway. Some kids want them savory with salt, others want cinnamon and sugar sprinkled on after baking — so make half each way. The cinnamon sugar version tastes like dessert but counts as a vegetable, which feels like winning.
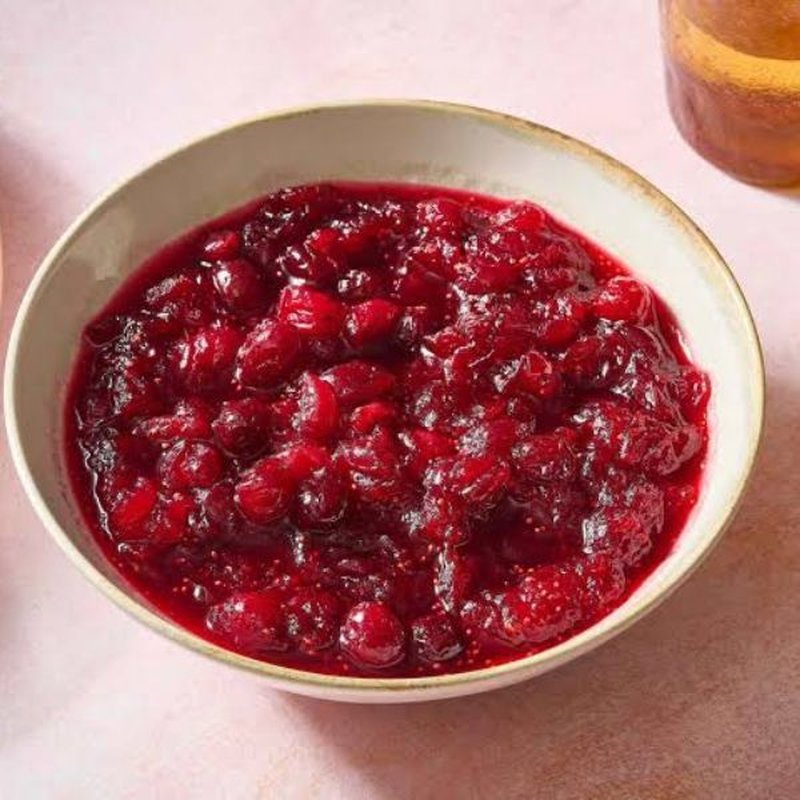
5. Cranberry Sauce with Orange Juice Instead of Water
Most kids think cranberry sauce looks scary until they taste this version, which is less tart and closer to jam. One 12oz bag of fresh cranberries costs around $3; add a cup of sugar and orange juice instead of water. Simmer 10 minutes and it’s done. Make it two days ahead so it’s fully chilled and has that jelly-like texture kids prefer. The whole thing is $4 total and makes enough for 8–10 servings.
6. Cornbread Muffins with Honey Butter
Plain boxed cornbread (about $2) becomes something when you bake it in muffin tins and put honey butter on the side. Mix one box according to the directions, fill the cups, and bake for 15 minutes. The honey butter is equal parts softened butter and honey mixed together — maybe $2 for a whole bowl. Kids love having their own muffin instead of a square cut from a pan. Freeze extras for up to a month.
7. Green Beans Wrapped in Crescent Rolls
Steam fresh green beans (about $2.50/lb) for just 3 minutes so they stay crispy, wrap small bundles in crescent roll dough ($3/tube), and bake per the package. It’s a green bean pig in a blanket. The roll gets buttery and flaky, the beans stay crunchy, and kids will eat vegetables wrapped in bread without a word. Prep these the morning of and bake right before dinner. One tube makes about 8 bundles, and the whole thing runs $5.50 or less.
8. Mac and Cheese with Butternut Squash Hidden Inside
Your kid sees orange mac and cheese and doesn’t question it, because plenty of mac and cheese is orange. Use a box of pasta ($1.50), make a cheese sauce with shredded cheddar ($3), and blend in roasted butternut squash ($2 for a small one). Total around $7, and it feeds 6–8 kids easily. The squash makes it creamier and adds Thanksgiving flavor without announcing itself. Bake it in a dish with a breadcrumb topping if you want it fancier.
9. Turkey Sliders on Dinner Rolls
Kids eat more turkey when it’s on a tiny bun they can hold themselves. Get a package of 12 dinner rolls (about $3), slice them in half, add thin-sliced deli turkey ($5/lb gets you enough for 12 sliders) and a slice of mild cheese. Warm in the oven at 325°F for 10 minutes so the cheese melts. Set up a little topping station and let them build their own. This keeps the kids’ table busy for an extra 10 minutes while the adults finish eating.
10. Roasted Carrots with Brown Sugar Glaze
Even vegetable-refusing kids eat these, because they taste like candy. Buy 2 lbs of baby carrots ($2.50), toss with melted butter, brown sugar, and a tiny pinch of salt, and roast at 400°F for 25 minutes. The brown sugar caramelizes and turns them sweet and sticky. You’ll spend under $4, and you can prep the pan earlier and just slide it in the oven. Roast longer if your kids prefer softer vegetables.
11. Pumpkin Pie Parfaits in Small Cups
For the kid who picks at pie but loves pudding, this works. Mix canned pumpkin puree ($2.50/can) with vanilla pudding mix ($1.50) and milk per the pudding directions. Layer into small clear cups with whipped cream and crushed graham crackers. You get about 8 servings for under $6 total. It tastes exactly like pumpkin pie, but there’s no crust to complain about and no fork required. Make these the day before and keep them in the fridge.
12. Corn Casserole That Tastes Like Cornbread
This is the side that saves dinner, because it’s slightly sweet and has a cake-like texture. Mix two cans of corn ($2 total), a box of cornbread mix ($2), sour cream ($2), and melted butter, then bake in a dish at 350°F for 45 minutes. Total around $7, and it serves 8–10 easily. It lives somewhere between cornbread and pudding, so kids who hate vegetables don’t even register it as one. Serve with a spoon, not a fork.
13. Apple Slices with Caramel Dip
When the desserts are too fancy or too pie-heavy, kids will eat this. Buy 3–4 apples ($4), slice them thin, and serve with caramel dip from a jar ($3). The whole spread runs $8 or less and feels festive without being another baked good. Put it on the kids’ table right when you sit down so they have something to munch on while plates are being passed. Squeeze lemon juice on the slices if you’re cutting them more than 30 minutes ahead.
14. Sausage Stuffing Balls
Kids who won’t eat regular stuffing will try these, because they look like meatballs. Use your favorite stuffing mix ($2.50), add cooked breakfast sausage ($4/lb), form golf ball-sized portions, and bake on a sheet pan at 350°F for 20 minutes. They hold together, they’re not mushy, and the sausage keeps them from tasting like bread. You’ll spend roughly $8 for 20 balls. Make them earlier and reheat for 10 minutes before serving.
15. Fruit Salad with Marshmallows and Whipped Cream
This is technically a salad so it goes on the dinner plate, but it tastes like dessert. Mix canned fruit cocktail ($2), mini marshmallows ($2), and Cool Whip ($2.50). It comes to about $7, takes 5 minutes to stir, and kids will eat fruit they’d normally refuse because of the marshmallows. Make it the night before so it gets cold and the marshmallows soften slightly. Some people add mandarin oranges or grapes if they want it fancier.
16. Biscuit Dough Wrapped Around Hot Dogs
For the kid who refuses everything Thanksgiving-related, this saves the day. Unroll canned biscuit dough ($2.50/tube), cut each biscuit in half, wrap it around hot dog pieces ($3/pack), and bake at 375°F for 12 minutes. They’re pigs in a blanket, they cost under $6 for about 16 pieces, and suddenly you have one fed, happy kid instead of a meltdown. Sometimes you just need kids to eat something so everyone can enjoy dinner.
17. Chocolate Pudding Cups with Crushed Oreos
When pecan pie and pumpkin pie get rejected, these get demolished. Make instant chocolate pudding ($1.50 for a box) per the directions, pour into small cups, and top with crushed Oreos ($3/package). You get 6–8 servings and the whole thing runs $5 or less. Kids love anything with Oreos, and the pudding is familiar and low-threat after a meal of unfamiliar food. Make these the morning of and stick them in the fridge. They’re portion-controlled and done in 10 minutes.
18. Pretzel Sticks with Cream Cheese Dip
When everything on the table looks brown and soft, this gives kids something crunchy they can control. A big container of pretzel sticks runs about $3, softened cream cheese is $2.50, and you can mix in a little ranch seasoning packet ($1) if your kids like flavor or leave it plain. The whole setup comes to about $7 and takes two minutes to put out. Set it before dinner starts so they can snack while the adults are still cooking.
19. Turkey and Cheese Pinwheels
For the kid who eats exactly three foods, this combines two of them. Spread cream cheese (about $2.50 for 8oz) on flour tortillas ($3/pack), add thin deli turkey ($5/lb) and shredded cheese, roll tight, and slice into 1-inch rounds. You get about 24 pinwheels for under $11, and they look like something off a fancy appetizer platter. Make them in the morning and refrigerate until dinner. Kids grab three or four without realizing they’re eating protein and dairy.
20. Roasted Broccoli with Parmesan Cheese
If your kid will eat pizza, they might eat this, because the cheese gets crispy and the broccoli tastes nutty instead of boiled-vegetable gross. Cut broccoli ($3/lb) into small florets, toss with olive oil and salt, roast at 425°F for 20 minutes, then sprinkle with grated Parmesan ($4 for a container that lasts forever). It comes in under $6 total for enough to serve 6 kids. The edges turn crunchy and almost chip-like, which is the texture that wins over vegetable skeptics.
21. Pull-Apart Garlic Butter Rolls
Fifteen minutes of work gets you bread kids will fight over instead of plain rolls they ignore. Buy frozen dinner rolls ($3 for 12), arrange them close together in a baking dish, brush with melted butter mixed with garlic powder, and bake per the package. They come out connected so the kids can pull them apart themselves. You’ll spend about $4.50 total including the butter. Let them cool for five minutes before serving, or the kids will burn their mouths and complain for the rest of the meal.
22. Jello Jigglers Cut Into Thanksgiving Shapes
Kids who won’t eat anything hot or mixed together will eat these. Make Jello ($1.50/box) with half the water the package calls for so it sets up firm enough to cut with cookie cutters. Pour into a 9×13 pan, refrigerate for 4 hours, then cut into leaves or turkeys or whatever shapes you have. One box makes about 20 pieces, and the whole thing totals around $2. Orange or red Jello feels seasonal without tasting like pumpkin or cranberry. Make these two days ahead and store them in a container with parchment between layers.
23. Baked Ziti with Ground Turkey
This tricks kids into eating Thanksgiving protein without it looking like turkey. Cook ziti ($1.50/box), brown ground turkey ($6/lb), mix with jarred marinara ($2.50), layer with mozzarella ($3.50), and bake at 375°F for 25 minutes. The whole pan costs around $10 and feeds 8 kids easily. It’s familiar comfort food that happens to use Thanksgiving ingredients. Assemble it the day before and bake it while the turkey rests.
24. Cucumber Slices with Ranch Dressing
For the kid who needs something cold and crunchy and completely un-Thanksgiving, this is the peace offering. Two cucumbers cost about $2, a bottle of ranch is $3, and you’ll use maybe a quarter of it. Slice the cucumbers into rounds, pour ranch into a small bowl, done. It takes 3 minutes and gives the vegetable-refusing kid something green they’ll actually eat. Sometimes a kid needs one safe food on their plate so they don’t spend the whole meal anxious.
25. Mini Pancakes with Syrup
When the meal lands at 2 pm and kids are confused about whether it’s lunch or dinner, pancakes make sense to them. Use pancake mix ($3), make silver dollar-sized pancakes on a griddle, and keep them warm in the oven at 200°F until serving. Add real maple syrup ($6, but you probably already have it) or the cheap stuff ($2). You’ll spend about $5 total and get 30–40 mini pancakes. Kids will eat eight of these and ignore everything else, but they’re fed and happy.
26. Applesauce in Individual Cups
This is the reset button when a kid is overwhelmed by too many new textures and smells. Buy individual applesauce cups ($3 for a 6-pack), put one at each kid’s place setting, and they suddenly have something familiar and safe. It’s cold, it’s smooth, it tastes like a regular Tuesday, and it calms down the kid who’s stressed about weird holiday food. It runs $4 or less for six kids and requires zero prep.
27. Graham Cracker Turkey Treats
Thirty minutes before dinner, hand kids these to decorate and you buy yourself peace. Each “turkey” is one graham cracker ($2.50/box), peanut butter or frosting to stick things on ($3), candy corn for the feathers ($2), and chocolate chips for the eyes ($3). You’ll spend about $11 total and get enough supplies for 12–15 turkeys. Kids are busy decorating instead of asking when dinner’s ready every five minutes, they feel involved in the holiday, and they get to eat their craft afterward. The crafts are ugly, but the kids are proud, and that’s really the point of a holiday table with kids anyway.
They’ll Eat, and Everyone Eats Together
You’ve spent enough holiday dinners watching food go untouched while relatives commented on your kids’ plates, and you’re done planning two separate menus. Start with the Mashed Potato Cups if you need something that looks fun but tastes traditional, try the Sweet Potato Fries if regular sweet potato casserole always gets rejected, or make the Mini Turkey Meatballs when you want protein they’ll finish. Most of these bake while you’re still working on the turkey, and the leftovers reheat better than the traditional sides anyway. You’re giving your family a dinner where everyone eats together, without the fight.
Trade-It Tip: No pumpkin puree on hand? A can of butternut squash puree works in the parfaits — same softness, a little sweeter edge.
If it doesn’t fit a Tuesday night, it doesn’t get published.
I used to think a restaurant-quality shrimp scampi meant three pans, a bottle of wine I didn’t want to drink, and a sauce that tasted like I’d stirred a stick of butter into a pot of water. Then I figured out the version I actually make at home — less butter, more olive oil, a squeeze of fresh lemon, and a pan of linguine that’s ready before the pasta finishes boiling. It’s the good kind of simple.
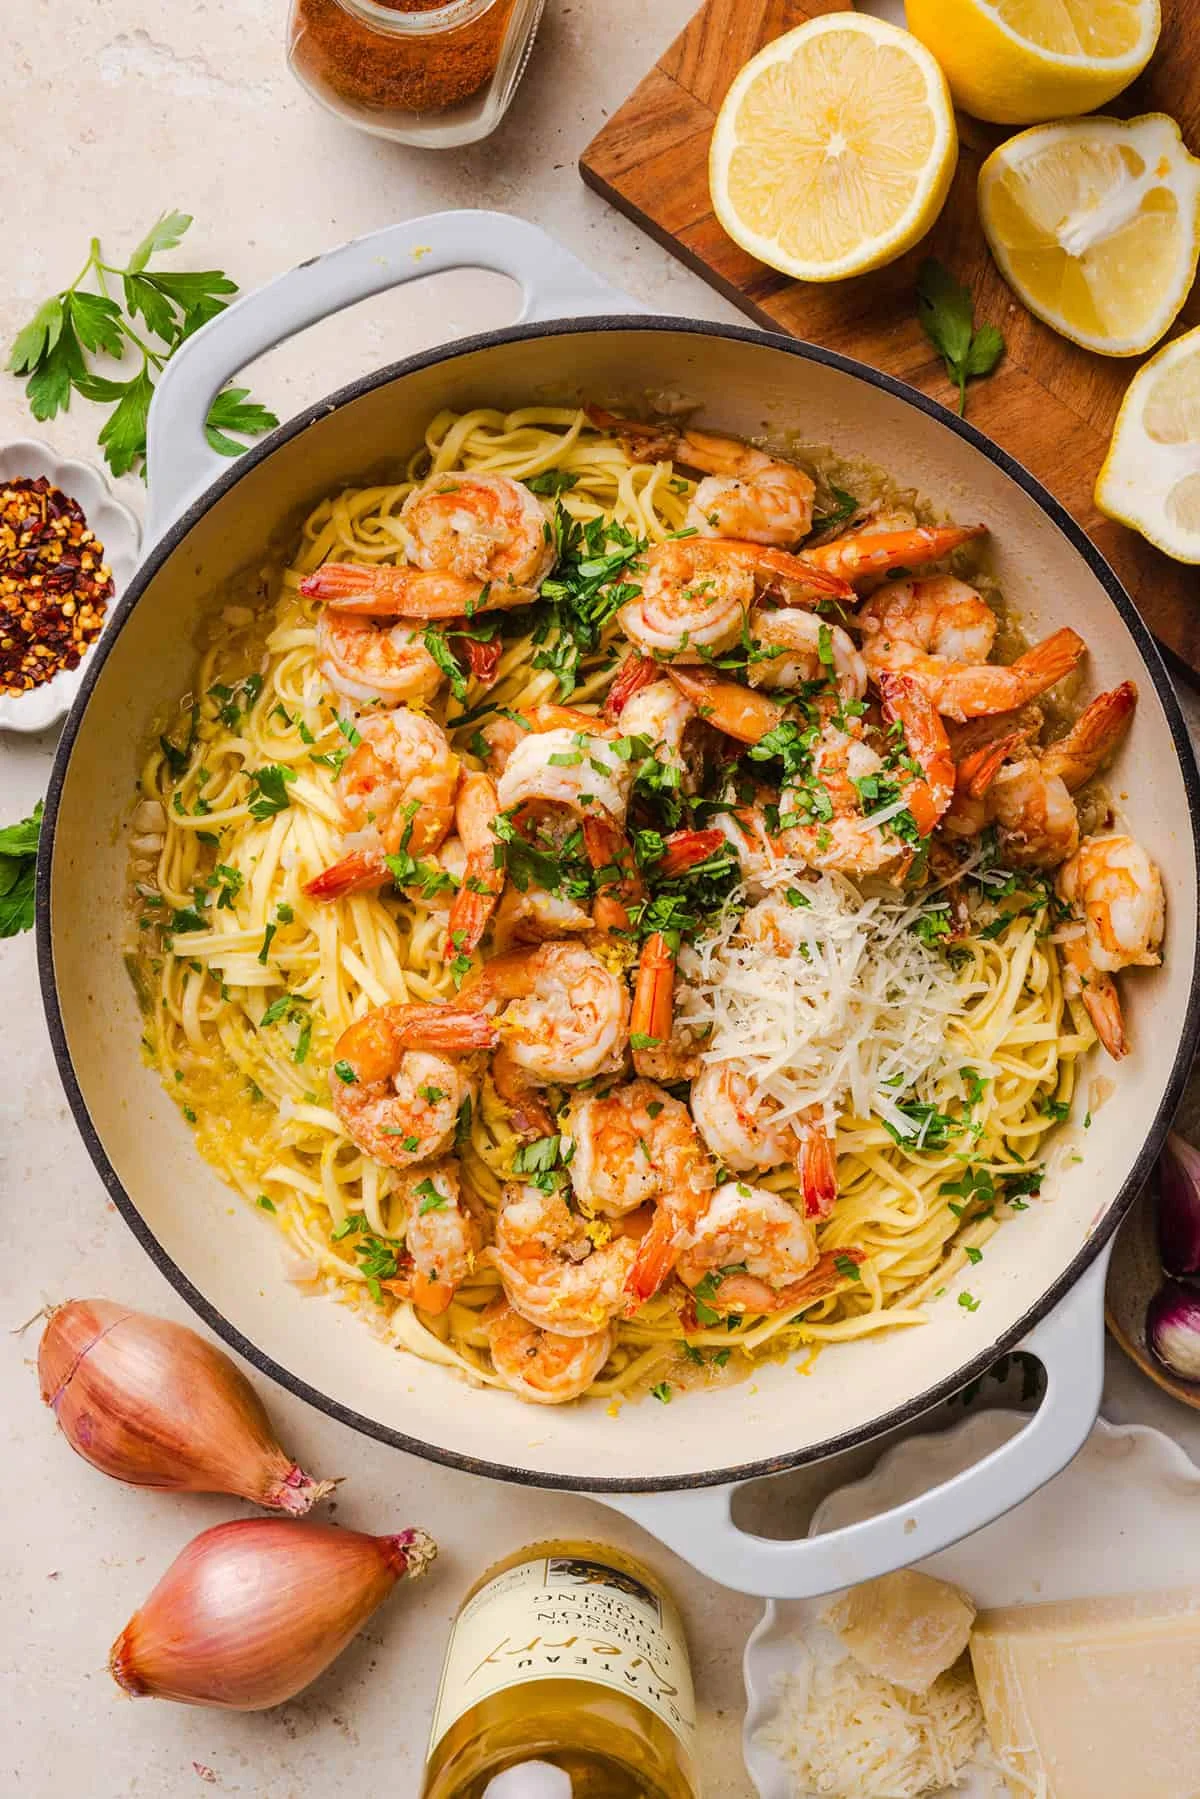
This is the dish I reach for when I want dinner to feel a little fancy without me having to dress up the kitchen. Shrimp get a quick sear, the garlic goes fragrant, the sauce simmers down for just a couple of minutes, and everything comes together in the same skillet. 30 minutes total, start to finish, prep and all.
Why this works
Shrimp cook in a couple of minutes and hold their flavor better when the sauce is light, so we swap most of the butter for olive oil and let lemon, garlic, and a little white wine do the talking. The result is a silky sauce that clings to the pasta without weighing the plate down. Shrimp also give you a lot of protein for very few calories, which is why this one keeps coming back to our table.
What you’ll need
I keep this list short on purpose. If you have a lemon and a jar of red pepper flakes, you’re 90% of the way there.
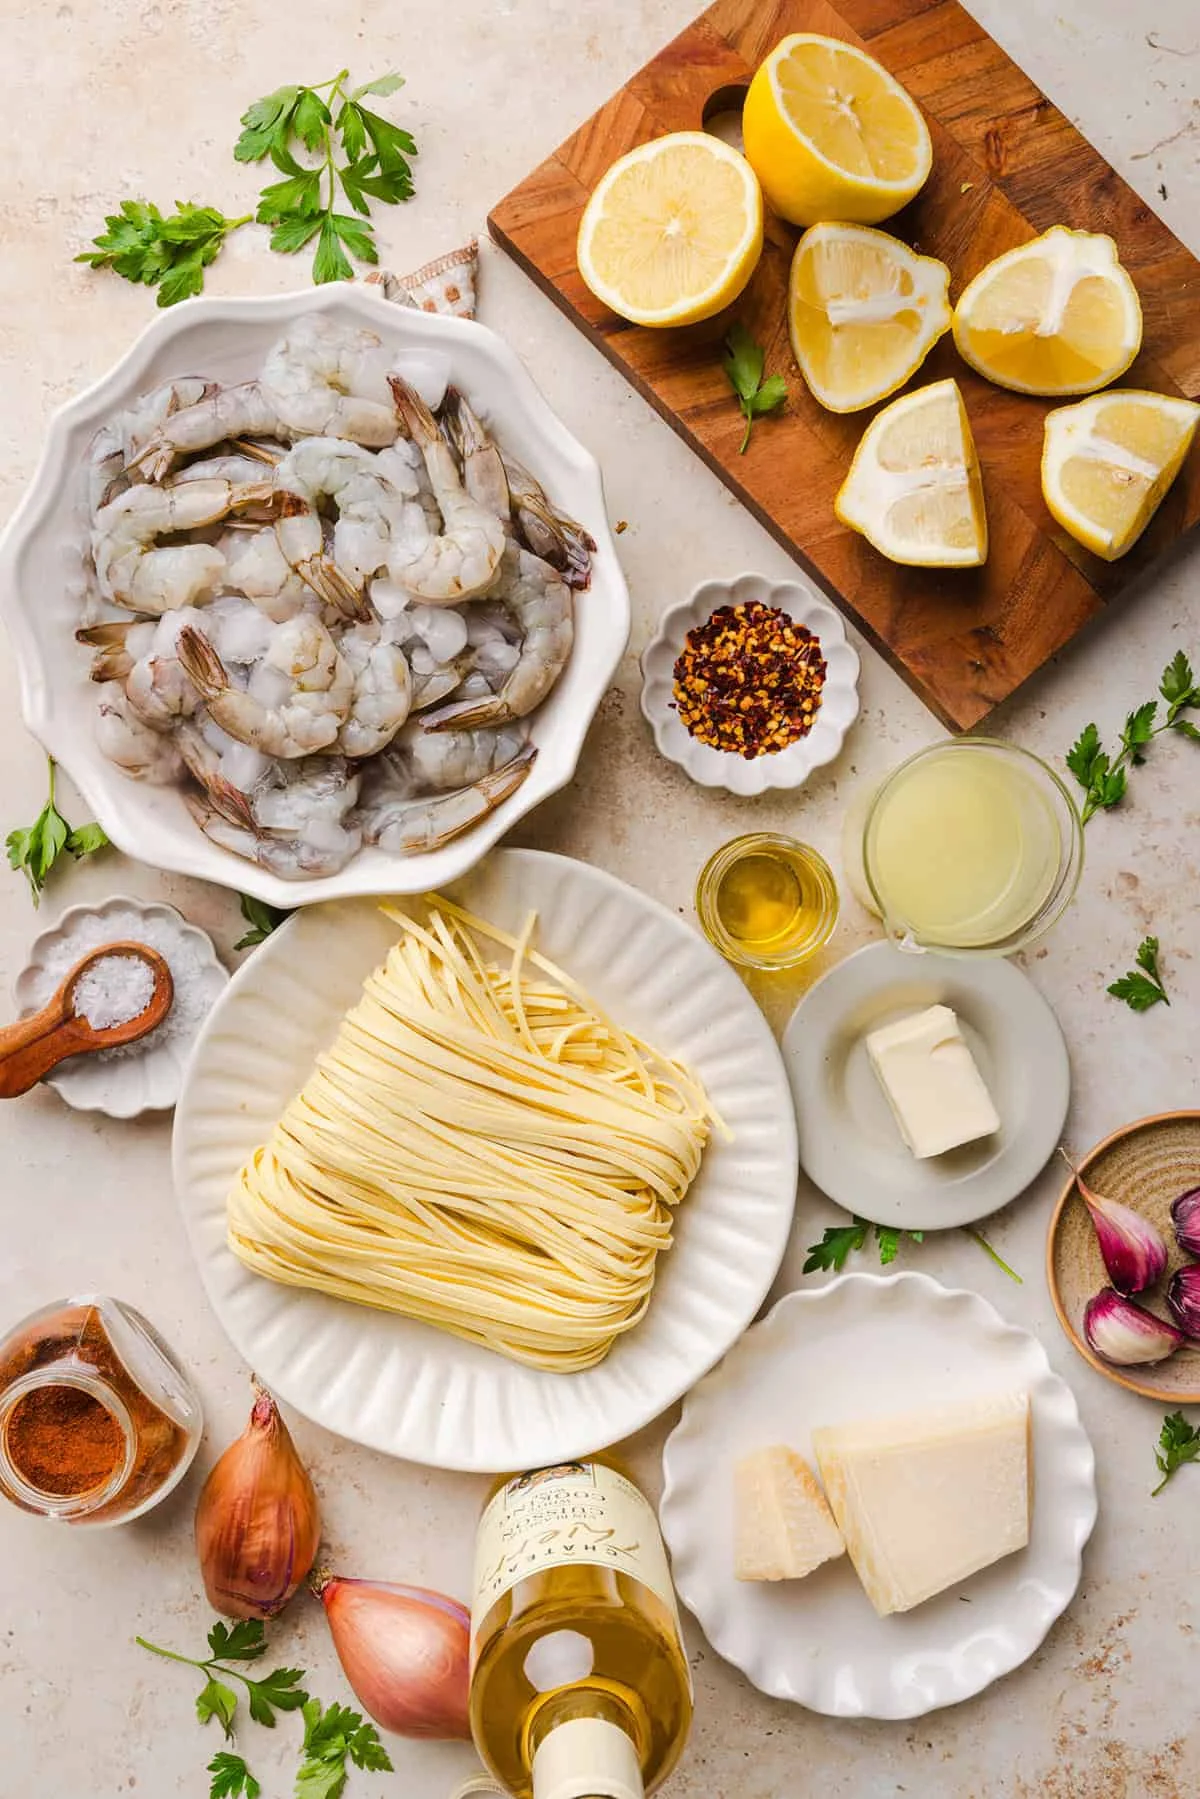
12 oz linguine — I use whole wheat, but spaghetti, fettuccine, or angel hair work fine too
1 1/2 lbs large shrimp, peeled and deveined — fresh or frozen, thawed completely if frozen
1/2 tsp each salt and black pepper
1/4 tsp paprika
3 Tbsp salted butter
2 Tbsp olive oil
2 medium shallots, finely chopped
6 cloves garlic, minced fresh
1/2 tsp crushed red pepper flakes
1/3 cup chicken broth (vegetable broth works too)
1/4 cup dry white wine — Sauvignon Blanc, Pinot Grigio, or Chardonnay
1 large lemon, zest and juice (about 3 Tbsp of juice)
2 Tbsp fresh parsley, finely chopped
2 Tbsp freshly grated Parmesan
A couple of notes on the list: jarred garlic is an emergency, not a plan — fresh is what makes scampi taste like scampi. And grate your own Parmesan; the pre-shredded stuff doesn’t melt the same way and can leave the sauce grainy.
How to make it
Cook the pasta. Bring a large pot of salted water to a boil and cook the linguine until al dente according to the package. Before you drain it, scoop out 1/2 cup of the starchy pasta water and set it aside — that’s the secret to a silky sauce.
Season the shrimp. Pat them thoroughly dry with paper towels, then season both sides with the salt, pepper, and paprika. Dry shrimp sear properly; wet ones steam and the sauce turns watery.
Soften the aromatics. Heat the olive oil and butter in a large skillet over medium heat. Add the shallots and cook 2 to 3 minutes until soft, then stir in the garlic and red pepper flakes and cook 30 more seconds until fragrant.
Cook the shrimp. Add them in a single layer and cook 1 to 2 minutes per side, just until pink and opaque. Pull them out onto a plate — they’re done the moment they curl into a loose “C” shape, and they keep cooking on the plate. Trust me, I’ve eaten rubbery shrimp more than once to learn this.
Make the sauce. Pour in the chicken broth, white wine, lemon juice, and zest, scraping up the browned bits from the bottom of the pan. Let it simmer 2 to 3 minutes until it’s slightly reduced.
Toss it together. Return the shrimp to the skillet with the cooked pasta and toss, adding a splash of the reserved pasta water as needed until the sauce coats everything lightly.
Finish and serve. Stir in the Parmesan and parsley, taste, and fix the seasoning with a little more salt or a squeeze of lemon if it needs it. Serve right away with extra Parmesan and lemon wedges.
Tips that actually matter
Don’t overcook the shrimp. Pink, curled, and just opaque means done. Overcooked means rubbery, and no amount of lemon fixes that.
Reserve plenty of pasta water. The starch in it is what makes the sauce cling to the noodles instead of pooling in the bowl.
Simmer the sauce gently. A slow simmer lets the wine cook down and the sauce stay light and balanced.
Fresh lemon, no exceptions. The juice and the zest together are what make this taste bright instead of just garlicky. Bottled juice can’t do that.
Pick good shrimp. Wild-caught has the best flavor, but any quality shrimp works — you’re not going to notice a difference in a pan full of garlic and lemon.
Swap it, if you need to
This recipe is built to be bent, not broken:
No gluten-free pasta on hand? Use your favorite gluten-free variety instead — the sauce doesn’t care.
Want fewer carbs? Swap all or half the linguine for zucchini noodles, or skip the pasta entirely and serve the shrimp over steamed broccoli or cauliflower rice.
Add vegetables. Spinach, asparagus, cherry tomatoes, broccoli, or mushrooms all stir in nicely for extra color and volume.
Different protein? Scallops, chicken, or salmon work in the same garlic-lemon sauce. I’ve even done it with chunks of lobster when we wanted to feel fancy.
Not cooking with wine? Use extra chicken broth plus another squeeze of lemon juice. You lose a little brightness, but it still works.
What to serve alongside
A simple green salad or a Mediterranean chopped salad keeps the plate light.
Roasted asparagus, sautéed spinach, or roasted broccoli go beautifully with it.
You will want bread for soaking up the sauce. Warm whole grain bread or a crusty sourdough is the move.
Questions I get asked
Can I use frozen shrimp? Absolutely. Thaw them in the refrigerator overnight (or under cold running water), pat them dry, and go on with the recipe exactly as written.
What if I don’t have wine? Replace it with extra chicken broth and an extra tablespoon of lemon juice. The sauce loses a little depth but stays bright.
How do I know the shrimp are done? Opaque, pink, and curled into a loose “C” — usually 1 to 2 minutes per side depending on size. That’s the whole trick.
Can I use pre-cooked shrimp? You can, but raw shrimp taste better. If you’re using cooked shrimp, add them at the very end just long enough to warm through.
Can I make this dairy-free? Yes — swap the butter for extra olive oil and either skip the Parmesan or use your favorite dairy-free alternative.
Why is my sauce watery? It probably didn’t reduce long enough, or too much pasta water got in. Simmer the sauce a few minutes before the pasta goes in, then add the pasta water gradually until it’s the right consistency.
Can I make it ahead? The dish is best fresh — shrimp cook so fast. But you can prep the garlic, shallots, and lemon an hour ahead so dinner comes together in minutes.
Leftovers and storage
Leftovers keep in an airtight container in the refrigerator for up to 3 days. To reheat, warm gently in a skillet over medium-low heat with a splash of broth or water to loosen the sauce — don’t crank the heat or the shrimp will get rubbery. You can freeze the shrimp and sauce for up to 2 months, but the pasta softens after thawing, so freeze the sauce and make fresh pasta when you’re ready to eat.
A note from Grace
This is one of those recipes that looks like it took effort and really didn’t. One pot of pasta, one skillet, 30 minutes on the clock. The lemon and garlic do the heavy lifting, and the pasta water is the trick that makes it feel restaurant-quality without the restaurant bill.
Trade-It Tip: No white wine on hand? Extra chicken broth plus an extra squeeze of lemon juice does the job — same brightness, no alcohol.
If it doesn’t fit a Tuesday night, it doesn’t get published.
Nutrition per serving (recipe makes 6): 425 kcal, 36 g carbs, 34 g protein, 15 g fat, 6 g fiber. Numbers are auto-calculated, so treat them as a guide rather than gospel.
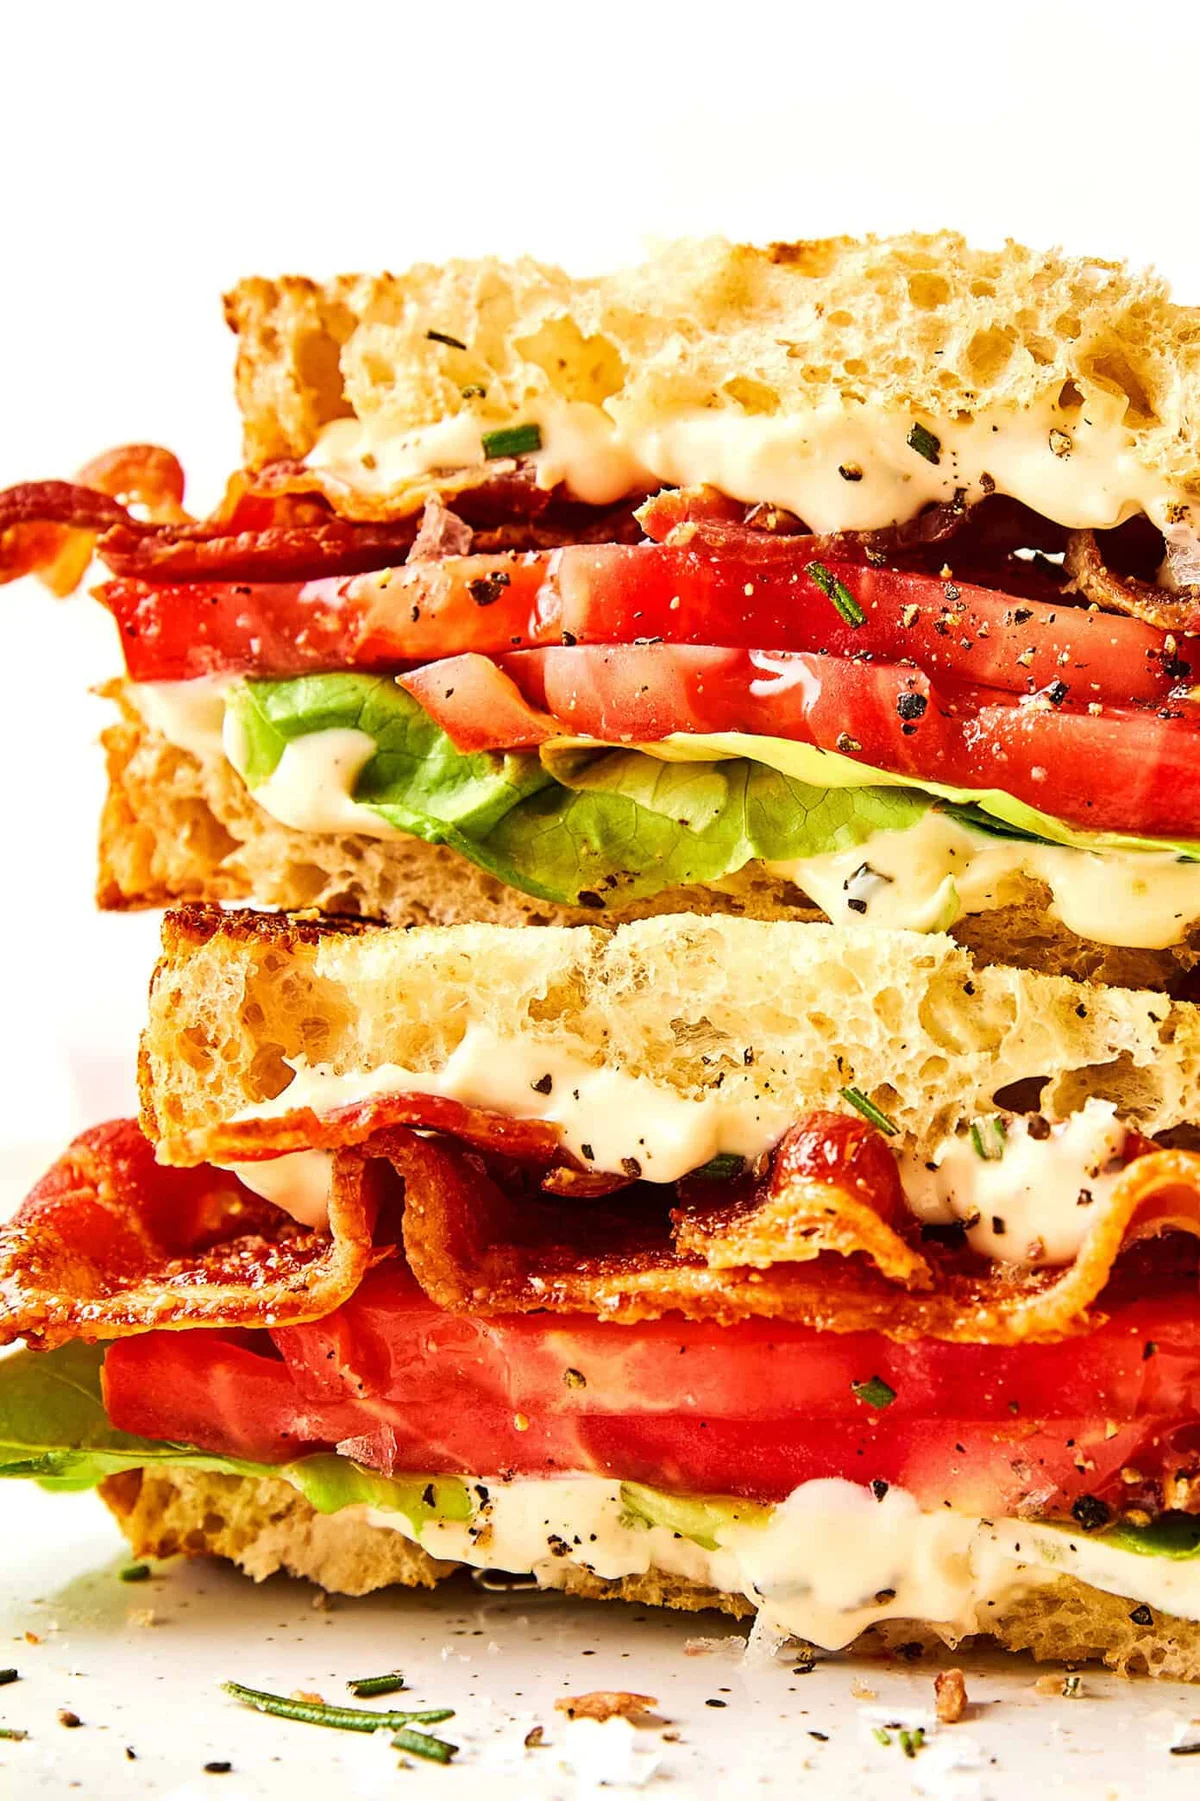
A sandwich with five parts and no place to hide — that’s a BLT. Thick-cut bacon, a tomato that’s actually ripe, sturdy sourdough, good lettuce. And until recently, the mayo was the one component just sitting in the middle, creamy and doing nothing. I fixed that with a jar of mayonnaise, a sprig of fresh rosemary, and a squeeze of lemon. Stir, and suddenly there’s a savory, herby brightness running through the whole sandwich.
I may never make a plain BLT again — and honestly, I’m a little annoyed at myself for waiting this long. Back when I worked the line, we’d punch out a hundred of these a day. None of them had this mayo. All of them should have.
Why this works
Fresh rosemary, garlic, and lemon give the mayo a savory, herbal lift that plain mayo just doesn’t have. It’s not about making something complicated — it’s about making the one ingredient in the sandwich that’s supposed to taste boring actually taste like something. Five minutes of stirring, and the whole sandwich changes.
Buy good stuff
This sandwich has five components, and not one of them can hide. Here’s the short list:
Thick-cut bacon. The thin kind turns to lace. Thick-cut stays crispy without turning to rubber.
A ripe, juicy summer tomato — heavy for its size, fragrant near the stem. A BLT is not the place for a sad, watery one.
Bread that won’t collapse. Sourdough is my favorite here, but any sturdy sandwich loaf works.
Good, crunchy lettuce. Romaine, butter lettuce, green leaf — whatever’s freshest at the store.
Then slather that mayo on generously. Both sides. All the way to the edges. That part’s not optional.
BLT Tips (learned the hard way, so you don’t have to)
I made this sandwich a handful of times before I got it right. A few things that actually matter:
Salt the tomatoes. Lay the slices on a paper towel, sprinkle with flaky salt, and give them five minutes while you toast the bread. It pulls out a little water (good for sogginess) and seasons them all the way through (good for flavor). A small step that makes a real difference.
Let the mayo sit. The garlic and rosemary need time to season the mayo. Fifteen minutes is the minimum, half an hour is noticeably better, and the next day is even better. If you’re prepping ahead, this is the one part of the sandwich that actually improves with time.
Bake the bacon if you’re making more than a couple sandwiches. Sheet pan, 400°F (200°C), walk away. It crisps more evenly than the skillet, and your stovetop stays clean.
Eat it immediately. This is not a make-ahead sandwich. Assemble, slice, eat. The bacon’s crispy and the toast is warm for about four minutes after that, and then it’s just a very good sandwich that’s slightly less good.
Make it your own
The classic bacon-lettuce-tomato combo is hard to beat, but there are plenty of fun ways to play:
Sliced avocado makes a creamy BLAT — genuinely great with the rosemary mayo.
Arugula instead of lettuce for a peppery version (my personal fave).
A fried egg for extra protein.
Thinly sliced red onion for crunch and a sharper bite.
A little crushed red pepper, cayenne, or Calabrian chile paste stirred into the mayo if you like heat.
Balsamic vinegar instead of lemon in the mayo for a deeper, slightly sweeter flavor.
Sliced fresh mozzarella for a BLT-meets-caprese. Truly so good.
Grill the bread with a little olive oil instead of toasting, for a smoky, extra-crisp version.
FAQ
Can I make the rosemary mayo ahead of time?
Definitely. It keeps in an airtight container in the fridge for about a week — and I think it’s better on day two than day one. It’s also great on burgers, roasted potatoes, and as a dip for anything fried.
Can I use dried rosemary instead of fresh?
Fresh is much better here. Dried rosemary is tougher and has a more concentrated, woodsy flavor that doesn’t blend into the mayo as naturally. In a pinch, use only a very small amount, and crush it finely between your fingers first.
How do I keep my BLT from getting soggy?
Toast the bread, spread mayo on both slices, briefly drain very juicy tomato slices on a paper towel, and assemble just before serving. I also put the lettuce directly against one side of the bread — it acts as a second barrier between the tomatoes and the toast.
BLT with Rosemary Mayo
Makes 4 sandwiches · 15 min prep + 20 min cook = 35 min total (the mayo takes 5 of those prep minutes; the rest is chopping and toasting)
Ingredients
For the rosemary mayo
1/2 cup mayonnaise (about 120 ml)
1 teaspoon finely chopped fresh rosemary
1 teaspoon lemon juice
1/2 teaspoon Dijon mustard
1 small garlic clove, pressed or finely minced
Freshly-ground black pepper, to taste
For the BLTs
8 slices thick-cut bacon
8 slices sourdough, sandwich bread, or whatever sturdy bread you have
2 large ripe tomatoes, sliced
4 leaves romaine, butter lettuce, or green leaf lettuce
Flaky sea salt and freshly-ground black pepper
Instructions
Make the rosemary mayo. Stir together the mayonnaise, rosemary, lemon juice, Dijon, garlic, and a few twists of black pepper until combined. Taste and add more rosemary, lemon, or pepper if you want. This is the 5-minute part.
Cook the bacon. Skillet over medium heat until crispy, or bake on a parchment-lined sheet pan at 400°F (200°C) for 15 to 20 minutes. Transfer to a paper towel-lined plate to drain.
Toast the bread until golden and crisp.
Season the tomatoes. Sprinkle the slices lightly with flaky sea salt and black pepper. With fresh summer tomatoes this makes a huge difference — it pulls out a little water and seasons them through.
Assemble. Spread a generous layer of rosemary mayo on one side of each slice of toast, all the way to the edges. Layer with lettuce, bacon, and tomato slices.
Serve. Close the sandwiches, slice in half, and eat while the bacon is still crispy and the toast is warm. Don’t overthink it.
Back when I worked the line, we had a rule: if a sandwich takes more than two hands to fix, it’s not a sandwich, it’s a project. This one’s two hands, one jar of mayo, and 35 minutes. It’s a sandwich.
Trade-It Tip
No fresh rosemary? A little dried rosemary works in a pinch — but use a small amount, and crush it between your fingers first so it distributes evenly instead of landing in one big woody chunk.
If it doesn’t fit a Tuesday night, it doesn’t get published.
Last week I looked in the crisper drawer and found three zucchini I’d forgotten about. That’s how every zucchini season starts in my kitchen — one day there’s nothing, the next day the drawer is just zucchini.
When I worked the line, the fix for ‘too much of one vegetable’ was always the same: high heat and a good sauce. This one is exactly that. Zucchini with garlic sauce, in one pan, about 30 minutes start to finish. It’s the good kind of simple.
Why this works
Two things make this dish. One: searing the zucchini over high heat before it touches the sauce, so it gets real color and sheds its water instead of steaming soggy. Two: a sauce built on oyster sauce and rice vinegar — the salty, sweet, garlicky, slightly tangy balance you get in a good restaurant kitchen.
Pick your zucchini small
If you’re buying zucchini, go for the small to medium ones. The bigger they get, the more seeds and the more water — and water is the enemy of a good sear. I learned the hard way that a small amount of a better product beats a big amount of a worse one.
What you’ll need
1/2 cup (120 ml) hot water
1 tbsp (15 g) sugar
1 tbsp (15 g) cornstarch
1.5 tbsp (22 ml) oyster sauce — vegetarian oyster sauce works too
In a small bowl, stir the sugar into the hot water until it dissolves. Add the cornstarch, oyster sauce, rice vinegar, Shaoxing wine, soy sauce, sesame oil, dark soy sauce, and white pepper, then stir in half of the minced garlic. Set aside.
Scrub the zucchini under running water (no need to peel) and trim the ends. Cut on an angle into triangular bite-size chunks, rotating the zucchini with each cut.
Heat a wok over medium-high until it’s lightly smoking. Add 2 tbsp (30 ml) of the oil around the edge and spread the zucchini in a single layer. Drop the heat to medium and cook for 3–4 minutes, turning occasionally, until lightly browned and just soft. Move to a plate.
Crank the heat to high. Add the remaining 1/2 tbsp (7.5 ml) of oil, then the ground meat. Cook until opaque, breaking it into small bits.
Add the ginger and dried chilies and stir for about 10 seconds until fragrant. Add the white scallion parts and the remaining garlic, and stir for another 20 seconds until everything smells like the best thing in the kitchen.
Tip the zucchini back in and stir-fry to combine. Give the sauce a good stir (the cornstarch settles), then pour it in. Simmer until it’s reduced and just thick enough to coat a spoon. Stir in the green scallion parts until they just start to wilt.
Serve straight away with a big bowl of steamed rice.
Notes and swaps
Want it vegetarian? Omit the meat and swap in a vegetarian oyster sauce — the sauce does all the heavy lifting anyway. And if you’re short on time, cut the zucchini a little thicker: it takes longer to brown, but you get a chewier, more satisfying bite.
Trade-It Tip: No Shaoxing wine? Dry cooking sherry works in its place — same job, same result.
Nutrition per serving, as a rough guide: 232 kcal, 14 g carbs, 8 g protein, 16 g fat, 404 mg sodium. These are estimates — different brands and squash sizes will shift the numbers, so run your own calculator if you need precision.
This one lives in my rotation every summer. If it doesn’t fit a Tuesday night, it doesn’t get published.
The first time I made graham crackers from scratch, I’d already given up. I was three steps in, dough on my hands, convinced I’d wasted a whole afternoon on something a supermarket box would have solved in ten seconds.
Then they came out of the oven and I bit into one still warm. Crisp, deeply buttery, that warm honey-and-cinnamon smell that no store-bought version has ever quite managed. It took about 2 hours start to finish — and I’ve made them every few months since.
Why these work
Store-bought graham crackers are usually made with oil and artificial flavoring to fake the buttery taste. These start with real butter and real honey, so the flavor is deeper and the snap is cleaner. And no, you don’t need specialty graham flour — a mix of whole wheat flour and all-purpose flour does the job, which is how most commercial versions do it too.
What you need
1 and 1/2 cups (195g) whole wheat flour (spooned & leveled) — the whole-grain graham flavor
2/3 cup (83g) all-purpose flour (spooned & leveled) — keeps them crisp, not dense
1/2 teaspoon baking soda
1/2 teaspoon salt
1 teaspoon ground cinnamon
8 Tablespoons (113g) unsalted butter, softened to room temperature
1/3 cup (67g) packed light or dark brown sugar
1/3 cup (113g) honey
1 teaspoon (7g) molasses (optional — I always use it, it makes the flavor)
1 teaspoon pure vanilla extract
1 and 1/2 Tablespoons (23g/ml) milk, room temperature — any kind, dairy or nondairy
Why this works: creaming the softened butter with the brown sugar is what makes a dough that rolls without cracking, and honey plus a little molasses is the flavor backbone of a real graham cracker. Skip the molasses and you lose the depth.
How to make them
Full times: about 2 hours start to finish, plus cooling (1 hour 45 minutes of hands-on prep and chilling, 16 minutes of baking). The chilling is not optional — it’s what keeps them from turning into puddles.
Make the dough. Whisk the whole wheat flour, all-purpose flour, baking soda, salt, and cinnamon together in a medium bowl. In a large bowl, beat the softened butter and brown sugar on medium-high until light and creamy, about 3 minutes. Add the honey, molasses, and vanilla and beat until combined, scraping the bowl as needed.
Add the milk, then the dry ingredients, and mix on low until just combined. The dough will be soft.
Shape into squares. Divide the dough in half and flatten each portion into a square (not a disc — a square rolls into a rectangle much more easily; I’ve learned this the hard way). Wrap each tightly in plastic wrap and refrigerate for at least 1 hour, up to 2 days.
Roll it out. If the dough has chilled longer than 1 hour, let it sit at room temperature for about 20 minutes to soften. Lay a silicone baking mat on the counter with a lightly floured sheet of parchment on top. Set the dough on the parchment, dust the top lightly, and cover with a second sheet of parchment. Roll into a rectangle that’s evenly 1/8-inch thick (just over 3mm). It takes a bit of arm strength at first and gets easier. The thinner you roll it, the crisper they’ll be.
Peel off the top parchment. Trim the edges and use a pizza cutter or sharp knife to cut the slab into evenly sized rectangles — cut all the way through but leave the pieces together as one slab. A sturdy ruler is a genuine help here for straight, even edges. Dock each cracker several times with a fork so they don’t puff up.
Slide the parchment onto a baking sheet and refrigerate for 20 minutes while you preheat the oven to 350°F (177°C). The chill keeps them from spreading — they really shouldn’t spread much at all. Repeat steps 4 and 5 with the second square of dough.
Bake for about 16 minutes, rotating the pans halfway through, until lightly browned around the edges and dry on top.
Cool on the baking sheet for 5–10 minutes, then move to a wire rack to cool completely. They crisp up considerably as they cool — don’t panic if they seem slightly soft straight out of the oven.
Once fully cool, run a sharp knife along the seams to separate the crackers. Store in an airtight container at room temperature for up to 1 week.
Crisper or softer? Your call
Crispier: roll the dough slightly thinner and bake an extra minute or two.
Slightly softer: roll a touch thicker, trim the baking time a little, and let them cool completely on the pan instead of transferring to a rack.
Once you’ve got the basics down
Swirl in a pinch of cardamom or ground ginger with the cinnamon
Add orange zest for a bright citrus twist
Dip cooled crackers halfway into melted chocolate and let set
Cinnamon-sugar version: before baking, brush the tops very lightly with water and sprinkle with a mix of 3 Tablespoons (37g) granulated sugar and 1/2 teaspoon ground cinnamon. The kids at my table go for this one
What to do with them
S’mores — the whole point, honestly
Pie and cheesecake crusts — one catch: because these are made with real butter (most store-bought crackers aren’t), cut the melted butter in your crust recipe from 6 Tablespoons (85g) down to 4 Tablespoons (56g), or the crust gets greasy and slides down the dish sides
Crushed over banana pudding or key lime pie bars
Layered into a no-bake icebox cake
Straight from the cooling rack with peanut butter, chocolate spread, or buttercream
Storage and FAQ
How long do they keep? Up to 1 week in an airtight container at room temperature. If they go a little soft after a few days (or after freezing and thawing), re-crisp them in a 300°F (150°C) oven for about 5 minutes and cool completely.
Can I freeze them? Yes — up to 3 months, layered between sheets of parchment in a freezer-safe container. You can also freeze the dough (before rolling) for up to 3 months; thaw it in the refrigerator overnight, then bring it to room temperature for about 1 hour before rolling.
Can I use cookie cutters? Sure — treat it like cut-out sugar cookie dough. They’ll bake individually rather than as a slab, so they’ll likely need less time in the oven.
How many do I get? 24–32, depending on how large you cut them. One rolled-out portion cuts into 12, 15, or 16 rectangles, and the recipe makes two portions. The full batch of dough weighs about 600g if you’re curious.
Recipe card
Homemade Graham Crackers — crisp, lightly sweet, and properly buttery, with that classic honey-and-cinnamon flavor. Made from basic pantry ingredients, and far better than the box for snacking, s’mores, pie crusts, cheesecake crusts, and icebox cakes.
Recipe adapted from learning homemade graham cracker basics from King Arthur Baking & The Kitchn.
Make them this weekend
Here’s my honest take: these aren’t a weeknight snack — you’ll want to bake them a day ahead for whatever you’re using them in. But the first time you bite into one, you’ll get why I keep coming back to them. Try them, and if you make a s’more with one, tell me about it in the comments — and if you rate the recipe, it genuinely helps other home bakers find it.
Trade-It Tip: No molasses? You can leave it out — the honey carries the sweetness either way, you just lose a little of that dark, toasty depth. No whole wheat flour? You can nudge toward all-purpose, but you’ll miss the graham flavor that makes them them.
If it doesn’t fit a Tuesday night, it doesn’t get published. (These fit a Saturday — and that’s the honest trade.)
I used to think a slow cooker was a lazy person’s crockpot, and I’d be honest: I said it out loud, more than once. Then the night I tossed a slab of flank steak into mine, walked away, and came back to a pot of beef that fell apart at the look of it. That was the moment I stopped being smug.
This is a high-protein, set-and-forget dinner. The gochujang sauce turns the meat juicy and tender, and it comes together with rice and fresh, crunchy sides. It’s the good kind of simple, and I mean that as the highest compliment I know.
Why this works
Flank steak is a lean cut that’s usually seared fast over high heat. Cooking it low and slow is the exact opposite of what it wants, and it works remarkably well. The long, gentle heat breaks the fibres down until the meat shreds by itself, and because the cut is lean, the finished dish never feels greasy or heavy.
Picking the beef
I went to the butcher wanting chuck or short ribs. Closer inspection: both cut too thinly, loaded with fat, and the chuck was on the bone. I left with flank steak instead (it’s also called bavette) and it looked beautiful. If you can find chuck that’s been trimmed of its fat, or leaner short ribs, those work wonderfully too. Just avoid anything that’s going to make you chew through a fence.
The sauce
The whole thing is built on gochujang, the fermented Korean chilli paste that gives the dish its warmth and depth. It’s not aggressively hot. It’s a complex, slightly sweet heat that mellows out once the shredded meat soaks it all back up. If you want more fire, add an extra tablespoon. If you’re cooking for kids or someone who’s sensitive to heat, drop it to a tablespoon and a half.
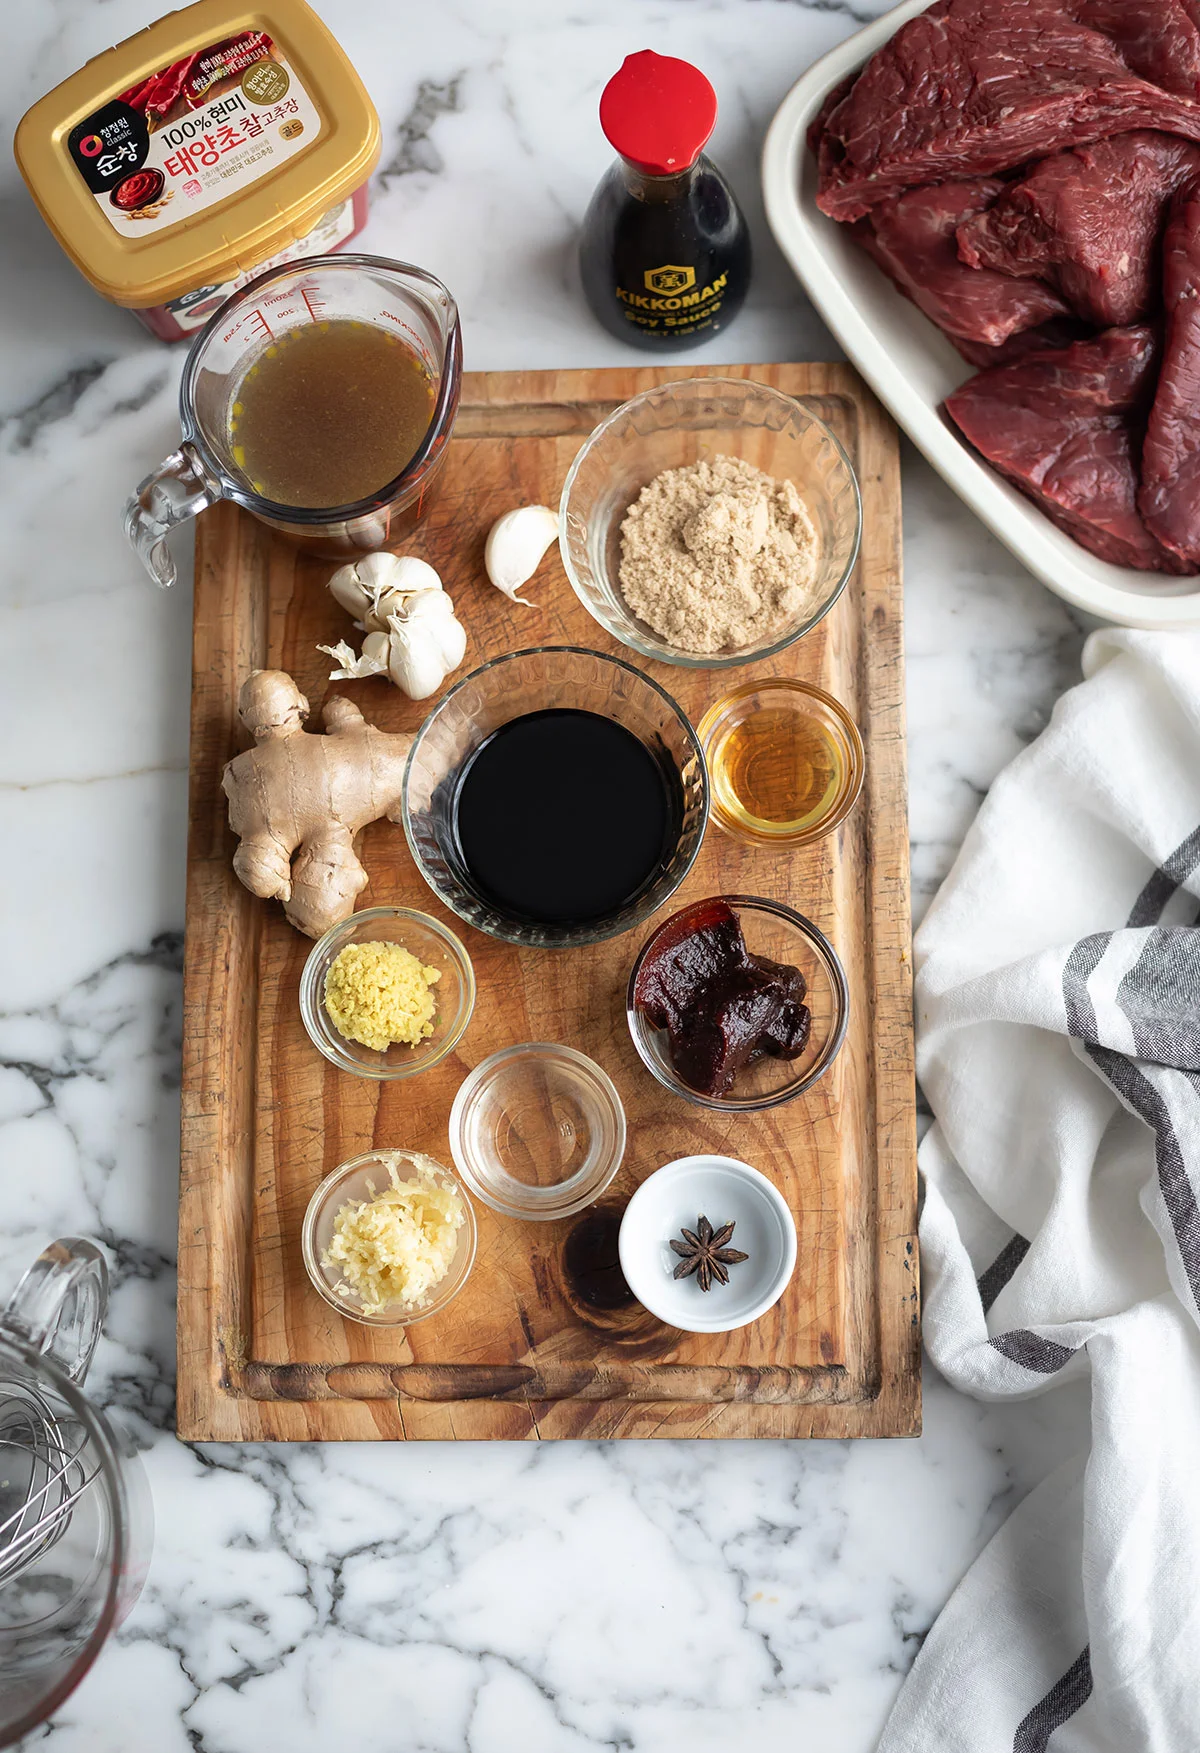
Soy sauce, sesame oil, rice vinegar, fresh ginger, crushed garlic, and a little brown sugar round it out. Star anise is optional but it adds a subtle warmth that plays really nicely with the beef. When everything goes in, the liquid looks like a lot. Trust it. By the time the meat shreds and gets tossed back through, it absorbs beautifully and the sauce coats every strand.
Don’t skip the fresh stuff
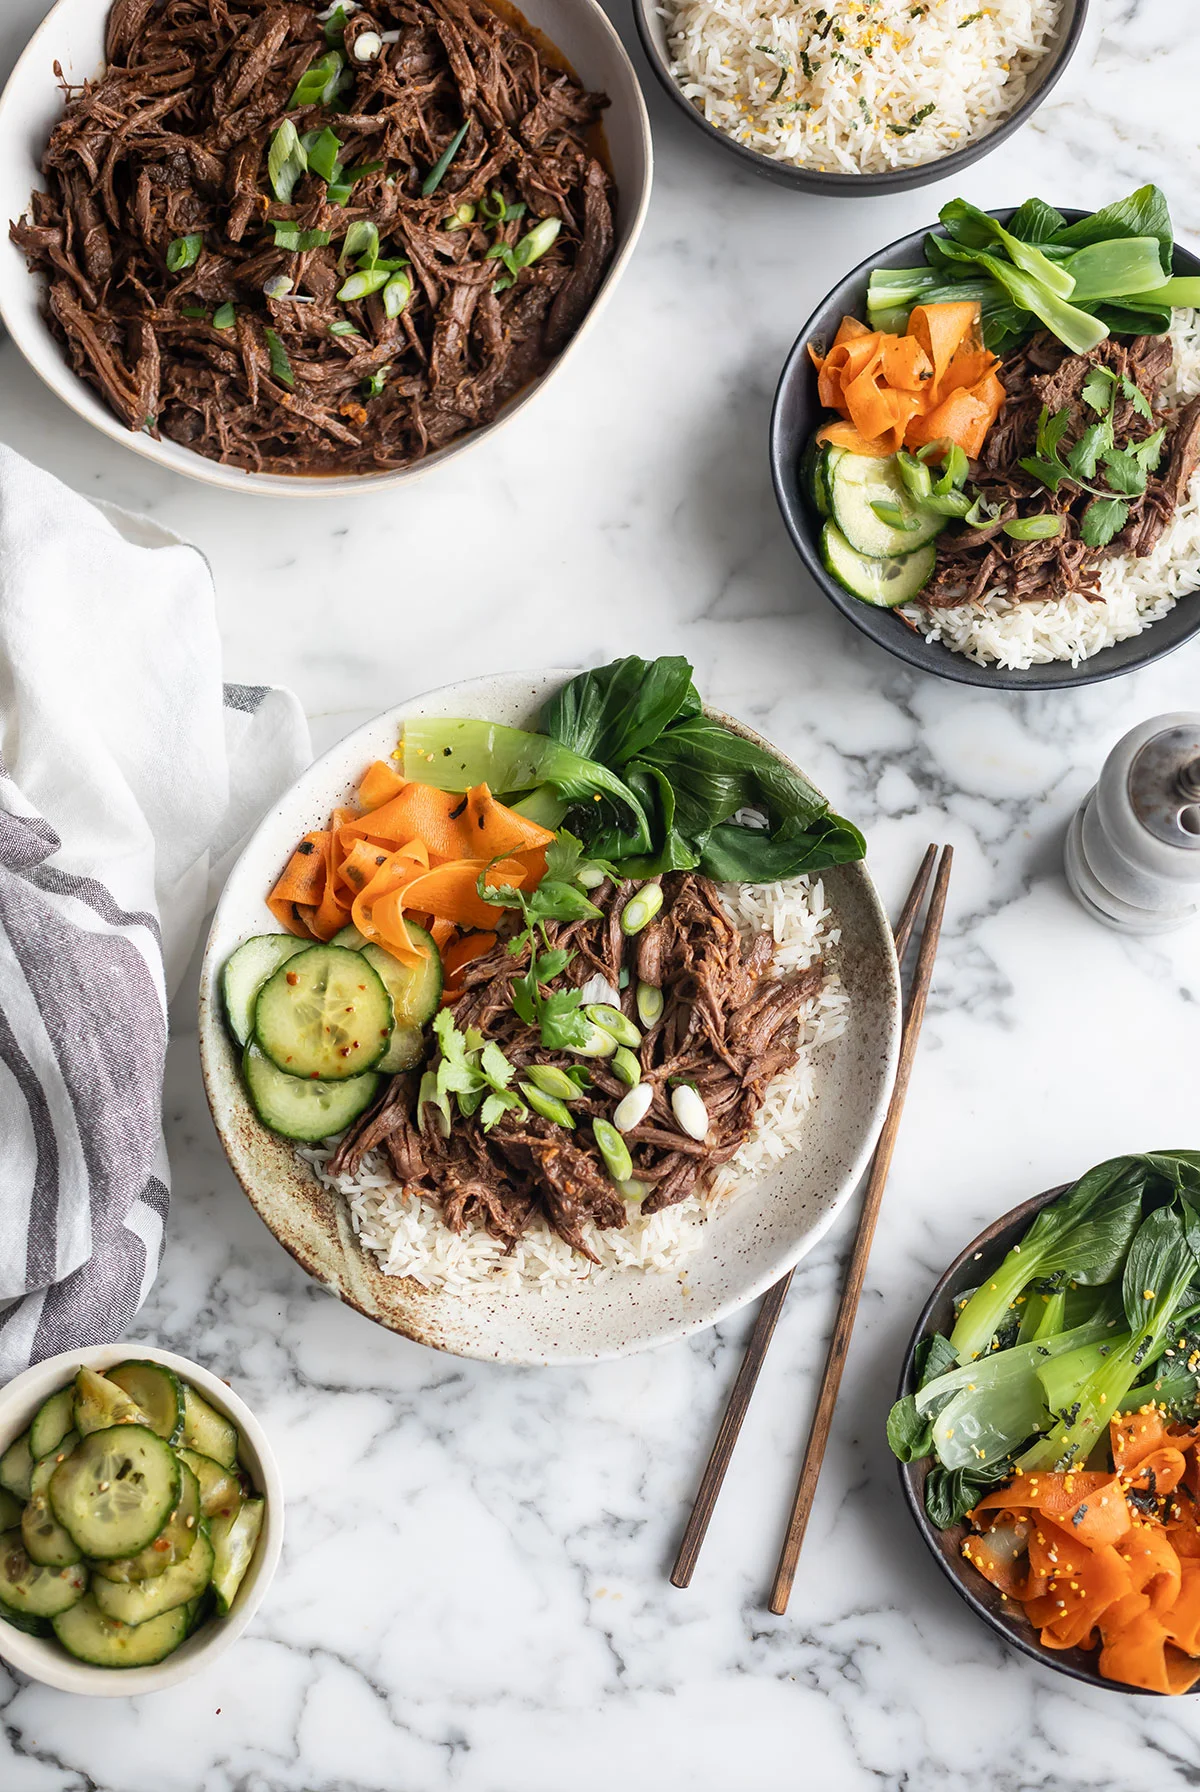
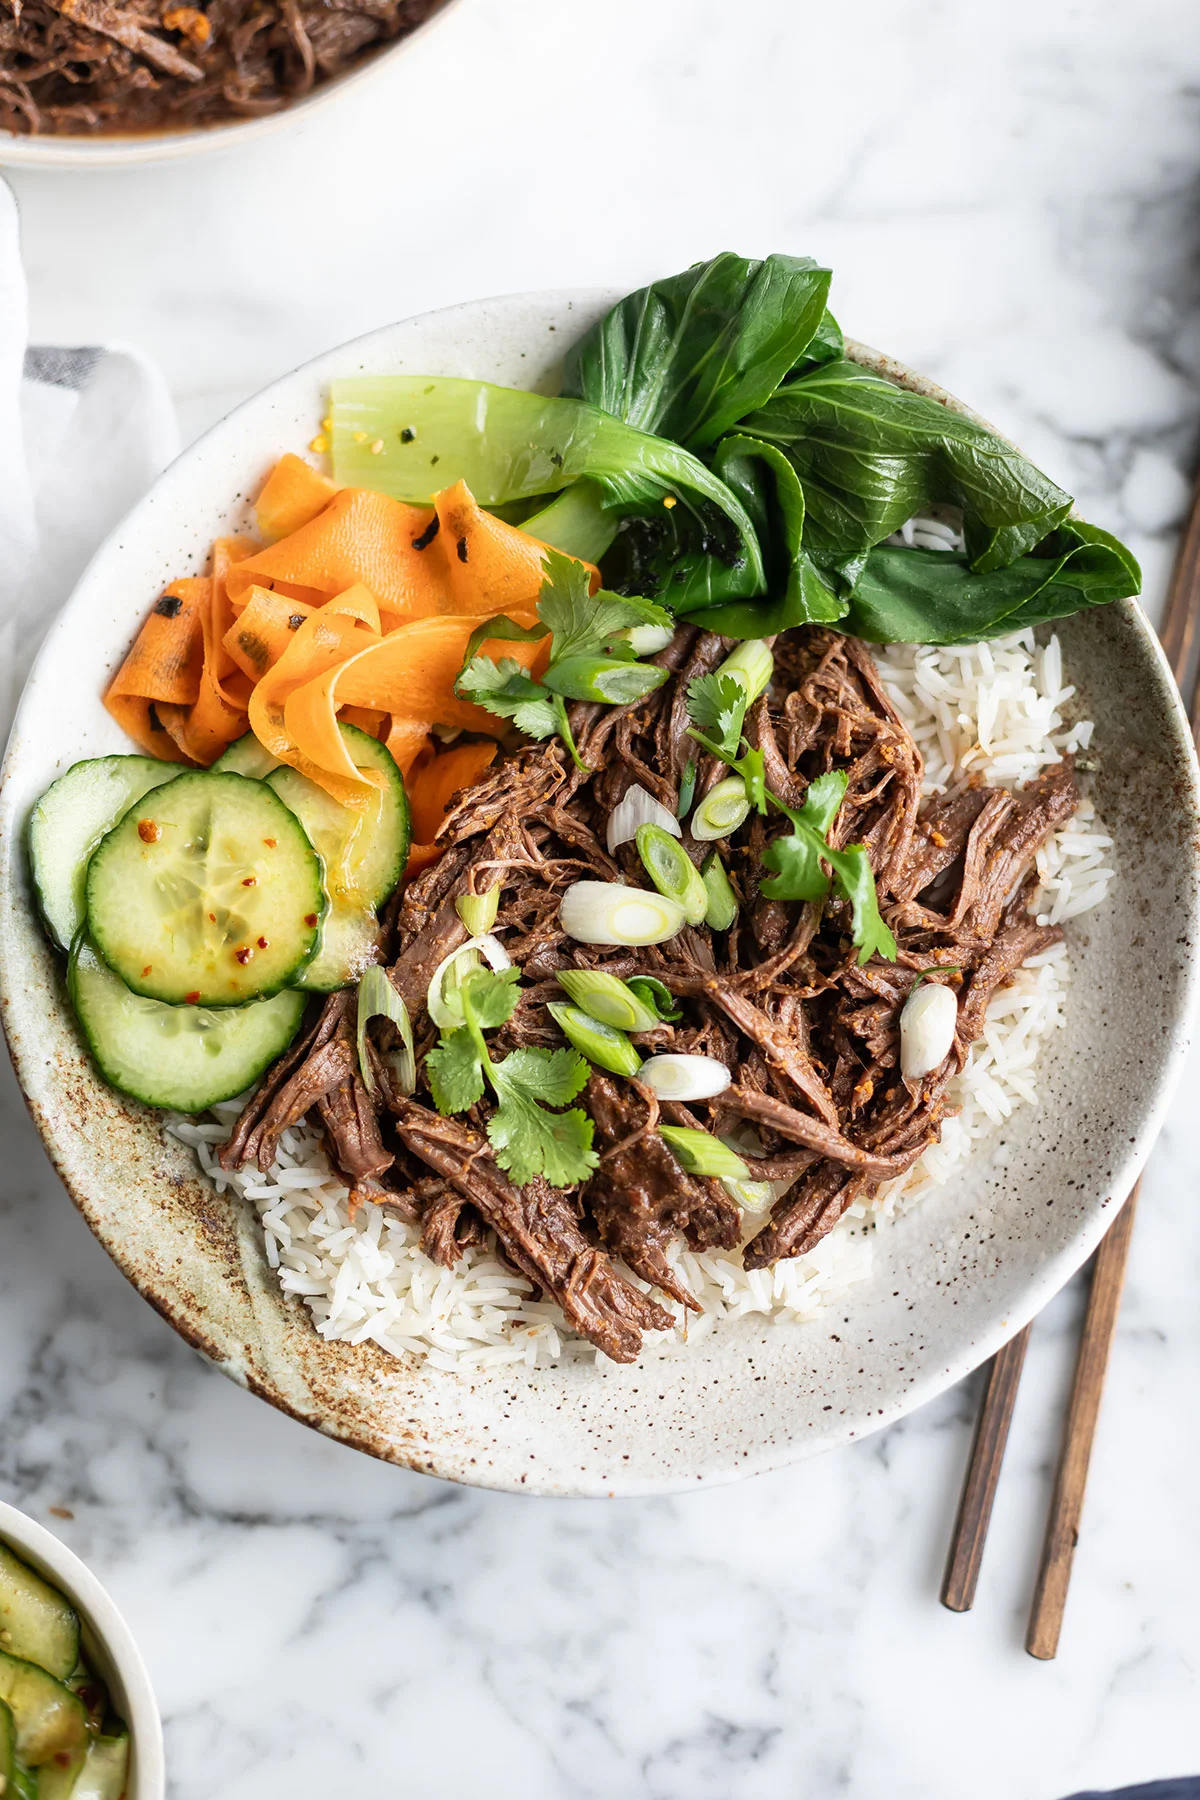
The beef is rich and intensely flavoured, and without something cool, crunchy, and clean on the plate it can feel heavy. I served it with basmati rice, sliced spring onions, a quick cucumber salad, steamed bok choy, and a simple carrot salad. Jasmine rice is lovely here too. Kimchi is the classic condiment and worth including if you can find it; any quick pickle works as well. Those fresh elements aren’t optional garnishes. They finish the dish.
Make it ahead
This is a strong batch-cooking candidate. You can make it up to two days ahead and reheat it gently on the stovetop or in the microwave. It freezes well too. Make a full batch, freeze half in portions, and you’ve got an easy high-protein dinner ready to go on a weeknight. No decisions required, which is exactly what a Wednesday night needs.
The recipe
10 minutes of prep, start to finish, including the chopping. Then four hours of the machine doing the work.
Ingredients
1.3 kg beef flank steak (bavette), or chuck trimmed of fat
1 tablespoon fresh ginger, finely grated
2.5 to 3 tablespoons gochujang (Korean chilli paste)
3 cloves garlic, crushed
3 tablespoons soy sauce
1 tablespoon rice vinegar
1 tablespoon sesame oil (drop to 1 teaspoon if using a fattier cut)
2 tablespoons brown sugar
200 ml beef stock
1 star anise pod (optional)
To serve: basmati or jasmine rice, sliced spring onions, steamed bok choy, cucumber salad, quick carrot salad, and kimchi or any pickle you like.
Method
Place the beef in the base of the slow cooker. If the pieces are large, cut them so they fit in a single layer.
Mix the ginger, gochujang, garlic, soy sauce, rice vinegar, sesame oil, brown sugar, and beef stock until well combined. Pour it over the beef and add the star anise if you’re using it.
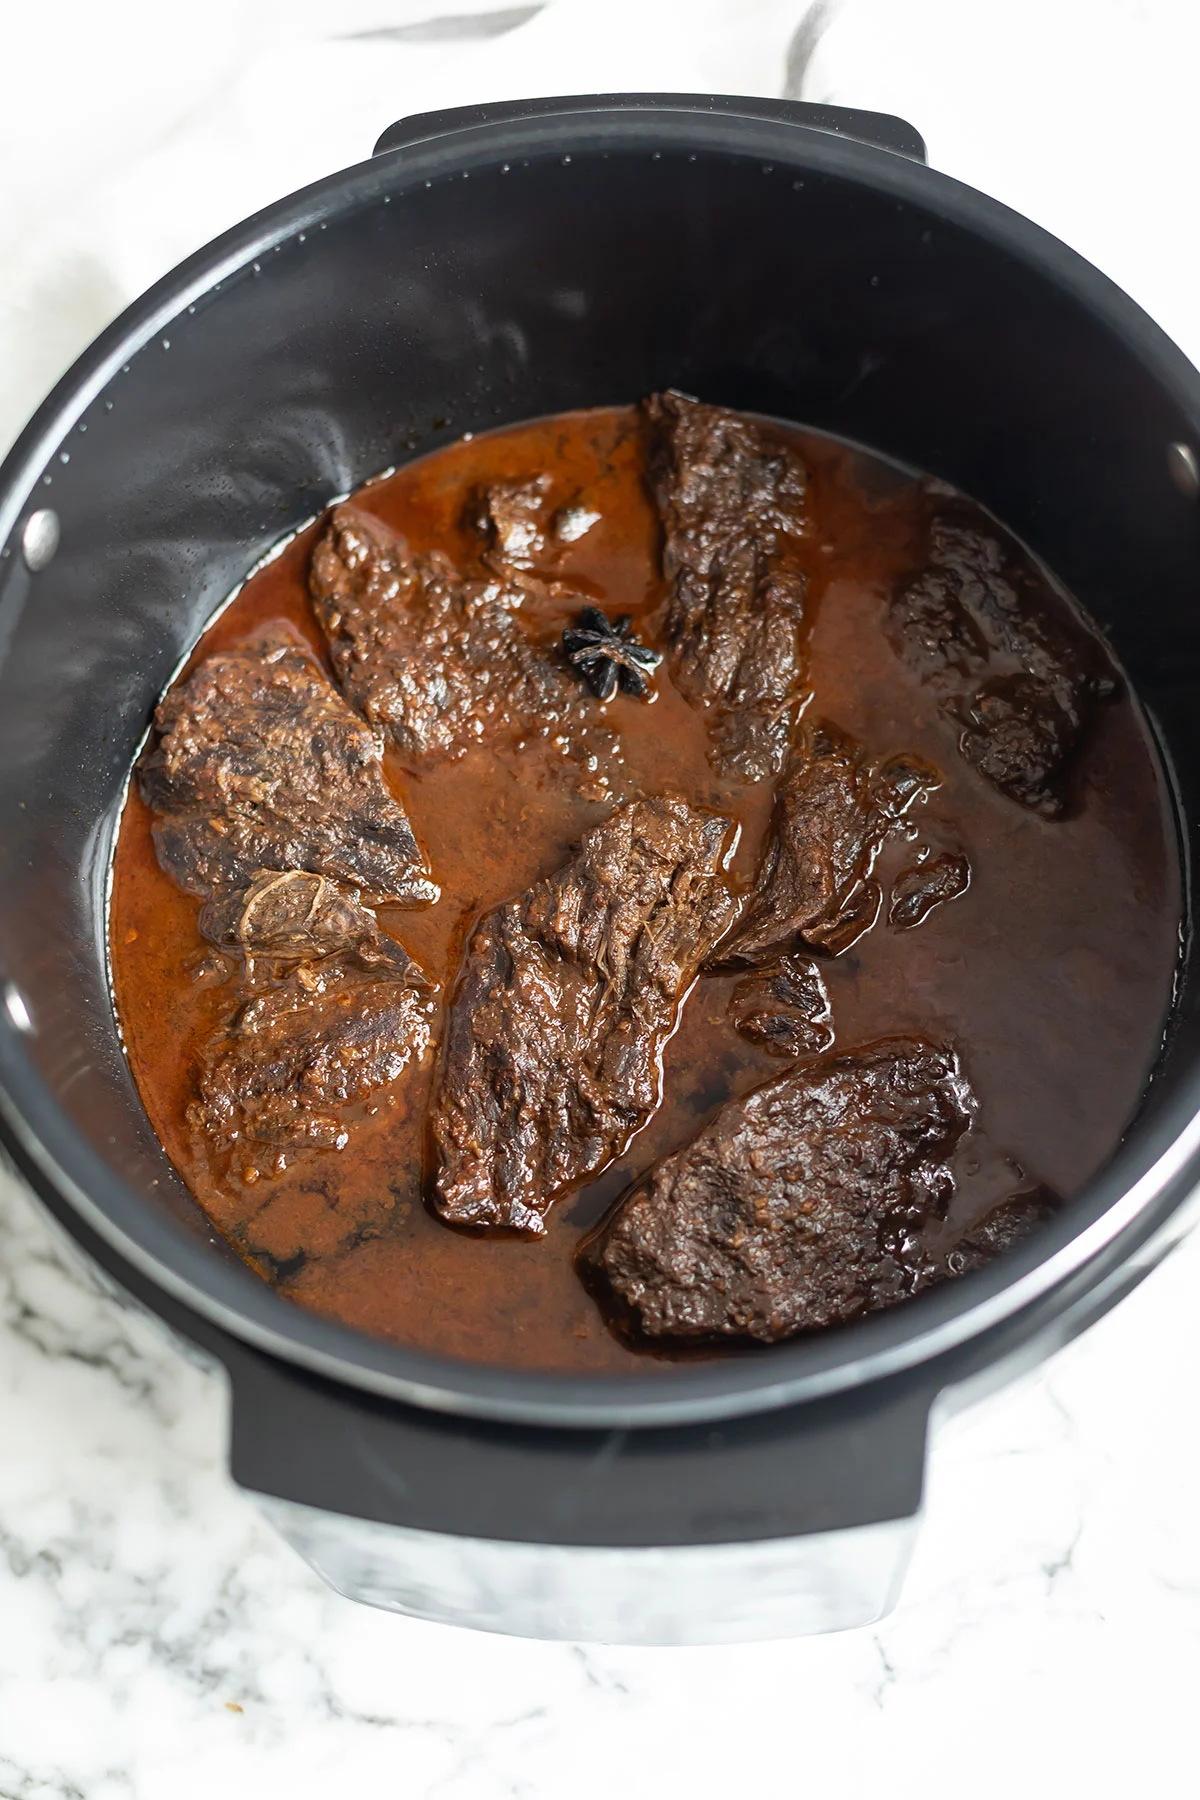
Cook on low for 4 hours, or until the meat shreds easily when pulled with two forks. Slow cookers vary, so use the shred test, not the clock.
Remove the star anise. Shred the meat right in the pot with two forks, then toss it through the sauce until every strand is coated.
Serve over rice with the spring onions, bok choy, salads, and kimchi alongside.
A note on storage: it keeps in an airtight container in the fridge for up to 3 days, and the flavour actually improves overnight. Reheat gently on the stovetop over low heat with a splash of water or stock to loosen the sauce, or in the microwave until piping hot. To freeze, let the shredded beef cool completely, then freeze in an airtight container or zip-lock bag for up to 3 months. Defrost overnight in the fridge before reheating.
Questions I get asked
Can I use a different cut? Yes. Beef chuck trimmed of excess fat is the most natural substitute and gives a slightly richer result. Leaner short ribs work well too.
What on earth is gochujang? A Korean fermented chilli paste made from red chilli, glutinous rice, fermented soybeans, and salt. It has a complex, slightly sweet, deeply savoury heat that’s quite different from other chilli pastes. You’ll find it in most large supermarkets, Asian grocery stores, and online. It keeps in the fridge for months once opened.
Can I do this in the oven instead? Yes. Put the beef and sauce in a lidded casserole dish and cook at 160°C (325°F) for 3 to 4 hours until the meat shreds easily. Check occasionally and add a splash of water or stock if the sauce reduces too much.
How do I know when it’s ready? When it shreds easily with two forks. If it’s still resisting, lid back on and keep going. Flank steak on low typically takes 4 hours, but every slow cooker runs a little differently, so trust the shred test over the clock.
Is it spicy? Mildly to moderately, depending on how much gochujang you use. At 2.5 to 3 tablespoons it has a pleasant warmth rather than aggressive heat, and that mellows further once the meat soaks up the sauce. Drop to 1.5 tablespoons for a milder result, or go higher for more heat.
Trade-It Tip
No gochujang in your pantry? A tablespoon of sriracha plus a teaspoon of brown sugar gets you most of the way there, but gochujang is worth hunting for. It’s the backbone of this dish, and once you’ve got a jar it keeps for months.
If it doesn’t fit a Tuesday night, it doesn’t get published.
Back when I worked the line, we’d get a tray of asparagus tossed on at 6 p.m. and the only question was how it was going to come out — because nobody had a clue how long to grill it. Guessing at timing is exactly how you end up with spears that are either chewy wood or limp mush, so I did what I do at home: I tested three different stalk thicknesses side by side until I could tell you the number. Now the whole thing lives in a foil packet, takes about 15 minutes on the grill, and the cleanup is one crumpled ball of foil in the bin.
15 minutes, start to finish — no babysitting, nothing falling through the grates, and it comes off the heat at the same moment your chicken or salmon is resting. That’s the good kind of simple.
Why this works
The foil packet traps its own steam, so the spears finish cooking gently on the inside while the outside picks up a little char. The oil does double duty — flavor, and even heat on every spear — which is why this method is genuinely hard to screw up.
How to pick asparagus that grills well
Stick with spears that are roughly the same thickness, so they cook at the same rate. Tips should be tight and compact, not splayed or mushy, and the stalks should feel firm and look bright green. I lean toward medium-thick spears for the grill — they hold up without going limp. Asparagus is at its peak from March through June, which is when you’ll find the best bundles at the store or farmers market.
Prep: three quick moves
Rinse. Run the spears under cold water to shift any dirt or sand, especially out of the tips.
Dry. Pat them completely dry with a clean towel. Dry spears take oil and seasoning more evenly, and they grill better for it.
Trim. Cut or snap off the woody end of each spear. I use the snap method — bend it near the base and it breaks exactly where the tough part ends. No measuring.
How to make grilled asparagus in foil
Season. Lay the trimmed spears on a large sheet of heavy-duty aluminum foil. Drizzle generously with olive oil, season with salt and pepper, and toss everything together right on the foil.
Seal. Fold the foil over the asparagus and crimp all the edges tight into a sealed packet. This is the step I learned the hard way — a loose seal lets the steam escape and you end up with dry, uneven spears. Seal it tight.
Grill. Set the packet on the grates over medium-high heat (400–425°F) and cook for 12–15 minutes, flipping it once halfway through. When you open it, use tongs and open away from your face — there will be a burst of hot steam.
Finish. Transfer the spears to a plate and squeeze fresh lemon over the top if you’ve got it.
Grill time by spear thickness
Grilled asparagus in foil takes 8 to 18 minutes total, depending on how thick your spears are. I tested all three sizes so you don’t have to guess:
Stalk thickness
Grill time
Doneness
Thin (pencil-width)
8–10 minutes
Tender, slightly snappy
Medium
12–15 minutes
Tender-crisp (ideal)
Thick (jumbo)
15–18 minutes
Fork-tender, meaty
The fork test is the only doneness check you need: slide a fork into the thickest part of a spear. It should go in easily, but the spear should still hold its shape. If it’s floppy, it’s overdone.
Seasoning ideas (keep the 4 ingredients, or don’t)
As written, this is olive oil, salt and pepper — the char does a lot of the flavor work. But if you want to go further, these all work in the same packet:
Lemon-garlic: minced garlic and a squeeze of fresh lemon before grilling, finished with lemon zest.
Parmesan: a shower of freshly grated Parmesan the moment you open the packet, so it melts slightly. (No longer vegan or dairy-free.)
Everything bagel: toss with everything bagel seasoning before sealing for a savory, seedy crunch.
Balsamic: drizzle with balsamic glaze straight after grilling for a sweet, tangy finish.
Cajun: fajita seasoning or your favorite Cajun blend for a kick of heat.
Butter and herbs: a pat of butter with Italian seasoning before sealing. (No longer vegan or dairy-free.)
Tips from my kitchen
Heavy-duty foil only. Regular foil tears, leaks, and won’t hold a seal over high heat. If you only have thin foil, double-layer it.
Don’t overcrowd. Keep the spears in a single layer or a loose double layer so steam circulates evenly. Big bunch? Split it into two packets.
Preheat first. Get the grill to 400°F+ before the packet goes on, so the spears start cooking immediately instead of steaming in a cold one.
One flip only. A single flip halfway through is all you need. Constant flipping breaks the seal and doesn’t speed anything up.
Charcoal vs. gas: both work. Charcoal adds a slightly smokier flavor; gas gives you more precise temperature control.
Let it rest 1 minute. After the packet comes off the grill, wait a minute before opening — the residual steam finishes the spears gently.
Mistakes that make asparagus sad
Skipping the trim. Woody bottoms are tough and chewy no matter how long they grill. Always snap or cut them off.
Too-low heat. A cool grill steams the spears slowly and turns them mushy. You want 400–425°F.
Skipping the oil. Oil keeps spears from sticking, helps the seasoning stick, and carries heat. Don’t skimp.
Peeking. Every time you crack the packet open, steam escapes and the cook slows down. Resist.
Overcooking — the big one. Pull the packet off when the spears are still tender-crisp. They keep cooking a little in the residual heat inside the foil, and that’s where the mush starts.
What to serve it with
This side goes with just about anything coming off the grill. When I’m planning a full grill night, I start the potatoes in foil first since they take the longest, then add the corn and this asparagus about halfway through, so everything — sides and protein — comes off at the same time. It’s a great partner for grilled chicken thighs, and it keeps going into salads, grain bowls, pasta, and egg scrambles later in the week.
Storage and reheating
Leftovers keep in an airtight container in the fridge for up to 4 days. To reheat, spread the spears on a baking sheet and warm them in a 350°F oven for about 5 minutes, or toss them in a hot skillet for 2–3 minutes. Honestly, cold grilled asparagus straight from the fridge is great in a salad, too. Skip freezing — the texture turns watery and limp once it thaws. It’s best enjoyed fresh or refrigerated.
FAQ
How long do you cook asparagus on the grill in foil?
Grill for 12–15 minutes over medium-high heat (400–425°F), flipping once halfway through. Thin spears may only need 8–10 minutes; thick ones can take up to 18. It’s done when it’s tender-crisp — a fork slides in easily but the spear still holds its shape.
Should I wrap asparagus in foil on the grill?
Yes — it’s one of the best methods. The foil stops thin spears falling through the grates, traps steam for even cooking, and makes cleanup a breeze. It’s especially useful for thinner asparagus that would be fiddly to grill directly.
What are the common mistakes?
Overcooking, not trimming the woody ends, grilling at too low a heat, and packing the packet too tightly. Keep it at 400°F+ and the spears in a single or loose double layer so steam can circulate.
What’s the best seasoning?
Olive oil, salt and pepper lets the asparagus flavor shine — the char adds plenty on its own. For more, add minced garlic and lemon zest before grilling, or finish with Parmesan, balsamic glaze, or everything bagel seasoning.
Do I need to soak asparagus before grilling?
No. Rinse under cold water, pat dry, and trim the ends. Dry spears actually grill better because the oil and seasoning stick more evenly.
Can you grill asparagus without foil?
Absolutely — lay thicker spears directly on the grates, perpendicular to the grate lines. But foil is the easier, more foolproof route, especially for thin spears. If you go direct, medium-thick to thick spears work best.
Recipe card
Grilled Asparagus in Foil — 15 minutes total, serves 4. Prep 5 minutes, cook 15 minutes. This recipe is vegan, gluten-free, dairy-free, Whole30-compatible, paleo and keto-friendly as written.
Ingredients
1 lb. asparagus, trimmed
2 tablespoons olive oil
Salt and pepper, to taste
Lemon wedges, for serving (optional)
Instructions
Preheat the grill to 400–425°F (medium-high heat).
Place the trimmed asparagus on a large sheet of heavy-duty aluminum foil. Drizzle with the olive oil, season with salt and pepper, and toss to coat evenly.
Top with a second sheet of foil and crimp all edges tightly to seal the packet.
Set the packet directly on the grill grates and grill for 12–15 minutes, flipping once halfway through.
Open carefully (watch for hot steam) and transfer the asparagus to a serving plate. Squeeze fresh lemon over the top if desired.
Notes
Thin (pencil-width) spears: grill 8–10 minutes.
Thick (jumbo) spears: grill 15–18 minutes.
Heavy-duty foil, or double-layer regular foil, prevents tears.
Oven alternative: roast on a sheet pan at 425°F for 15–18 minutes — no flip needed.
Nutrition (per serving, approximate): 83 kcal, 4 g carbs, 3 g protein, 7 g fat, 2 g fiber.
Trade-It Tip: No olive oil? Avocado oil works in a 1:1 swap — same smoke point, same neutral base, so the asparagus flavor still leads. And if you’re out of lemon, a squeeze of lime is a fine stand-in.
If it doesn’t fit a Tuesday night, it doesn’t get published.
The first time I made this, my youngest cut the first slice before it had even cooled, and I let him. That’s the only quality test I trust: a child eating it straight off the pan, no persuasion required.
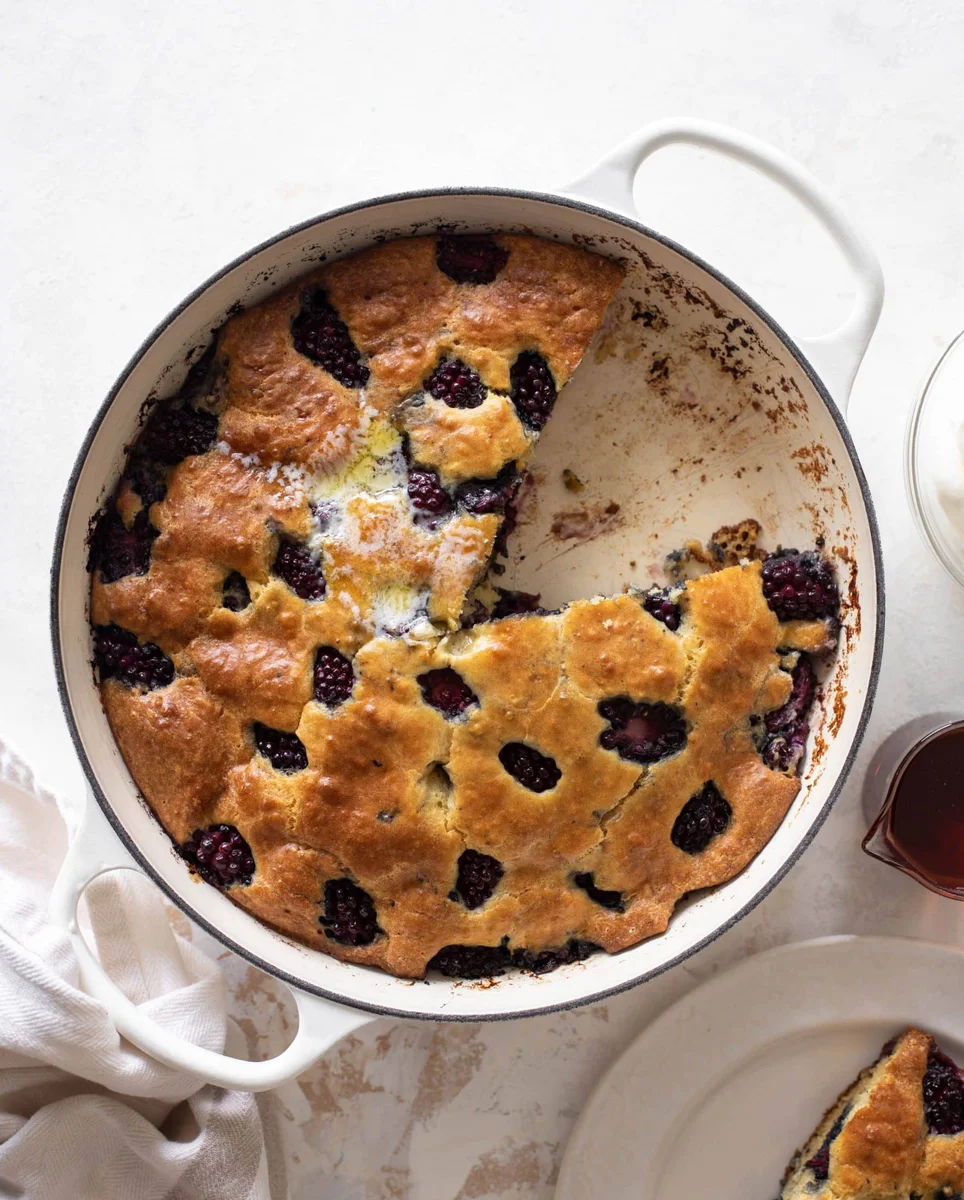
This blackberry skillet pancake is the kind of breakfast you make when you want one single pan to do all the work. It’s somewhere between a coffee cake and pancakes — baked whole in a skillet, then sliced, so you’re not standing over a griddle making one at a time. Big, fruity, and easy to feed a whole table from.
What makes this different from a Dutch baby
I’m a huge fan of a Dutch baby — that puffy, thin, slightly gummy giant pancake. But this is a different animal. This one’s a proper breakfast cake. Hearty but light, with a tender crumb, and it tastes exactly like a pancake. The berries get jammy as they bake and burst inside, so every slice carries a little berry sauce all the way through.
Why this works
Separating the eggs is the whole trick. Whipping the whites to soft peaks and folding them in at the end keeps the crumb tender instead of dense. And the berries go in last, by hand, so they stay whole until the oven does its thing.
Blackberry Skillet Pancake
Yield: 6 to 8 servings. Prep 20 minutes, bake 25 to 30 minutes — 50 minutes total, start to finish.
Ingredients
2 tablespoons butter, plus 2 tablespoons melted butter
2 large eggs, separated
1 1/4 cups all-purpose flour
2 tablespoons sugar
2 teaspoons baking powder
1/2 teaspoon baking soda
1/2 teaspoon kosher salt
1/2 teaspoon cinnamon
1 1/4 cups buttermilk
2 teaspoons vanilla extract
2 cups blackberries, plus more for serving
Maple syrup, powdered sugar, and whipped cream for serving
How to make it
Preheat the oven to 375 degrees F. Put the 2 tablespoons of butter in an oven-safe or cast iron 10-inch skillet.
Separate the eggs. Beat the whites with a hand mixer until soft peaks form, then set them aside.
Slide the buttered skillet into the oven to heat up while you mix the batter.
In a large bowl, whisk together the flour, sugar, baking powder, baking soda, salt, and cinnamon. In a smaller bowl, whisk together the buttermilk, egg yolks, vanilla, and melted butter. Pour the wet into the dry and mix until just combined.
Gently fold in the egg whites — fold, don’t mix. Then stir in the blackberries.
Take the skillet out of the oven, the butter should be melted. Pour in the batter and bake for 25 to 30 minutes, until golden brown.
Let it cool slightly, then serve in slices with maple syrup, whipped cream, and a dust of powdered sugar.
On toppings
My kids always pick maple syrup. I keep reaching for the plain stuff instead — a dusting of powdered sugar, or softly whipped cream with no sugar in it. That unsweetened cream cuts the sweetness of the pancake in a way I genuinely like. It’s the same cloud I float into hot coffee, only warmer. If you want to, a touch of vanilla in the cream is nice, but I never add sugar. The berries are sweet enough.
Make it yours
The best part of this recipe is that it doesn’t care what berry season we’re in. My family’s favorite is blueberry, and when blackberries are the ones piled high in the fridge, this is what gets made. Different berries, different spices, same batter. A fall version is on its way — that’s what this template is for.
Trade-It Tip: No blackberries? Use whatever berry the season is offering — blueberries, raspberries, even frozen. Frozen berries go straight from the freezer into the batter, no thawing.
This recipe is slightly adapted from The Kitchn, and it holds up as a crowd-pleaser because it’s the good kind of simple: one skillet, one batter, zero stacks to flip.
If it doesn’t fit a Tuesday night, it doesn’t get published.