My counter is currently a museum of banana decay. Three bananas, brown as toast, doing their best to look intentional. Next to them sits a jar of sourdough discard that has been patiently waiting for a job. This is the recipe that finally employs both of them.
1 hour start to finish — and it makes two loaves. One to keep, one to share (or freeze, which is what I always actually do).
Why this works
Sourdough discard does two things in banana bread: it adds moisture and a gentle tang that takes the edge off the sweetness. You don’t need to feed a starter or wait on a rise — this is a quick bread, so there’s no kneading and no 12-hour ferment. If you can mash a banana, you can make this. That’s the good kind of simple.
What you need
No special tools beyond what’s already in your kitchen. Two standard loaf pans, a hand mixer or a strong arm, and a toothpick for the doneness check.
Ingredients
115 g (½ cup) salted butter, softened
200 g (1 cup) white sugar
140 g (½ cup) sourdough discard — straight from the fridge is fine
280 g (1½ cups) mashed overripe bananas (3 large or 4 small)
5 ml (1 tsp) vanilla extract
2 large eggs
250 g (2 cups) all-purpose flour
3 g (½ tsp) salt
5 g (1 tsp) baking soda
2 g (½ tsp) baking powder
Method
Preheat the oven to 175°C (350°F). Spray two 21×11 cm (8×5 inch) loaf pans with nonstick spray and line the bottoms with parchment paper.
Mash the bananas with a fork until there are no large lumps. Leave the little flecks — that’s flavour.
Beat the butter and sugar for 2–3 minutes until pale and creamy, scraping the bowl down once or twice. This softens the sugar crystals, which is why the crumb ends up soft instead of crumbly.
Add the discard, mashed bananas, vanilla, and eggs. Beat until smooth.
Whisk the flour, salt, baking soda, and baking powder together in a separate bowl.
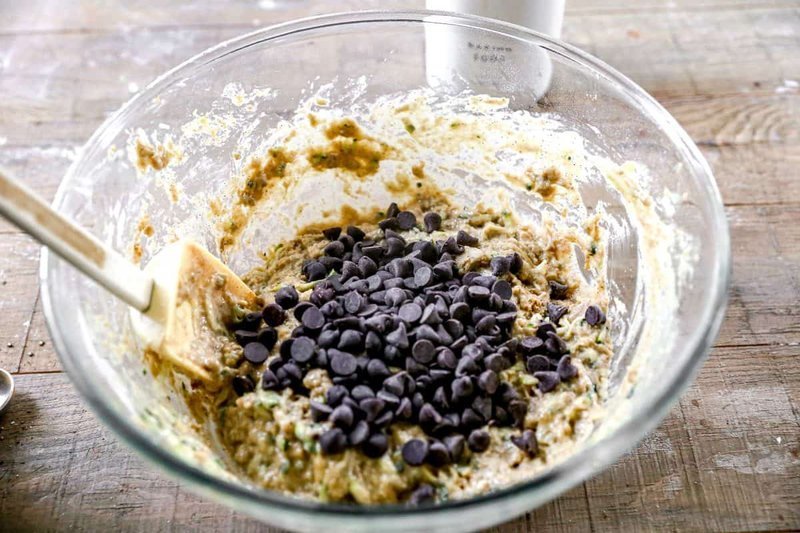
Stir the dry ingredients into the wet mixture, along with any mix-ins you’ve chosen. Stop stirring the moment no flour streaks are left. Overmixing is the number one way to end up with a dense loaf, so give it a lazy final mix and let it be.
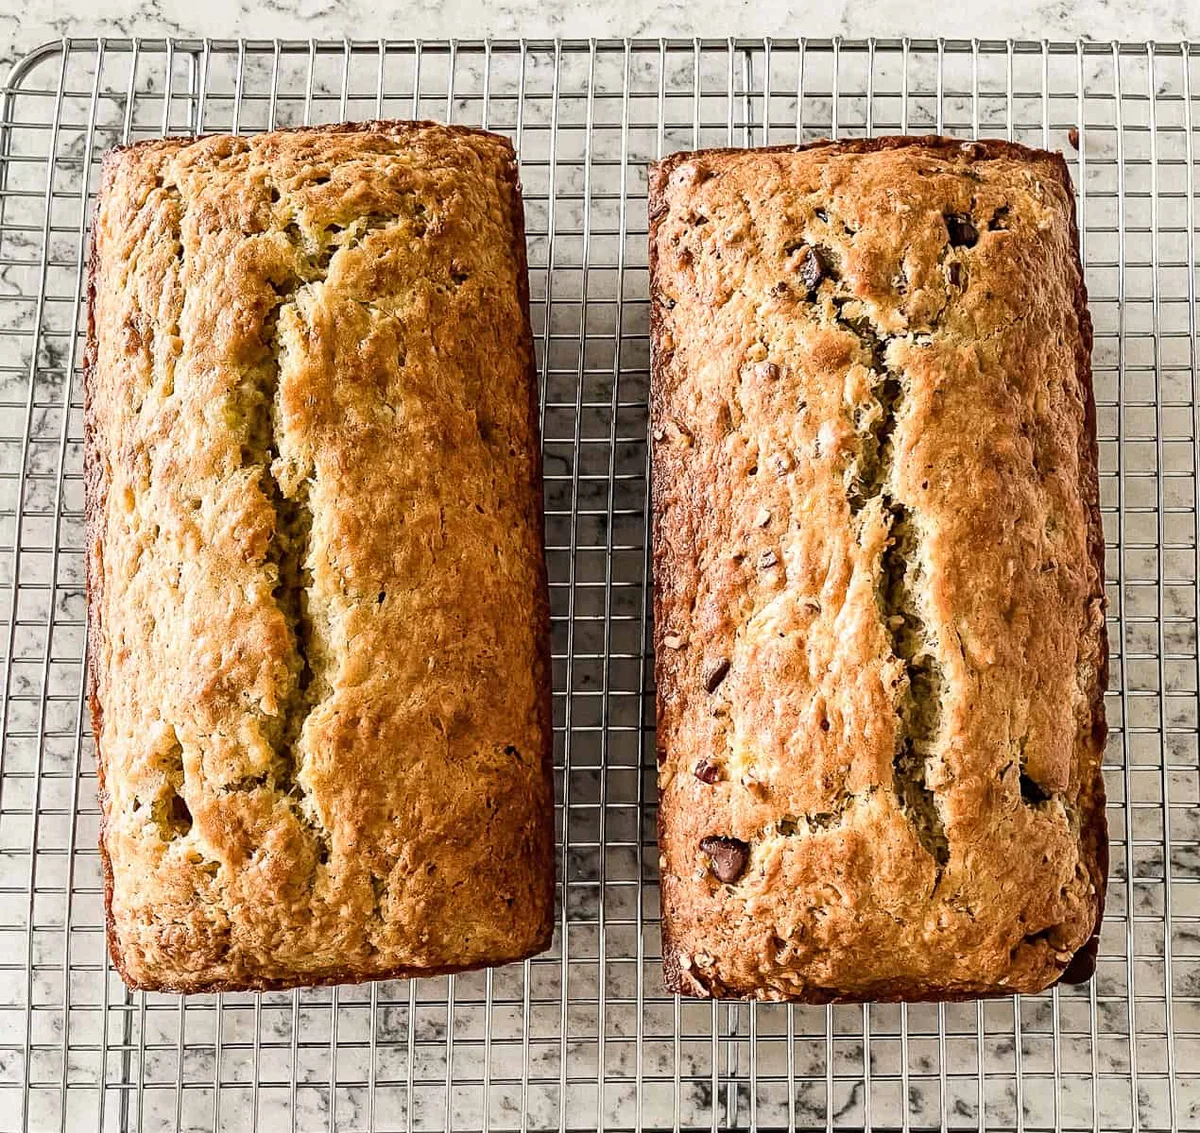
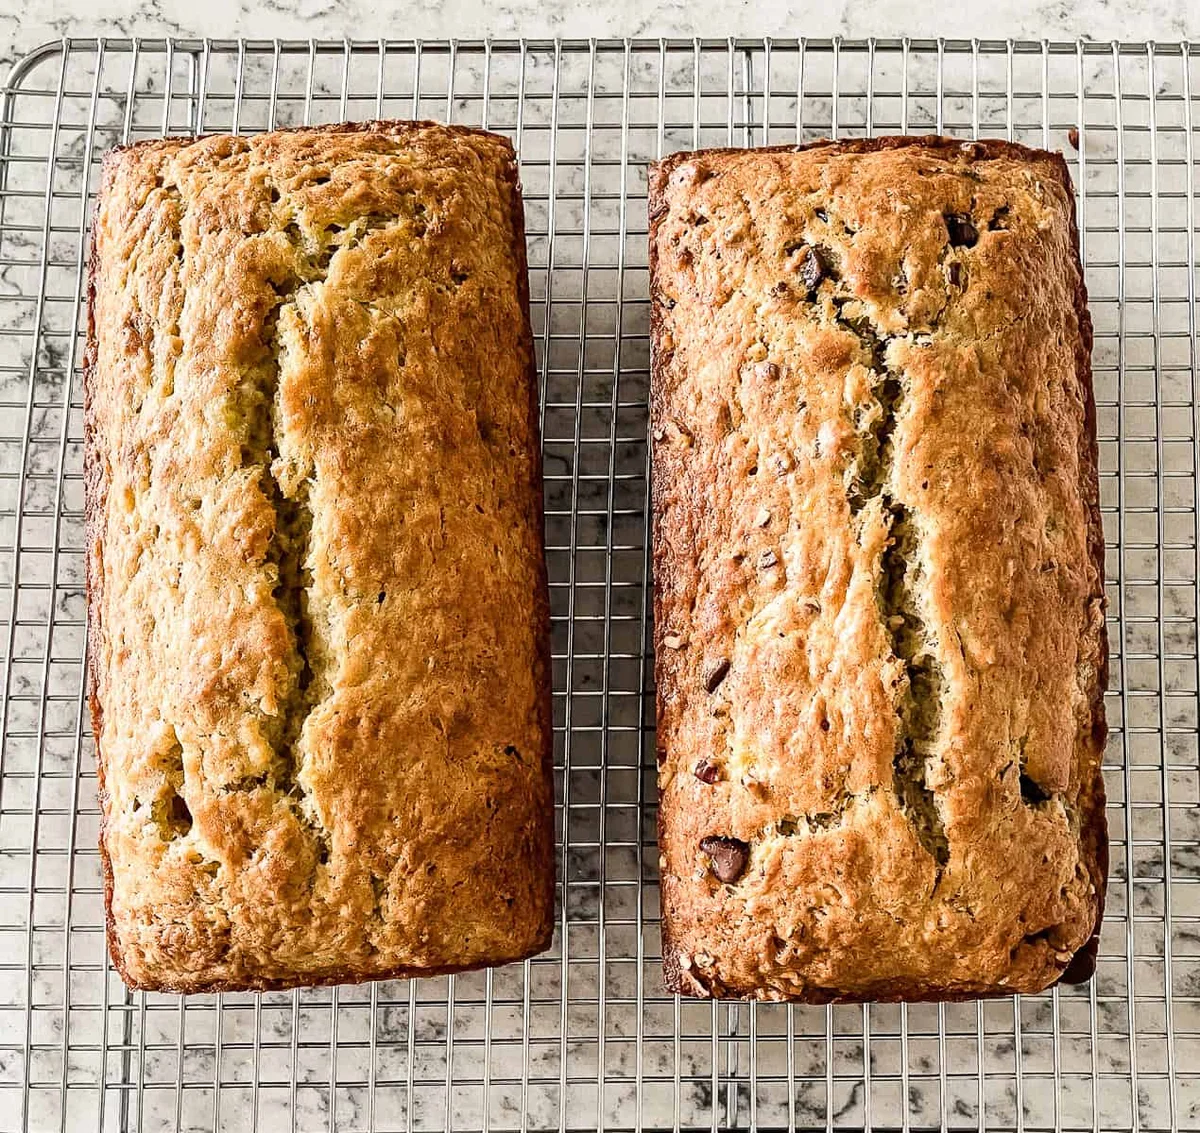
Divide the batter evenly between the two pans. Bake for 40–45 minutes, until a toothpick comes out with only a few moist crumbs — no wet batter.
Let the bread cool in the pans for about 10 minutes, then turn it out onto a wire rack. Warm slices are the best kind, but it cuts cleanest once completely cool.
Tips I learned the hard way
The first time I made this, I packed the flour down into my measuring cup and the loaf came out like a brick. Spoon it in, level it off, or weigh it. I weigh mine now.
Use bananas that are properly brown-spotted. The darker, the sweeter, the better this bakes.
Don’t rush the creaming step. It’s the only part of this recipe where patience pays.
Trust the toothpick, not the clock. The moment it comes out clean, pull the pans.
It keeps well: wrapped, it stays fresh for 3–4 days on the counter, and frozen it lasts 4–5 months.
Make it yours
Banana nut: stir in 240 ml (1 cup) of toasted pecans or walnuts.
Chocolate chip: stir in 240 ml (1 cup) of chocolate chips. That’s the loaf I always keep for myself.
Berry: fold in 240 ml (1 cup) of blueberries, chopped strawberries, or raspberries.
Cinnamon swirl: spread half the batter in one pan, sprinkle with cinnamon sugar, top with the rest, and drag a knife through in a swirl.
Tropical: add 120 ml (½ cup) toasted coconut and 120 ml (½ cup) very well-drained pineapple.
Peanut butter: stir in 160 ml (⅔ cup) of peanut butter chips and layer the batter with swirls of peanut butter.
Can I make it differently?
Active starter instead of discard? Yes — both work. I’ve never once regretted using whatever was in the jar.
Muffins instead of loaves? Absolutely. Divide the batter among 18–20 prepared muffin cups and bake at 175°C (350°F) for 18–20 minutes, until a skewer comes out clean.
One big pan? You can fit this into a single 23×12 cm (9×5 inch) pan, but bake for 55–65 minutes and skip the mix-ins — it tends to overflow with them.
And if it comes out dense? It’s almost always one of two things: overmixed batter, or packed flour. Both are fixable next time.
How we serve it
At our house it goes three ways: fresh from the oven with a proper slab of butter; toasted the next morning with peanut butter (the kids’ vote); and on the rare fancy afternoon, spread with cream cheese. It’s also a fine thing to just eat standing at the counter while it cools, which is how most of it disappears.
Trade-It Tip
No sourdough on hand? Plain yogurt works in a pinch — about 140 g (½ cup) — for similar moisture and a mild tang. It won’t taste exactly the same, but it gets the job done.
If it doesn’t fit a Tuesday night, it doesn’t get published.
There’s a week or two every summer when the zucchini comes out of nowhere and lands on your counter in a pile, and suddenly the whole house smells faintly of garden. I don’t have a garden — I have a farmers’ market — but the panic is the same. That’s when I make this chocolate chip zucchini bread, and it always goes before it cools all the way down.
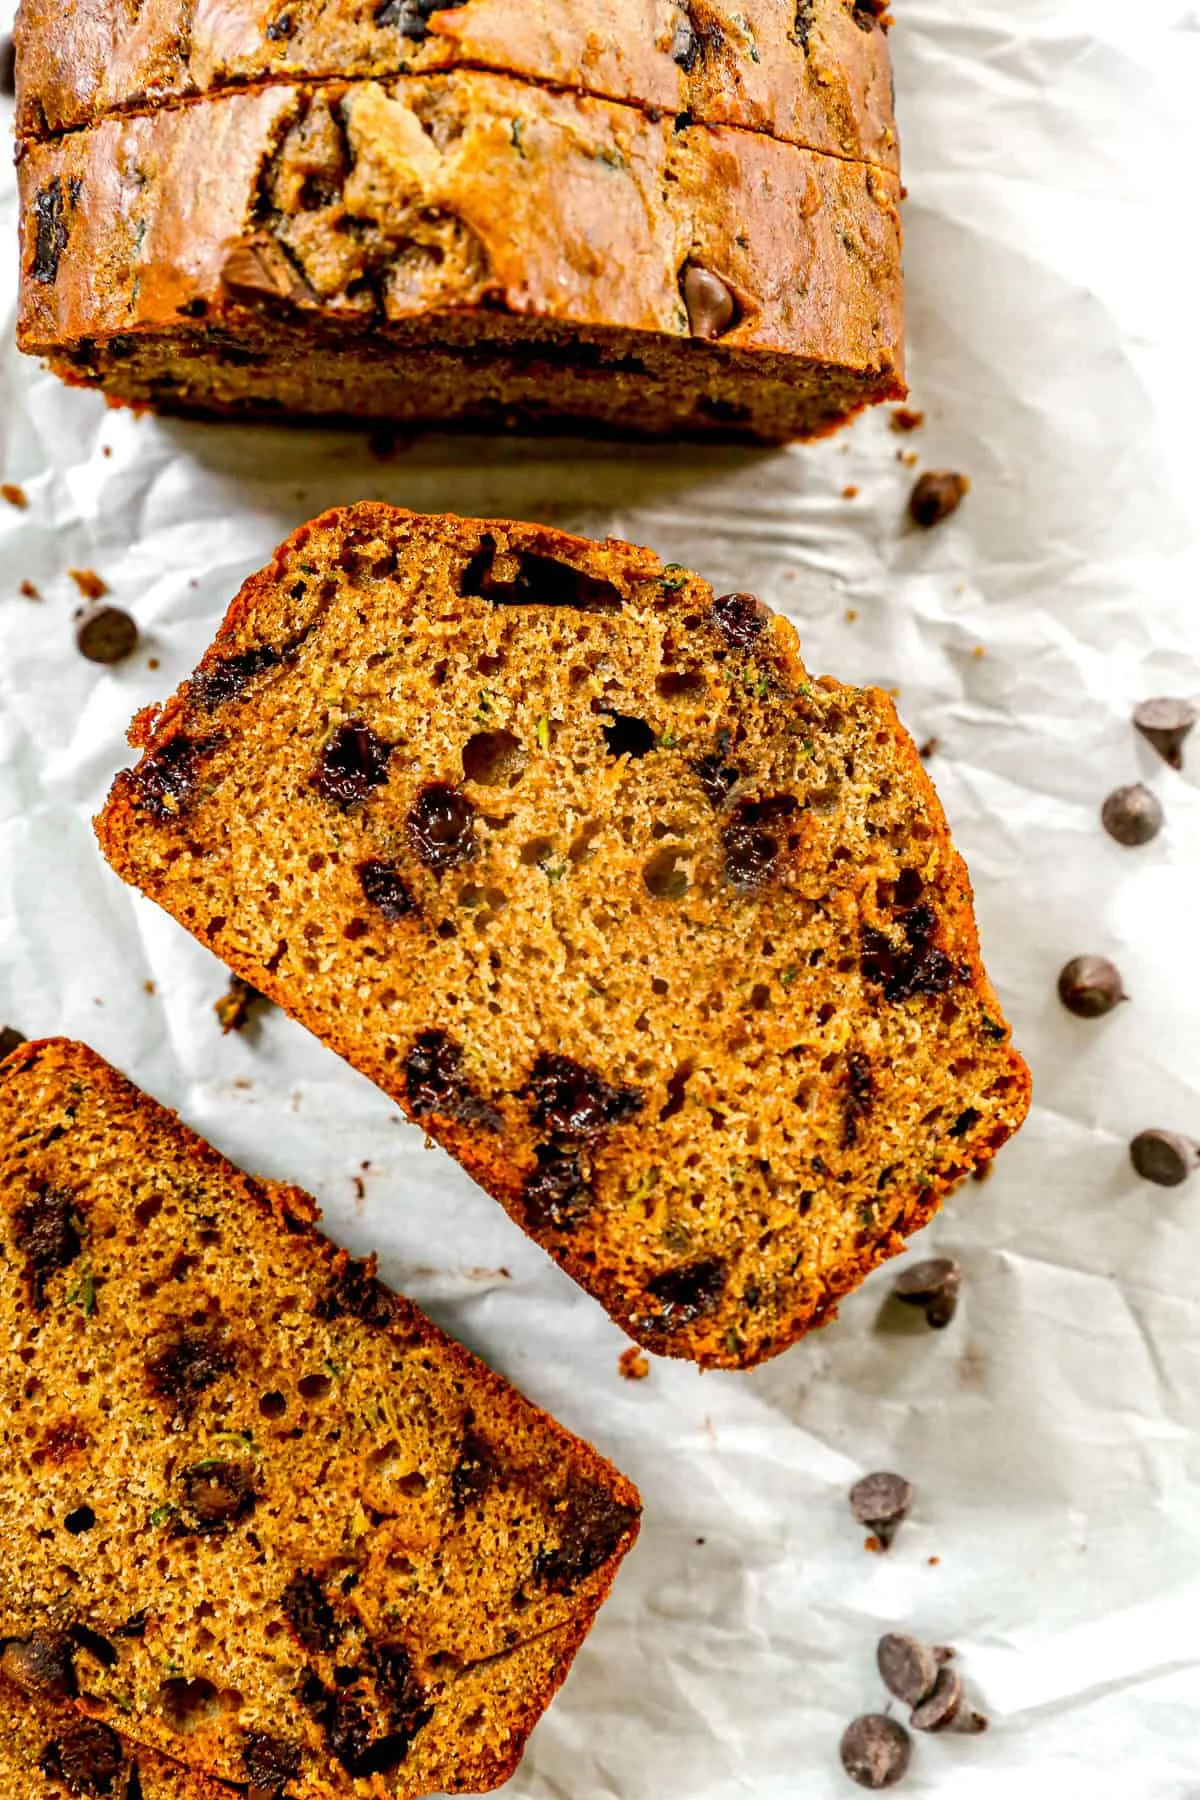
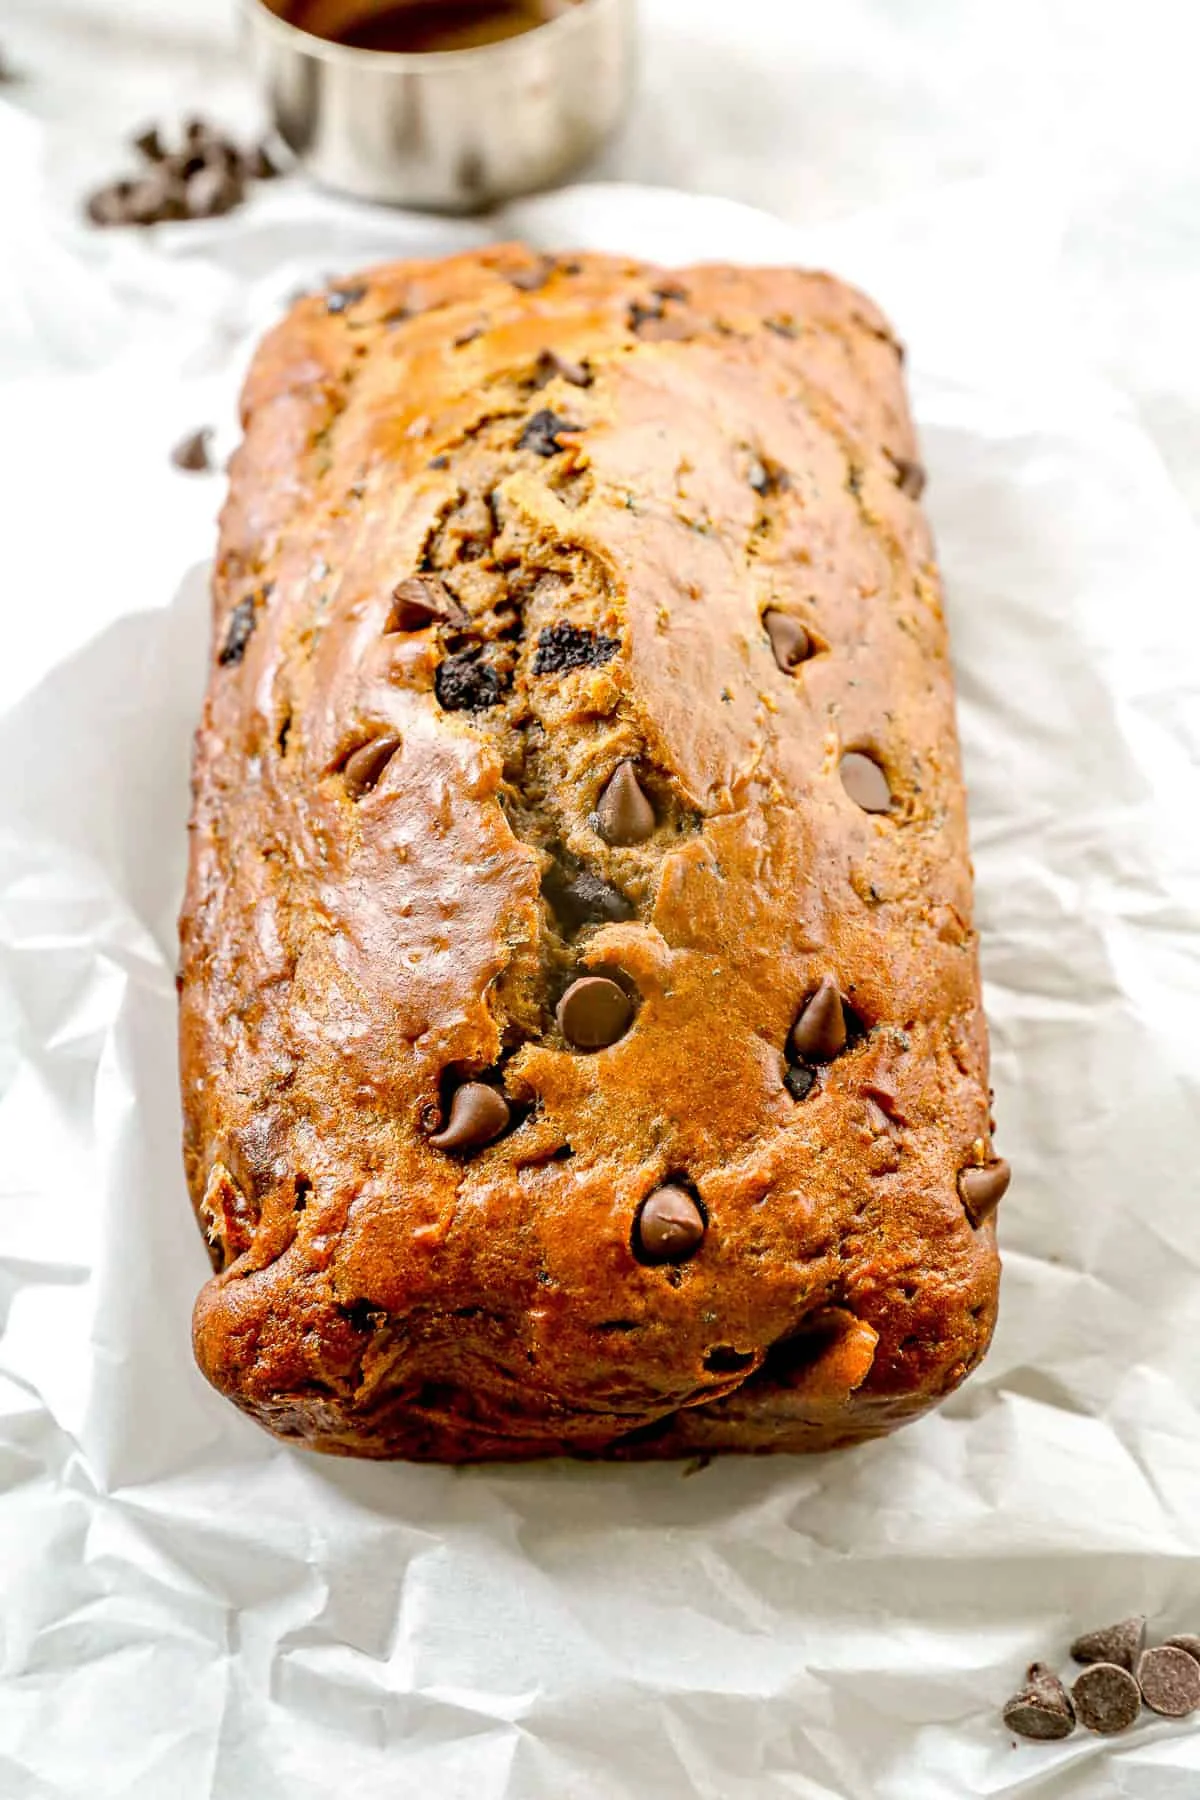
This one is moist, lightly sweetened with honey, and studded with dark chocolate chips. Greek yogurt and properly squeezed zucchini keep the loaf tender, and a blend of all-purpose and whole wheat flour gives it substance without making it heavy. No butter in sight — it’s the good kind of simple.
Why this works: the one non-negotiable step is squeezing the shredded zucchini dry. That single extra move is what gives you a loaf that’s moist without being gummy, with a nicely domed top instead of an under-baked middle. Skip it and you’re gambling; do it and the bread bakes like it means business.
Ingredients, with honest swap notes
You’ll find the full list in the recipe card below. A few things worth knowing first.
Zucchini: pick small ones. The seeds are smaller, and big squash-y zucchini tastes more like — well, squash — than like sweet bread.
Eggs: bring them to room temperature if you can; they fold into the batter much more easily.
Honey: sweetens the bread and helps it stay moist for several days. Pure maple syrup works in its place. Imitation “pancake” syrup does not behave properly in baking — trust me, I’ve watched it happen.
Greek yogurt: what keeps the loaf tender and moist without making it heavy.
Coconut oil: canola or any neutral oil works just as well if that’s what’s in your pantry.
Vanilla: this is what makes zucchini bread taste like dessert and not like a vegetable. Don’t skip it.
Cinnamon (and a pinch of nutmeg, if you’re feeling cozy): for a warm, bakery-style background.
Baking soda: reacts with the acidity in the yogurt for a proper rise and a tender crumb.
Kosher salt: brings the whole thing together.
Flour: half all-purpose, half white whole wheat or regular whole wheat — tender, but with a backbone.
Dark chocolate chips: mini or regular, both work. Sprinkle a few extra over the top before baking for the good looks.
Method
1. Prepare the pan. Preheat the oven to 325°F (about 165°C) and place a rack in the center. Lightly coat a 9×5-inch (about 23×13 cm) loaf pan with nonstick spray, then line it with parchment, letting two opposite sides overhang the edges so you can lift the loaf out later. Spray the parchment too.
2. Prep the zucchini. Grate the zucchini and measure 2 loosely packed cups (about 2 small zucchini, roughly 200g shredded). Wrap it in paper towels and squeeze with your whole hand until very little moisture remains. This is the step that makes or breaks the loaf, so don’t be polite about it.
3. Mix the wet ingredients. In a large bowl, whisk the eggs, honey, Greek yogurt, oil, and vanilla until smooth.
4. Add the dry ingredients. Sprinkle the cinnamon, baking soda, and salt over the wet mixture and whisk briefly. Add both flours and stir just until the flour disappears. Overmixing develops gluten and turns quick breads tough — stop the second the streaks are gone.
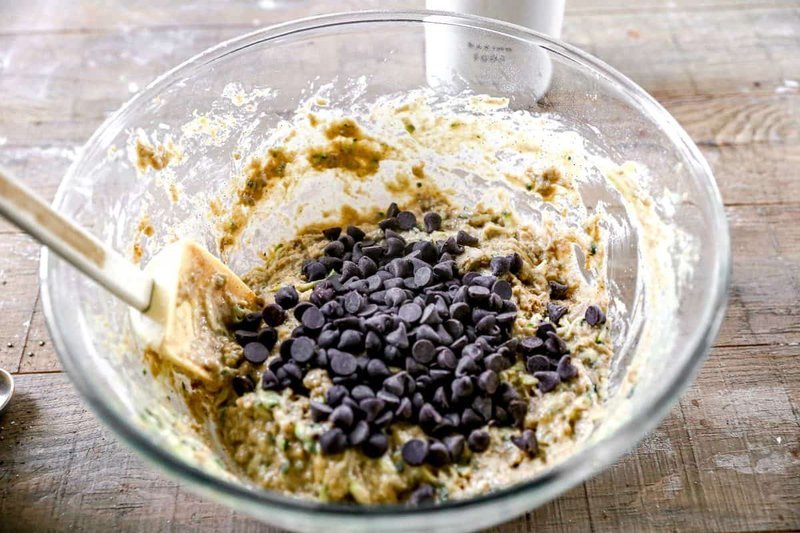
5. Fold it all together. Fold in the zucchini and chocolate chips, just until incorporated. The batter will be very thick — that’s correct, not a sign of a mistake.
6. Bake. Scrape the batter into the prepared pan and smooth the top. Scatter a few extra chocolate chips over the surface. Bake for 50 to 60 minutes, checking from around the 50-minute mark. A toothpick inserted into the center should come out clean or with a few moist crumbs (melted chocolate doesn’t count), and the loaf should spring back lightly when gently pressed in the middle. If you want to be precise, it should read 195° to 200°F (about 90° to 93°C) on an instant-read thermometer.
7. Cool. Let the bread cool in the pan for 10 minutes, then use the parchment handles to lift it onto a wire rack. Wait until it’s completely cool before slicing — hot zucchini bread crumbles, and we’ve both been there.
Notes from my testing
I’ve tested this recipe with both applesauce and Greek yogurt, and the yogurt version wins — it bakes up plusher and richer. I also tried it in an 8×4-inch pan before settling on the 9×5: in the smaller pan it was much harder to get the center to bake through evenly, so I went with the bigger one.
And yes, this is a whole loaf in about an hour and a half, start to finish — the good kind of simple.
Storage and freezing
To store: wrap the cooled loaf tightly, or keep it in an airtight container at room temperature for up to 3 days. Refrigerated, it keeps for up to 1 week.
To freeze: freeze individual slices or the whole loaf, tightly wrapped, for up to 3 months.
To reheat: 10 to 15 seconds in the microwave makes the chocolate chips soft and melty again.
Trade-It Tip: No Greek yogurt? Applesauce keeps the moisture, though the loaf will be a little less rich. And if honey’s gone, pure maple syrup is the swap to make — never the imitation kind.
If it doesn’t fit a Tuesday night, it doesn’t get published.
There are two kinds of tapas in Barcelona. One kind is a wooden board of overcooked prawns and a carafe of sangria that tastes like grape juice got drunk. The other kind is a counter you squeeze yourself onto, a glass of cava, and food so good you stop caring that your elbows are touching the person next to you.
I’ve spent enough years working a restaurant line to know the difference at a glance — and enough tourist dinners to have made the mistake a few times. Every address on this list, I’ve been to myself. Some are old bodegas where cava pours by the glass and nobody rushes you. Others are small kitchens where the fish is still moving when it hits the pass. A couple I found by accident, wandering, and walked in just to see what the place smelled like.
These are the eight bars I’d go back to.
El Born
El Xampanyet
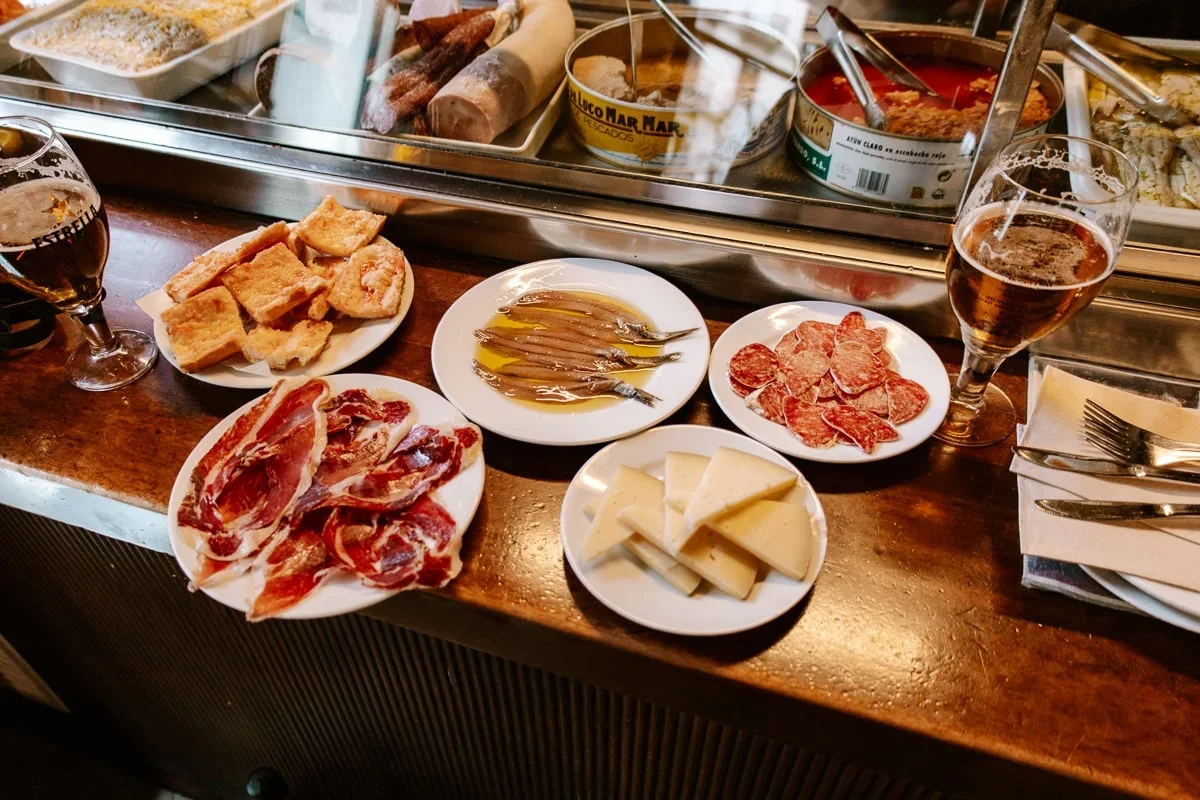
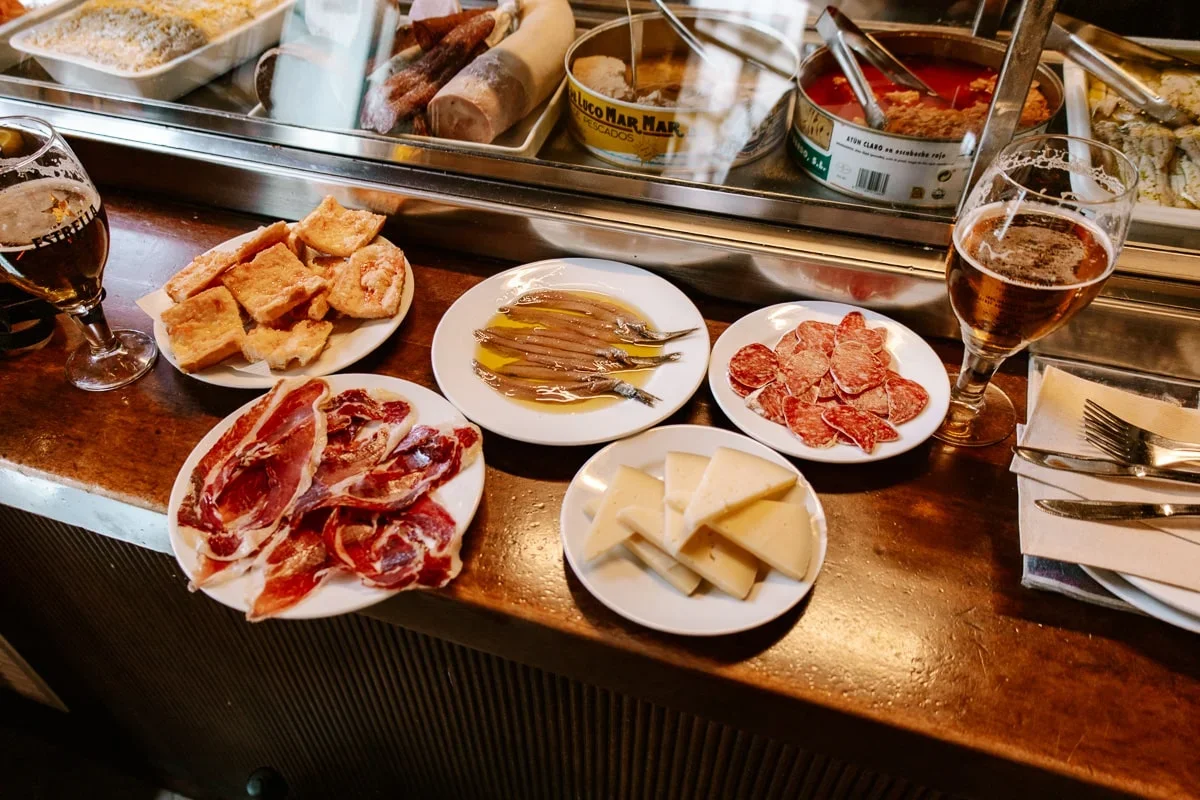
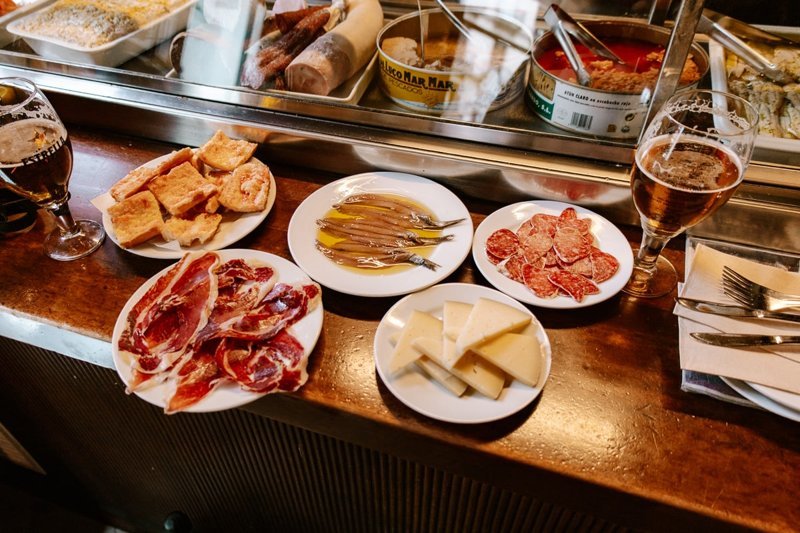
Small, loud, and usually full. The tables are close together, cava keeps getting poured behind the bar, and there is no such thing as a quiet sit-down here. Order the anchovies, the jamón, the tortilla, and pan con tomate — that tomato-bread thing with olive oil and garlic that costs almost nothing and tastes like the whole city. Then see what else lands on your table. No reservations, so come early or work the outdoor seats.
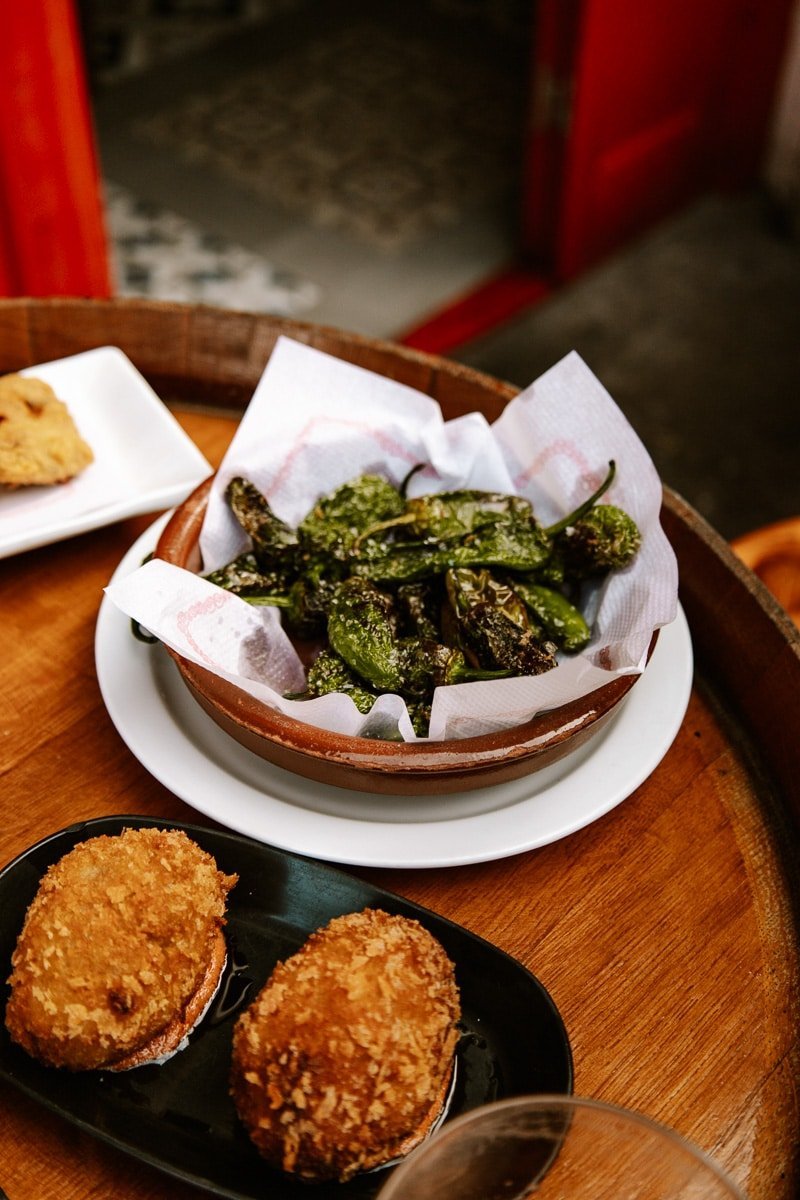
A tiny vermutería right next to the Mercat de Santa Caterina. We happened to walk past it and went in. The table came up with fuet, a ham croquette, pan con tomate, and cazón en adobo — marinated and fried fish, a bit like a crisp, briny fish-and-chip. We washed it down with a vermutillo, the small glass of vermouth that basically is the whole point of a place like this.
Carrer de Colomines 2, Barcelona
Cal Pep
Sit at the bar if you can. You get a straight line into the kitchen and can watch the plates going out at speed — a lot of fish and shellfish moves through that pass. Let them advise you, split several plates, and whatever you do, order the tortilla. Prices run higher than a traditional tapas bar, and without a reservation the wait can get long.
Busy, lively, and tight on the machine. From inside you can see into the open kitchen while the staff keep new plates landing at pace. The menu mixes classic tapas with fish, shellfish, and meat off the grill. Book ahead if you can, especially for dinner.
Sit on the Rambla de Catalunya and it’s small and noticeably calmer than most tapas bars in the centre. There’s a terrace outside with a view along the boulevard, and inside you can get toasts, warm tapas, and a drink. It’s not the kind of place I’d cross half the city for — but it’s a good stop if you’re already in Eixample and want a breather.
Rambla de Catalunya 94, Barcelona | {{link:https://la-alcoba.com/la-alcoba-azul|la-alcoba.com}
La Bodegueta de Rambla
A proper old-school bodega: a long bar, bottles lined up along the walls, small tables close together. Order the fuet, the Manchego, the patatas bravas, the marinated anchovies, the pan con tomate. Nothing new on the menu — and that’s the point. This is exactly what you go to a traditional bodega for, done properly.
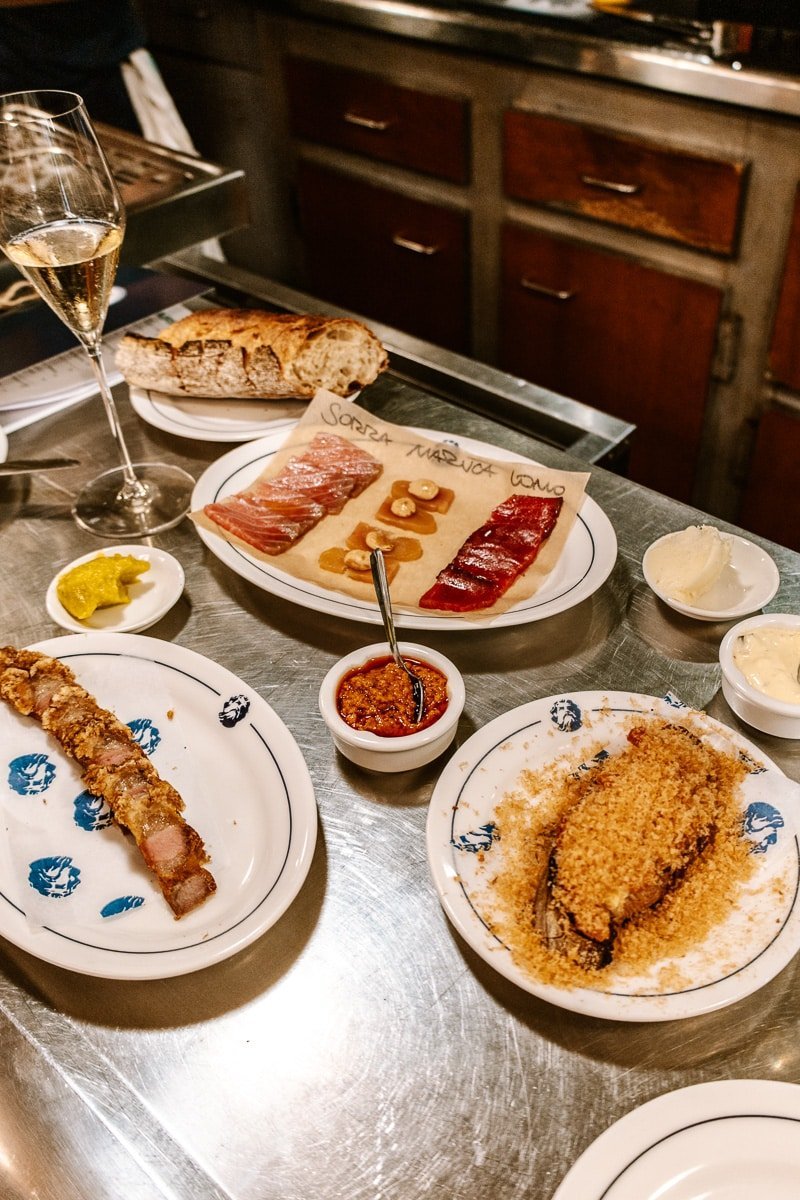
This was the favourite of the whole trip, and I’d say it without hesitation. The place is built around fish, fire, and simple cooking with a lot of flavour. Sit at the bar — you can watch the fish get cut, then go straight into the kitchen. We had calamari, a few kinds of fish, chicharrón, and the homemade aioli. For that aioli we ordered extra bread, which tells you everything. It’s pricier than a traditional tapas bar, and a reservation makes sense. We’d come back in a heartbeat.
Small, and no seats at all. You stand between the bottles along the wall while the montaditos — the tiny toasted bread bites — get made at the bar in front of you. They’re small, so order a few and share. Don’t expect a calm lunch. It’s a short, busy stop that fits perfectly into an afternoon or evening in Poble-sec.
That’s the lot. No tourist menus, no sad sangria — just the bars where the food actually landed. If you’re in Barcelona and you want to know where the locals are standing, this is your list.
If it doesn’t fit a Tuesday night, it doesn’t get published. — Grace
There’s a moment at the end of a long week when I don’t want to cook. I want one thing made properly in a glass. That’s when the gimlet comes out — three ingredients, five minutes start to finish, and it tastes like a bar made the effort.
A traditional gimlet is just gin, fresh lime juice, and simple syrup. Lightly sweet, sharply refreshing, the good kind of simple. It’s the gin version of a daiquiri — a spirit, lime, sugar — and it has been around long enough to have a story attached to it.
The short history of the gimlet
Like most classic drinks, the gimlet’s origins aren’t 100% clear. Rumor has it that in the 18th century, the British Royal Navy made it as a medicinal tonic against scurvy. The vitamin C from citrus was supposed to ward off illness, and the gin — let’s be honest — must have been the part that got people to actually drink it.
The name, too, has a maritime feel: it’s thought to come from the gimlet tool, the little handheld drill used to bore holes in the wooden barrels that carried food and spirits.
What’s in a gimlet
Just three things, and none of them are complicated:
2½ ounces gin — the base. Quality matters more here than anywhere else, because there’s nothing hiding behind it.
¾ ounces fresh lime juice — the star flavor. I always squeeze it fresh; bottled lime never gets the same bright bite.
¾ ounces simple syrup — store-bought works, but homemade is a 10-minute jar that keeps in the fridge and makes the drink silky without any gritty sugar crystals.
Best gin for a gimlet
In a two-or-three-ingredient drink, the spirit you use really shows. My go-to is Hendrick’s — it’s high quality, reliable, and always in stock where I shop. But any good top-shelf gin you like will make a great gimlet. Spend the little extra here; it’s the one place this recipe rewards it.
How to make it
Combine the gin, lime juice, and simple syrup with ice in a cocktail shaker.
Shake well.
Strain into a chilled coupe or martini glass.
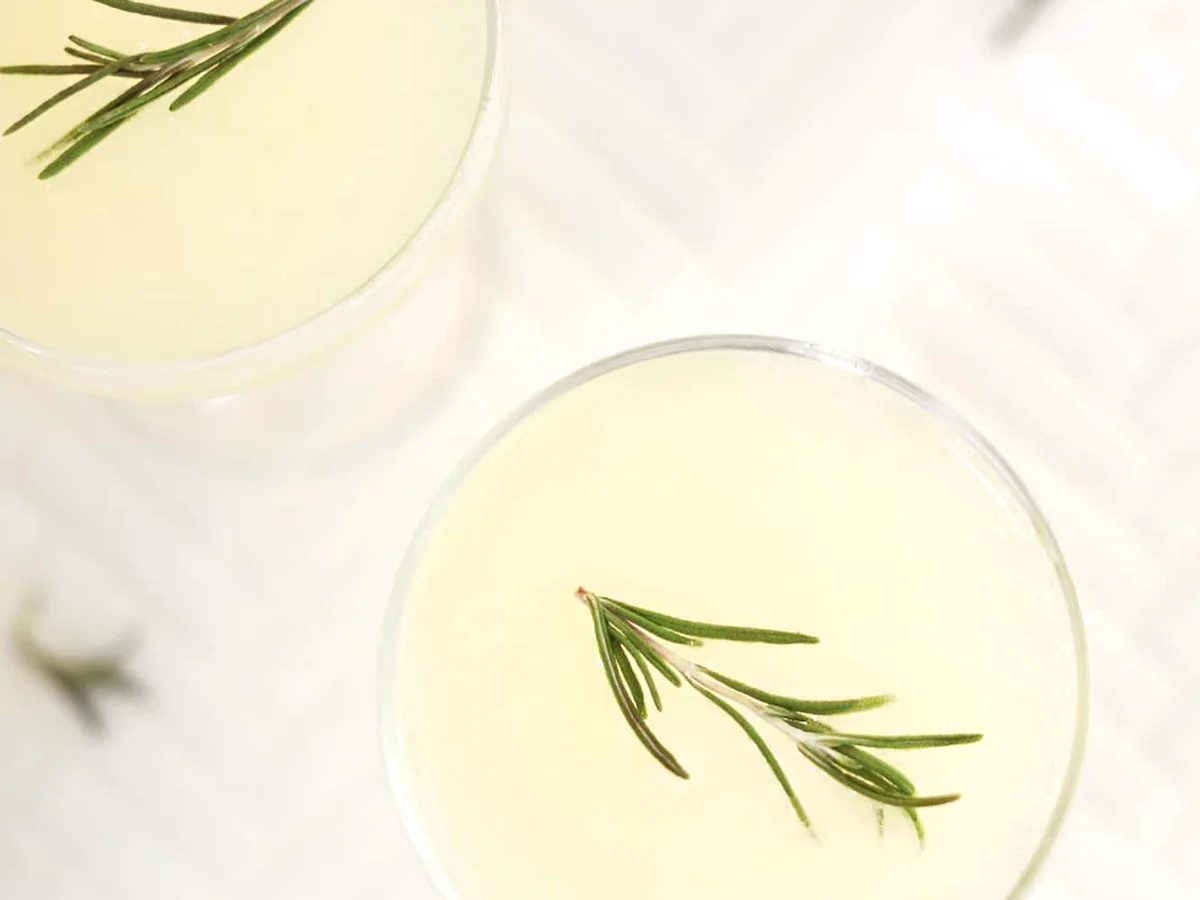
Garnish with a sprig of rosemary or a mint leaf if you have one — it adds a little aroma when you sip. A lime wedge works just as well.
Sometimes I make it on the rocks instead. My favorite local restaurant always asks which I prefer when I order one — up or over ice — and I’ve never once regretted either answer. For a full glass, stir the ingredients with ice instead of shaking.
Gimlet variations worth trying
Once you’ve got the base down, the variations are where it gets fun. All of these take the same five minutes.
Lime cordial gimlet — an old-school recipe-book style: 2 ounces gin with 1 ounce of Rose’s Lime Juice Cordial, shaken with ice and poured into a chilled glass. Slightly sweeter, very easy.
Vodka gimlet — same recipe, swap the gin for vodka. That’s the whole trick.
Basil gimlet — muddle a few fresh basil leaves in your shaker before adding the gin and lime. Instant herbal note.
Cucumber gimlet — add a few slices of cucumber to the shaker and muddle gently. Strain over ice and garnish with a cucumber wheel.
Rosemary gimlet — steep some fresh rosemary in your simple syrup as you make it, add a sprig when shaking, and garnish with rosemary. Yes, it makes sense.
What glass to use
I love this drink in a classic coupe, and any martini-style glass you own works fine. The one pro move worth stealing: pop the glass in the freezer for at least 30 minutes before pouring. You get that properly cold, frosty glass from a fancy restaurant, at home, with zero effort.
That’s the whole point of a gimlet. No fancy shaker required, no bar cart, no three pans in the sink — one glass, three ingredients, and a drink that actually tastes like someone took their time.
Trade-It Tip: No Hendrick’s on the shelf? Any dry gin you’d happily drink neat works — the lime does the heavy lifting, and the gin just needs to be clean.
Here’s to the good kind of simple.
If it doesn’t fit a Tuesday night, it doesn’t get published.
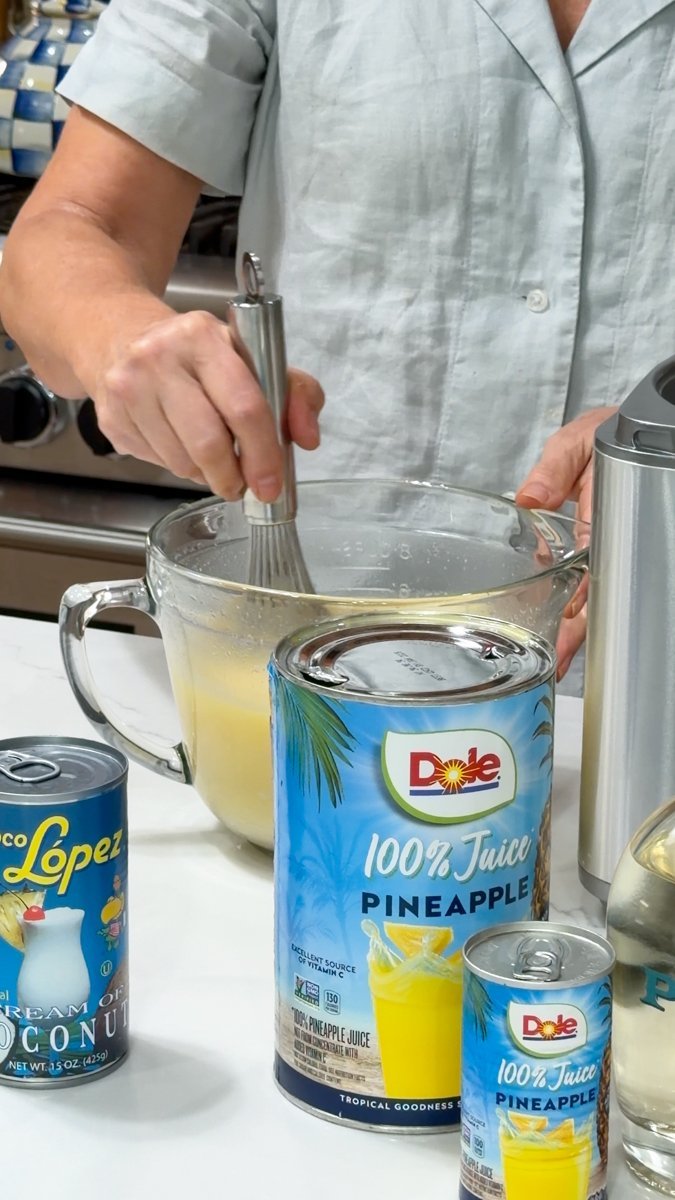
I’ve had maybe thirty piña coladas in my life, and the one that ruined all the others for me was on a hot afternoon in Old San Juan. We were three rounds deep — the real thing, the kind they pour over shaved ice in the old town — and I was already calculating how to get that back home.
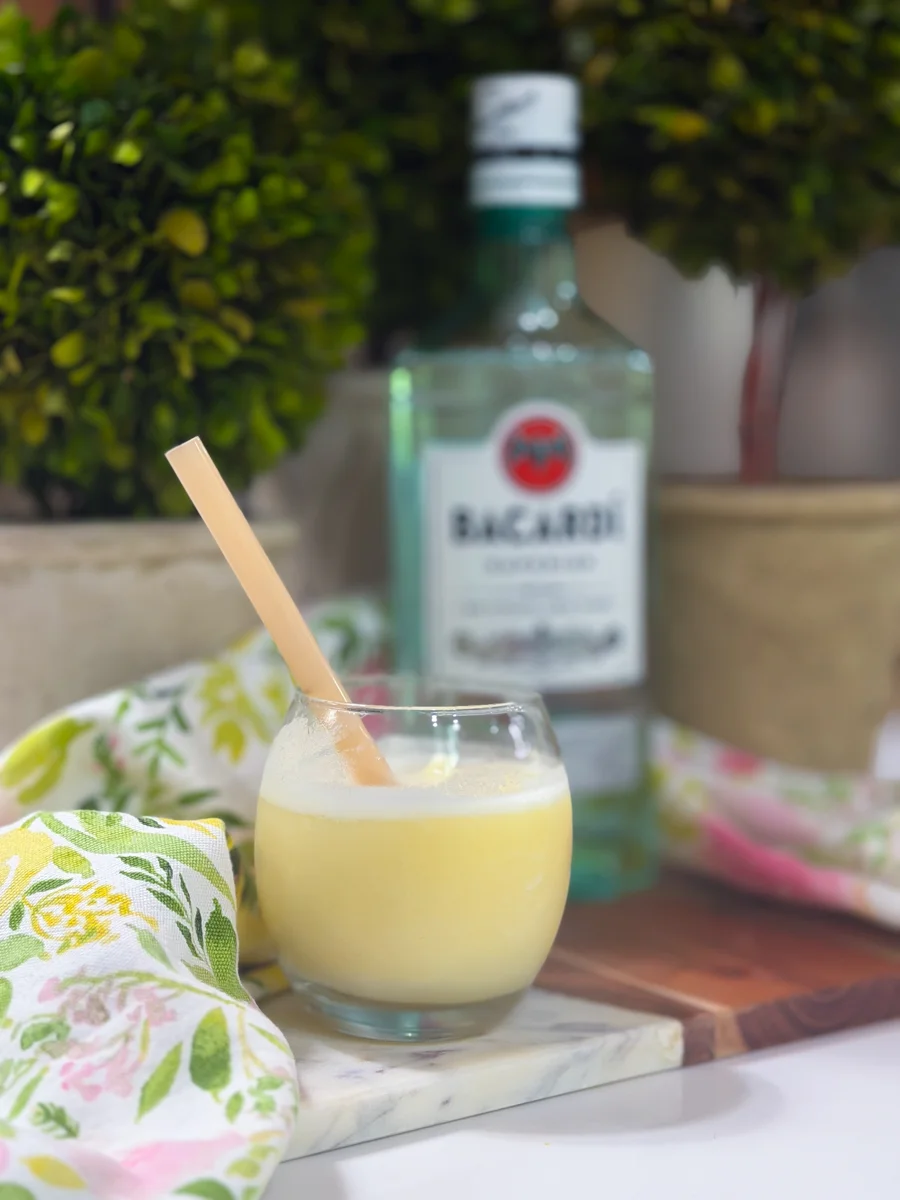
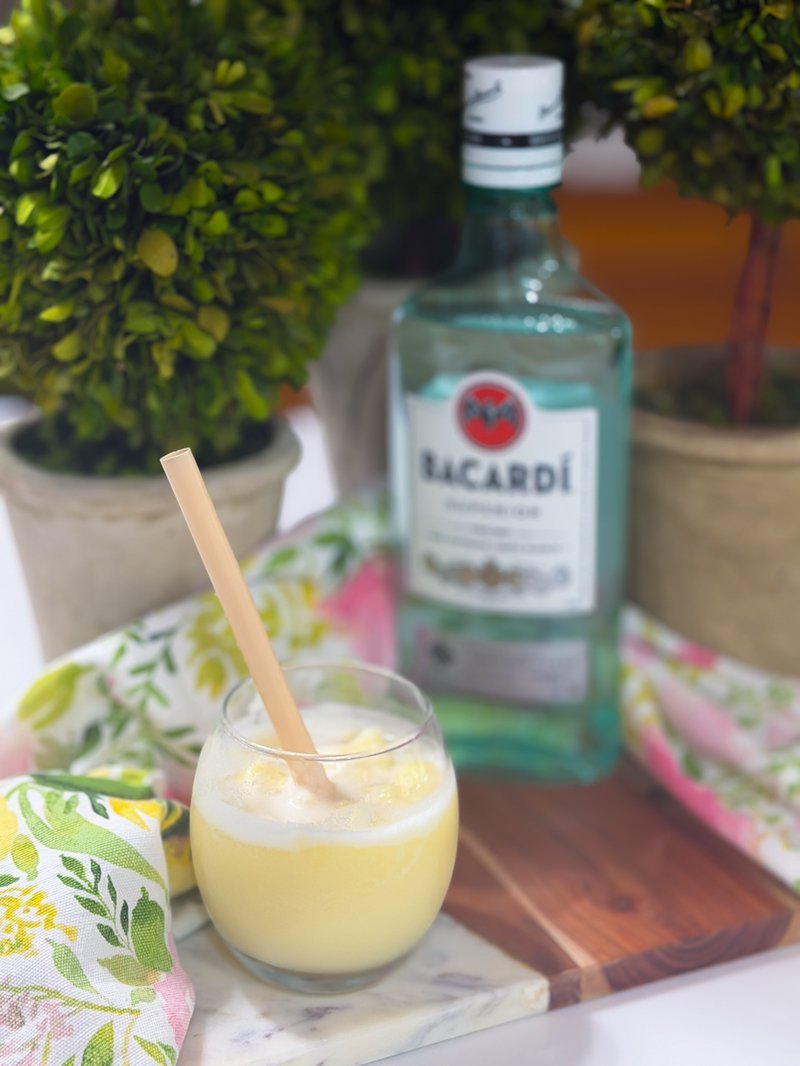
I ended up with a file on my fridge, a 2-quart Cuisinart ice cream maker, and three failed attempts before it tasted right. The details in some of the photos don’t quite match the recipe below — you were there during my experiments, so I left them in. The recipe itself is the final version.
Why this actually works
The whole trick is making a frozen pineapple-coconut base ahead of time, then adding the rum only when you’re ready to serve. Alcohol keeps the mixture soft, so it goes in last. Which means the base is a perfectly good no-alcohol treat in its own right — scoop it for the kids, the teetotallers, or the 7pm me. One batch serves whoever’s in the house, whenever they want it. Back when I worked the line, we did the same thing with punch bases: pre-make the big thing, let the guest finish their own.
Total hands-on time is somewhere around 20 minutes. The chilling and churning wait themselves out.
What you’ll need
For the frozen base (serves around 10):
1 x 22-ounce bottle Coco Real Gourmet Cream of Coconut. This is the creamiest option I’ve found, and it is not the same thing as coconut cream or coconut milk — the recipe leans on it for exactly that reason.
1 x 46-ounce can Dole 100% Pineapple Juice
1 cup water
Equipment: a 2-quart Cuisinart ice cream maker (or any freezer-bowl model), a large mixing bowl, a whisk, a freezer-safe container with a lid, an ice cream scoop, thick straws, and glasses — mine are roughly 13 ounces each. A jigger is a bonus, a measuring cup works fine.
How to make it
Whisk the cream of coconut, pineapple juice, and water in a large bowl until completely smooth. Cover and refrigerate for at least 4 hours — overnight is better, and it’s the part I always do the night before.
Pour the chilled mixture into the frozen bowl of your ice cream maker and churn, following the machine’s instructions, usually 20–30 minutes, until it’s soft-serve consistency.
If your machine is small, chatter it in two batches.
With my 2-quart Cuisinart, I churn half at a time. Big catch: if you’re doing a second batch with this machine, refreeze the metal insert for 24 hours before the second run, or it will not freeze. I learned this the expensive way.
Transfer the finished base to a lidded, freezer-safe container and freeze for several hours, or overnight, until firm.
At serving: measure roughly 1 1/2 to 2 ounces of white rum into each glass, then scoop the frozen base on top. Hand your guests a thick straw — the kind for milkshakes work best — and let them stir it as they drink. Trim the straws if they’re taller than your glasses. A wedge of pineapple and a cherry on the rim if you’re feeling fancy.
Tips for the best piña coladas
Chill the base before churning — it’s the difference between creamy and icy.
Stick with real cream of coconut, not coconut milk or coconut cream. That’s the whole point of the recipe.
Rum goes in at serving. Alcohol lowers the freezing point and keeps the base from setting properly.
Want it thicker? More base, less rum for each glass. Want it sipperable? Add a splash of pineapple juice.
Make the base a day ahead. The base does the work; the weekend does the rest.
Questions you’re probably thinking
Can I make this without alcohol? Yes — the frozen base is the whole drink, minus the rum. It’s grown into a genuine hit with my kids.
How far ahead can I make it? The base stores in a sealed container in the freezer for up to two weeks. Make it the weekend before and forget about it.
What rum should I use? A light or white rum keeps the classic tropical flavor. More or less to taste — the base is doing most of the work.
Can I use a different ice cream maker? Any freezer-bowl model will work. Follow your machine’s instructions for freezing the bowl and churning time, and expect the batching to be different on a smaller unit.
Useful trades
Trade-It Tip: No thick milkshake straws? Your thickest available straw, trimmed to the glass, is fine. And if the Coco Real is sold out, Coco López cream of coconut is the backup I’d reach for — same idea, same texture.
I make this the weekend before I host, freeze the base, and on the day I do nothing but scoop, measure rum, and hand out drinks. That’s the whole job. If it doesn’t fit a Tuesday night, it doesn’t get published.
My father-in-law makes these every single summer, and I used to stand at his counter watching him toss cucumbers into a bowl with Greek yogurt and dill like it was nothing. No recipe card, no kitchen timer, no one asking him for measurements. I always thought I’d never get that close to the taste — until I realized the whole trick was the bread.
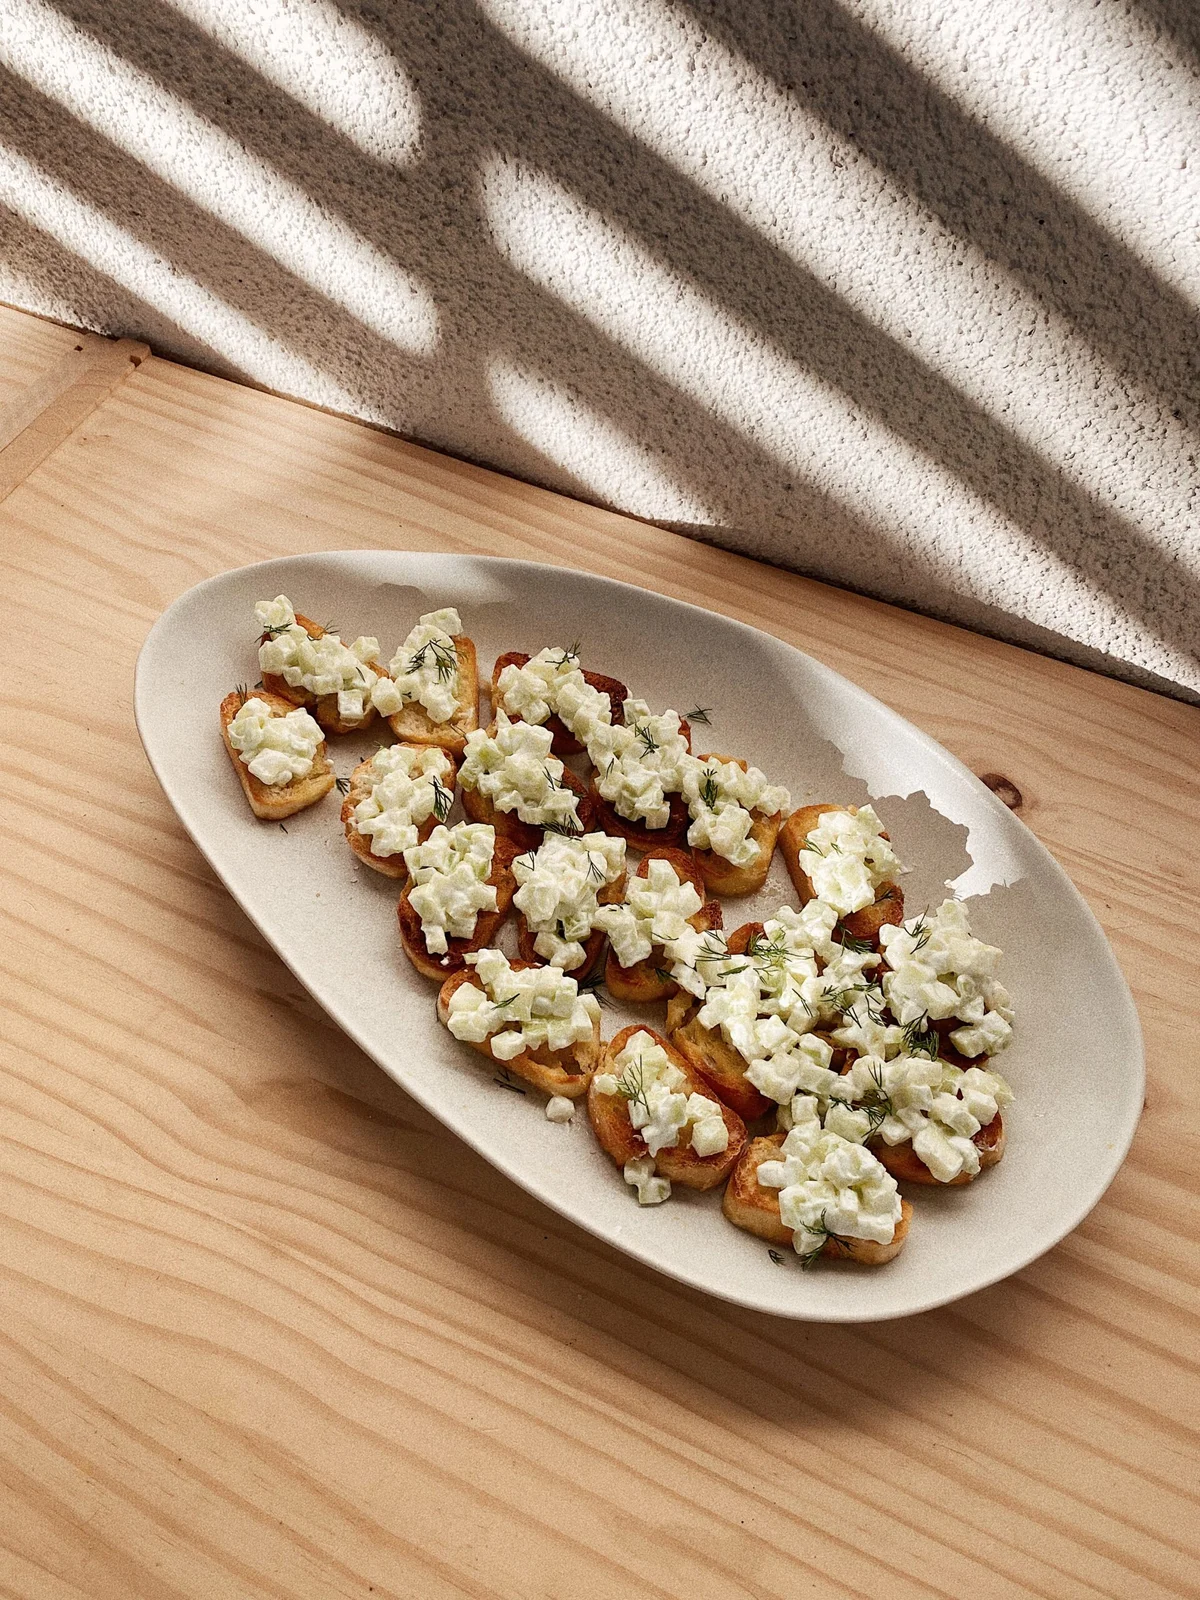
These are basically tzatziki on toast, and they’re the kind of thing your guests ask about before they’ve even had their second one. Not the “oh that’s lovely” kind of compliment. The “wait, what’s in that?” kind.
Why this works
The cucumbers release their water when you dice them and let them sit, so by the time you’re serving the yogurt has that clean, bright edge instead of a soggy pool. The bread does the heavy lifting here — any toast you already have or can make in two minutes. My version uses a baguette, but honestly, if your cupboard has something with a crust, you’re in business.
What you’ll need
1 baguette (or equivalent crusty bread, about 4 to 6 slices)
1 to 2 large cucumbers, or a handful of English cucumbers
1 to 2 tablespoons full-fat Greek yogurt
Coarse sea salt
Fresh dill, a few sprigs for the top
Olive oil, just enough for the bread
No chamomile, no fancy equipment, no second pot. That’s the whole deal.
Step by step
Finely dice the cucumbers and set them in a bowl. Let them sit while you get the bread ready. This is the one non-negotiable step — the sitting gives the flavor room to settle in.
Brush the bread with olive oil and toast it however you prefer — grill, pan-fry, bake, or a proper toaster if you’ve got one. I use the toaster with the strongest setting and check it after a minute so it doesn’t turn to a coal. Golden brown is the target; slightly darker is fine, dark enough to make you say “huh” is not.
When the bread is ready, fold the yogurt into the cucumbers. Start with a tablespoon, mix it in, then add another if you want it creamier. You want it thick enough to hold on the bread but not so wet it drips down your fingers.
Spoon the cucumber-yogurt mixture over each piece of toast. Sprinkle with coarse sea salt and a few torn sprigs of fresh dill on top. Done.
That’s it. From start to finish, probably ten minutes if your bread is in the toaster while the cucumbers sit. If your kids ask “can I make them too?” — the answer is yes, and they should, because chopping cucumbers and spooning yogurt onto toast is a skill that comes in under ten years old.
Ingredient swaps that work
No Greek yogurt? Plain yogurt works. You’ll lose a little tang but the texture holds up. Low-fat yogurt is an option if that’s what you have — it’ll be a bit thinner, so go easy on the salt.
No dill? Fresh chives are a fine swap. If you’re out of both, a pinch of dried dill is worth half the flavor of fresh, so that’s the lesser evil if it’s all you’ve got.
No baguette? Any crusty white bread works. Whole wheat is good here if you want a little more chew. Pita bread, half-sliced, also makes a great base if you’re going the casual route.
Want it a bit sharper? A teaspoon of lemon juice stirred into the yogurt before you spoon it over the bread brightens the whole thing without making it taste like a salad.
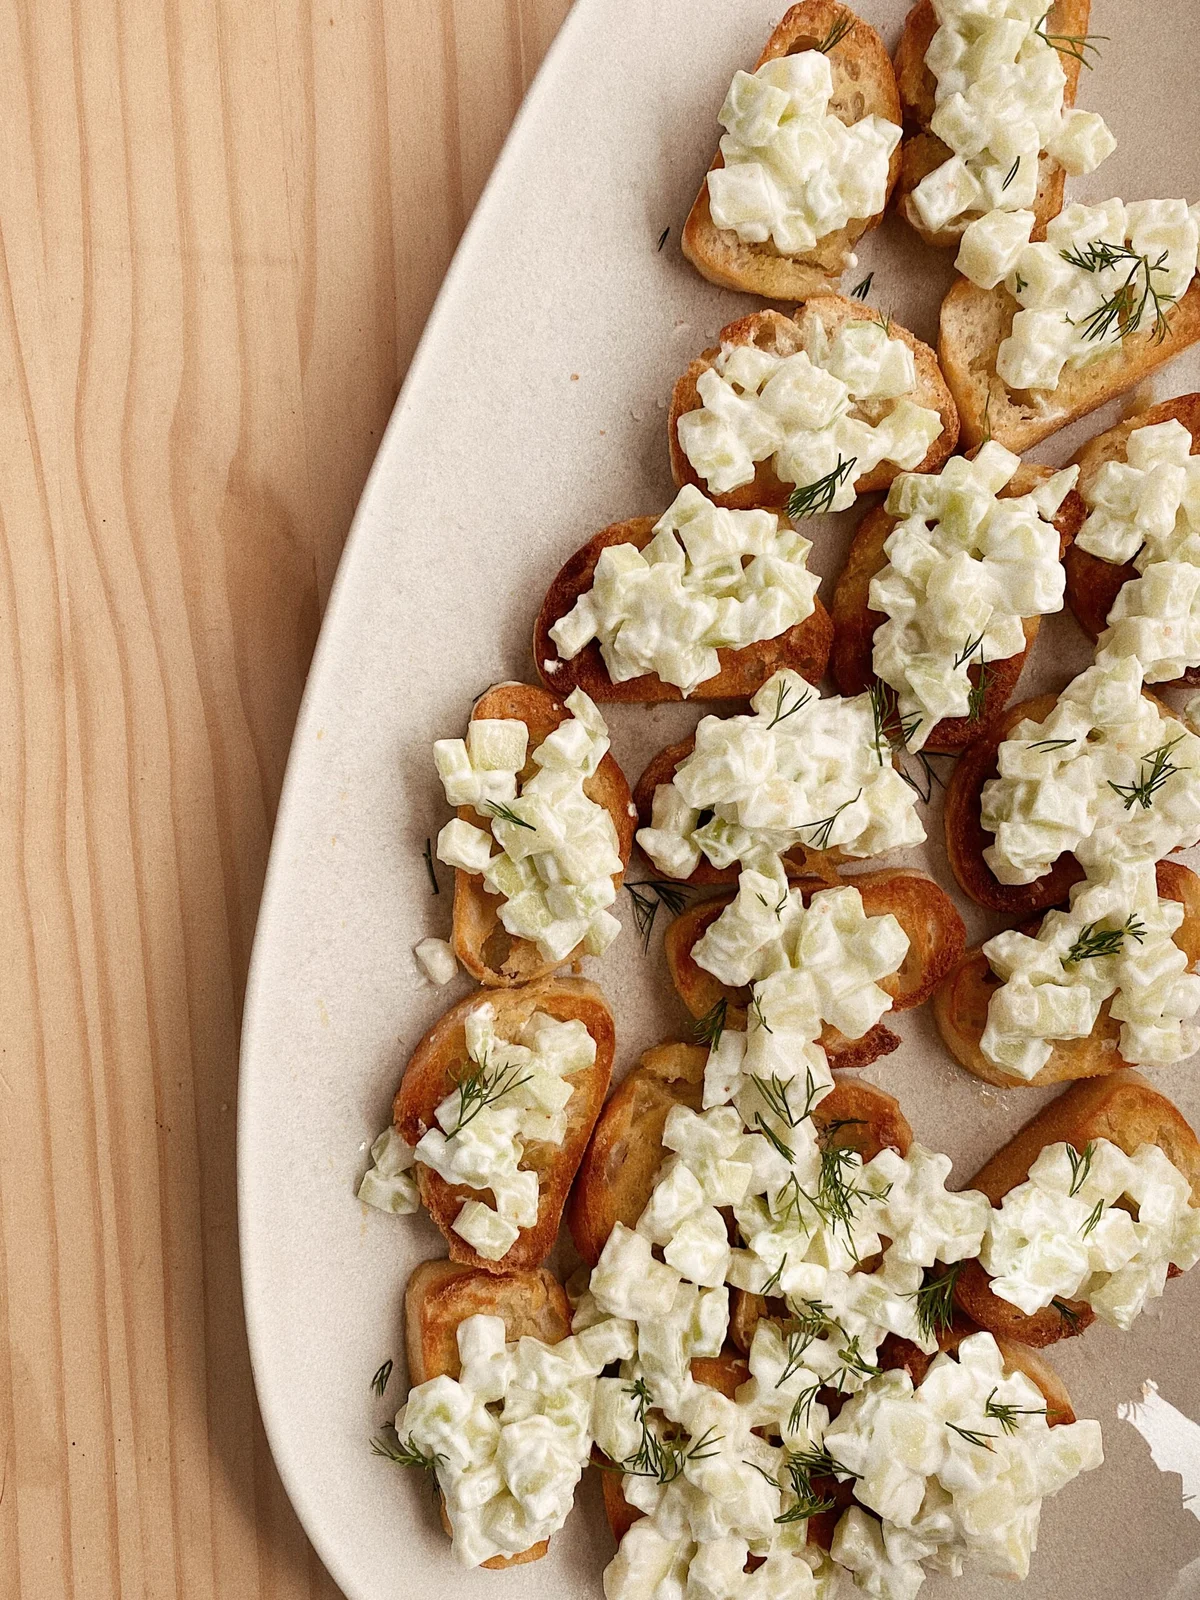
I made these for a dinner last month and a guest asked if I’d “French-fried the bread.” I laughed. Told her I toasted it. She laughed too, but I think she actually meant it. The one thing I want you to see is the way the yogurt clings to the bread — that’s the difference between a soggy dollop and something that actually holds together when you pick it up.
Here’s what the top should look like when you get it right — a little salt, a few torn dill sprigs, and the kind of plating that takes thirty seconds but earns you a second helping.
That’s the kind of dish that earns a phone number. Serve them with a salad and some roasted something, and you’re done for the evening.
If it doesn’t fit a Tuesday night, it doesn’t get published.
Earlier this week I opened a fresh bag of spinach from the shop and found a small patch of soil at the middle of the leaf. I stared at it for a minute before I worked out what it was: dirt, sitting in the middle of a leaf, in a bag I have bought before, from a store I trust.
It is the kind of thing that makes you rethink the whole washing setup. My lettuce has gone from the sink rinse-it-off routine to a bowl-and-colander setup, and it has quietly become the best five minutes of my day — hands in cold water, leaves turning, the kitchen going quiet while I sort one leaf at a time. That is the moment I changed how I wash vegetables, and it started with one very small stain.
Back at the restaurant where I spent six years on the line, the washing station was the one job nobody on the team wanted. The cold water never stopped being cold, the leaves kept clinging to your hands, and by the end of lunch service every basin was opaque with grit. I got good at it. I could spot a bad batch in seconds. Then I came home, picked up the colander-and-bowl routine I had borrowed from a line senior I worked with a long time ago, and started making my own routines out of his. This is that setup, updated for a small family kitchen with a fridge and no spare counter.
The three-step method I actually use
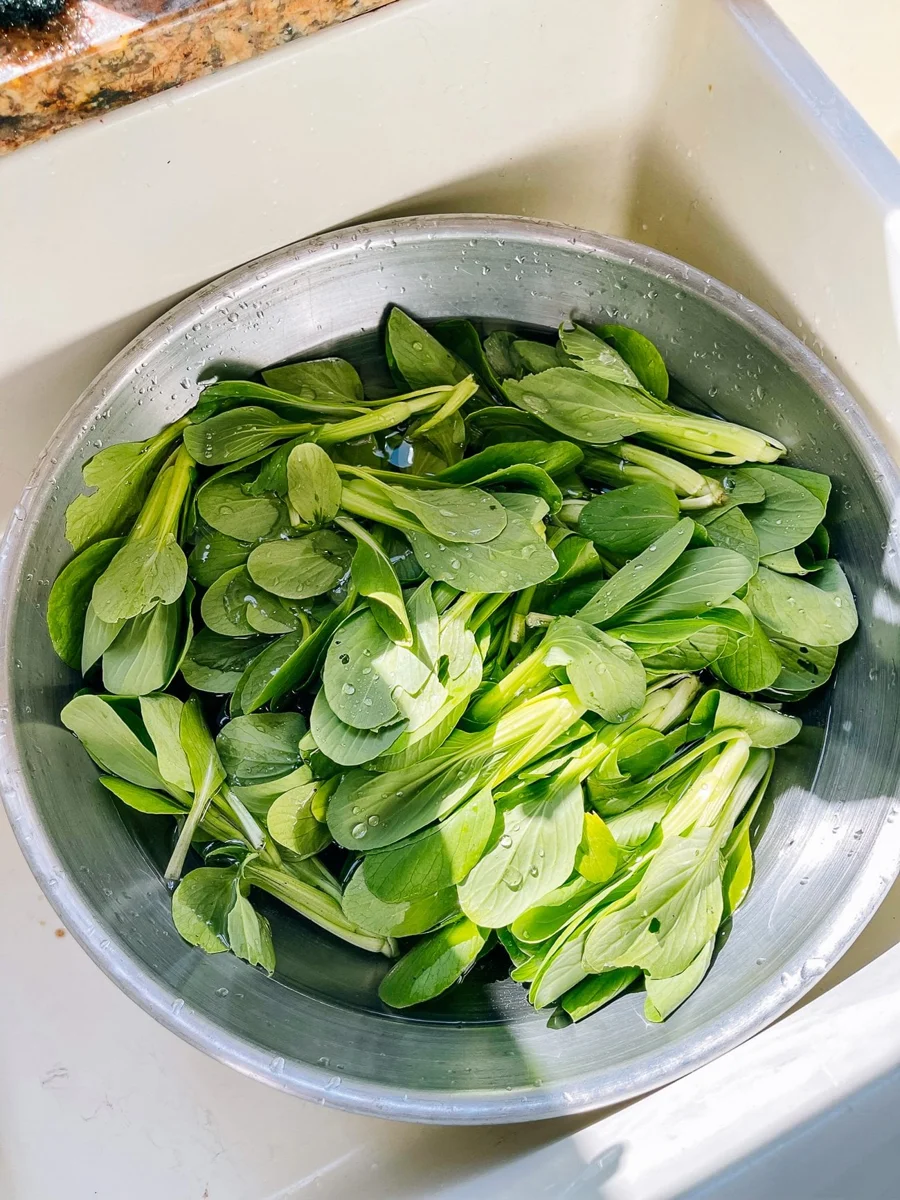
It sounds like it would be a lot of work. It is not. You need a big stainless steel bowl, a colander with lots of small holes, and cold water. That is all.
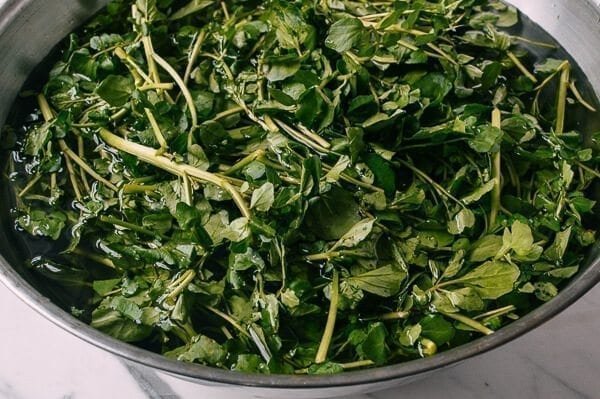
Step one: the first soak, five to ten minutes. Fill the bowl with cold water and put the greens in. Give them a gentle turn with your hand so the water reaches every leaf. This is for the obvious dirt — the soil on the surface, the little clumps that stick to the base of the stems. Leave them for five to ten minutes while you pull out the yellow, tired leaves and the ends that have gone rough. Not much. Just the pieces you would not actually want to eat.
Step two: lift, do not pour. This is the move I still check. Lifting the vegetables out of the bowl and into a colander keeps the grit at the bottom of the bowl instead of rain over them again. If you pour, the gritty water goes right back through the clean leaves. You are undoing the first five minutes of work for nothing. I found this out in the line, watching food that could have stayed clean come out gritty.
Step three: the second wash, ten to twenty minutes. Fresh water in the clean bowl, greens back in. This is where the water gets into the layers of the leaves and the grit settles, and it also gives you somewhere to stand while the cook is happening at the stove. Swap the leaves around by hand — you can actually feel where the sand is hiding — and let them sit. They are done when you cannot find a particle under your thumbnail and the water stays clear.
The leaves you should cut
These are the vegetables that get a slightly different wash: lettuce, cabbage, napa cabbage, broccoli, cauliflower, and anything else that grows in a head. The layers here are where the dust settles, and the water cannot get between them until you splay them open.
For lettuce, simply pull the outer leaves off, one at a time, and drop them into the bowl. For cabbage and napa, cut out the core and spread the leaves apart so the water gets around them. Broccoli and cauliflower come apart into florets — you do this before the wash, not after, because the cut side is the one that grabs the grit when the water hits it.
That last part is the rule that makes the difference between a clean plate and a gritty one. Cutting first means the water washes into the interior. Cutting after the wash means you are scraping soil right back onto the surface that is already clean. Wash the whole leaf, then cut it at the end, and keep the wet pieces from drying out if you cannot cook them just now — a covered container in the fridge is enough.
Baking soda, and when it earns its place
I was burned by this one. A senior at the restaurant taught me that alkaline water takes the grit off the surface better than plain water, and it works. But I used to push it too far — soaking the wetter greens in a solution for too long, then serving them damp and slightly bitter, and I could not figure out what I had done wrong.
The ratio is simple: three tablespoons of baking soda to a large bowl of water , which comes out around a teaspoon per two cups of water. Stir it in, swish the produce around so the water is moving against the leaves, and then put the timer on for ten minutes. Ten, not more. After that, rinse the greens well under a running tap, and the water should feel the difference — not bitter, not plain, just clean.
For the firmer, least-leafy items — wheat, greens, the big leafy bits I buy in a market bag — I do them twice in the washing bowl with plain water. That is usually enough. For the salad greens I eat straight out of the fridge, I use the baking soda soak. It is not an either/or choice as much as a judgment you make as you look at the leaves in your hands.
The waxy ones
These are the vegetables that look fine but never actually are. Tomatoes, peppers, zucchini, squash, eggplant, celery, potatoes. None of them need a long soak. They need a brush.
I have used a natural-bristle vegetable brush for years, and I keep one in a drawer under the sink where I can find it in the dark. The trick is to rinse the produce in the bowl of water first. Then, with the brush, work through the whole skin in short, decisive strokes. You can feel the grit give under the bristles before you rinse it off. For the tougher skins — the end of zucchini, the ends of a pepper, the eye on a potato — press the brush in a little. That is where the sand hides, and a quick tap over the surface with an open palm will tell you there is still dirt under the brush if you are still finding grit when you peel the vegetable for the pan.
Peel after, not before. The cleaner the skin is when you peel it, the less grit you carry into the crisper pieces that go straight into the food.
The thick-stemmed stuff
Some of the leafy vegetables come from the farm with a stem that is not something you want to bite all the way through. Asparagus, broccoli stems, gai lan (Chinese broccoli, a thick-stemmed Chinese green), the leaves of the turnip greens you see at the Asian market. The outer layer is woody and woody. It is not one you want to crunch through.
The fix is a paring knife, or a good peeler if you have one. Run it down the length of the stem, just under the surface, and the outer layer comes away in a long, thin strip. The inside of the stem is almost sweet and barely woody. I eat it in the same meal as the leaf, and the person across from me has no idea it was ever the outside of anything. If I am being honest, I am not always getting the layer off perfectly. Sometimes it is a ragged little strip, and sometimes it is just a better-looking fjord. That is fine. It is not a salad.
For the really tough ones — the ones that will not give up their outer layer no matter how much you scrape — the trick is to cut the stem into small pieces. Wine or broth will soften the stem in the cooking pot, and then it is just another part of the meal instead of the bit you have to fish out at the end of the plate.
When to stop washing, and when to move on
There is a point where I stop polishing the greens and start moving on with the meal. It happens more often than I used to think. If the water is clear and the leaves are shaking dry, the washing is done, and anything more is just me standing there and moving leaves around. The sink and the colander and the clean towel in the corner will tell you when you are done, and I have learned to listen to them before I get stuck in a loop where I am re-washing the same batch three times in an evening.
One more thing, because it keeps my sanity: I pull the colander out of the sink water and let the leaves settle in there. I let the water run through the holes, gently, for a few seconds before I move them to the towel. That rinse-out is not the wash. It is the finishing move. The tartar stays in the sink, and the greens come out clean. That takes fifteen seconds and I do it every single time.
The thank-you that does not get out
Here is what I have learned from doing this a few hundred times: the vegetables do not come out the way you want them to unless somebody has taken the time to pull them through these steps. That somebody is often the person who is washing the dinner table at the end of the night instead of the person who is eating the meal. I have stopped pretending I do it just because I like standing over a colander. I do it because I want the meal in front of me to come out the way it should come out, and because the person I share it with is more relaxed when the food does not have a fine coat of sand on the leaves.
The kids are old enough now to ask what I am doing at the sink. I tell them I am washing the vegetables. The youngest still looks at me like I am doing something he has not seen an adult do. I do not mind that. I do it the same way my senior did, and I keep the towel nearby, and no one in the house is chewing on sand, and that is all the proof I need that the setup is doing what it should.
Trade-It Tip: No colander hole-count to choose from? A flat mesh strainer set over a second bowl gives you the same up-and-out-of-the-bowl finish with nothing to buy.
If it does not fit a Tuesday night, it does not get published.
The other week the heat came straight through the kitchen window and about half my dinner ideas died on that spot — anything with an oven standing a chance of surviving. So here’s the one that did win: a blender, a bowl, and a pot of something cold and green.
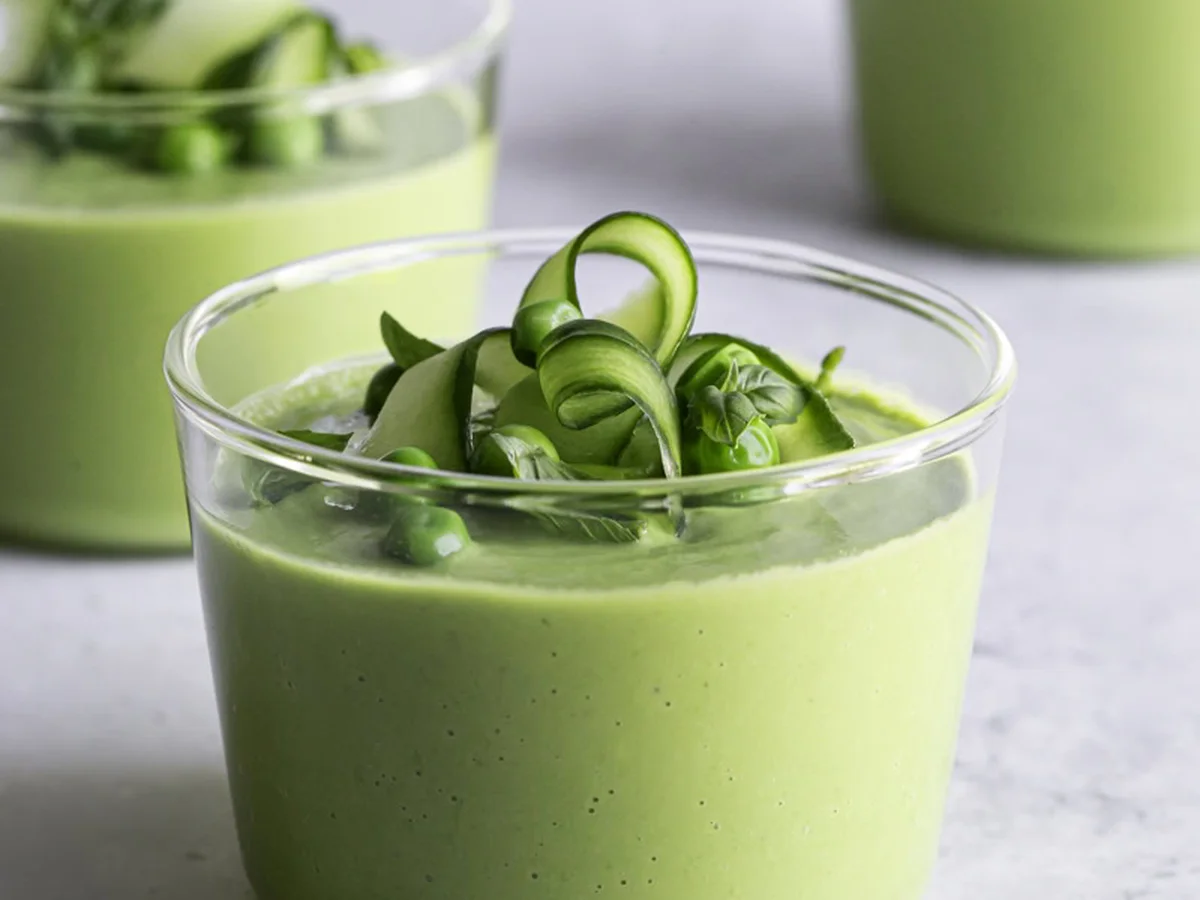
Green gazpacho is the chilled cousin of that tomato soup from Spain. Swap the tomatoes for cucumber, spinach and basil, and instead of a thick red you get something bright, herbaceous and genuinely cooling — which is exactly what a soup should be when the window’s open and the temp’s up.
This one is 10 minutes start to finish, and the stove never even turns on. If that sounds like a lie, keep reading — the whole thing is in a blender and the fridge does the last bit.
Why this works
Avocado and coconut milk do what cream does in other soups — they carry the whole thing into a smooth, thick texture, no dairy required. Lime and garlic put in the counterbalance so it never tips to being a sweet pea soup, and the cucumber keeps the whole bowl light and hydrating.
Ingredients
Everything here is a shelf, a fridge or a frozen drawer a norm. Nothing you’ll have to stretch for:
1 cup cold water
1 cup coconut milk (the solid part)
1 large avocado
2 mini cucumbers, cut into large pieces (more for garnish, if desired)
2 cups (12 oz) frozen peas, cooked/thawed
1 cup fresh spinach leaves, packed
1/2 cup fresh basil leaves, packed
2 tablespoons avocado oil (or extra virgin olive oil)
3 tablespoons lime juice
1 teaspoon minced garlic
1 teaspoon sea salt (more to taste)
A pinch of black pepper
How to make it
Steps to do it:
Chop the cucumber. Leave the avocado with its skin on, or in halves. Pull the spinach and basil out, and measure everything else in front of you.
Put the water and coconut milk into the blender. Add the cucumber, avocado and everything else:
Blend until smooth. If it’s a little thick, a bit more water — you want it pourable, not heavy.
Taste, then salt and pepper to your taste.
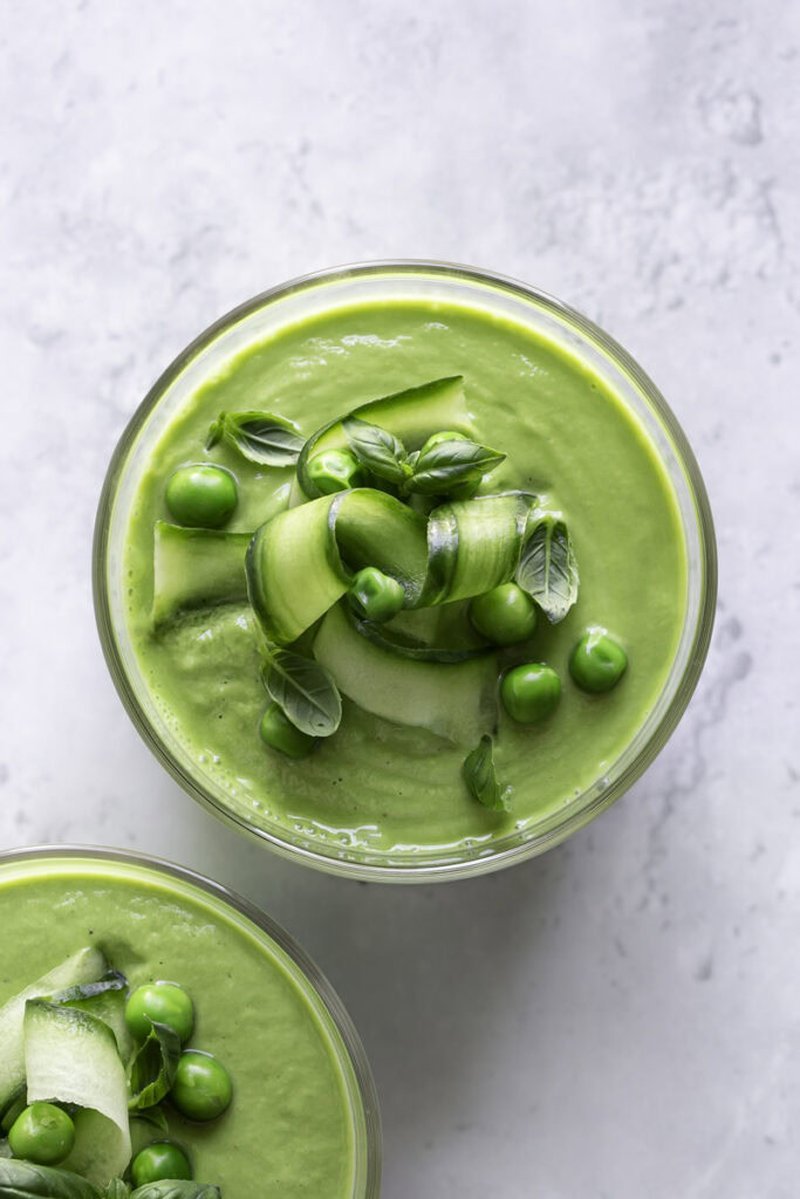
Put it into a glass and let it sit in the fridge for at least 30 minutes. This is the step nobody wants to skip, and it’s the only one worth the wait. Garnish with extra basil, a few peas, and — if you’re feeling fancy — a ribbon of cucumber from a peeler.
How to serve it
Prep, lunch, or a starter at a dinner — it doesn’t pick. Serve cold in small glasses with a chunk of gluten-free bread on the side, or just straight out of a bowl where it’s thick enough to eat with a spoon.
Your questions, answered
Can I make it in advance?
Yes. Pour it into jars, seal the lids, and let it sit in the fridge for up to 24 hours. Garnish right before serving.
Can I freeze it?
You can, but the avocado doesn’t always survive the thaw. Leftover in the fridge, eaten within a day, is better on texture.
Can I switch out the herbs?
Go for it. Mint, cilantro, parsley — anything fresh and green with flavour. Mix and match to whatever you have.
What can I use instead of coconut milk?
Oat, cashew, soy, almond — anything dairy-free that holds a bit of body. It will change the flavour a little, but that’s the point of a swap.
Do I need a fancy blender?
Any decent blender will get you there. A high-speed one gives you the smoothest result, but you’re not forced to spend something on one — just expect a little texture in the glass.
The fine print, honestly
Yes, coconut milk is dairy-free, vegan and gluten-free. Yes, pea protein is not a joke. This is light soup with actual flavour, not a shake. I’ve made it twice this summer and it’s become the default on days the heat doesn’t let me turn the stove on.
Trade-It Tip
No sea salt? Kosher salt works — you’ll use a pinch more. Frozen peas in a hurry? Just thaw in the microwave for a minute, they break down in the blender even if not fully soft.
If it doesn’t fit a Tuesday night, it doesn’t get published. — Grace
I used to think cooked zucchini meant either rubbery green sad stuff in a browning pan, or soft smear. I’d skip it on restaurant menus every single time — which, I’ll admit, made me a little bit unpopular with the vegetable counter.
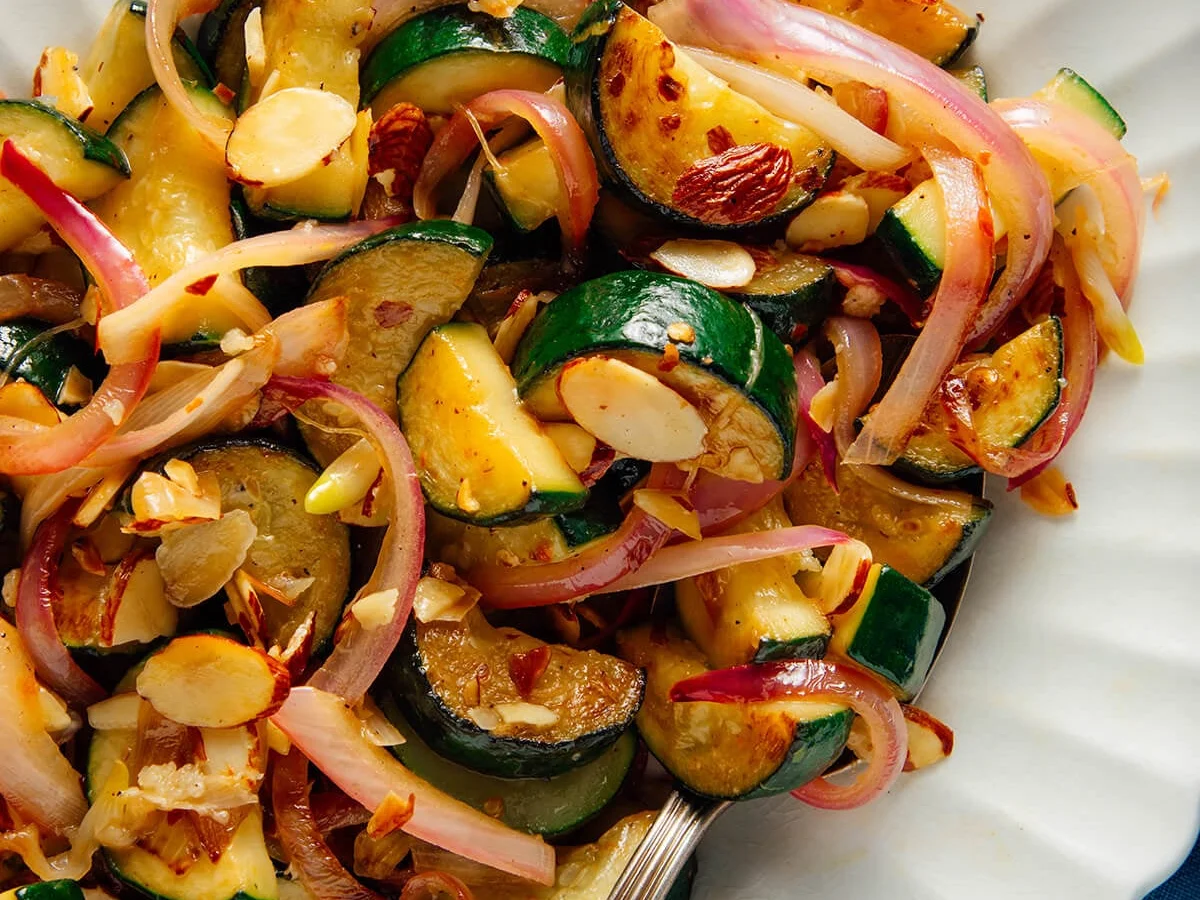
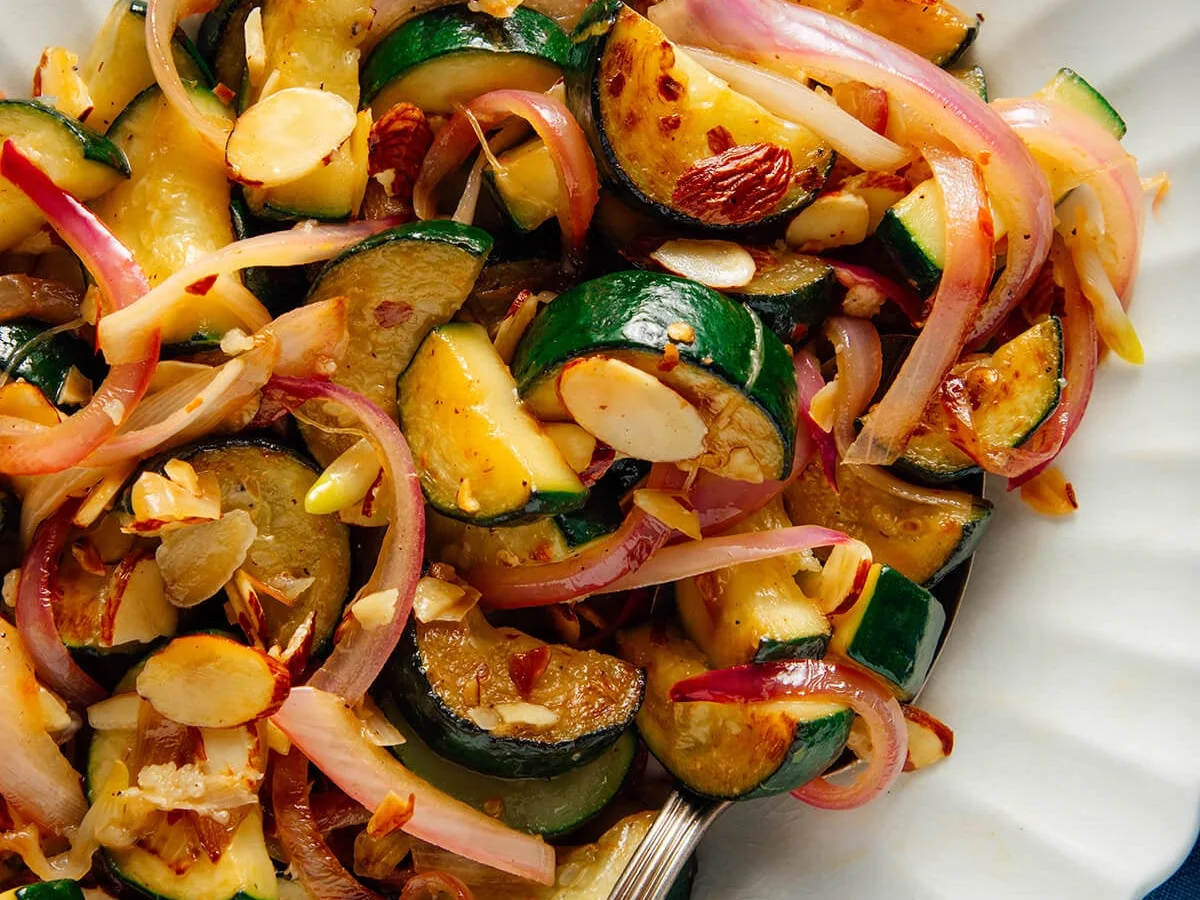
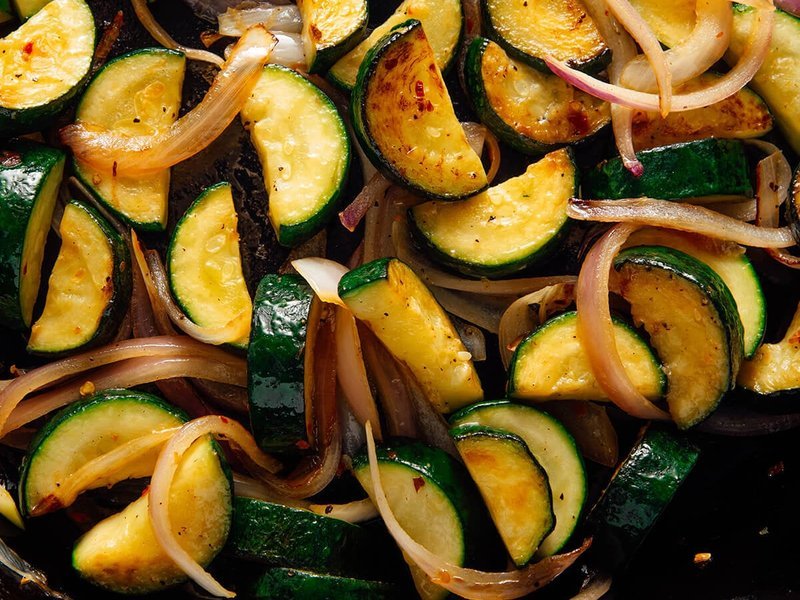
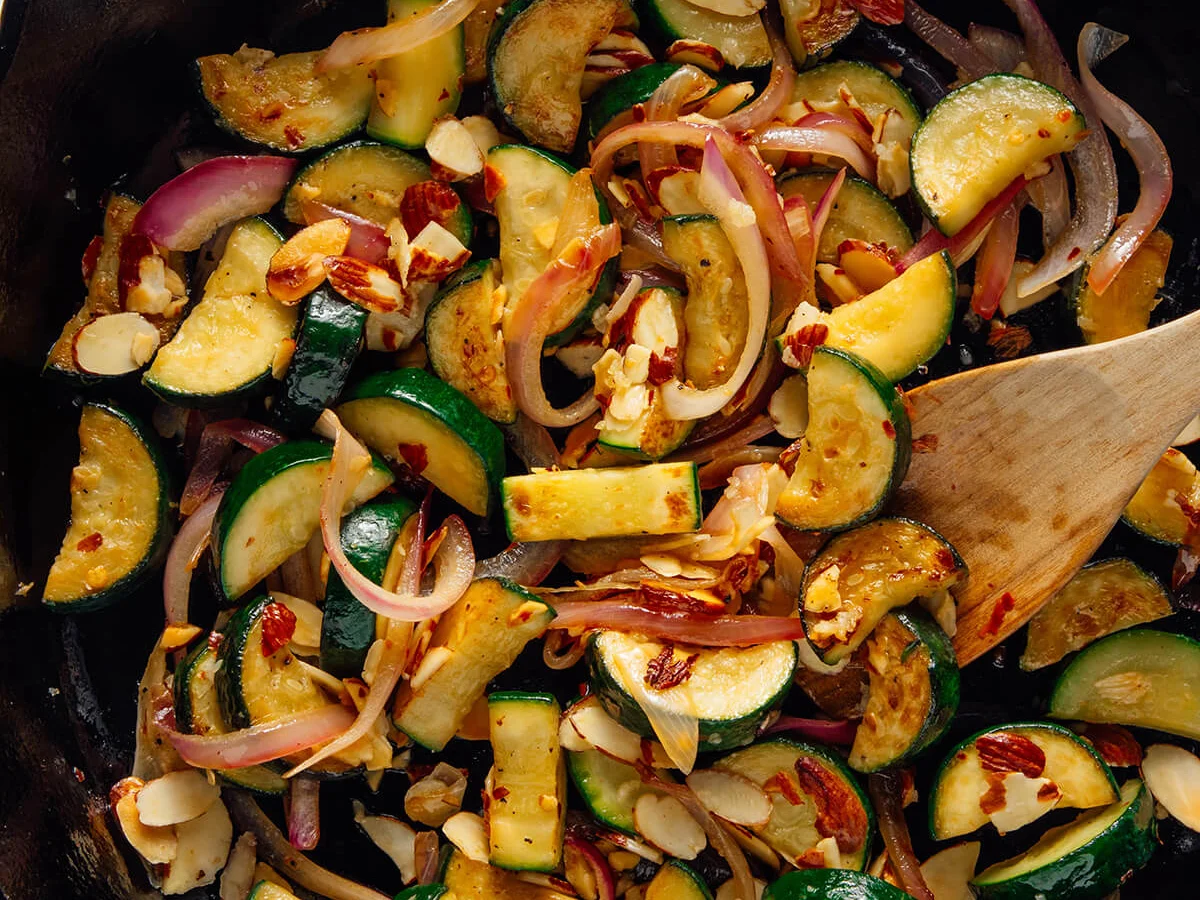
Then I made this. Caramelized zucchini, red onion, toasted almonds, garlic, a squeeze of lemon. One pan, 15 minutes, start to finish. The zucchini comes out tender all the way through and golden at the edges, not the usual sad, soggy mush instead. This is the side dish I am making all summer, and I am not sorry about it one bit.
Why this works
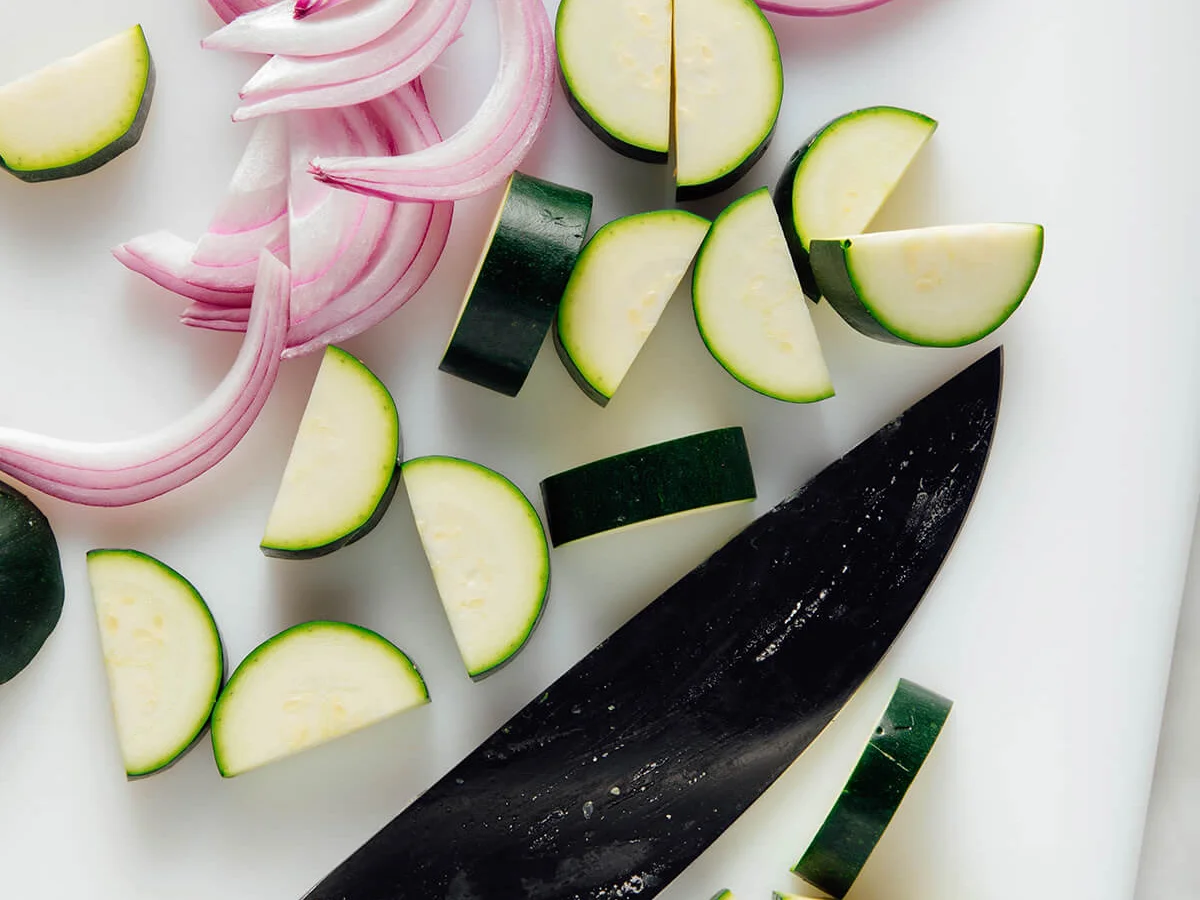
Zucchini is about 95% water, which is exactly why it turns to mush if you treat it like everything else. The trick is thickness — half-inch slices give the outside enough contact with a hot pan to brown before the inside releases all its liquid. Give the zucchini space in the pan, and give it a few minutes before you start fiddling with it, and it behaves completely differently.
(If you’ve ever bought a firm zucchini at the market and it came out soggy and squeaky — that’s the moisture rebelling, not you. This method fixes it.)
Ingredients
15 minutes, start to finish — including the toast. Serves 4 as a medium side. Leftovers keep in an airtight container in the fridge for up to 4 days, and they reheat beautifully.
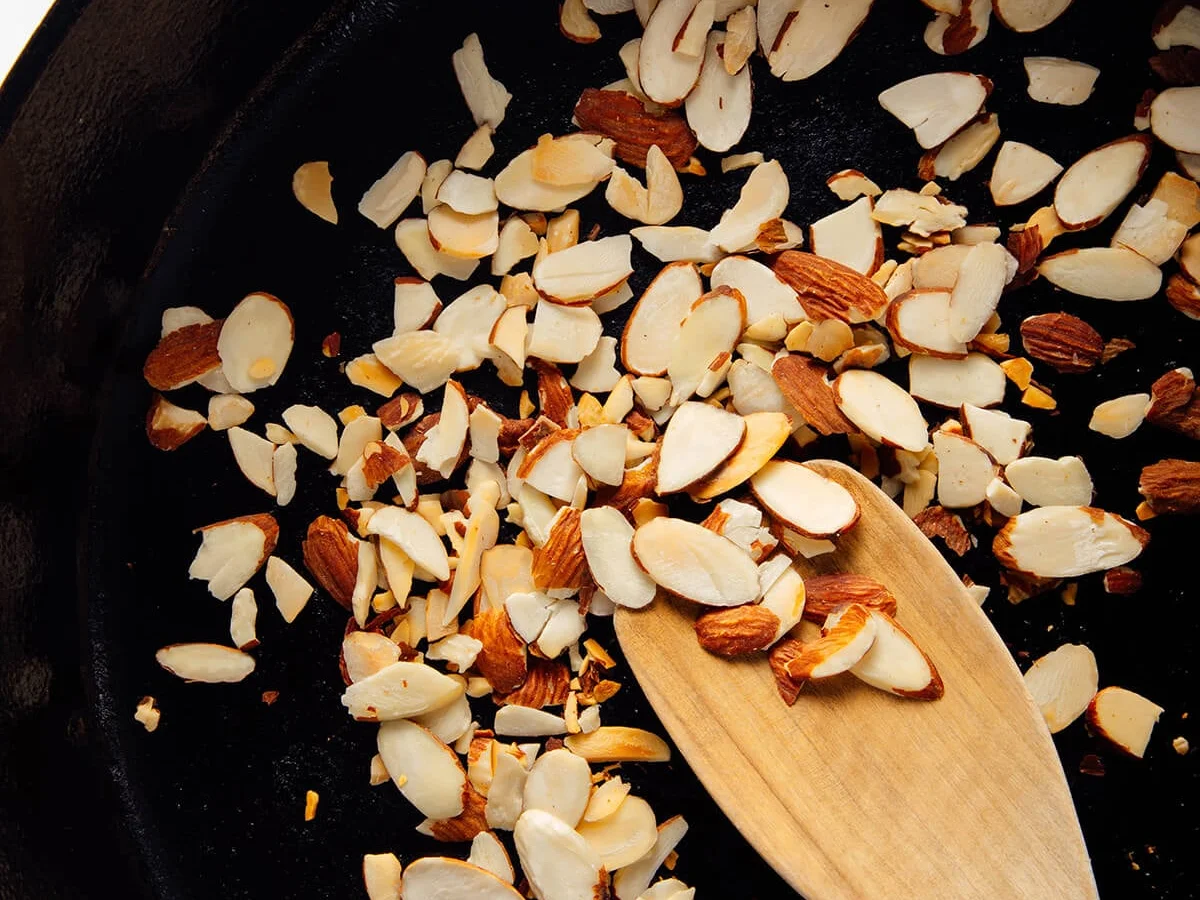
¼ cup sliced almonds
1 tablespoon olive oil
2 small-to-medium zucchinis (about 1 pound total), ends removed, halved lengthwise and cut into ½-inch (~1.3 cm) wide segments
½ medium red onion, thinly sliced
Fine salt, to taste
Pinch of red pepper flakes, if you want a little heat
Freshly ground black pepper, to taste
2 medium garlic cloves (or 1 large one), pressed or minced
1 tablespoon lemon juice, plus more to taste
Steps
Toast the almonds first. In a large 12-inch skillet (cast iron or stainless steel works great), warm the sliced almonds over medium-low heat, stirring often, for about 2 to 4 minutes until golden. Pour them onto a plate to cool. Leaving the skillet on the stovetop pre-heats it for you — one less thing to think about.
Get the oil hot. Return the skillet to medium heat and add the olive oil. When it’s shimmering, use a spatula or a big spoon to carefully add the zucchini — it’s full of water and the oil will pop. Don’t ask. Arrange in a single even layer and sprinkle with the sliced red onion.
Season. Add ¼ teaspoon fine salt, a pinch of red pepper flakes if you’re using them, and a few cracks of black pepper.
Cook 5 to 7 minutes. Resist the urge to stir. After 2 minutes, turn the zucchini over with a spatula, then stir or turn again about every minute after that. You want light browning and soft, not-sticky onion — the zucchini will keep softening as it cools.
Finish off the pan. Take the skillet off the heat. Toss in the garlic and the toasted almonds and stir for about 30 seconds in the residual heat — that way the garlic gets fragrant without scorched. Stir in the tablespoon of lemon juice and let it sit for at least 5 minutes.
Taste and serve. If it’s not zingy enough, add up to another tablespoon of lemon juice. Finish with salt and pepper to taste (I usually add a pinch or two of salt at the end) and serve warm.
A few notes from my kitchen
Thicker slices are your friend. Half-inch pieces are the sweet spot — thick enough to brown without falling apart. Cut them any thinner and you just have a lot of zucchini in the pan with no brown anywhere.
Skip the pre-salt trick. A lot of recipes tell you to salt the zucchini ahead of time to draw out moisture, then rinse it. I tried that, and my zucchini came out way too salty even after rinsing. Cook it straight — easier, and tastes better.
Toast the nuts before the zucchini. That way the pan is already warm when you dump the zucchini in, and you don’t have to go find another pan.
Don’t crowd the pan. About a pound of zucchini = one 12-inch pan, exactly, once cut up. If the pieces are too much, they’ll steam instead of brown, and that’s when you get the sad, smushed result.
What to serve it with
This is the side dish I reach for all summer — it’s light, it’s got real flavor, and it only takes 10 minutes of actual cooking time, so it won’t cook the whole kitchen.
It goes with basically anything from the summer table: tomatoes, corn, basil, Mediterranean-style food. I’ve been eating leftovers for the past few days, which is its highest compliment.
Keep it simple: a burrata-style salad, a white bean dip, some pesto pizza, a pasta with tomato and chickpeas — anything that doesn’t already have a green side. And if you want a fresh dessert to wrap it up, a simple fruit clafoutis is about as easy as it gets.
Trade-It Tip: No sliced almonds? Roughly chopped, toasted pistachios work just as well. Or if you’re keeping it nut-free, pine nuts (they’re actually seeds) do the job — or skip the nuts entirely, and the zucchini is still great.
Tell me how yours turned out in the comments. I hope this becomes your new go-to way of cooking zucchini too.
If it doesn’t fit a Tuesday night, it doesn’t get published.
There’s a particular kind of happy that smells like slow braising beef and hits you half a block before you’re at the door. This is the whole reason I keep the slow cooker going every single week, and honestly, some of these took a couple of fails on my end before they turned out right. These are the fixed versions.
Back when I worked the line, the kitchens ran on exactly this logic: start the big pots early, and by service time the heavy lifting is done. My family still doesn’t get why the kitchen smells like a restaurant at four on a Tuesday. Give them a decade, though. They’ll get it.
Every recipe below follows the same deal: under ten minutes of hands-on work, one pot, and you’re out the door before the timer matters. No browning, no babysitting, no standing over a stove after a long day.
The crockpot rules I run by
Most of these run a full 8 hours on low. A few shorter ones are marked 3-4 hours, 2-3 hours, or overnight.
Whatever’s left of the pot liquid is often the best part of the dish. Taste it.
If it feeds a crowd, double it. I always do.
1. Beef and Noodles
Why this works: low, slow cooking takes a chuck roast to pull-apart tender, and stirring egg noodles into the broth at the end soaks up all of that flavor in one pot.
The first 8 hours on low does all the heavy lifting. I say about 8 minutes of prep, then I leave. It’s the slow cooker version of a hug, and my husband orders it on repeat from October through March. I just say yes — there’s barely any effort on my side.
2. Beef Stew
Raw potatoes, carrots, and beef go in raw and come out after 8 hours on low like you simmered them on the hob for hours. No browning is required, which means no browning.
I set this on for Sundays when we have plans and I want a proper dinner waiting when we get back. It tastes even better the next day, which in our house means it’s usually discovered at midnight by someone and is gone.
3. Pulled Pork
A pork shoulder with some spice in it in the morning, 8-10 hours on low, and it shreds with two forks. Eat it over rice, in tacos, on a bun, straight from the pot with a fork. Nobody’s judging.
This is how I feed a crowd without doing the work. I made it for my son’s birthday last summer, and his friends were sure I’d been slaving over a hot stove all day. No. The slow cooker did. I was the only one at the supermarket.
4. Crockpot Lasagna
Why this works: dried pasta actually cooks beautifully in the slow cooker, so the whole dish happens in the pot instead of the oven.
Layer dry lasagna sheets, meat sauce, and ricotta straight in the pot. Three to four hours on low and the pasta is tender and the top is properly bubbling and melted. My teens treat lasagna like a special occasion. I never tell them it took me about ten minutes to assemble.
5. French Dip Sandwiches
A chuck roast in beef broth and onion soup mix, all day long, until it falls apart. Slice it thin, pile it on sandwich rolls, and dip in the pot liquid, which is genuinely the most flavorful au jus I’ve been served in a restaurant.
People always ask how I pull that off. Not much effort is needed to look like a genius, but they’ll keep asking anyway.
6. Philly Cheesesteak Edition
Peppers, onions, beef, and a splash of Worcestershire going on low for the day. Load the rolls with provolone, or go full-on Philly with Cheez Whiz if that’s your thing. This barely costs more than a normal sandwich night, and it comes in far under any takeout cheesesteak.
My husband loves anything on a roll. I made it with a cheap beef pack from the中超 discount store — he doesn’t need to know. (UK readers: any smoked processed cheese works with this.)
7. Maid Rites, the Iowa Way
Ground beef simmered all day in well-seasoned broth until it’s impossibly tender, on a plain bun. No ketchup, no fuss. The all-day version of loose meat, served the way small-town diners have done it for decades.
If the original article is anything to go by, this is the one locals call a genius move. If that’s your thing, you already know. Doubled for a crowd.
8. Shredded Chicken Tacos
Chicken and salsa, taco seasoning, and a squeeze of lime in the pot, all day on low. Shreds with almost no effort, and it becomes tacos, burrito bowls, nachos, whatever the week demands. One batch feeds a lot of people and costs next to nothing.
Taco night is the one night my kids actually race to the table. This is my set-and-forget version. One of them watches the pot through the glass lid all afternoon, hoping something will spill. It never does.
9. Buffalo Chicken Sandwiches
Chicken, a stick of butter, and buffalo sauce in the slow cooker. Shred in the pot, pile on a bun with blue cheese or ranch. It beats delivery, which is the entire bar we’re clearing, and it works piled high on a baked potato or rolled in a wrap too.
My son asks for this one more than any other meal on the list. I’ve never once complained. Dump the chicken in, pour the sauce, walk away until dinner time. I’ve done more difficult things before finishing my first coffee.
10. Crack Chicken
Chicken in cream cheese, ranch seasoning, and cheddar that shreds into an absurdly creamy bun filling. Add bacon if you’re committing. This is the slow cooker recipe people ask you for at every family BBQ, and yes, that is the whole point.
My daughter made it for a school buffet and came home with an empty pot and three people hunting for the recipe. I point them to this post. That’s what I call success. No need to lock the kitchen in for the entire weekend.
11. Hawaiian Chicken
Why this works: the sweetness in the sauce keeps leftover rice interesting, and the slow cook keeps it from drying out.
Pineapple juice, soy sauce, brown sugar, and garlic make a sauce that soaks straight into the rice. It stays in the summer rotation because it doesn’t heat the kitchen up, and it’s over rice in about ten minutes. My kids call it pineapple chicken, which isn’t wrong, and it tells me they’ll eat it again, which is the whole point.
12. Crack Chicken Pasta
Chicken, cream cheese, bacon, and ranch in the pot all day, and you stir in pasta at the end. Rich and saucy, the kind that gets scraped clean to the point where no one leaves a dip behind. Feeds six, and you barely try.
This is my pick for summer nights when dinner needs to be more than just dinner. My husband once ate it cold the next morning. I didn’t ask questions.
13. White Bean Turkey Chili
Why this works: white beans hold up to the long simmer without dissolving, so the chili keeps a proper texture all the way through.
Ground turkey, white beans, green chiles, chicken broth, and plenty of cumin. All that simmering adds up. Top with sour cream, cheese, and avocado on the days you want to lean into it a bit more.
This is my pick on nights I want it to feel healthy without the meal giving up real flavor. And if I actually keep an eye on the fridge, a pot lasts a solid two or three meals, which I try not to think about too hard.
14. Copycat Panera Chicken and Wild Rice Soup
Chicken, wild rice, and vegetables in a creamy broth, all simmering in the slow cooker all day. It comes out thick and warming, the close cousin of the version you order at the cafe. In my opinion, I made the full pot for a fraction of the cost of two bowls, so I’d say better. (UK readers: any chicken and wild rice soup base will get you close enough.)
My daughter used to order this at the chain every single time we passed one. The first time I made it, she said the home version was better. That might be the highest compliment I’ve gotten from my kid, ever. We run it from October to March and nobody complains.
15. Ravioli Casserole
Frozen ravioli, a jar of marinara, ground beef, and shredded mozzarella, layered in the pot and bubbled into something proper. No boiling, no waiting in a hot pan, just a set-and-forget dinner that’s ready when you walk in.
This one’s fun to make, and my favorite kind of meal is the one where the making is the fun part. My kids think it’s fancy. I tell them it’s Italian. Both of those are more or less true, and neither is an exact answer.
16. Cheesy Crockpot Spaghetti
Just spaghetti, meat sauce, and melted cheese in the slow cooker, left until the pasta’s tender and everything’s melded. All the flavour of the baked version, except the oven and the annoying twenty-minute wait.
My family loves pasta, and I appreciate that it reheats properly for a weeknight when I’m busy. Set the pot, go do whatever’s next, and come home to a finished dinner.
17. Chicken Fajitas
Why this works: the longer the cook, the deeper the flavour gets into the chicken, and the peppers and onions really only give up all their bits to genuine low-and-slow.
Serve in warm tortillas with whatever you’ve got, or over rice.
The smell coming out of this one is almost unfair. Every single person who walks in assumes I’ve been cooking for hours. The crockpot has. My actual involvement was maybe six minutes at 7 AM before the day’s chaos started.
18. Cheesy Potatoes
Hash browns, chicken cream soup, sour cream, and cheddar, making an ooey-gooey mess that’s gone at every potluck I bring it to.
I’ve made this for Easter, Christmas, a random Tuesday, and a graduation party where someone asked if it was from a restaurant. It was made from a bag of frozen hash browns and a can of soup. All the credit goes to the crockpot. Honestly though, they weren’t from a restaurant.
19. Baked Potatoes
Wrap russet potatoes in foil and put them in the crockpot for 8 hours. Come home to potatoes that are perfectly fluffy inside, with no oven needed.
I started doing this one in summer, when I refuse to heat the kitchen any further, and it completely changed my idea of dinner. No prep, result when you want it. My kids pile on everything and call it a favourite dinner. Best win on this list.
20. Grape Jelly Meatballs
Frozen meatballs in a grape jelly and chili sauce that’s genuinely quite strange if you think about it too hard, and totally unremarkable once you taste it. I’ve been making it for well over 40 years, and it shows up on dinner requests year after year. Works as an app or over rice as a full meal.
I bring them to parties and they’re the first thing gone. Someone always asks about the sauce. I always tell them — grape jelly and chili sauce — and they don’t believe me till they go and try it themselves.
21. Spinach and Artichoke Dip
Artichokes, cream cheese, sour cream, parmesan, and spinach in the pot, hot in 2-3 hours and still warm by the time you’re done with it. Game day, guest house, and “I want something indulgent but minimal work” all covered by this one.
I plug this in before the first guest shows and never think about it again. It holds its own all night, so just set out some chips and a spoon and let people help themselves.
22. Apple Crisp
Sliced apples with cinnamon and brown sugar, under a buttery oat topping, in the slow cooker for 2-3 hours until everything’s warm and bubbling. Serve from the pot with a scoop of vanilla ice cream.
I make this in September, every time I see good apples, because I want the whole house to smell like it for no reason. It also gives me an excuse to buy more vanilla ice cream, which I fully support. This is the crockpot working so you don’t have to.
What makes these worth keeping
Twenty-two dinners, sides, and one dessert that you can kick off whenever you’ve got a minute and finish whenever life calms down. It doesn’t matter how chaotic the day was. The crockpot doesn’t care. That’s the whole point, and it’s the best part.
Save these for nights when 5pm gets here too fast, or for the whole week ahead. No judgment — that’s exactly what these are for.
Trade-It Tip: No hoagie rolls? Pull-apart dinner rolls or pretzel buns work almost as well. The only real trick is pressing a soft interior into the sandwich roll you’ve got on hand.
If it doesn’t fit a Tuesday night, it doesn’t get published.