My kitchen has a rule I’ve held onto since I worked the line at a small neighborhood restaurant: if the dish is worth putting your name on the board, it better be the one you’d actually eat again.
So when the deli on my street put a sandwich on the menu with my name on it — not my name, well, close enough — I had one question. Is it good?
The answer, apparently, was no.
The story comes from a recent episode of Curb Your Enthusiasm, the show where Larry David plays a version of himself who can’t let a single detail slide. In this one, his regular deli — the kind of corner spot with a board on the wall where the deli owner writes up special sandwiches — decided to name a sandwich after him. Here’s the exchange:
Jeff: “I went by Leo’s Delicatessen. You know what’s up on the board? A brand new sandwich called the ‘Larry David.’”
Larry: “What? Get out of here.”
Jeff: “Swear to God. Swear to God.”
Larry: “Leo named a sandwich after me? You’re kidding!”
Jeff: “Yep yep yep.”
Larry: “I can’t believe it. I’m on the board?”
Jeff: “You’re on the board.”
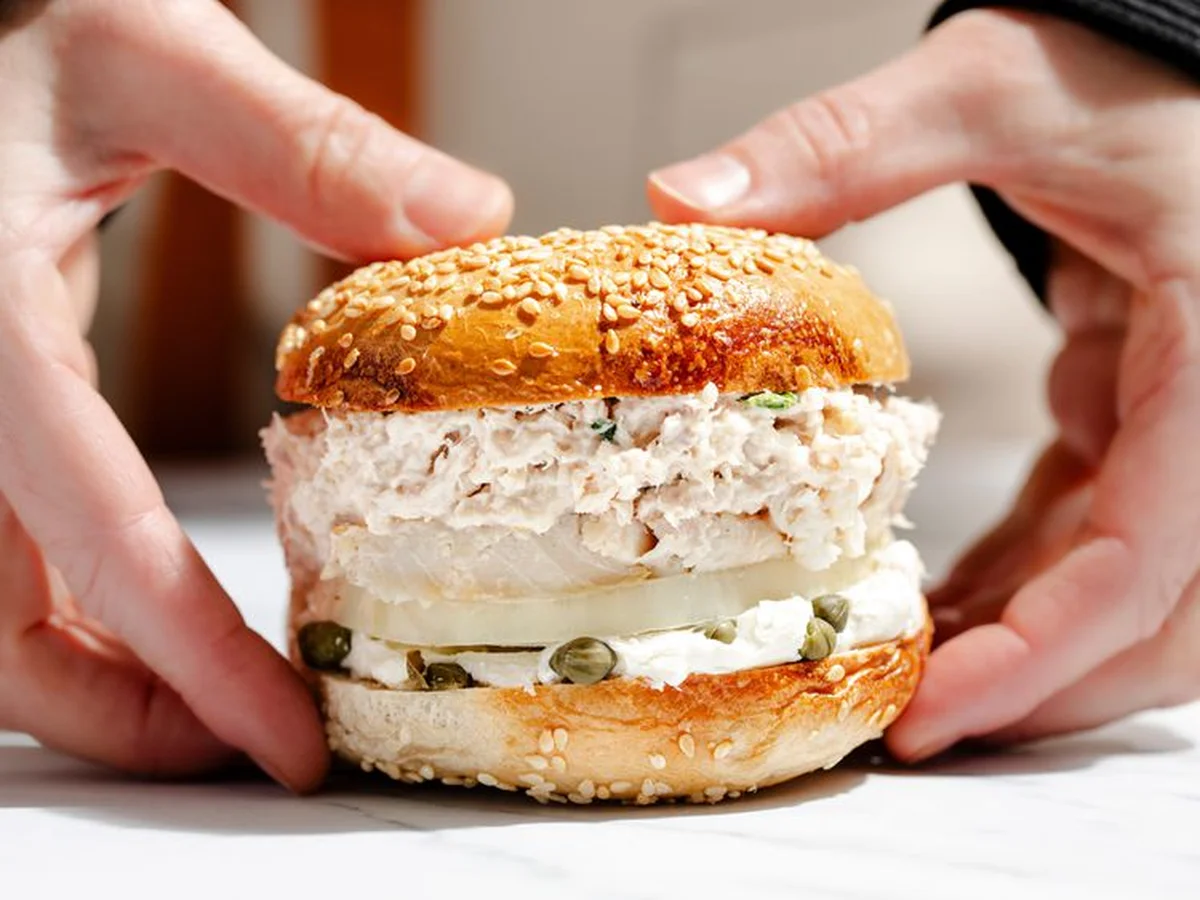
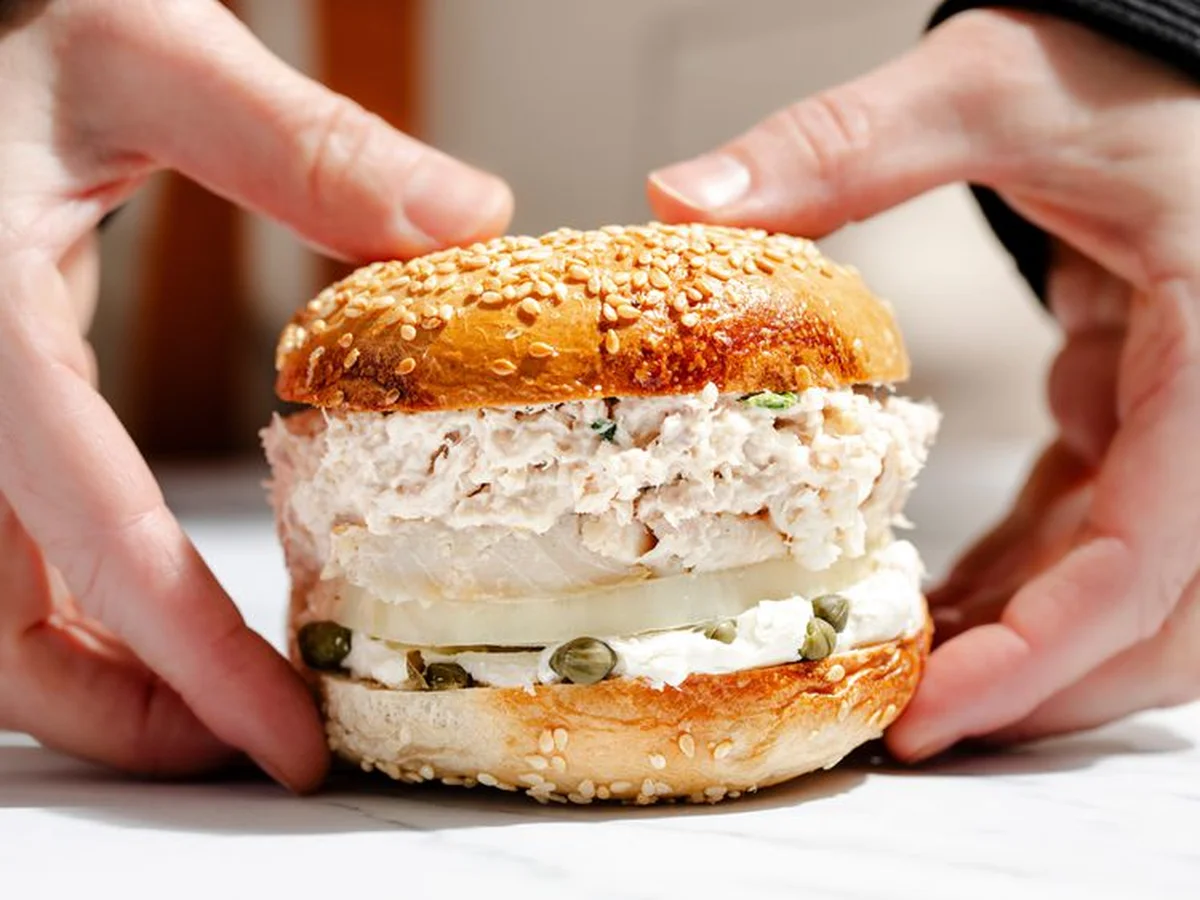
If you’re not a Curb person, the joke lands like this: the sandwich is whitefish, sable, cream cheese, capers, and onions. And Larry, a man who has opinions about everything, is “more of a pastrami, corned beef kind of guy… not really a big fish guy.” The sandwich on the board is not the sandwich he’d order.
That’s the thing about a sandwich named after you. It’s supposed to be the one that’s genuinely, unambiguously yours — the thing you’d reach for without thinking. Not a compromise. Not a “well, it’s fine” kind of plate. The good kind of simple.
So here’s my question to you: if the deli wrote your name on the board, what would be on that sandwich?
Mine would be a grilled cheese with Dijon mustard. Or maybe a classic bodega egg-and-cheese, the kind where the egg is actually cooked and not just a sad smear. Something I can make quick on a weeknight, start to finish, with whatever’s in the fridge. That’s the bar for me. If it doesn’t fit a Tuesday night, it doesn’t get published.
And if you’re stuck, here are a few directions to think about.
The melt route: a Swiss with tomatoes, or a grilled cheese with a little salad on the side so you don’t feel like you ate a whole pizza. Comfort food, but with a reason to be there. Or the kitchen-sink version — the sandwich with everything on it, the one that’s a little too much and exactly enough.
The fish route, for the days when you want something lighter: a 10-minute salmon sandwich, a fried fish sandwich on a bun with a proper tartar sauce, or a shrimp roll with the kind of soft roll that actually holds together. These are the ones that go fast when the kids are home and the afternoon is slipping away.
Or skip the meat entirely. A chickpea sandwich made from a can of chickpeas, some spices, and whatever greens you have — it’s not fancy, but it’s the good kind of simple. Or a giant egg patty sandwich, the kind where the patty is real and not a sad omelet fragment. Sometimes the best sandwich of the week is the one that takes the least thought.
Tell me yours. I’m curious what’s on your board.
If it doesn’t fit a Tuesday night, it doesn’t get published.
I used to think a margarita was a margarita — tequila, lime, orange liqueur, done. Then I poured fresh orange juice into one and my whole idea of the drink went a little sideways. It’s still a margarita. But it tastes different in a way I can’t quite explain, and I’ve been making it this way ever since.
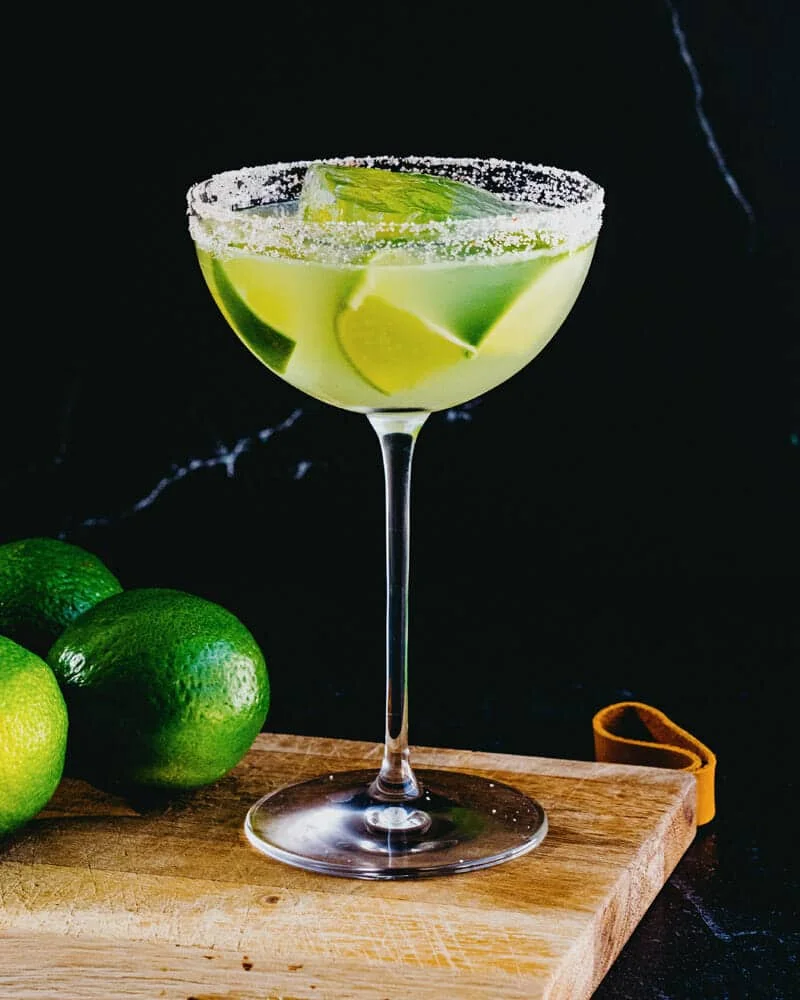
This is the Texas margarita. One honest warning before you start: I’ve never found a definitive origin story for it. No bar, no bartender, no famous first pour — it may have started as a throw-together pitcher of limeade, frozen orange juice, and tequila. Which, honestly, is the kind of drink that sounds like something I’d throw together after a long week. And I mean that as a compliment.
Why this works
The orange juice does two things at once: it rounds off the sharp edge of the lime and adds just enough sweetness that the whole drink feels balanced instead of just sour. The tequila pour stays exactly what it would be in a classic margarita, so it drinks smoother without actually being weaker. That’s the whole trick — same strength, softer landing.
What you need
Tequila blanco — I usually reach for reposado for its oak and vanilla notes, but this drink wants something clean and straightforward. Blanco is the right call here.
Triple Sec — more on the brand talk below. Cointreau works too, but I keep a simpler orange liqueur in the cabinet specifically for this one.
Fresh lime juice — always fresh. I say this the way I say “eat with a fork”: bottled lime juice just can’t compete.
Orange juice — freshly squeezed if you’ve got the time, decent bottled is fine if you don’t. No added sweeteners, whatever you choose.
Kosher salt or sea salt for the rim. A festive margarita salt blend works too if you’ve got one.
Triple Sec vs. Cointreau (the honest version)
Cointreau is a type of Triple Sec — they’re all in the same family of dry orange liqueurs — but in practice, “Triple Sec” usually means the cheaper, plainer bottle. My everyday margarita go-to is Cointreau, because it adds warm spice and a little vanilla-oak depth. For a Texas margarita, that complexity fights the orange juice. A straightforward Triple Sec lets the citrus do the talking. I like Drillaud; it’s a quality brand at a sensible price, and that’s all this recipe needs.
One more note on citrus: fresh-squeezed wins for lime and lemon, no debate. But orange juice is the exception — there’s genuinely decent bottled stuff out there. Just pick the highest quality you can find and skip anything with added sweeteners.
Texas Margarita
5 minutes, start to finish. Serves 1. Method: shaken.
Ingredients
1 ½ ounces tequila blanco
1 ½ ounces Triple Sec (Cointreau works too)
1 ounce fresh lime juice
1 ounce orange juice
Kosher salt or sea salt, for the rim
Ice, for serving (clear ice if you’re fancy)
Converting to tablespoons? 1 ounce = 2 tablespoons.
Instructions
Cut a notch in a lime wedge, then run it around the rim of your glass. Dip the rim into a plate of salt — or a margarita salt blend if you want the festive look.
Put the tequila, Triple Sec, lime juice, and orange juice in a cocktail shaker with ice. Shake until cold, then strain into your salted glass.
Fill the glass with ice and serve. You’re done. Go touch grass.
The pitcher version (for when you’re actually hosting)
Texas calls for big everything, right? So here’s the pitcher — and trust me, you want it. At 5 minutes per drink, mixing eight individual Texas margaritas by hand is a whole evening. One pitcher, and you’re done before the chips arrive.
1 ½ cups tequila
1 ½ cups Triple Sec
1 cup lime juice
1 cup orange juice
Stir it all together, add 3 handfuls of ice, stir again until cold. That’s it — 8 servings of a very tasty Texas margarita. Just try not to drink it too fast; these go down easy.
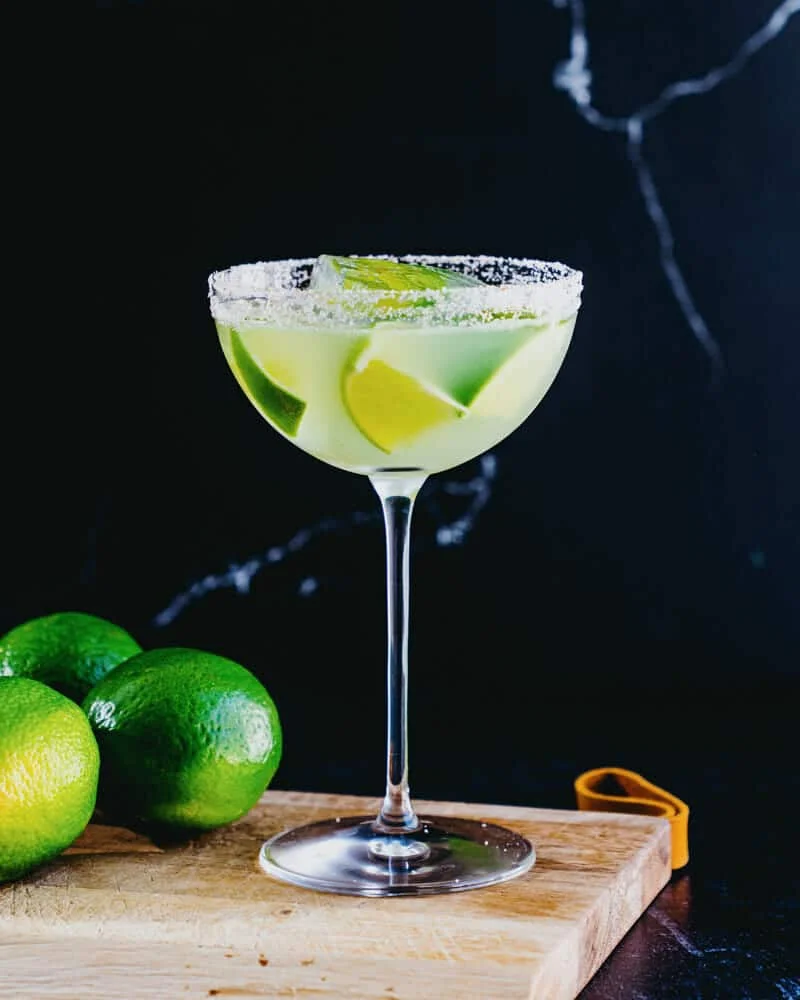
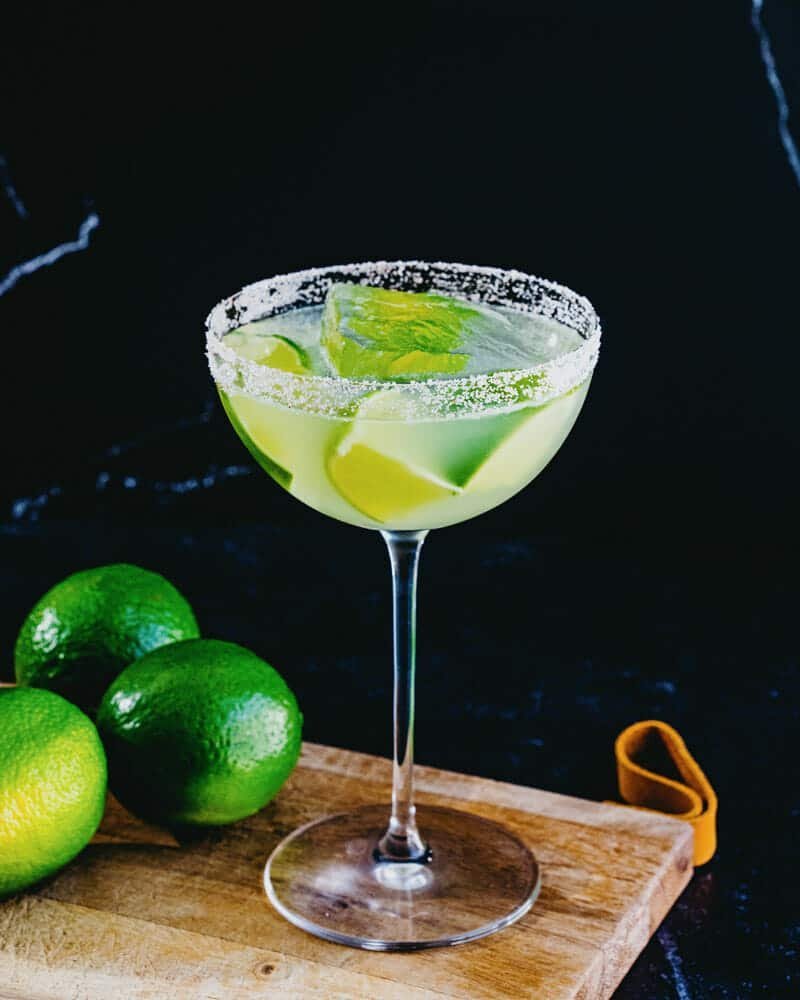
Fun detail: I’ve been serving it in a stemmed cocktail glass, which is a bit of a departure — margaritas usually land in a low ball glass or the classic wide-rimmed one. But it’s a cocktail, and it looks good up there. Honestly, any glass you have works.
What to eat with it
Pair it with something Tex-Mex, because that’s clearly where it’s headed. A few things that work great:
Texas caviar — aka Cowboy Caviar. The colorful bean dip that’s basically a party on a plate.
Fajitas — shrimp or a fully veggie version both go with this beautifully.
Taco salad — crunchy, loaded, zero regrets.
Nachos — what’s more fun than a Texas margarita and a big pan of sheet pan nachos? I haven’t met it yet.
When to make it
Practically always. It works as a summer drink, a Cinco de Mayo drink, a happy hour drink, a dinner party drink, a late night drink, a girls’ night drink — you get the idea. It’s the kind of cocktail that shows up for every occasion and never feels out of place.
FAQ
What’s the 3:2:1 rule for margaritas? The classic guideline: 3 parts tequila, 2 parts orange liqueur, 1 part lime juice. This recipe is closer to 3:3:2:2, because the orange juice matches the lime.
Is a Texas margarita stronger than a regular one? No — the tequila pour is the same. The orange juice just makes it taste smoother, which can trick your brain into thinking it’s weaker.
Can I skip the Triple Sec? You can, but you’ll lose real depth. Bump the orange juice up slightly and add a little agave to make up for it.
Do I still need Triple Sec if I’m using margarita mix? Most mixes already include orange flavoring and sweetener, so yes, skip it. But honestly? Skip the mix entirely. Fresh citrus is the whole point here.
Trade-It Tip
No Triple Sec in the cabinet? Cointreau works in a pinch — same family, a little more spice and oak. It’s not the first choice for this drink, but it’ll get you to the finish line without anyone noticing.
If it doesn’t fit a Tuesday night, it doesn’t get published.
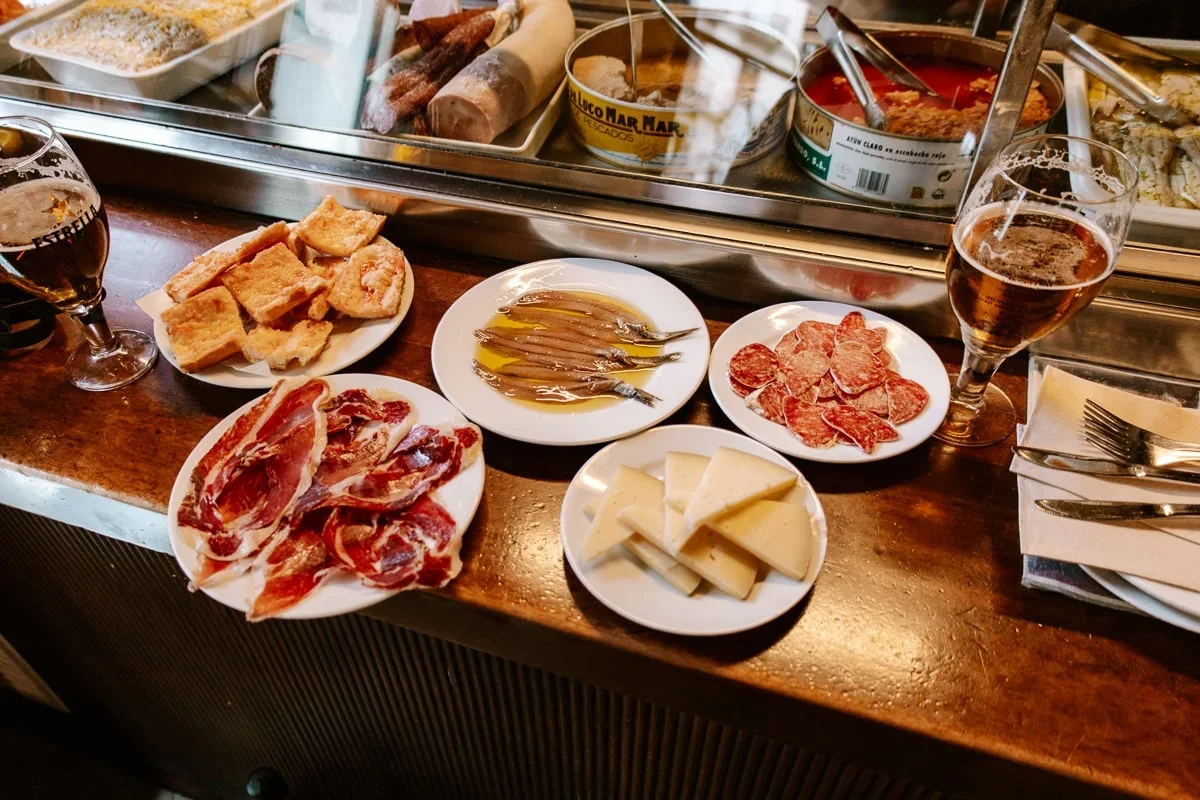
There are two kinds of tapas in Barcelona. One kind is a wooden board of overcooked prawns and a carafe of sangria that tastes like grape juice got drunk. The other kind is a counter you squeeze yourself onto, a glass of cava, and food so good you stop caring that your elbows are touching the person next to you.
I’ve spent enough years working a restaurant line to know the difference at a glance — and enough tourist dinners to have made the mistake a few times. Every address on this list, I’ve been to myself. Some are old bodegas where cava pours by the glass and nobody rushes you. Others are small kitchens where the fish is still moving when it hits the pass. A couple I found by accident, wandering, and walked in just to see what the place smelled like.
These are the eight bars I’d go back to.
El Born
El Xampanyet
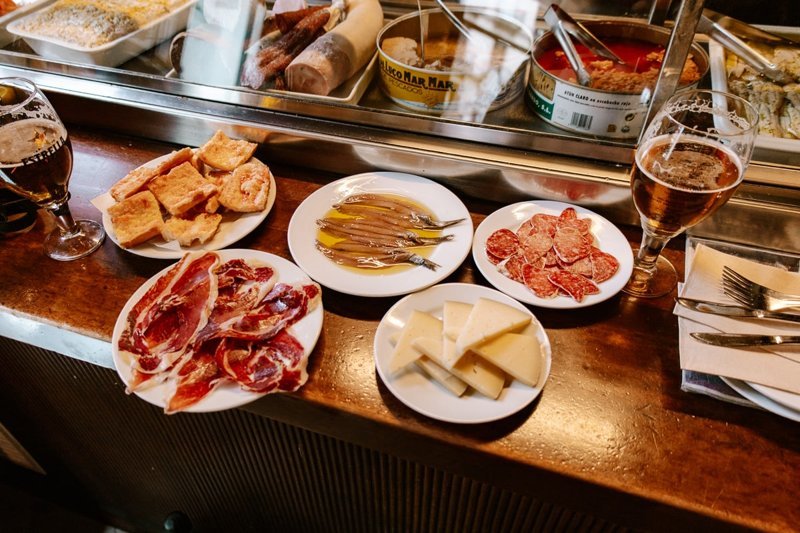
Small, loud, and usually full. The tables are close together, cava keeps getting poured behind the bar, and there is no such thing as a quiet sit-down here. Order the anchovies, the jamón, the tortilla, and pan con tomate — that tomato-bread thing with olive oil and garlic that costs almost nothing and tastes like the whole city. Then see what else lands on your table. No reservations, so come early or work the outdoor seats.
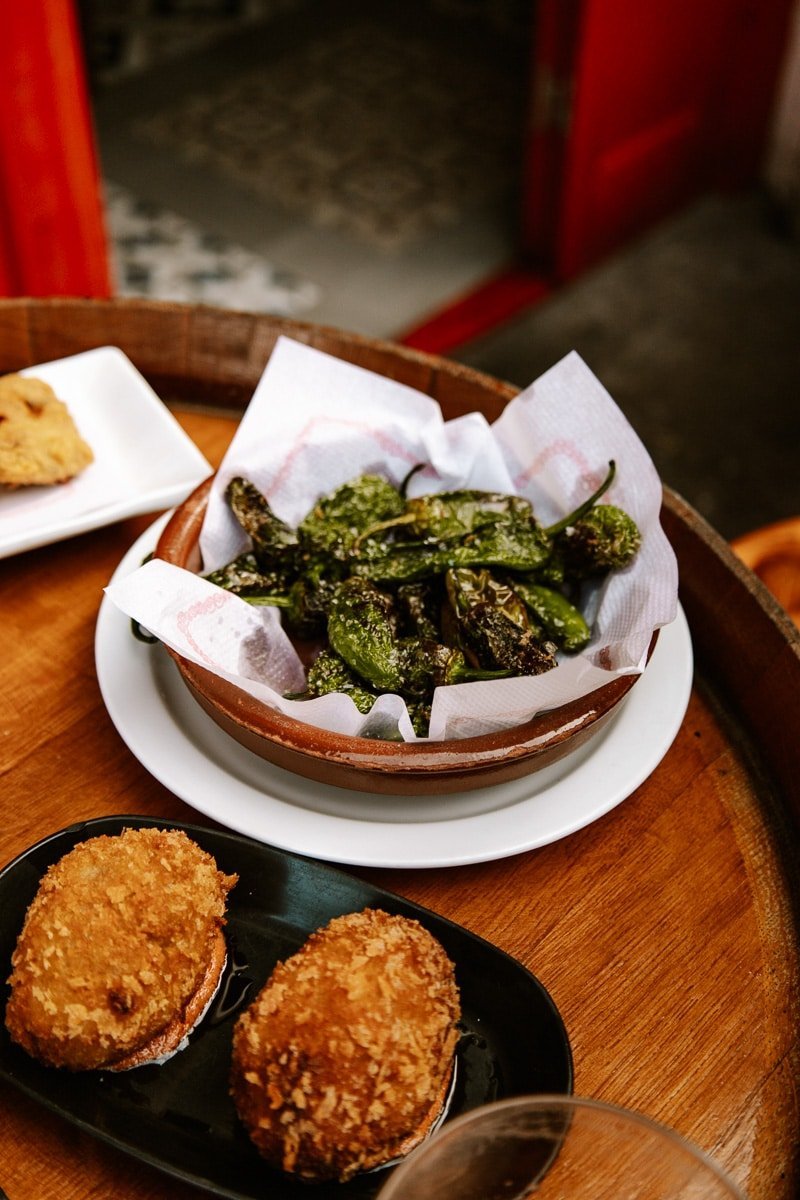
A tiny vermutería right next to the Mercat de Santa Caterina. We happened to walk past it and went in. The table came up with fuet, a ham croquette, pan con tomate, and cazón en adobo — marinated and fried fish, a bit like a crisp, briny fish-and-chip. We washed it down with a vermutillo, the small glass of vermouth that basically is the whole point of a place like this.
Carrer de Colomines 2, Barcelona
Cal Pep
Sit at the bar if you can. You get a straight line into the kitchen and can watch the plates going out at speed — a lot of fish and shellfish moves through that pass. Let them advise you, split several plates, and whatever you do, order the tortilla. Prices run higher than a traditional tapas bar, and without a reservation the wait can get long.
Busy, lively, and tight on the machine. From inside you can see into the open kitchen while the staff keep new plates landing at pace. The menu mixes classic tapas with fish, shellfish, and meat off the grill. Book ahead if you can, especially for dinner.
Sit on the Rambla de Catalunya and it’s small and noticeably calmer than most tapas bars in the centre. There’s a terrace outside with a view along the boulevard, and inside you can get toasts, warm tapas, and a drink. It’s not the kind of place I’d cross half the city for — but it’s a good stop if you’re already in Eixample and want a breather.
Rambla de Catalunya 94, Barcelona | {{link:https://la-alcoba.com/la-alcoba-azul|la-alcoba.com}
La Bodegueta de Rambla
A proper old-school bodega: a long bar, bottles lined up along the walls, small tables close together. Order the fuet, the Manchego, the patatas bravas, the marinated anchovies, the pan con tomate. Nothing new on the menu — and that’s the point. This is exactly what you go to a traditional bodega for, done properly.
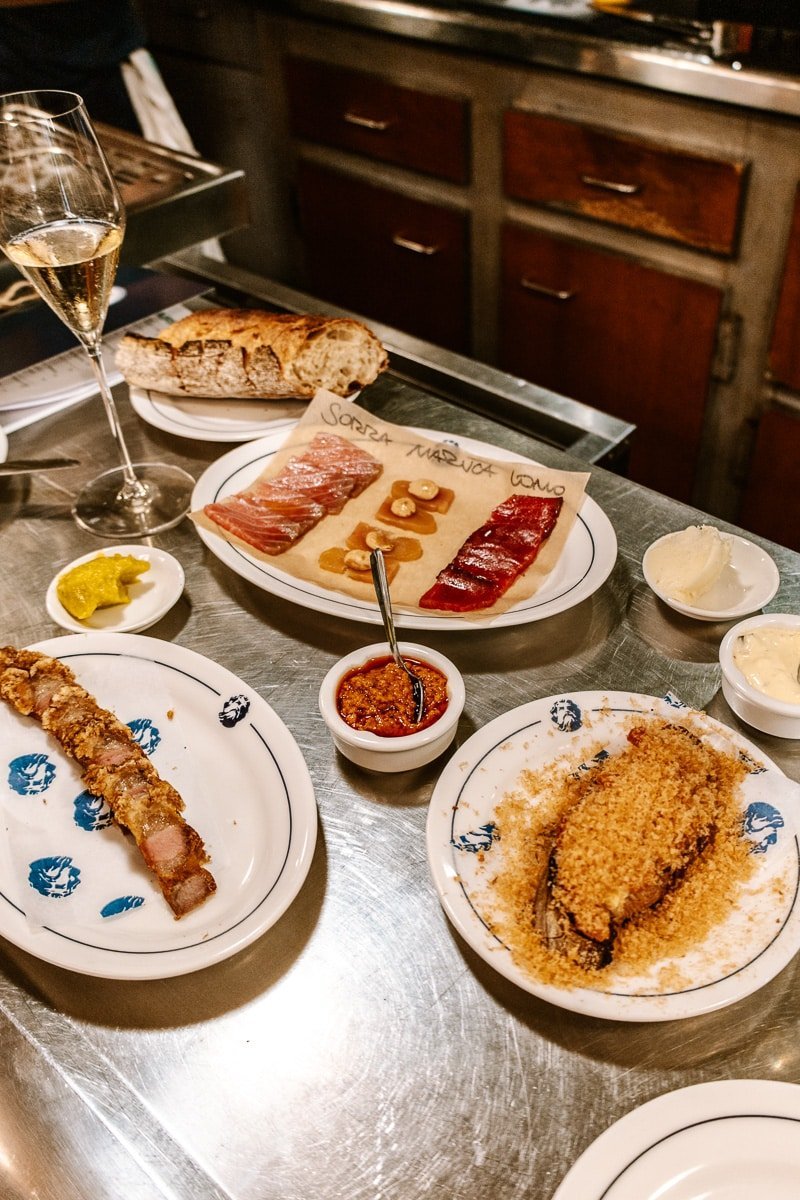
This was the favourite of the whole trip, and I’d say it without hesitation. The place is built around fish, fire, and simple cooking with a lot of flavour. Sit at the bar — you can watch the fish get cut, then go straight into the kitchen. We had calamari, a few kinds of fish, chicharrón, and the homemade aioli. For that aioli we ordered extra bread, which tells you everything. It’s pricier than a traditional tapas bar, and a reservation makes sense. We’d come back in a heartbeat.
Small, and no seats at all. You stand between the bottles along the wall while the montaditos — the tiny toasted bread bites — get made at the bar in front of you. They’re small, so order a few and share. Don’t expect a calm lunch. It’s a short, busy stop that fits perfectly into an afternoon or evening in Poble-sec.
That’s the lot. No tourist menus, no sad sangria — just the bars where the food actually landed. If you’re in Barcelona and you want to know where the locals are standing, this is your list.
If it doesn’t fit a Tuesday night, it doesn’t get published. — Grace
There’s a moment at the end of a long week when I don’t want to cook. I want one thing made properly in a glass. That’s when the gimlet comes out — three ingredients, five minutes start to finish, and it tastes like a bar made the effort.
A traditional gimlet is just gin, fresh lime juice, and simple syrup. Lightly sweet, sharply refreshing, the good kind of simple. It’s the gin version of a daiquiri — a spirit, lime, sugar — and it has been around long enough to have a story attached to it.
The short history of the gimlet
Like most classic drinks, the gimlet’s origins aren’t 100% clear. Rumor has it that in the 18th century, the British Royal Navy made it as a medicinal tonic against scurvy. The vitamin C from citrus was supposed to ward off illness, and the gin — let’s be honest — must have been the part that got people to actually drink it.
The name, too, has a maritime feel: it’s thought to come from the gimlet tool, the little handheld drill used to bore holes in the wooden barrels that carried food and spirits.
What’s in a gimlet
Just three things, and none of them are complicated:
2½ ounces gin — the base. Quality matters more here than anywhere else, because there’s nothing hiding behind it.
¾ ounces fresh lime juice — the star flavor. I always squeeze it fresh; bottled lime never gets the same bright bite.
¾ ounces simple syrup — store-bought works, but homemade is a 10-minute jar that keeps in the fridge and makes the drink silky without any gritty sugar crystals.
Best gin for a gimlet
In a two-or-three-ingredient drink, the spirit you use really shows. My go-to is Hendrick’s — it’s high quality, reliable, and always in stock where I shop. But any good top-shelf gin you like will make a great gimlet. Spend the little extra here; it’s the one place this recipe rewards it.
How to make it
Combine the gin, lime juice, and simple syrup with ice in a cocktail shaker.
Shake well.
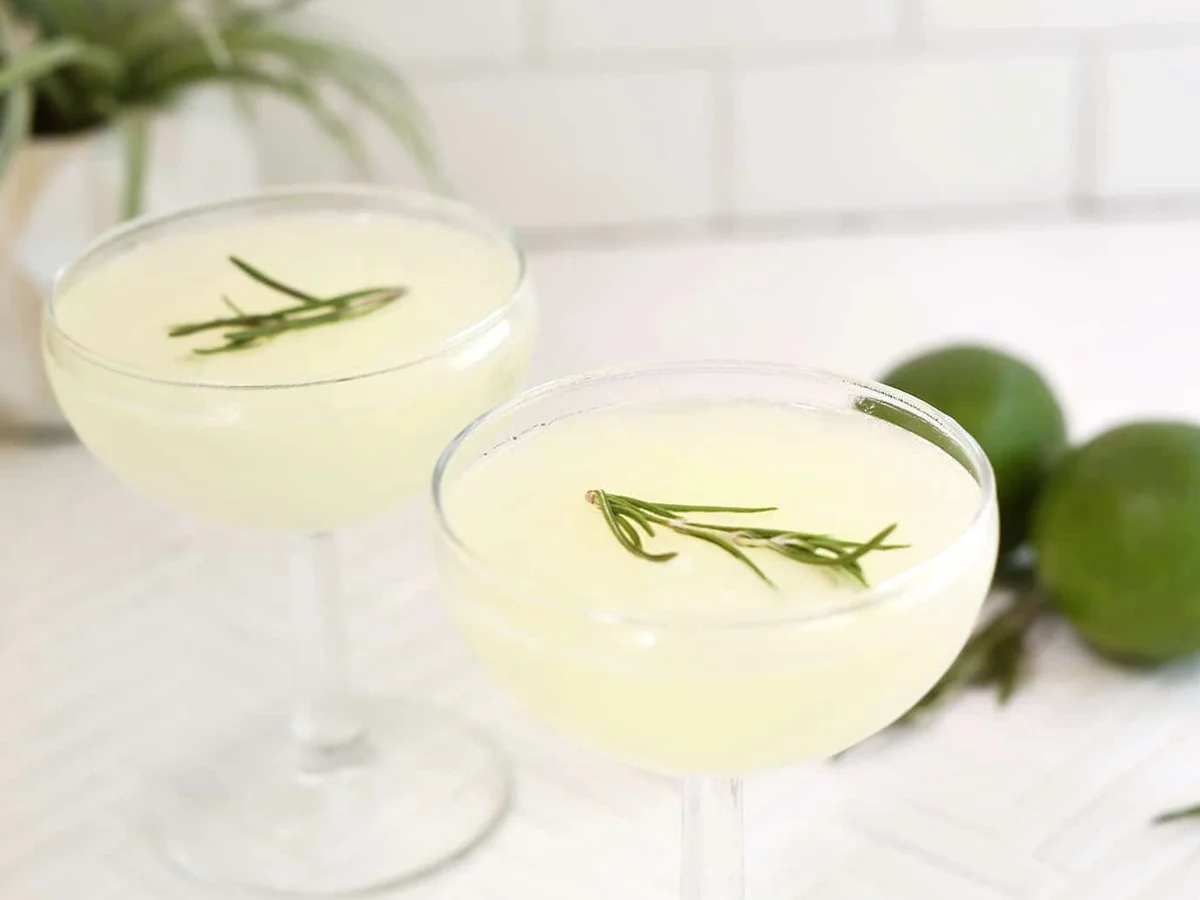
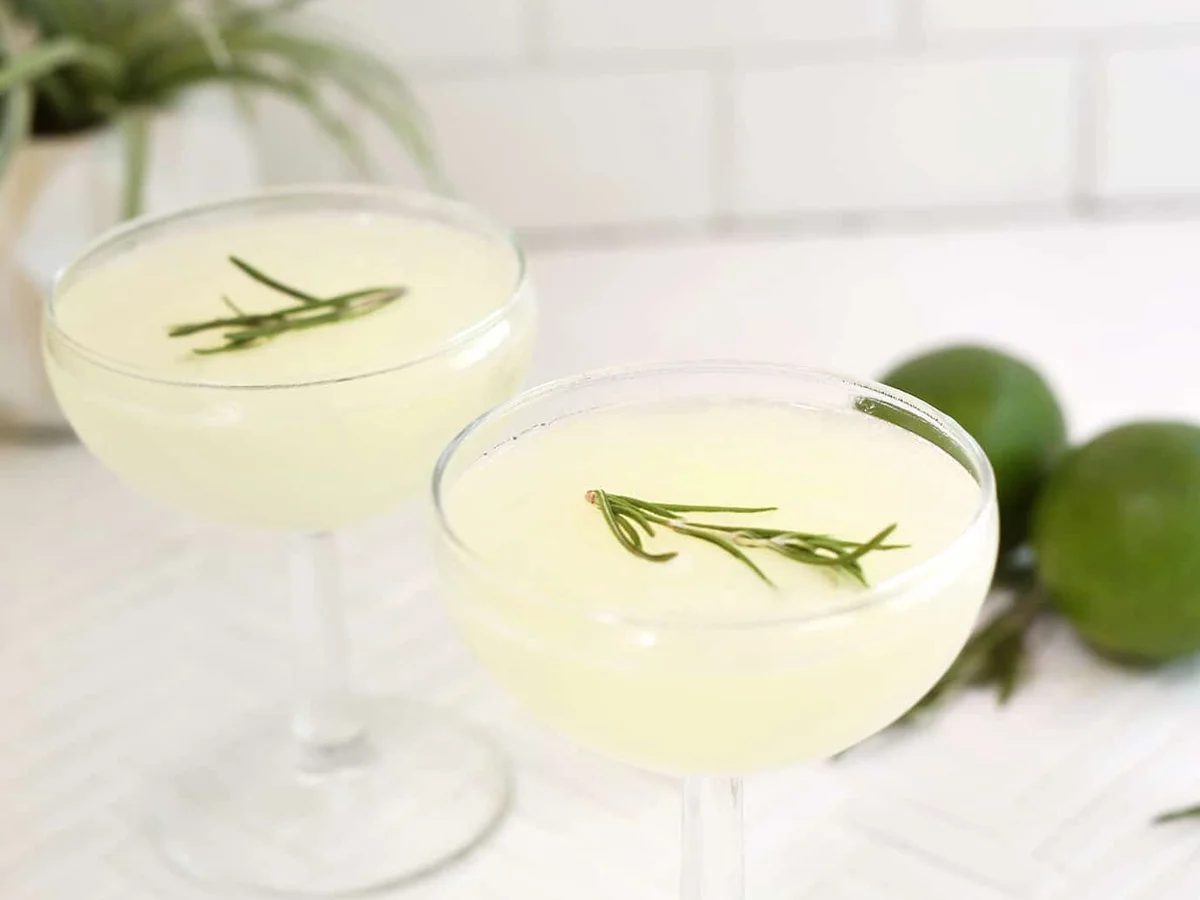
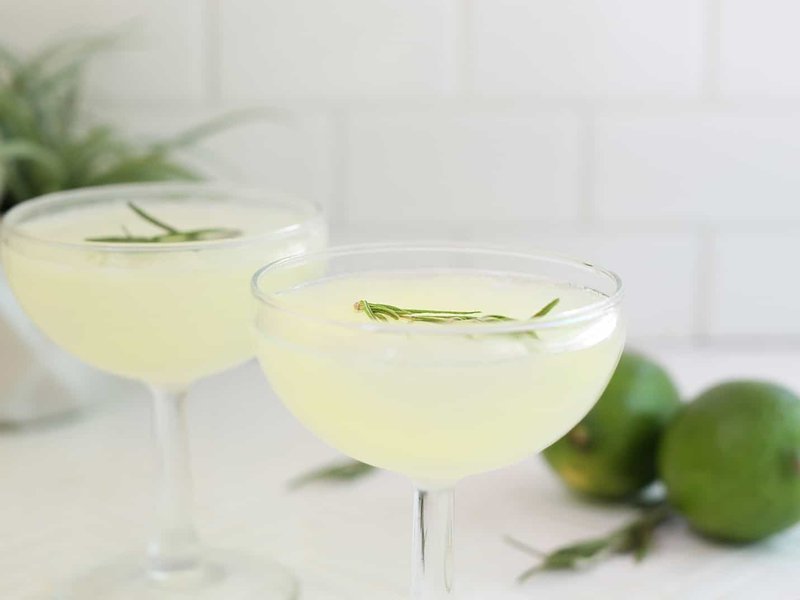
Strain into a chilled coupe or martini glass.
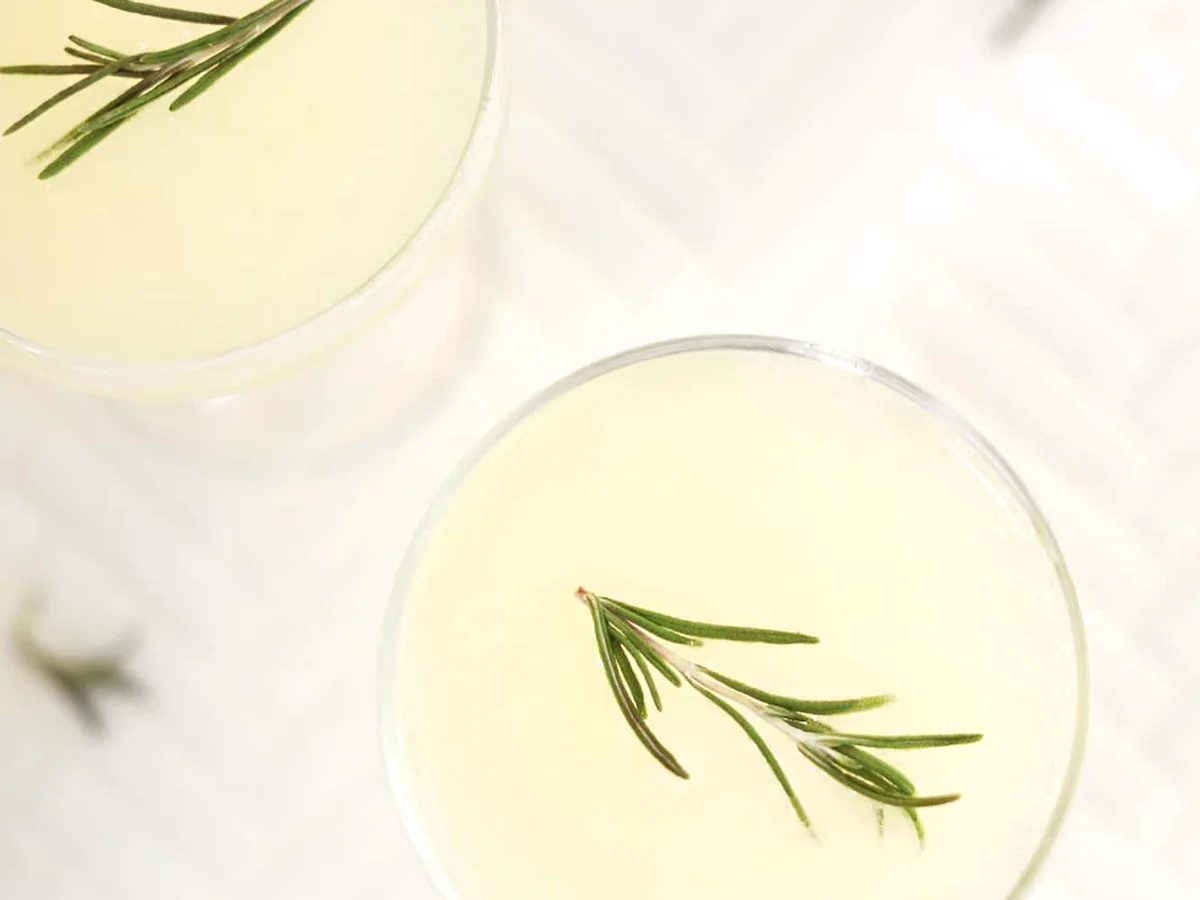
Garnish with a sprig of rosemary or a mint leaf if you have one — it adds a little aroma when you sip. A lime wedge works just as well.
Sometimes I make it on the rocks instead. My favorite local restaurant always asks which I prefer when I order one — up or over ice — and I’ve never once regretted either answer. For a full glass, stir the ingredients with ice instead of shaking.
Gimlet variations worth trying
Once you’ve got the base down, the variations are where it gets fun. All of these take the same five minutes.
Lime cordial gimlet — an old-school recipe-book style: 2 ounces gin with 1 ounce of Rose’s Lime Juice Cordial, shaken with ice and poured into a chilled glass. Slightly sweeter, very easy.
Vodka gimlet — same recipe, swap the gin for vodka. That’s the whole trick.
Basil gimlet — muddle a few fresh basil leaves in your shaker before adding the gin and lime. Instant herbal note.
Cucumber gimlet — add a few slices of cucumber to the shaker and muddle gently. Strain over ice and garnish with a cucumber wheel.
Rosemary gimlet — steep some fresh rosemary in your simple syrup as you make it, add a sprig when shaking, and garnish with rosemary. Yes, it makes sense.
What glass to use
I love this drink in a classic coupe, and any martini-style glass you own works fine. The one pro move worth stealing: pop the glass in the freezer for at least 30 minutes before pouring. You get that properly cold, frosty glass from a fancy restaurant, at home, with zero effort.
That’s the whole point of a gimlet. No fancy shaker required, no bar cart, no three pans in the sink — one glass, three ingredients, and a drink that actually tastes like someone took their time.
Trade-It Tip: No Hendrick’s on the shelf? Any dry gin you’d happily drink neat works — the lime does the heavy lifting, and the gin just needs to be clean.
Here’s to the good kind of simple.
If it doesn’t fit a Tuesday night, it doesn’t get published.
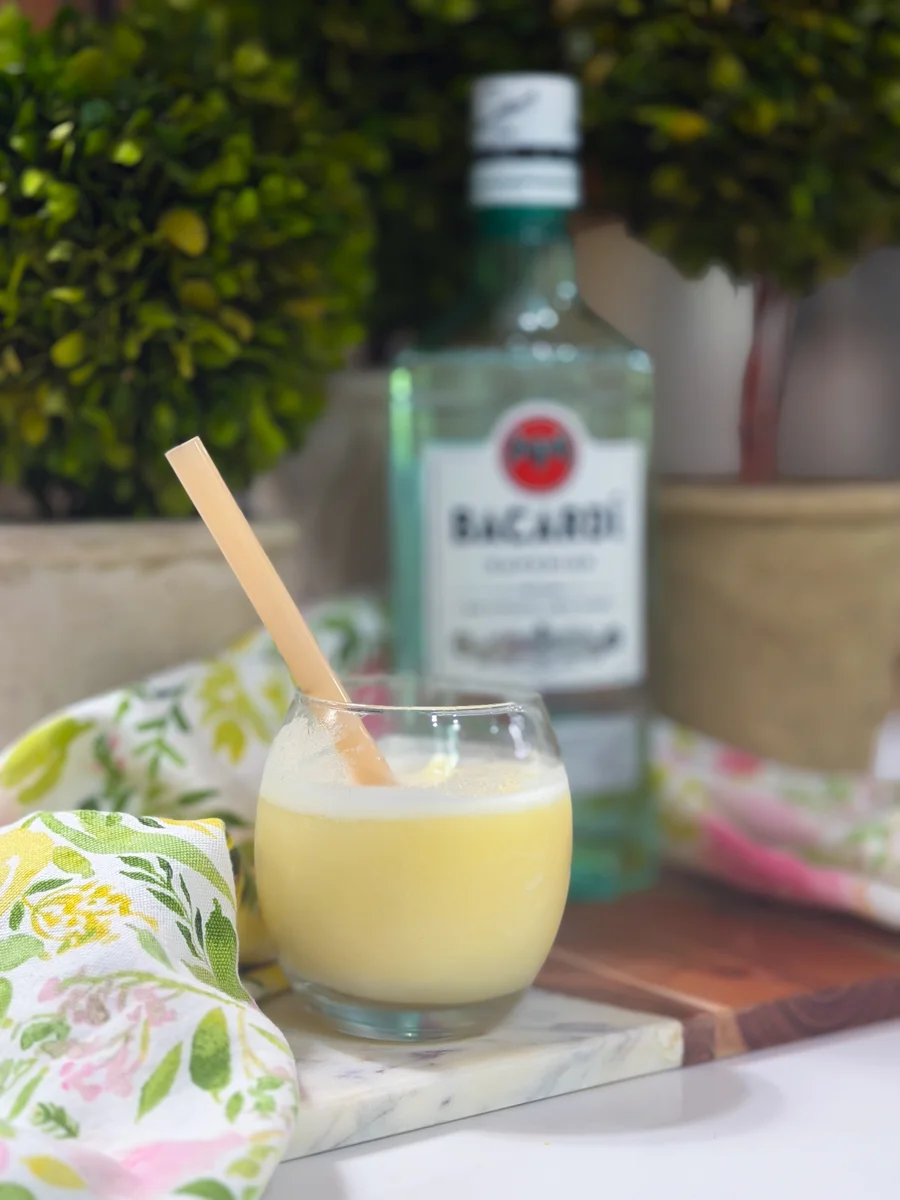
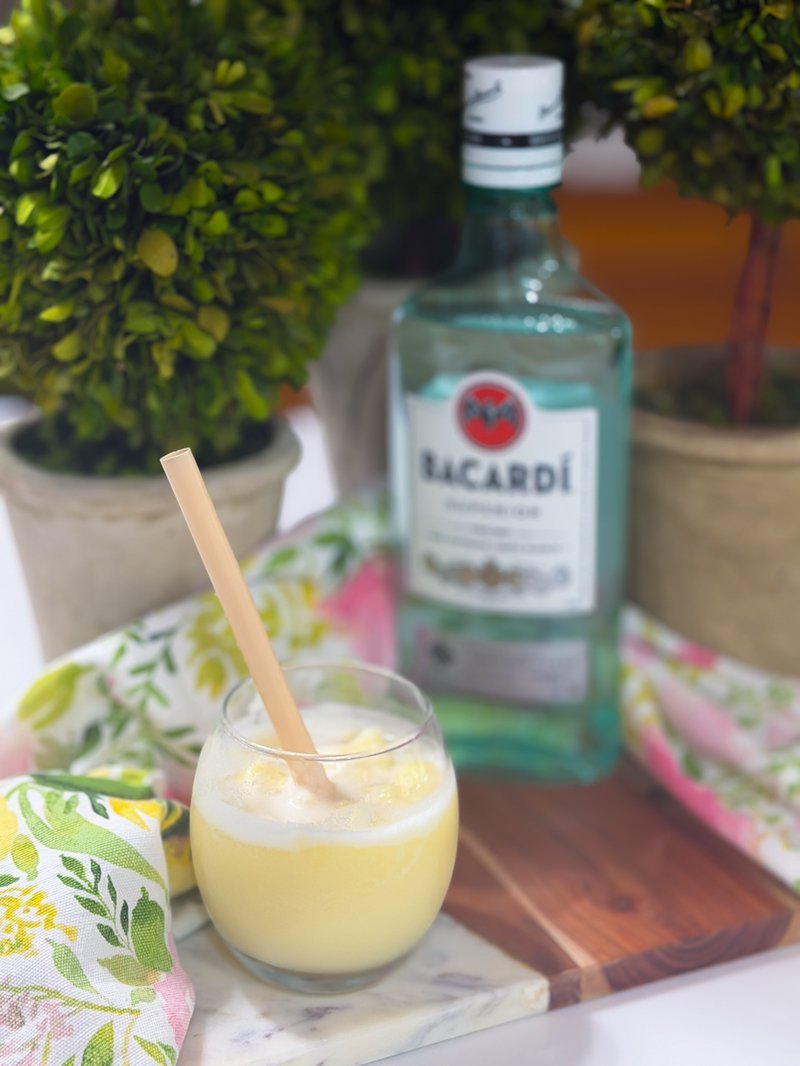
I’ve had maybe thirty piña coladas in my life, and the one that ruined all the others for me was on a hot afternoon in Old San Juan. We were three rounds deep — the real thing, the kind they pour over shaved ice in the old town — and I was already calculating how to get that back home.
I ended up with a file on my fridge, a 2-quart Cuisinart ice cream maker, and three failed attempts before it tasted right. The details in some of the photos don’t quite match the recipe below — you were there during my experiments, so I left them in. The recipe itself is the final version.
Why this actually works
The whole trick is making a frozen pineapple-coconut base ahead of time, then adding the rum only when you’re ready to serve. Alcohol keeps the mixture soft, so it goes in last. Which means the base is a perfectly good no-alcohol treat in its own right — scoop it for the kids, the teetotallers, or the 7pm me. One batch serves whoever’s in the house, whenever they want it. Back when I worked the line, we did the same thing with punch bases: pre-make the big thing, let the guest finish their own.
Total hands-on time is somewhere around 20 minutes. The chilling and churning wait themselves out.
What you’ll need
For the frozen base (serves around 10):
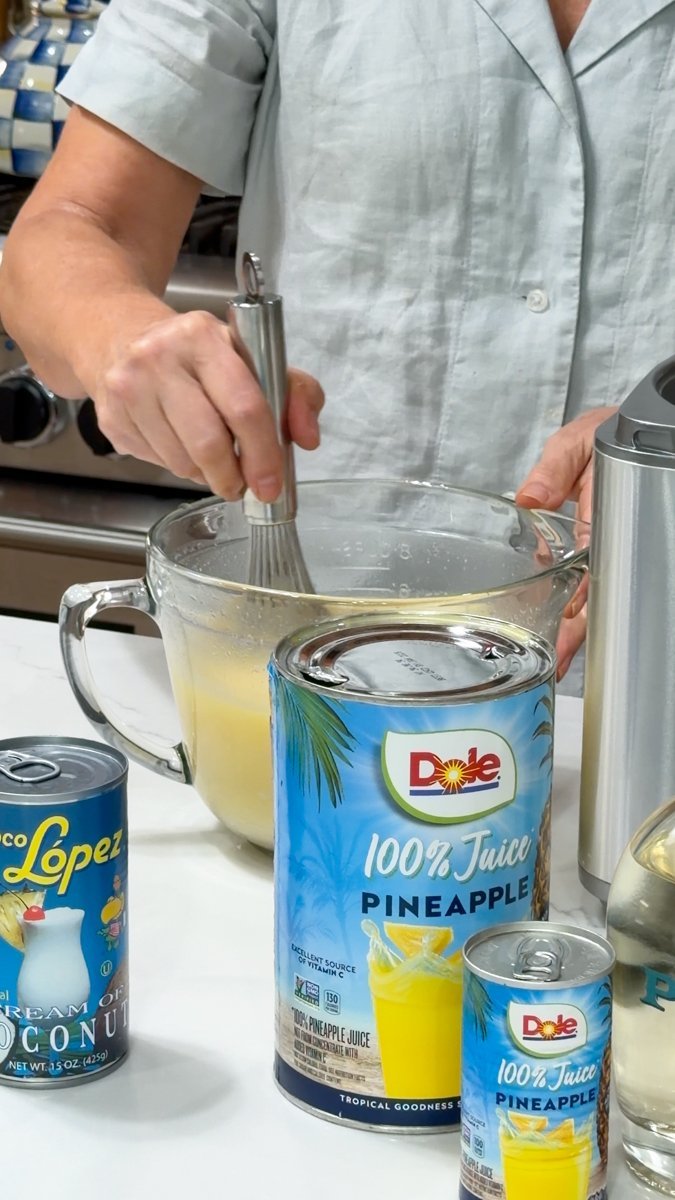
1 x 22-ounce bottle Coco Real Gourmet Cream of Coconut. This is the creamiest option I’ve found, and it is not the same thing as coconut cream or coconut milk — the recipe leans on it for exactly that reason.
1 x 46-ounce can Dole 100% Pineapple Juice
1 cup water
Equipment: a 2-quart Cuisinart ice cream maker (or any freezer-bowl model), a large mixing bowl, a whisk, a freezer-safe container with a lid, an ice cream scoop, thick straws, and glasses — mine are roughly 13 ounces each. A jigger is a bonus, a measuring cup works fine.
How to make it
Whisk the cream of coconut, pineapple juice, and water in a large bowl until completely smooth. Cover and refrigerate for at least 4 hours — overnight is better, and it’s the part I always do the night before.
Pour the chilled mixture into the frozen bowl of your ice cream maker and churn, following the machine’s instructions, usually 20–30 minutes, until it’s soft-serve consistency.
If your machine is small, chatter it in two batches.
With my 2-quart Cuisinart, I churn half at a time. Big catch: if you’re doing a second batch with this machine, refreeze the metal insert for 24 hours before the second run, or it will not freeze. I learned this the expensive way.
Transfer the finished base to a lidded, freezer-safe container and freeze for several hours, or overnight, until firm.
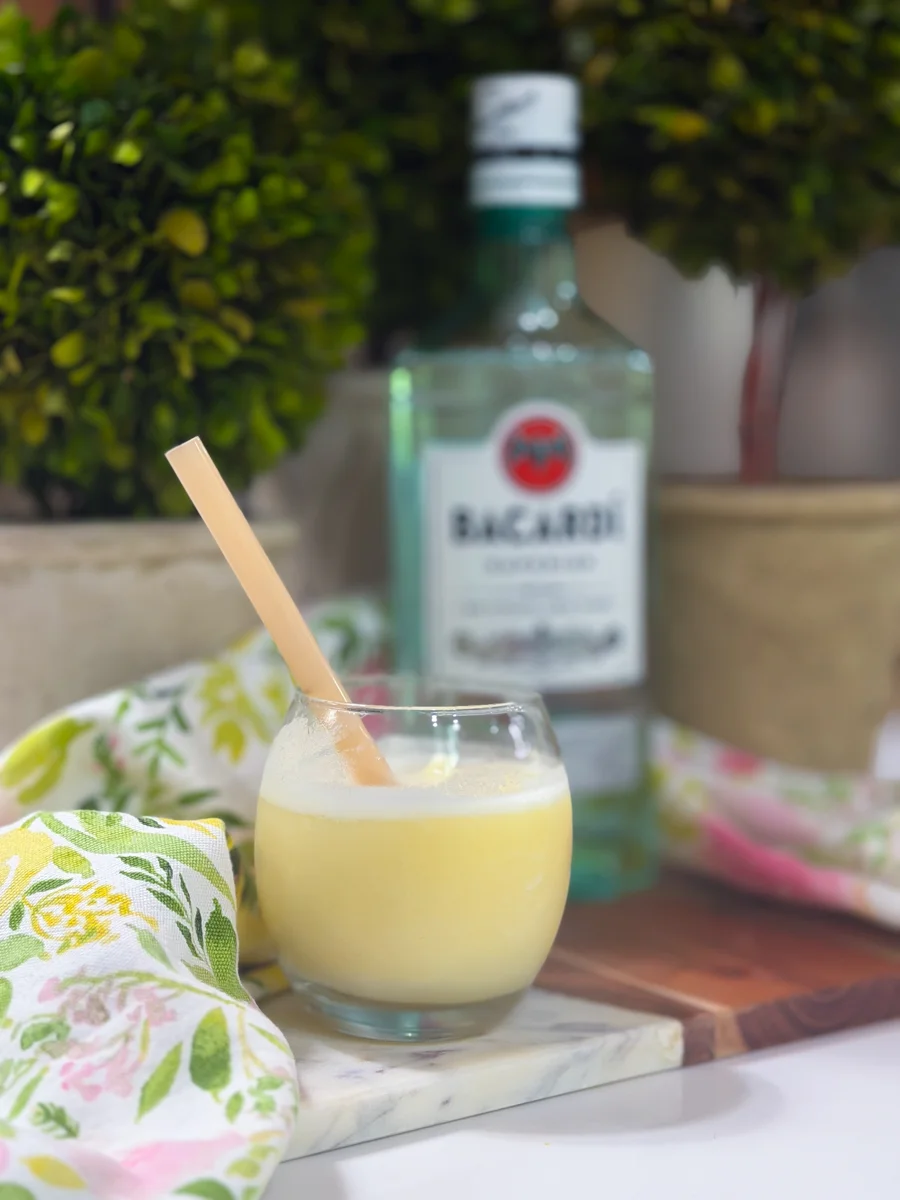
At serving: measure roughly 1 1/2 to 2 ounces of white rum into each glass, then scoop the frozen base on top. Hand your guests a thick straw — the kind for milkshakes work best — and let them stir it as they drink. Trim the straws if they’re taller than your glasses. A wedge of pineapple and a cherry on the rim if you’re feeling fancy.
Tips for the best piña coladas
Chill the base before churning — it’s the difference between creamy and icy.
Stick with real cream of coconut, not coconut milk or coconut cream. That’s the whole point of the recipe.
Rum goes in at serving. Alcohol lowers the freezing point and keeps the base from setting properly.
Want it thicker? More base, less rum for each glass. Want it sipperable? Add a splash of pineapple juice.
Make the base a day ahead. The base does the work; the weekend does the rest.
Questions you’re probably thinking
Can I make this without alcohol? Yes — the frozen base is the whole drink, minus the rum. It’s grown into a genuine hit with my kids.
How far ahead can I make it? The base stores in a sealed container in the freezer for up to two weeks. Make it the weekend before and forget about it.
What rum should I use? A light or white rum keeps the classic tropical flavor. More or less to taste — the base is doing most of the work.
Can I use a different ice cream maker? Any freezer-bowl model will work. Follow your machine’s instructions for freezing the bowl and churning time, and expect the batching to be different on a smaller unit.
Useful trades
Trade-It Tip: No thick milkshake straws? Your thickest available straw, trimmed to the glass, is fine. And if the Coco Real is sold out, Coco López cream of coconut is the backup I’d reach for — same idea, same texture.
I make this the weekend before I host, freeze the base, and on the day I do nothing but scoop, measure rum, and hand out drinks. That’s the whole job. If it doesn’t fit a Tuesday night, it doesn’t get published.
There’s a particular kind of happy that smells like slow braising beef and hits you half a block before you’re at the door. This is the whole reason I keep the slow cooker going every single week, and honestly, some of these took a couple of fails on my end before they turned out right. These are the fixed versions.
Back when I worked the line, the kitchens ran on exactly this logic: start the big pots early, and by service time the heavy lifting is done. My family still doesn’t get why the kitchen smells like a restaurant at four on a Tuesday. Give them a decade, though. They’ll get it.
Every recipe below follows the same deal: under ten minutes of hands-on work, one pot, and you’re out the door before the timer matters. No browning, no babysitting, no standing over a stove after a long day.
The crockpot rules I run by
Most of these run a full 8 hours on low. A few shorter ones are marked 3-4 hours, 2-3 hours, or overnight.
Whatever’s left of the pot liquid is often the best part of the dish. Taste it.
If it feeds a crowd, double it. I always do.
1. Beef and Noodles
Why this works: low, slow cooking takes a chuck roast to pull-apart tender, and stirring egg noodles into the broth at the end soaks up all of that flavor in one pot.
The first 8 hours on low does all the heavy lifting. I say about 8 minutes of prep, then I leave. It’s the slow cooker version of a hug, and my husband orders it on repeat from October through March. I just say yes — there’s barely any effort on my side.
2. Beef Stew
Raw potatoes, carrots, and beef go in raw and come out after 8 hours on low like you simmered them on the hob for hours. No browning is required, which means no browning.
I set this on for Sundays when we have plans and I want a proper dinner waiting when we get back. It tastes even better the next day, which in our house means it’s usually discovered at midnight by someone and is gone.
3. Pulled Pork
A pork shoulder with some spice in it in the morning, 8-10 hours on low, and it shreds with two forks. Eat it over rice, in tacos, on a bun, straight from the pot with a fork. Nobody’s judging.
This is how I feed a crowd without doing the work. I made it for my son’s birthday last summer, and his friends were sure I’d been slaving over a hot stove all day. No. The slow cooker did. I was the only one at the supermarket.
4. Crockpot Lasagna
Why this works: dried pasta actually cooks beautifully in the slow cooker, so the whole dish happens in the pot instead of the oven.
Layer dry lasagna sheets, meat sauce, and ricotta straight in the pot. Three to four hours on low and the pasta is tender and the top is properly bubbling and melted. My teens treat lasagna like a special occasion. I never tell them it took me about ten minutes to assemble.
5. French Dip Sandwiches
A chuck roast in beef broth and onion soup mix, all day long, until it falls apart. Slice it thin, pile it on sandwich rolls, and dip in the pot liquid, which is genuinely the most flavorful au jus I’ve been served in a restaurant.
People always ask how I pull that off. Not much effort is needed to look like a genius, but they’ll keep asking anyway.
6. Philly Cheesesteak Edition
Peppers, onions, beef, and a splash of Worcestershire going on low for the day. Load the rolls with provolone, or go full-on Philly with Cheez Whiz if that’s your thing. This barely costs more than a normal sandwich night, and it comes in far under any takeout cheesesteak.
My husband loves anything on a roll. I made it with a cheap beef pack from the中超 discount store — he doesn’t need to know. (UK readers: any smoked processed cheese works with this.)
7. Maid Rites, the Iowa Way
Ground beef simmered all day in well-seasoned broth until it’s impossibly tender, on a plain bun. No ketchup, no fuss. The all-day version of loose meat, served the way small-town diners have done it for decades.
If the original article is anything to go by, this is the one locals call a genius move. If that’s your thing, you already know. Doubled for a crowd.
8. Shredded Chicken Tacos
Chicken and salsa, taco seasoning, and a squeeze of lime in the pot, all day on low. Shreds with almost no effort, and it becomes tacos, burrito bowls, nachos, whatever the week demands. One batch feeds a lot of people and costs next to nothing.
Taco night is the one night my kids actually race to the table. This is my set-and-forget version. One of them watches the pot through the glass lid all afternoon, hoping something will spill. It never does.
9. Buffalo Chicken Sandwiches
Chicken, a stick of butter, and buffalo sauce in the slow cooker. Shred in the pot, pile on a bun with blue cheese or ranch. It beats delivery, which is the entire bar we’re clearing, and it works piled high on a baked potato or rolled in a wrap too.
My son asks for this one more than any other meal on the list. I’ve never once complained. Dump the chicken in, pour the sauce, walk away until dinner time. I’ve done more difficult things before finishing my first coffee.
10. Crack Chicken
Chicken in cream cheese, ranch seasoning, and cheddar that shreds into an absurdly creamy bun filling. Add bacon if you’re committing. This is the slow cooker recipe people ask you for at every family BBQ, and yes, that is the whole point.
My daughter made it for a school buffet and came home with an empty pot and three people hunting for the recipe. I point them to this post. That’s what I call success. No need to lock the kitchen in for the entire weekend.
11. Hawaiian Chicken
Why this works: the sweetness in the sauce keeps leftover rice interesting, and the slow cook keeps it from drying out.
Pineapple juice, soy sauce, brown sugar, and garlic make a sauce that soaks straight into the rice. It stays in the summer rotation because it doesn’t heat the kitchen up, and it’s over rice in about ten minutes. My kids call it pineapple chicken, which isn’t wrong, and it tells me they’ll eat it again, which is the whole point.
12. Crack Chicken Pasta
Chicken, cream cheese, bacon, and ranch in the pot all day, and you stir in pasta at the end. Rich and saucy, the kind that gets scraped clean to the point where no one leaves a dip behind. Feeds six, and you barely try.
This is my pick for summer nights when dinner needs to be more than just dinner. My husband once ate it cold the next morning. I didn’t ask questions.
13. White Bean Turkey Chili
Why this works: white beans hold up to the long simmer without dissolving, so the chili keeps a proper texture all the way through.
Ground turkey, white beans, green chiles, chicken broth, and plenty of cumin. All that simmering adds up. Top with sour cream, cheese, and avocado on the days you want to lean into it a bit more.
This is my pick on nights I want it to feel healthy without the meal giving up real flavor. And if I actually keep an eye on the fridge, a pot lasts a solid two or three meals, which I try not to think about too hard.
14. Copycat Panera Chicken and Wild Rice Soup
Chicken, wild rice, and vegetables in a creamy broth, all simmering in the slow cooker all day. It comes out thick and warming, the close cousin of the version you order at the cafe. In my opinion, I made the full pot for a fraction of the cost of two bowls, so I’d say better. (UK readers: any chicken and wild rice soup base will get you close enough.)
My daughter used to order this at the chain every single time we passed one. The first time I made it, she said the home version was better. That might be the highest compliment I’ve gotten from my kid, ever. We run it from October to March and nobody complains.
15. Ravioli Casserole
Frozen ravioli, a jar of marinara, ground beef, and shredded mozzarella, layered in the pot and bubbled into something proper. No boiling, no waiting in a hot pan, just a set-and-forget dinner that’s ready when you walk in.
This one’s fun to make, and my favorite kind of meal is the one where the making is the fun part. My kids think it’s fancy. I tell them it’s Italian. Both of those are more or less true, and neither is an exact answer.
16. Cheesy Crockpot Spaghetti
Just spaghetti, meat sauce, and melted cheese in the slow cooker, left until the pasta’s tender and everything’s melded. All the flavour of the baked version, except the oven and the annoying twenty-minute wait.
My family loves pasta, and I appreciate that it reheats properly for a weeknight when I’m busy. Set the pot, go do whatever’s next, and come home to a finished dinner.
17. Chicken Fajitas
Why this works: the longer the cook, the deeper the flavour gets into the chicken, and the peppers and onions really only give up all their bits to genuine low-and-slow.
Serve in warm tortillas with whatever you’ve got, or over rice.
The smell coming out of this one is almost unfair. Every single person who walks in assumes I’ve been cooking for hours. The crockpot has. My actual involvement was maybe six minutes at 7 AM before the day’s chaos started.
18. Cheesy Potatoes
Hash browns, chicken cream soup, sour cream, and cheddar, making an ooey-gooey mess that’s gone at every potluck I bring it to.
I’ve made this for Easter, Christmas, a random Tuesday, and a graduation party where someone asked if it was from a restaurant. It was made from a bag of frozen hash browns and a can of soup. All the credit goes to the crockpot. Honestly though, they weren’t from a restaurant.
19. Baked Potatoes
Wrap russet potatoes in foil and put them in the crockpot for 8 hours. Come home to potatoes that are perfectly fluffy inside, with no oven needed.
I started doing this one in summer, when I refuse to heat the kitchen any further, and it completely changed my idea of dinner. No prep, result when you want it. My kids pile on everything and call it a favourite dinner. Best win on this list.
20. Grape Jelly Meatballs
Frozen meatballs in a grape jelly and chili sauce that’s genuinely quite strange if you think about it too hard, and totally unremarkable once you taste it. I’ve been making it for well over 40 years, and it shows up on dinner requests year after year. Works as an app or over rice as a full meal.
I bring them to parties and they’re the first thing gone. Someone always asks about the sauce. I always tell them — grape jelly and chili sauce — and they don’t believe me till they go and try it themselves.
21. Spinach and Artichoke Dip
Artichokes, cream cheese, sour cream, parmesan, and spinach in the pot, hot in 2-3 hours and still warm by the time you’re done with it. Game day, guest house, and “I want something indulgent but minimal work” all covered by this one.
I plug this in before the first guest shows and never think about it again. It holds its own all night, so just set out some chips and a spoon and let people help themselves.
22. Apple Crisp
Sliced apples with cinnamon and brown sugar, under a buttery oat topping, in the slow cooker for 2-3 hours until everything’s warm and bubbling. Serve from the pot with a scoop of vanilla ice cream.
I make this in September, every time I see good apples, because I want the whole house to smell like it for no reason. It also gives me an excuse to buy more vanilla ice cream, which I fully support. This is the crockpot working so you don’t have to.
What makes these worth keeping
Twenty-two dinners, sides, and one dessert that you can kick off whenever you’ve got a minute and finish whenever life calms down. It doesn’t matter how chaotic the day was. The crockpot doesn’t care. That’s the whole point, and it’s the best part.
Save these for nights when 5pm gets here too fast, or for the whole week ahead. No judgment — that’s exactly what these are for.
Trade-It Tip: No hoagie rolls? Pull-apart dinner rolls or pretzel buns work almost as well. The only real trick is pressing a soft interior into the sandwich roll you’ve got on hand.
If it doesn’t fit a Tuesday night, it doesn’t get published.
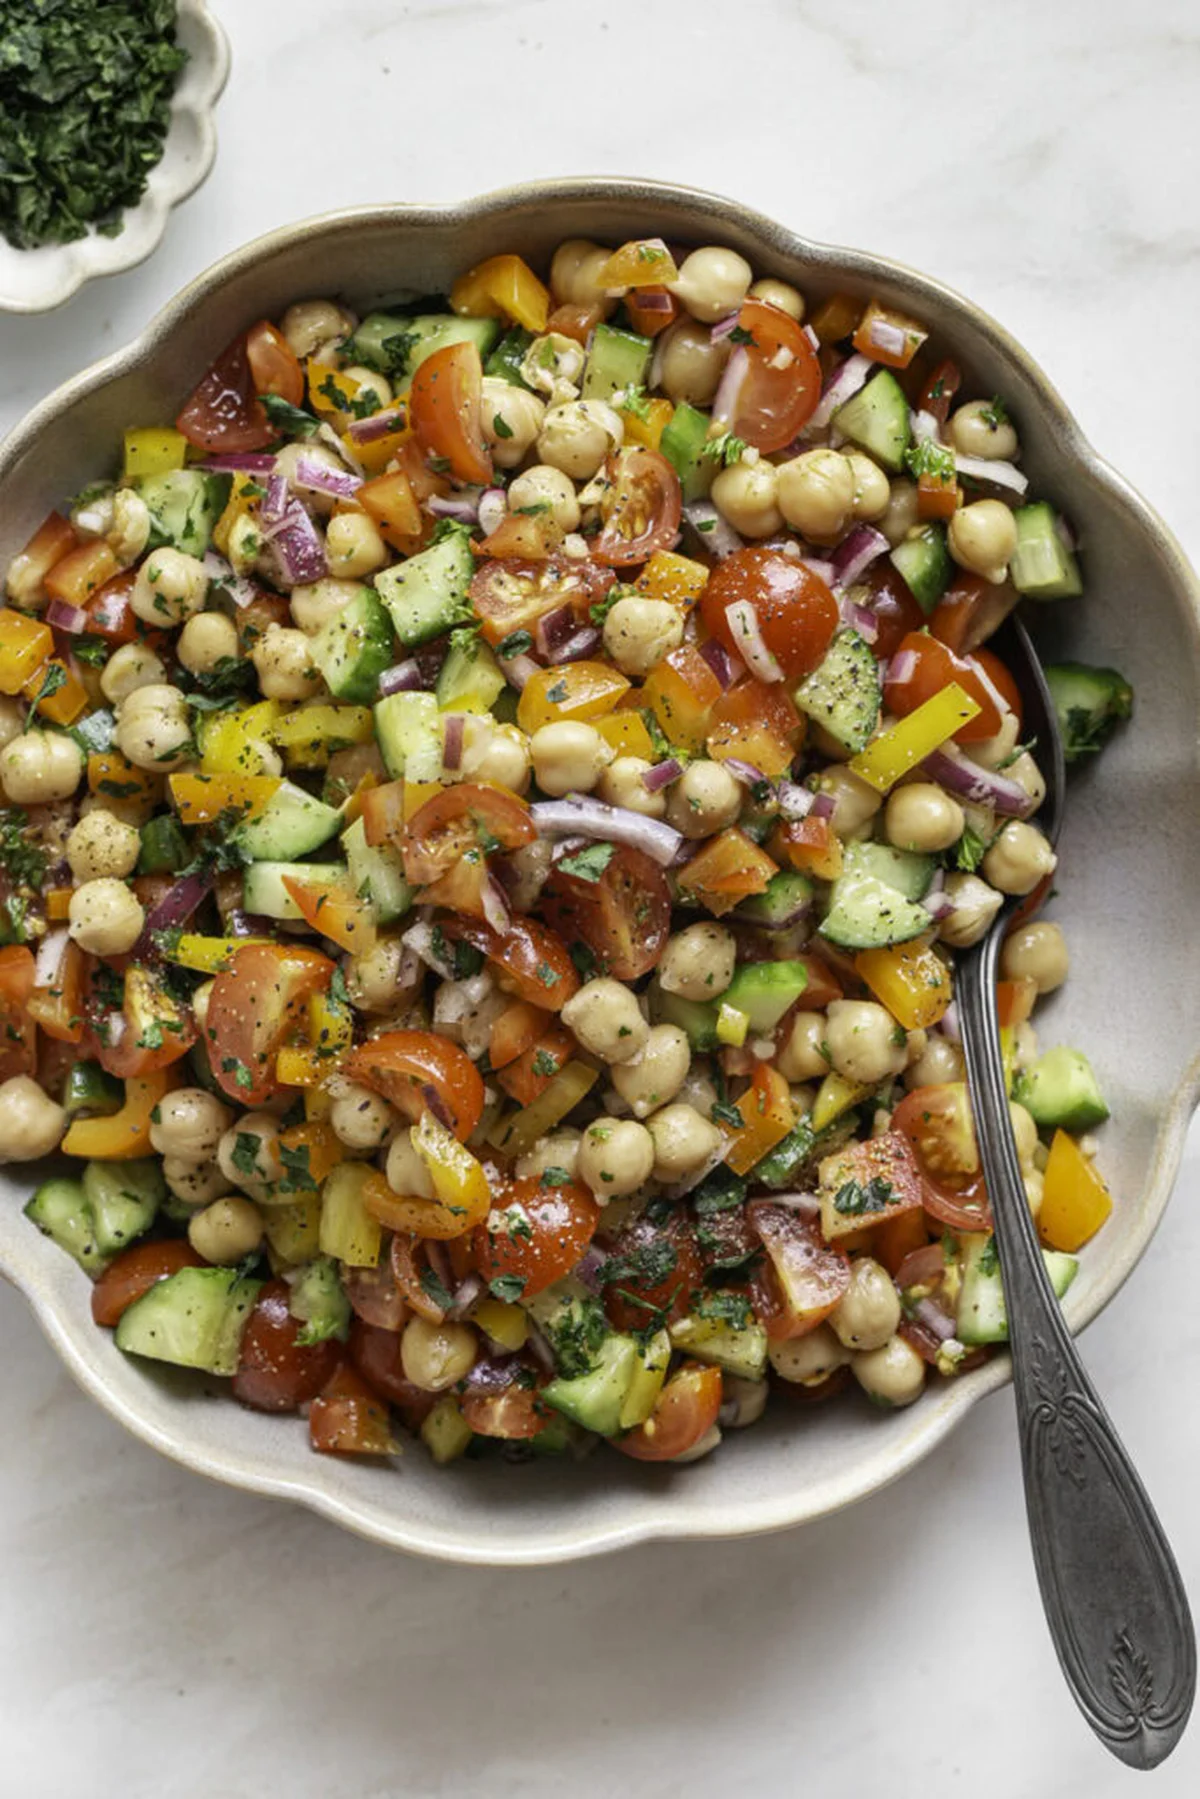
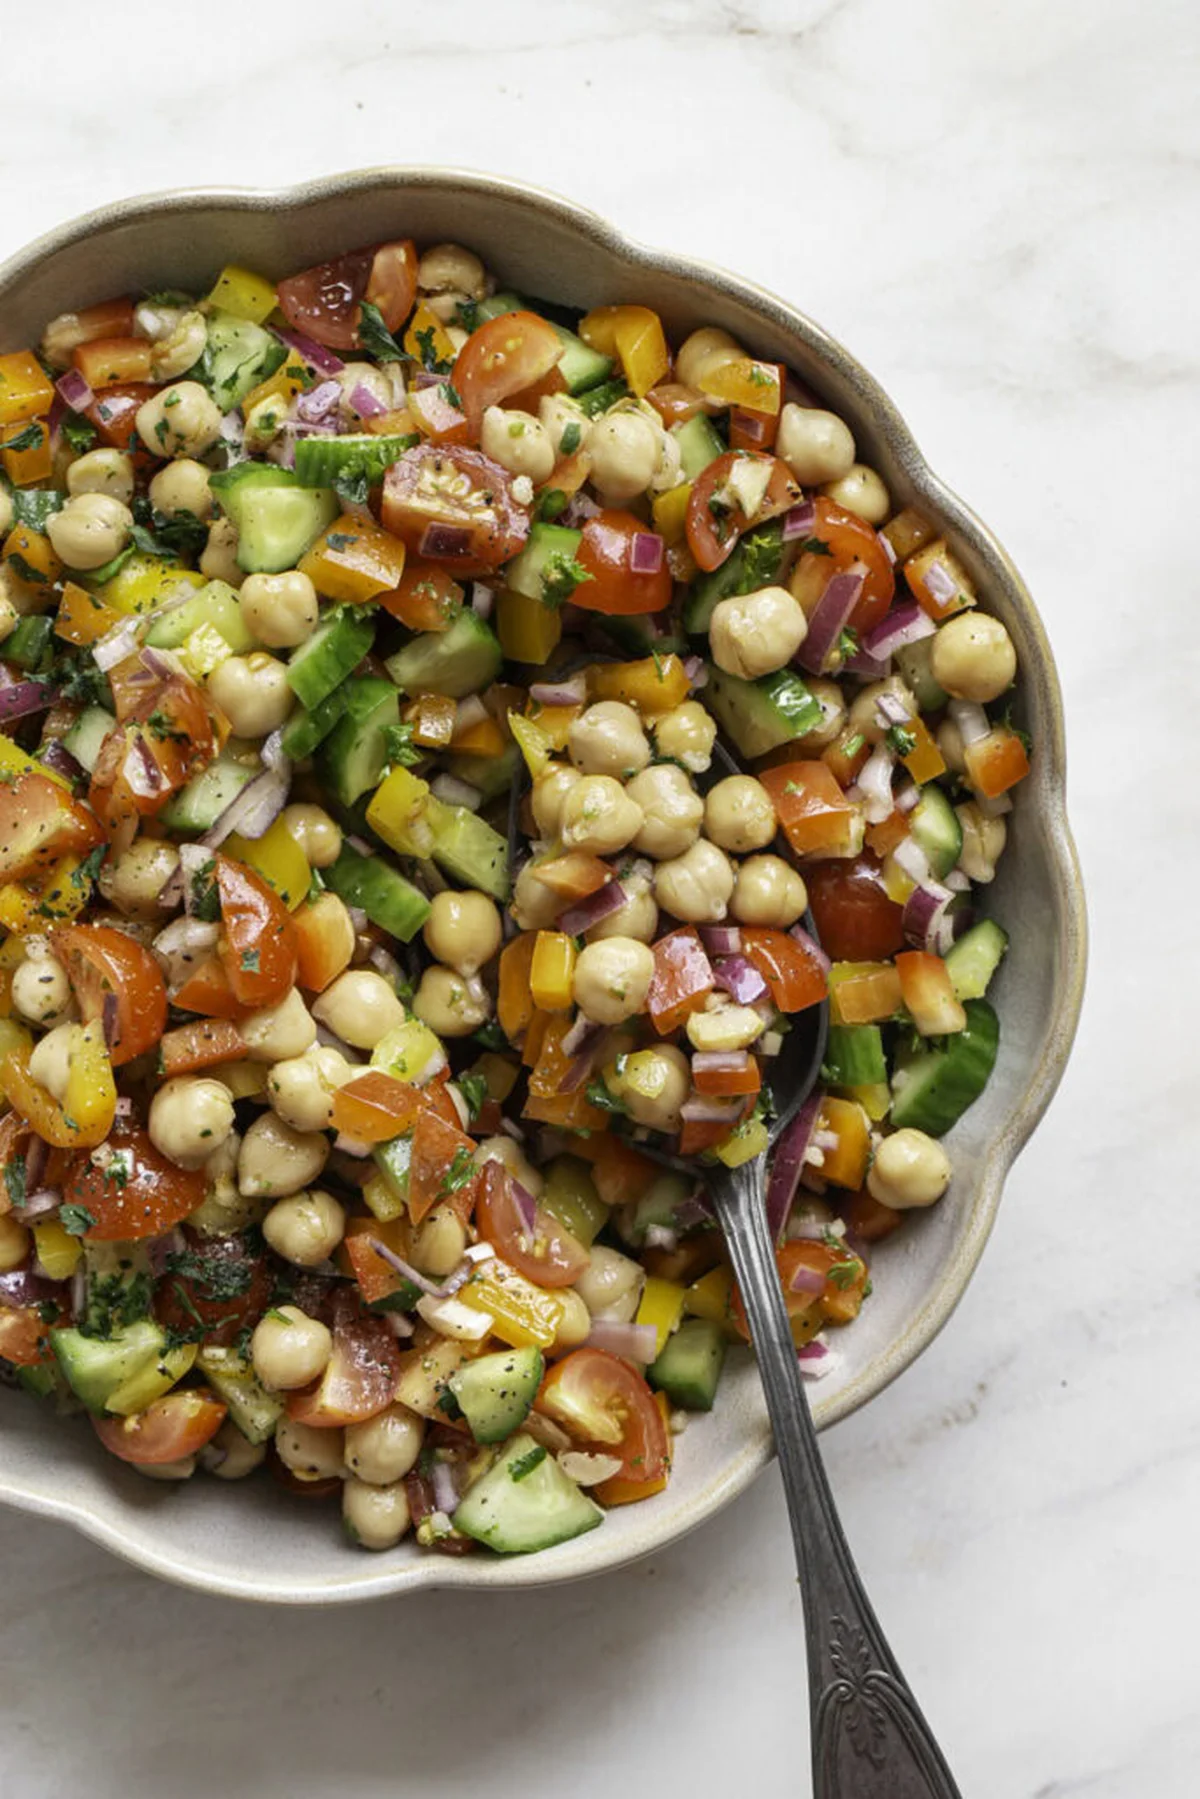
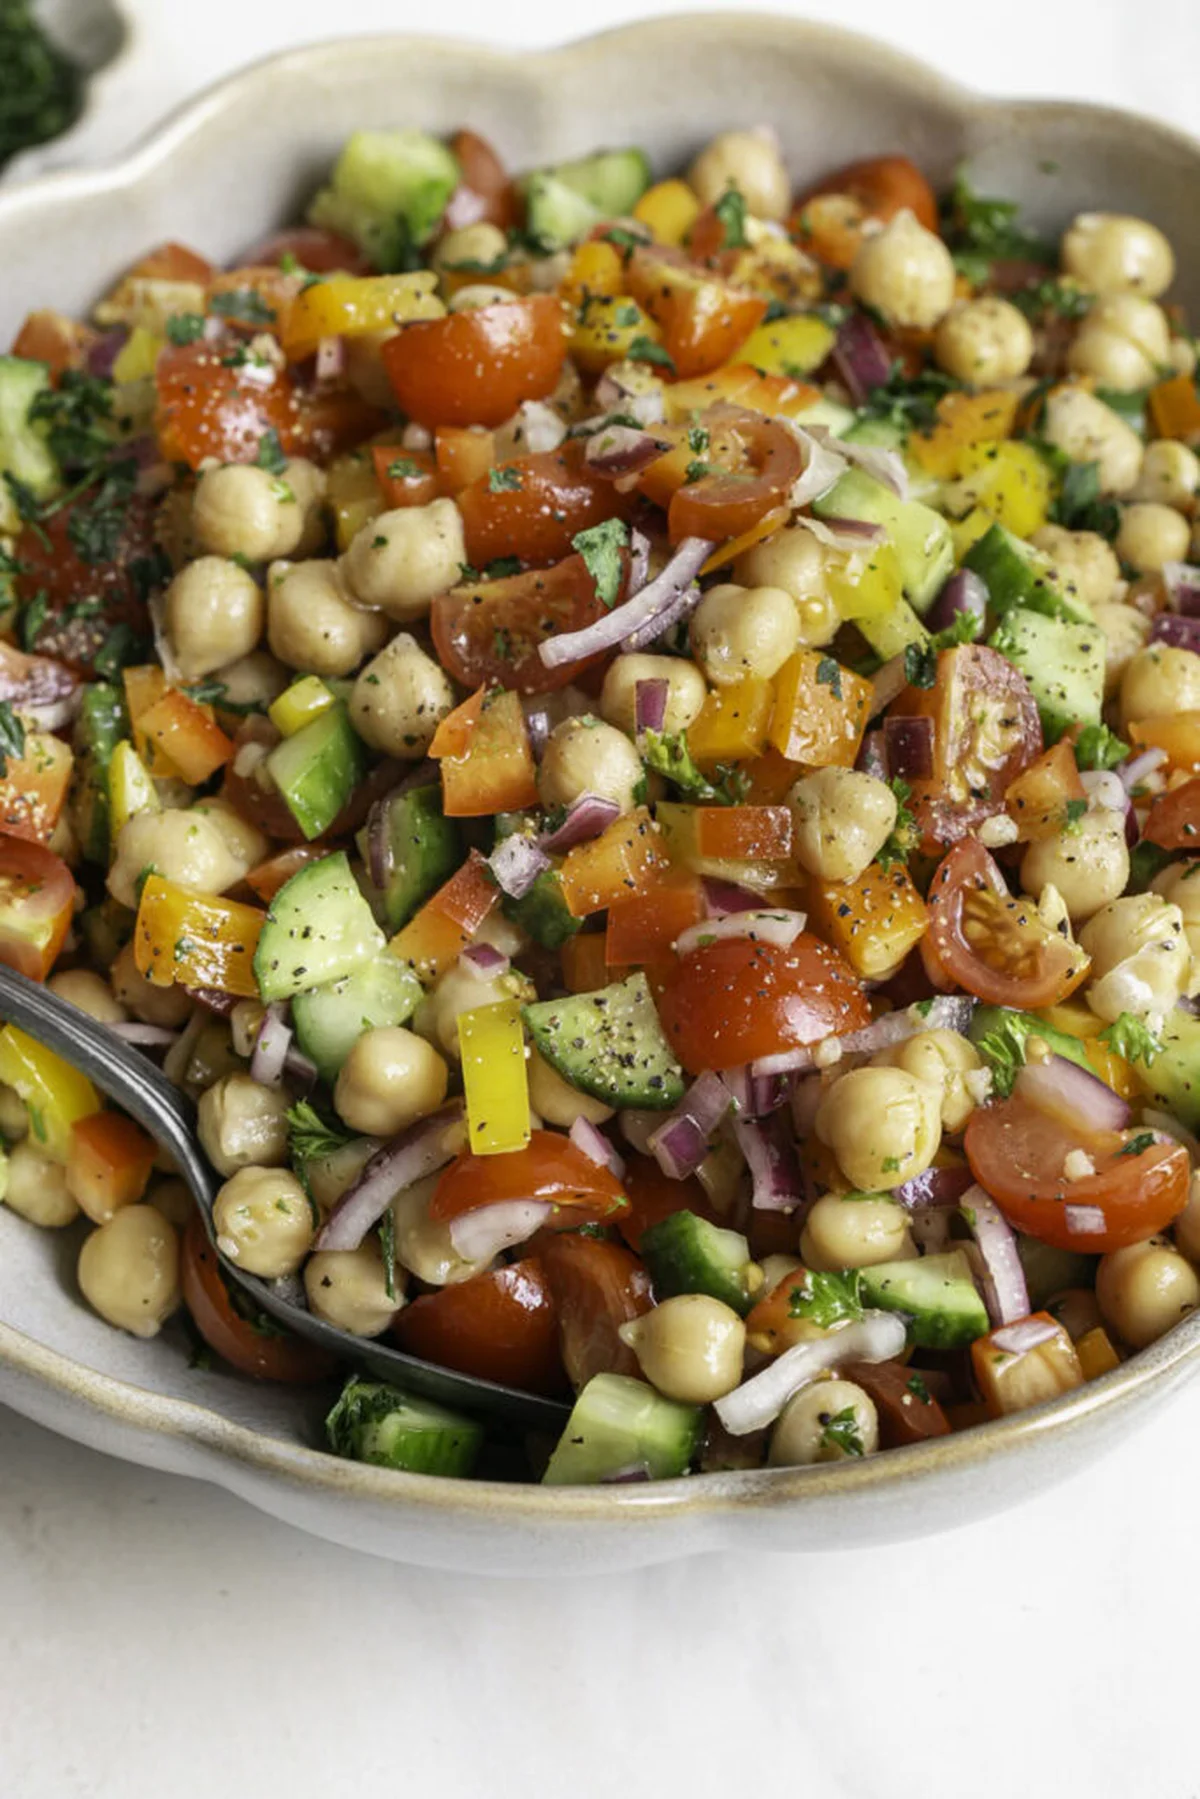
I used to think meal prep meant drawing a hard line between “salad night” and “I’m eating sad shelf-stable crackers night.” This chickpea salad erased the line. It’s vegan, gluten-free, takes 15 minutes start to finish, and it still tastes good on day four of the week.
Why this works: the chickpeas soak up the lemon dressing as they sit, so the salad actually gets better overnight — and hard vegetables like cucumbers and bell peppers don’t go limp the way leafy greens do. That’s the whole trick to a salad that survives four days in the fridge.
When I worked the line back in my first restaurant years, the trick to a good veggie salad was even cuts and a dressing you didn’t overthink. This is the good kind of simple: chop, drain, toss, box.
What you’ll need
3 bell peppers (red, orange, yellow), diced
1/2 red onion, diced
4–5 mini cucumbers, chopped small
12 oz cherry tomatoes, chopped or quartered
0.5 oz fresh parsley, minced
2 cans (25 oz) chickpeas, drained and rinsed
Dressing: juice of 2 large lemons (about 1/4 cup), 3 tablespoons olive oil (or avocado oil), 2 teaspoons salt, 1/2 teaspoon ground black pepper, 1 minced garlic clove (optional but recommended)
A word on the shopping list: chickpeas bring the protein and fiber that keep you full, mini cucumbers add crunch without the water, bell peppers bring sweetness and color, and the red onion keeps everything from going one-note. The parsley brightens the whole bowl, and the lemon dressing — four teaspoons of fuss — just ties it together.
How to make it
Wash the vegetables and chop everything into small, even pieces. Even cuts mean even flavor in every bite. Toss it all in a large bowl.
Drain and rinse the chickpeas and mince the parsley, then add them to the bowl.
In a small cup or bowl, whisk the lemon juice, olive oil, salt, pepper, and garlic.
Pour the dressing over and toss until everything is coated.
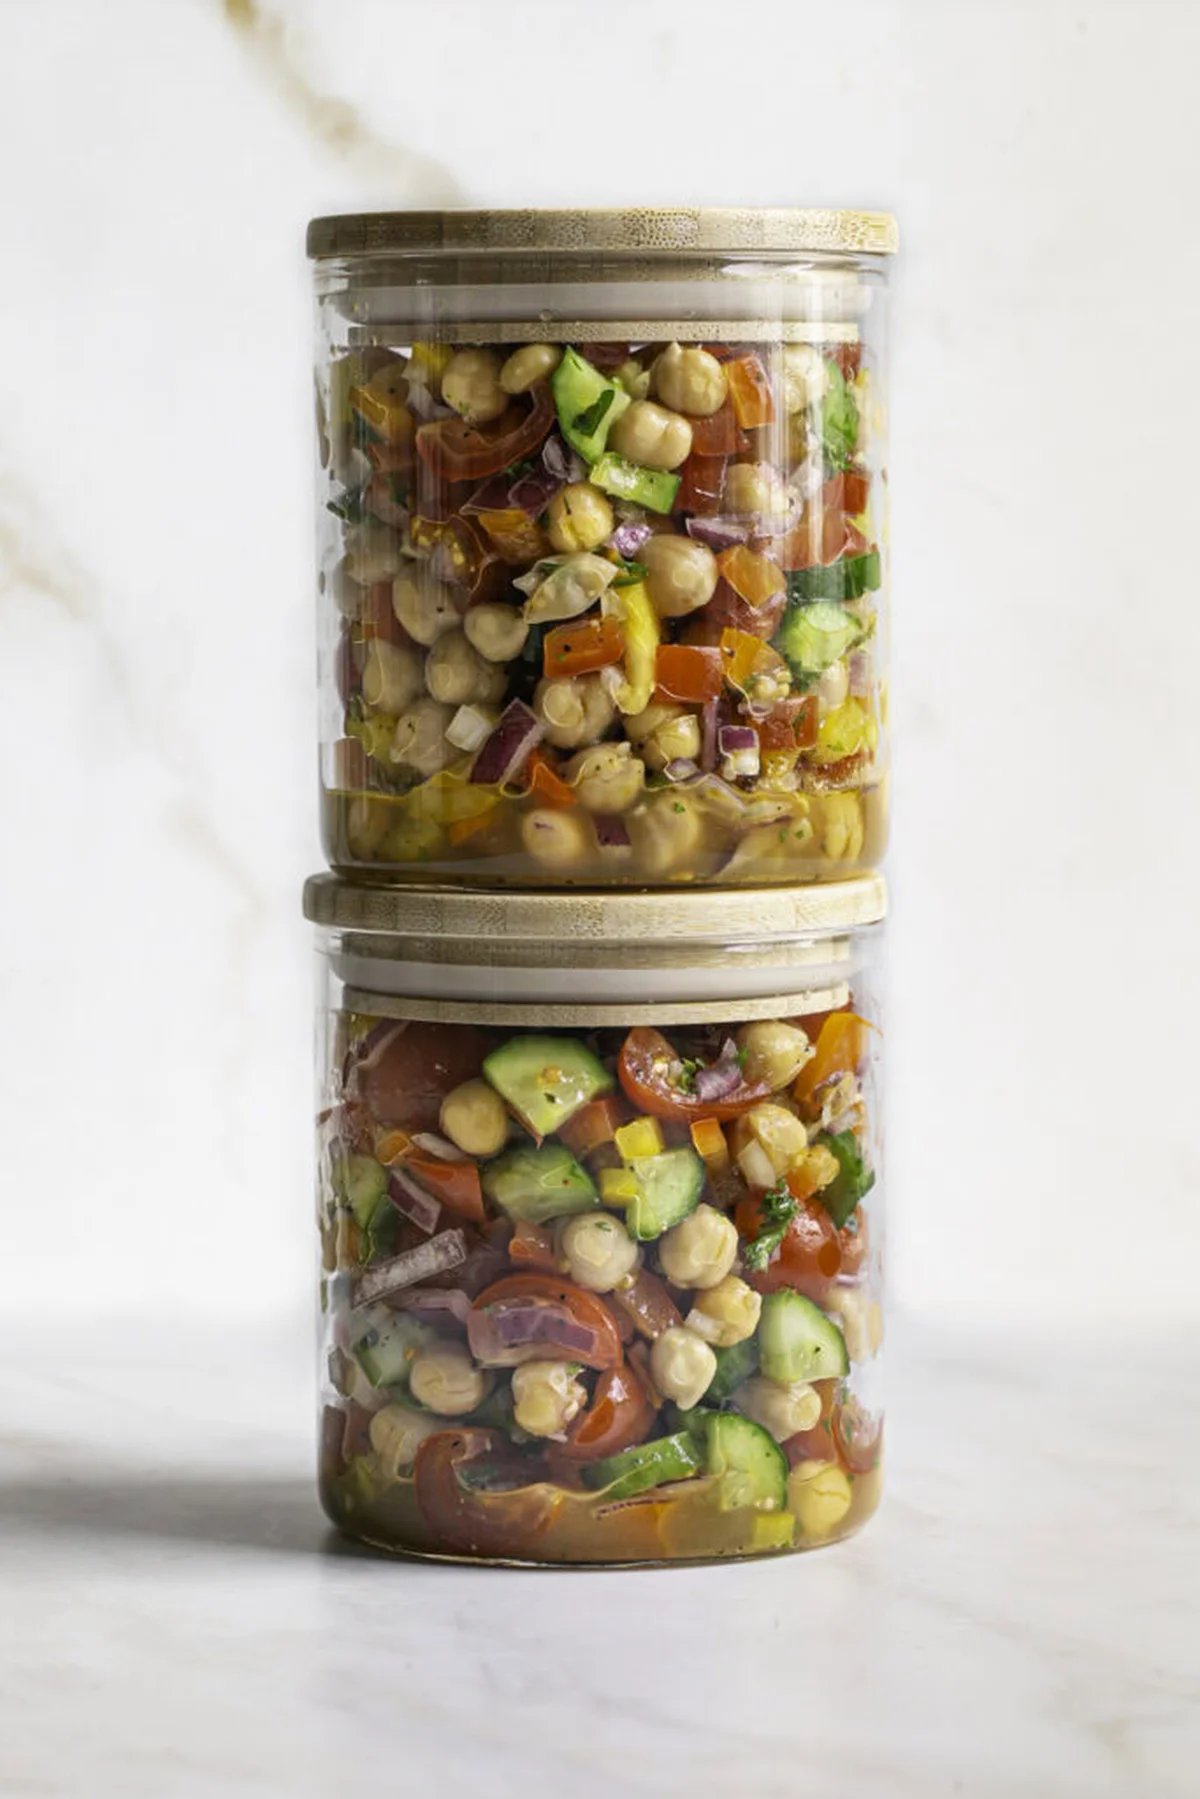
Divide into airtight containers and refrigerate until you’re ready to eat.
8 ways to eat it
The best part of this salad is that it doesn’t want to be one thing. Both my kids and I have been eating it for four days straight without a yawn.
On its own. Straight from the fridge, lunch or a light dinner, done.
With crackers or tortilla chips. Serve it over gluten-free crackers, or scoop it up like a chunky dip — it makes a shocking shareable snack party food.
In quinoa bowls. Spoon it over warm or cold quinoa to make it a complete meal. A drizzle of tahini takes it somewhere else.
In wraps or lettuce cups. Roll it into a wrap, or pile it into crisp lettuce leaves for a handheld lunch.
As taco filling. Top with avocado or a dairy-free sauce.
Inside an avocado. Spoon it into avocado halves — creamy, satisfying, zero extra effort.
On toast. Pile it onto toasted bread. Avocado toast with this on top is my personal favorite.
That’s seven if you count the naked salad. Add “straight out of the bag as a desk snack” — I won’t judge — and you’ve got eight days of lunch without repeating a thing.
Tips for the best version
Let it sit 15–20 minutes before serving. The flavors genuinely get better.
Want brighter? Add more lemon juice or a little zest.
Toss it again right before eating — the dressing settles.
Spice it up if you like: whatever you’ve got in the pantry works.
Questions I actually get asked
How long does it keep? Up to 4 days in the fridge, in an airtight container. That’s the four-day plan.
Can I use dried chickpeas? Yes — cook them ahead and let them cool completely first.
Why is it so good for meal prep? It holds up. The chickpeas keep their texture, the vegetables stay crisp, and the flavors deepen as the day goes by.
Can I add anything? Avocado just before serving so it doesn’t brown, olives, feta-style vegan cheese, or a sprinkle of seeds for crunch.
One more thing — my pick for the weeknight version: make it Sunday, and keep the cherry tomatoes in a separate bag until the day you eat it. Less juice, more crunch. I’ve made this exact salad four days in a row for the family, and nobody called it Tuesday dinner once. That’s the win.
Trade-It Tip: No lemon on hand? Two tablespoons of good-quality apple cider vinegar plus a pinch of sugar gets you almost there. Not identical — but close enough for a 15-minute Tuesday dinner.
If it doesn’t fit a Tuesday night, it doesn’t get published.
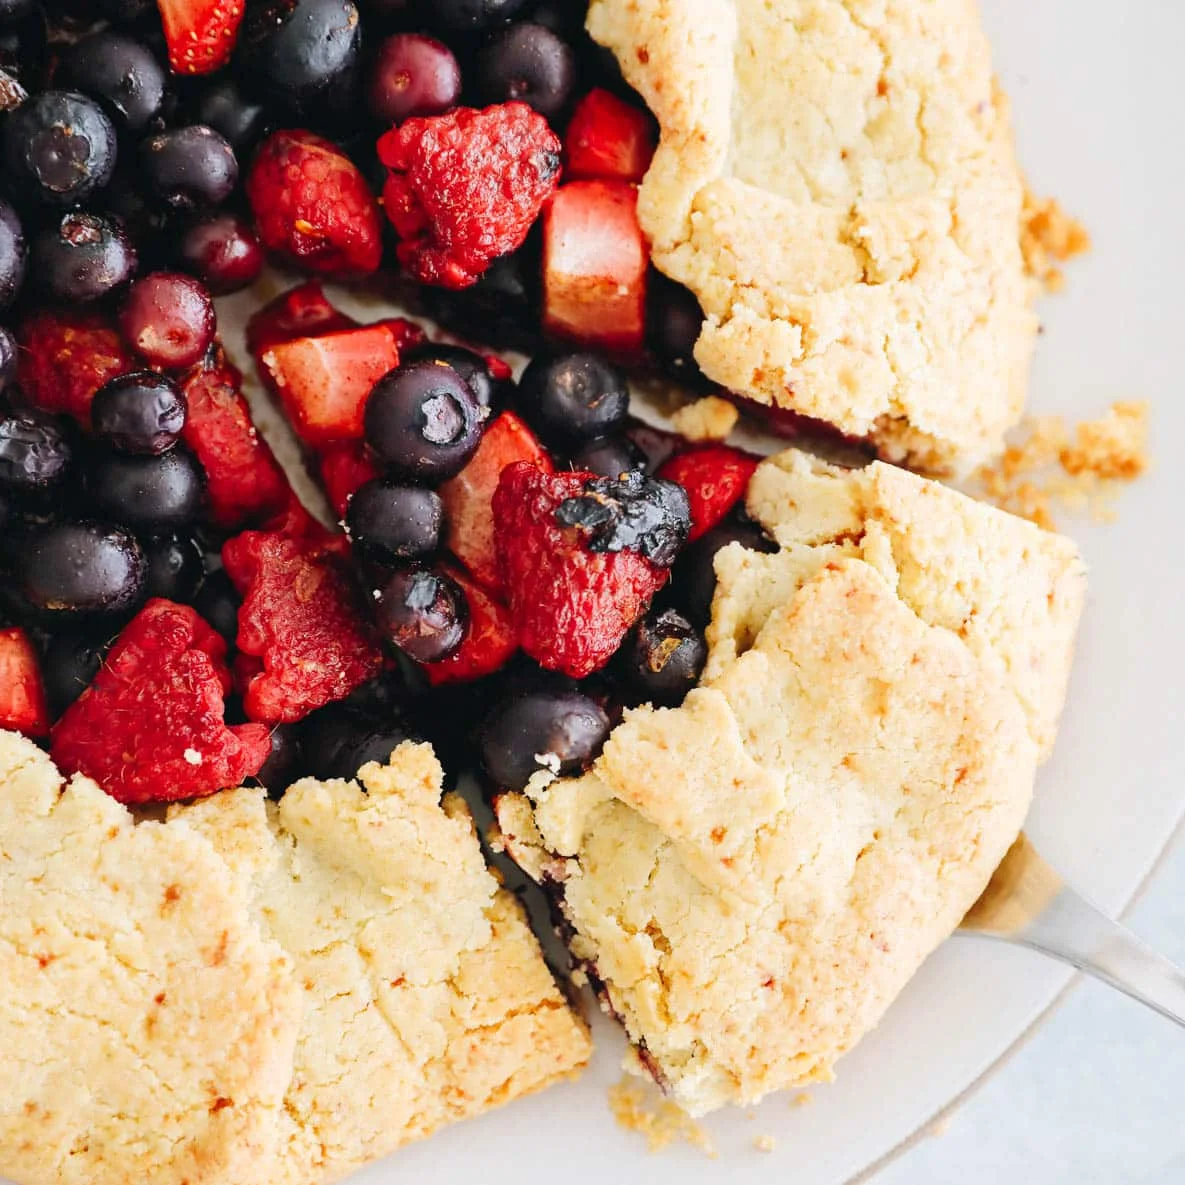
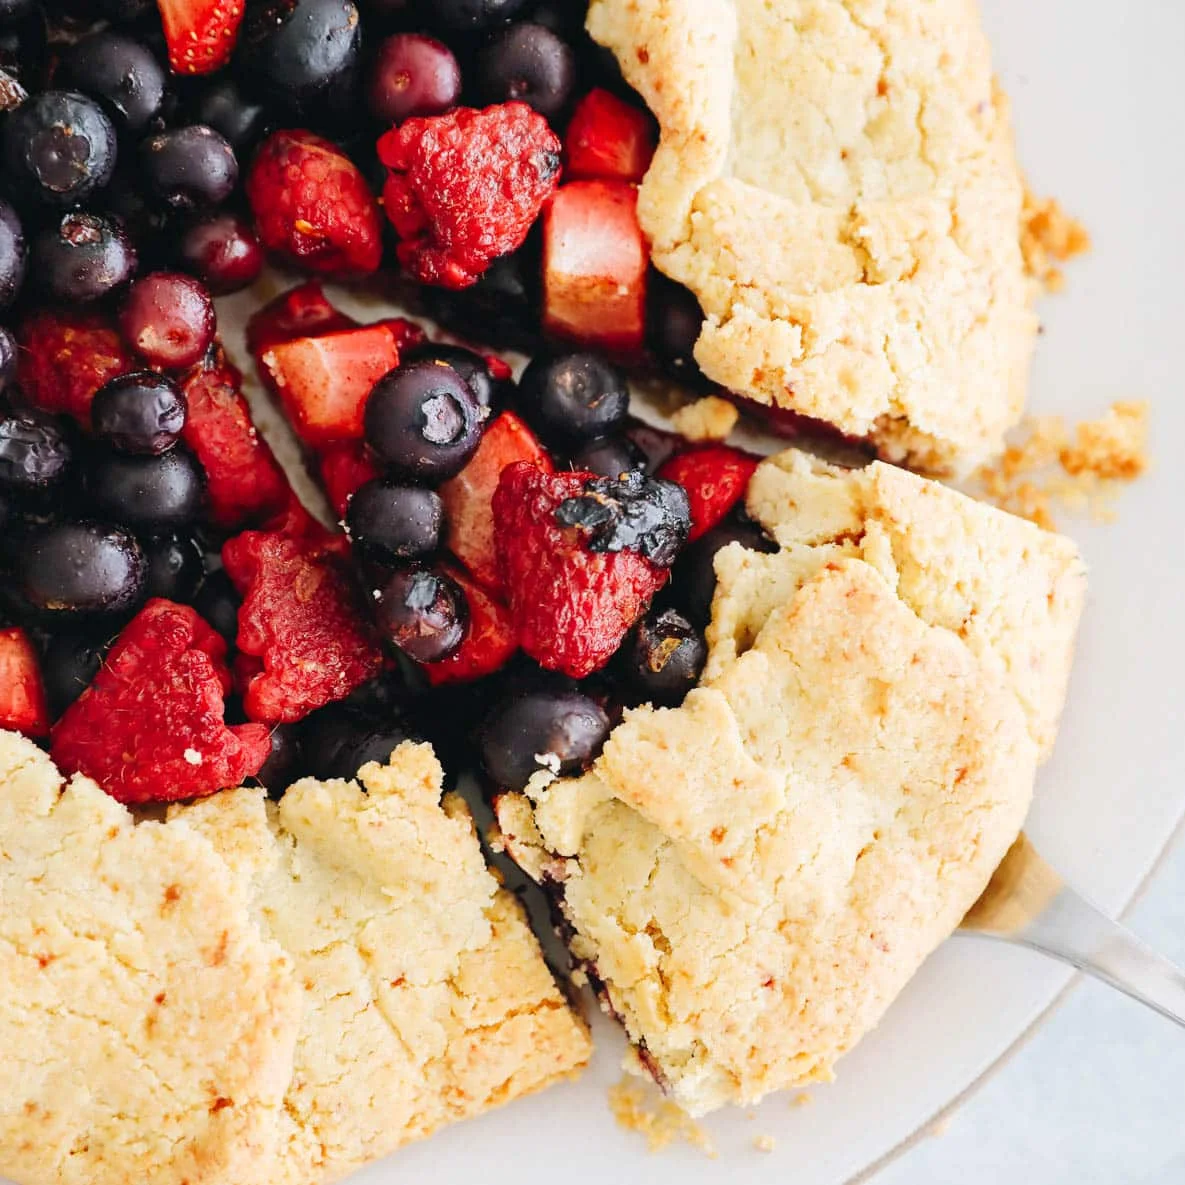
I’ve made this galette twice now, and I’m telling you — the second one came out looking like it belonged in a bakery window. The first one? Crust cracked in three places and I nearly sent it to the bin. Both were still delicious. That’s the thing about a galette: it’s the good kind of simple.
If you’re not a baking person, here’s your permission slip. A galette is a French free-form pastry — think of it as an open-faced pie that skips the pan entirely. You roll the crust out flat, pile the filling in the middle, and fold the edges up like a messy, beautiful envelope. No pie pan, no lattice, no stress.
Why this works
The crust skips wheat entirely, going with almond flour plus a little tapioca flour for structure, and the filling is just berries, lemon, and sugar — no tricks. The lemon is doing more work than it gets credit for: the zest and juice keep all that fruit bright instead of jammy.
The numbers, honestly
Prep: 15 minutes. Bake: 25 to 30 minutes. Total: about 45 minutes, start to finish — including the 20 minutes of cooling, which is really just a waiting game. It makes 8 slices, and leftovers keep for 3 days in the fridge. I serve it with a scoop of ice cream, and I will not be taking questions.
What you need
For the crust:
1 1/2 cups (180 g) almond flour — the fine kind, not almond meal
1/2 cup (50 g) tapioca flour
1 tbsp (15 ml) coconut sugar, or brown sugar if that’s what you have
1/4 tsp (1 g) sea salt
1/2 cup (115 g) cold butter, cubed — straight from the fridge
1 large egg
For the filling:
2 cups (300 g) mixed fresh berries — blueberries, raspberries, blackberries, strawberries, or whatever’s in season
Zest of 1 lemon
1/2 lemon, juiced (about 2 tbsp / 30 ml)
1 tbsp (10 g) tapioca flour
2 tbsp (25 g) coconut sugar, or brown sugar
1 tsp (5 ml) vanilla extract
1/2 tsp (1 g) cinnamon
How to make it
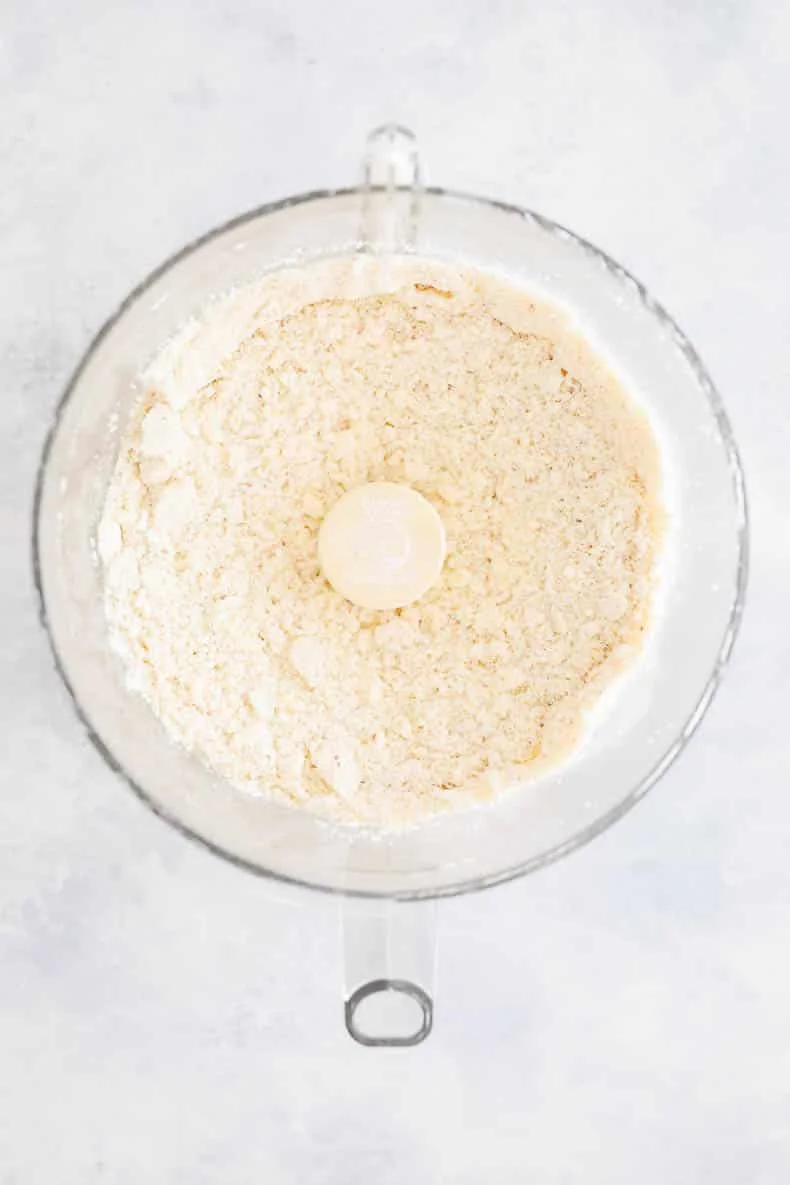
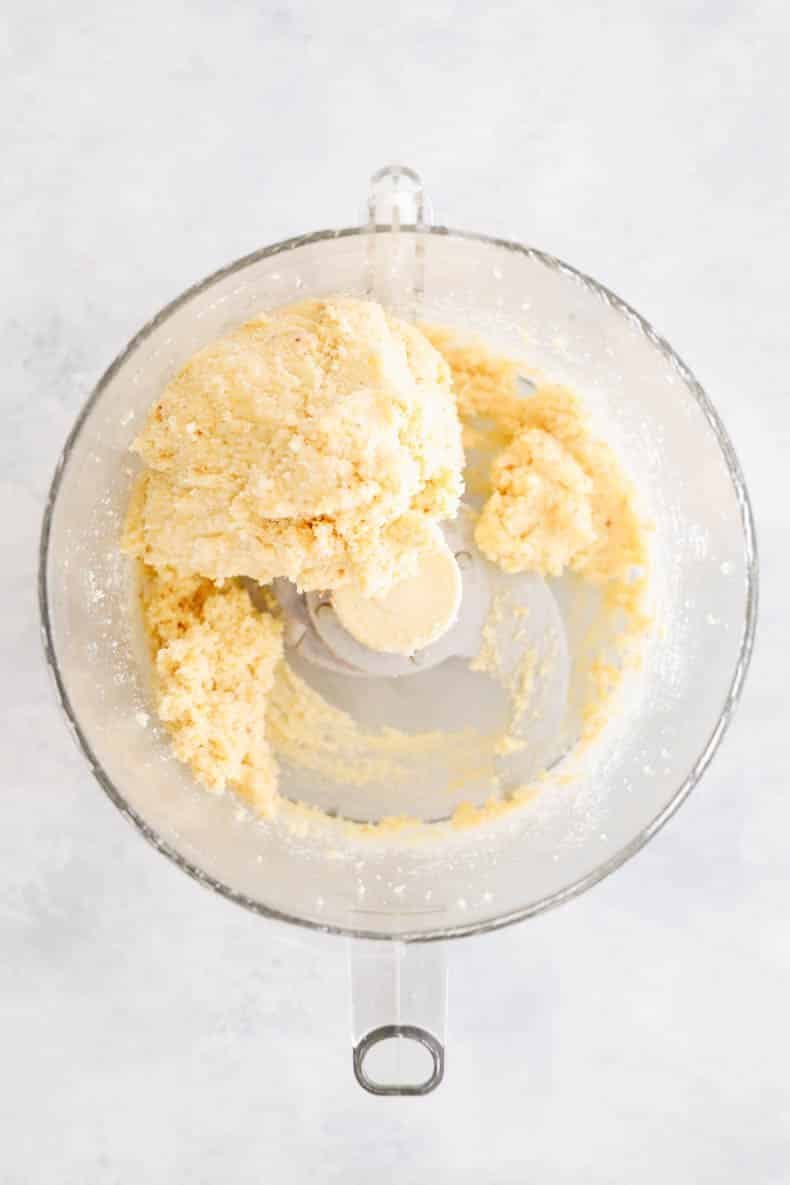
1. Make the crust. Preheat the oven to 350°F (180°C). Pulse the almond flour, tapioca flour, sugar, and salt in a food processor until mixed. Add the cold butter and pulse until it looks pebbly — like small rocks, not a paste. Add the egg and pulse until the dough just comes together. Resist the urge to keep pulsing. Overmixed dough = tough crust.
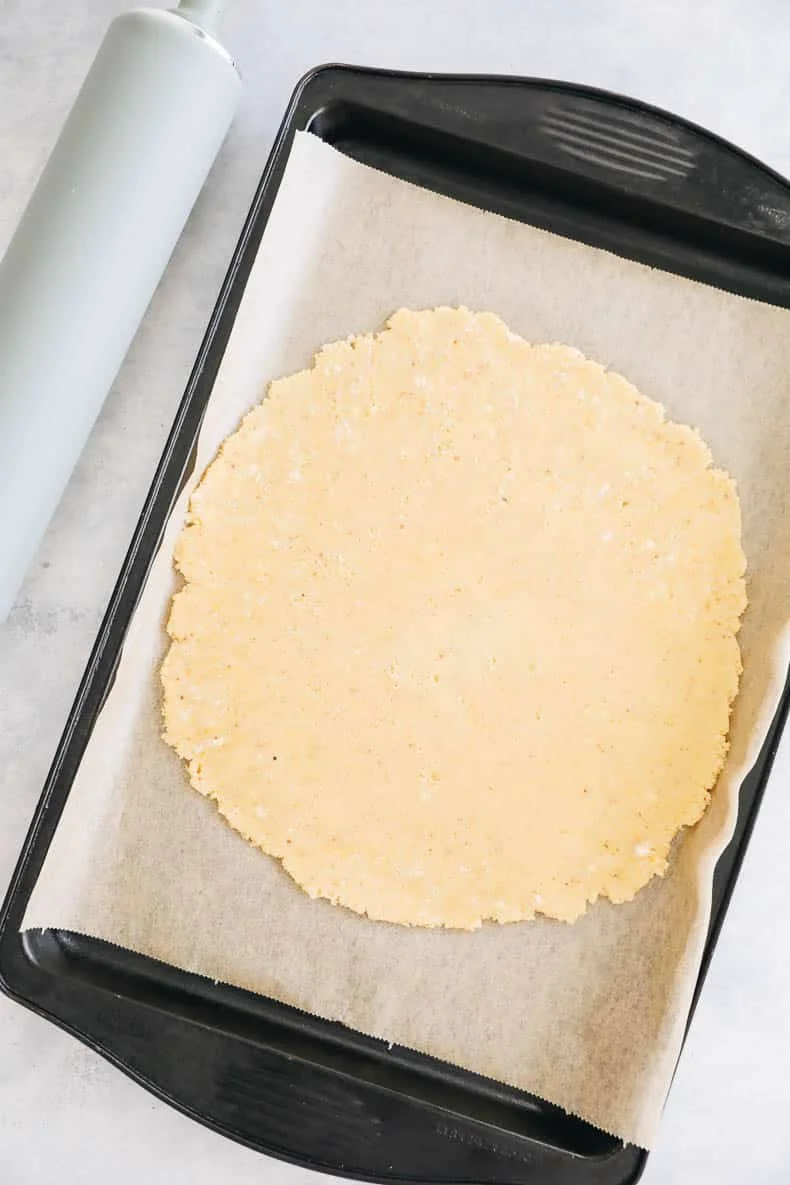
2. Roll it out. Tip the dough between two sheets of parchment paper and roll into a 12-inch (30 cm) circle. Slide it, parchment and all, onto a baking sheet and pop it in the fridge while the filling gets made. Cold crust is the whole game here.
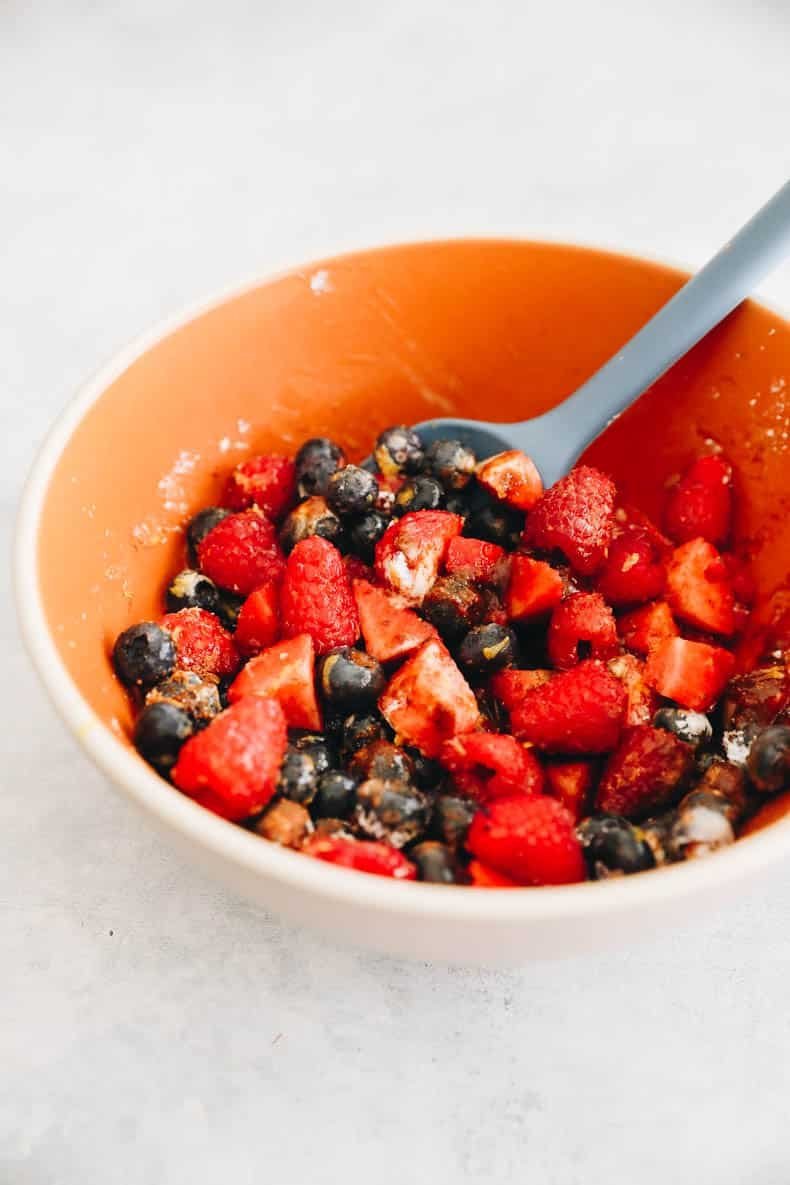
3. Make the filling. In a bowl, toss the berries with the lemon zest, lemon juice, tapioca flour, sugar, vanilla, and cinnamon until the berries are well coated.
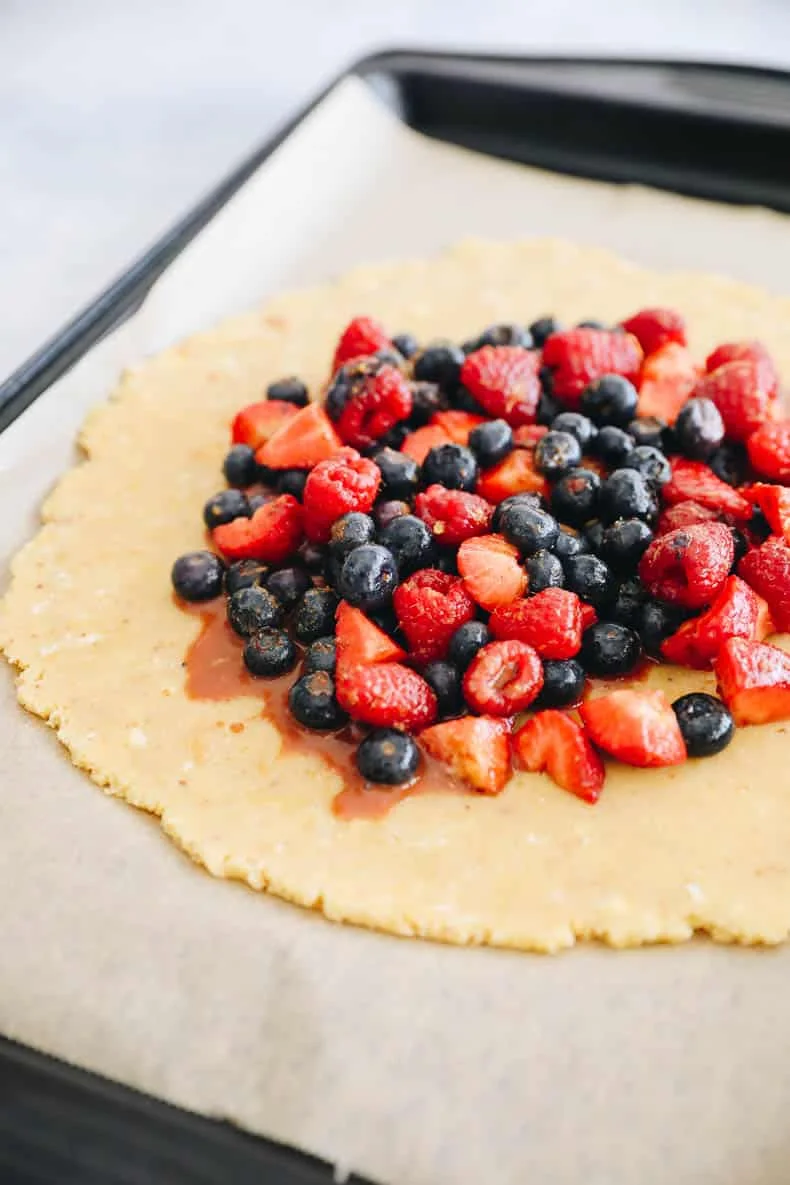
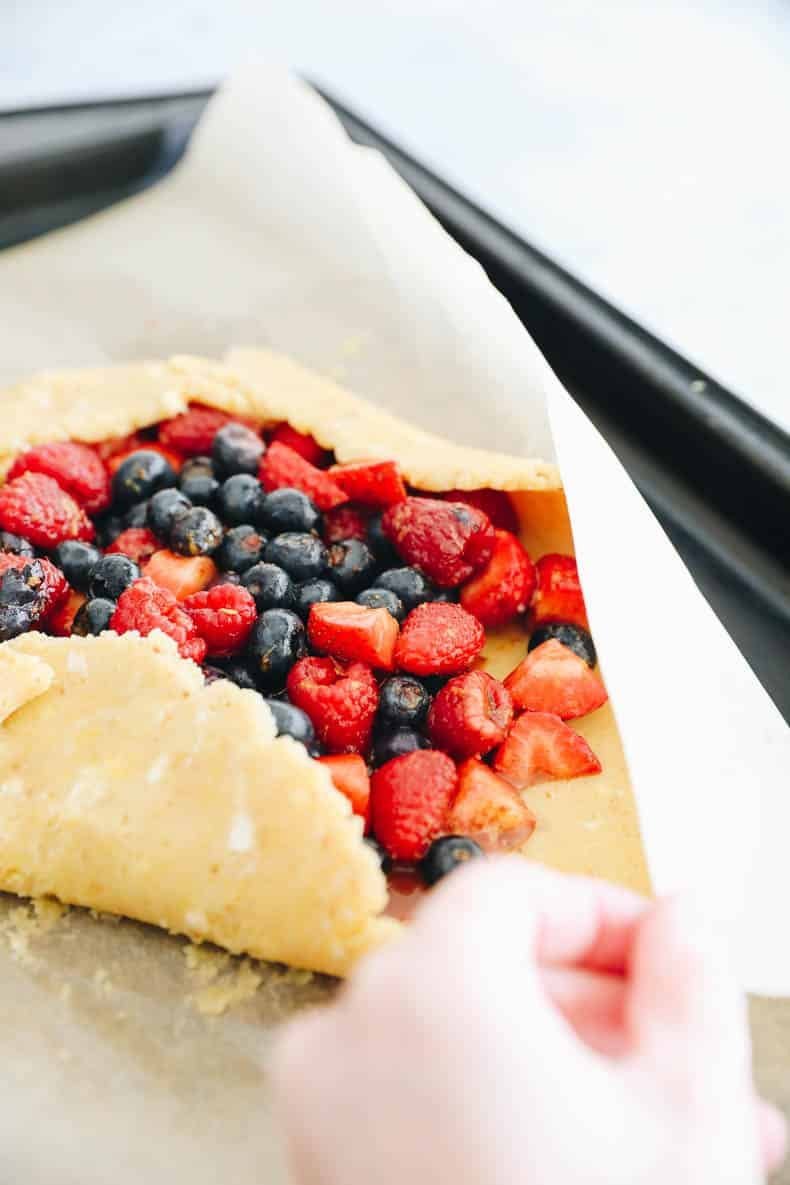
4. Assemble and bake. Tip the filling into the center of the chilled crust, leaving about a 2-inch (5 cm) border. Using the parchment paper to help, fold the edges up and over the filling all the way around. Patch any cracks with your fingers — the galette is supposed to look rustic, so don’t fight it. Bake for 25 to 30 minutes, until the edges are golden. Cool for 20 minutes before cutting.
5. Fold and bake. Give the edges one more fold to seal the berries in, then bake until golden. The galette will look loose and imperfect while it’s in the oven. That’s normal — it firms up as it cools.
6. Fix the cracks. Any broken spots? Press them shut with your fingers. The galette is meant to be rustic, and a few cracks make it look like it came from a bakery that doesn’t take anything too seriously.
Troubleshooting, from someone who’s failed at this
My crust is falling apart. That’s the aesthetic. Piece it back together with your hands and it’ll hold once baked.
Can I skip the egg? Yes — swap it for 2 to 3 tbsp (30 to 45 ml) of cold water. Start with 2 and add the last one only if the dough looks too dry.
Can I use different fruit? Absolutely. Use 2 cups of whatever berries you like, or any seasonal fruit.
Can I make it ahead? The raw crust keeps in the fridge for several days. You can also freeze the crust for up to 3 months and thaw before baking. If you freeze a fully assembled galette, just add a few extra minutes to the bake time.
Out of tapioca flour? Arrowroot flour is the best stand-in. Cornstarch works in a pinch, though the filling won’t set quite the same.
Is it actually gluten-free? Yes — as long as your almond flour and tapioca flour are labeled gluten-free.
Trade-It Tip
No coconut sugar? Brown sugar works fine in both the crust and the filling — same job, slightly different flavor, and your pantry already has it. And no ice cream? A splash of cream is a perfectly fine ending.
If it doesn’t fit a Tuesday night, it doesn’t get published.
I used to think “packed lunch” meant a whole counter of prep: a salad to toss, a sandwich to trim, a snack to buy. Then I started making pinwheel sandwiches and realized the whole thing is one tortilla, one knife, and about 10 minutes.
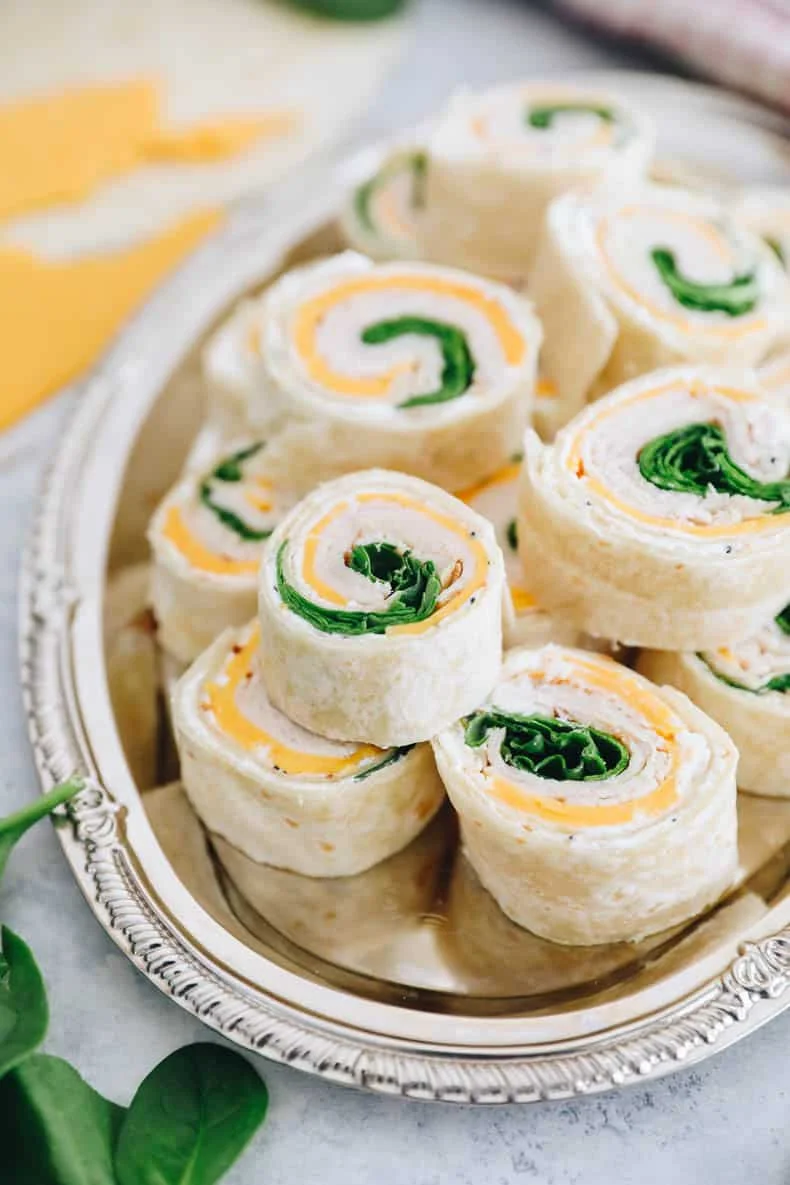
They’re the kind of thing that looks like you spent an hour, but you didn’t. They work as a lunch, a snack, or the “we have game day, what’s for the crowd?” answer. And the best part for a household with kids: they’re easy to hold, easy to eat, and hard to pick apart. My kids love them, which is the whole point.
Why this works
The cream cheese is doing two jobs. It’s the flavor, sure, but it’s also the glue. Without it, the fillings slide and the roll falls apart on the plate. Soften the tortillas for 30 seconds, press the cream cheese in, and the whole thing rolls up like it was meant to. That’s the good kind of simple.
A few things that actually matter
Soften the tortillas. This is the step people skip, and then they wonder why their rolls crack. 30 to 40 seconds in the microwave makes them pliable enough to roll without snapping.
Use a binder. Cream cheese is my go-to, but this is the part where you get to be yourself. Hummus, tzatziki, even pesto all hold a roll together. More ideas below.
Make ahead, but not too far ahead. These keep well in the fridge for up to 24 hours, and you can push it to about 3 days if you’re prepping a whole week. Past that the wraps start to go a little soggy, which is the price of convenience.
Customize the filling. The base recipe below is my default. Swap in whatever deli meat, cheese, and greens you have on hand and it still works.
What you’re working with
Think of these in layers, bottom to top:
Base — flour tortillas are my pick, but lavash, flatbread, or even big sturdy leaves of lettuce work.
Spread — the binder. Cream cheese, hummus, tzatziki, baba ganoush, or pesto.
Meat — I reach for smoked turkey, but any sliced deli meat, thinly sliced chicken, cooked bacon, or even smoked salmon works.
Cheese — any sliced cheese. I will not deny the turkey-and-cheddar combo is my favorite.
Veggies — leafy greens are the move, but thinly sliced peppers, cucumber, or shredded carrot are all fair game.
How to make pinwheel sandwiches
Ten minutes, start to finish — including the microwave and the slicing.
1. Spread evenly
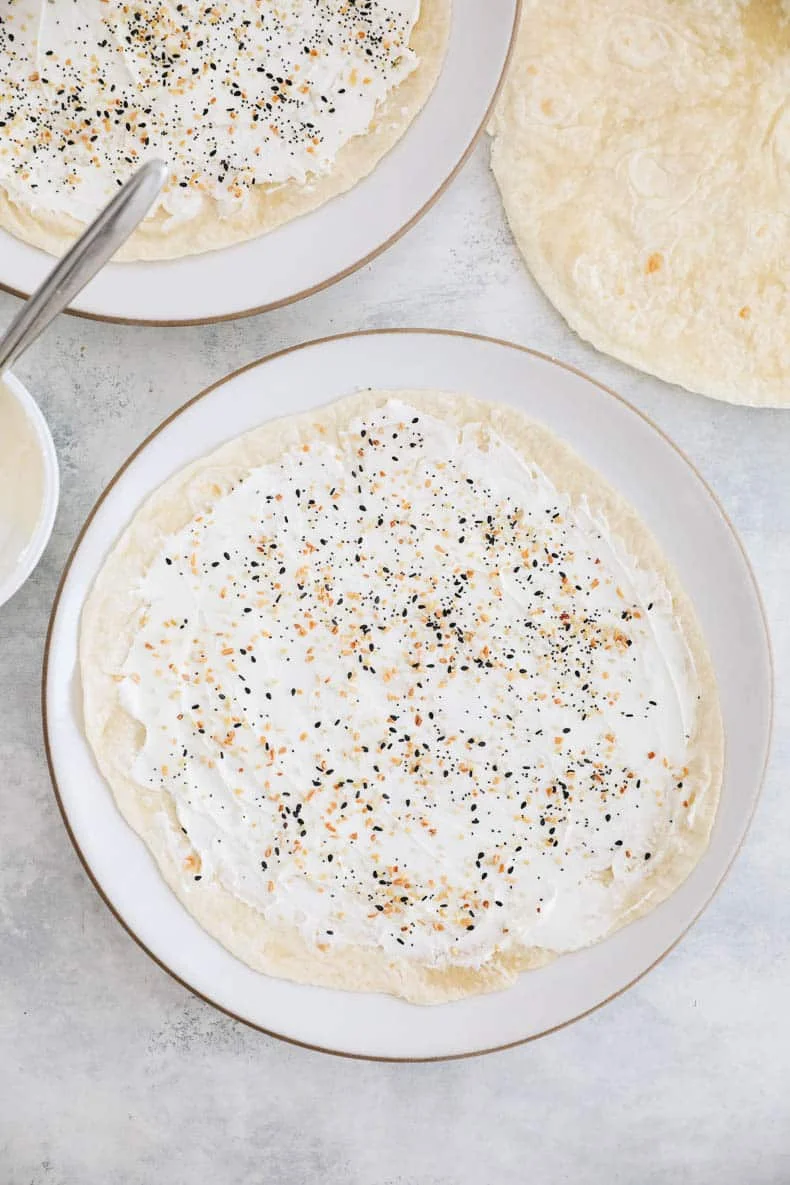
Soften your tortillas in the microwave for 30 to 40 seconds. Spread your softened cream cheese in an even layer over all 4 tortillas, then sprinkle the ranch seasoning (or everything-bagel seasoning) evenly on top.
2. Add the fillings
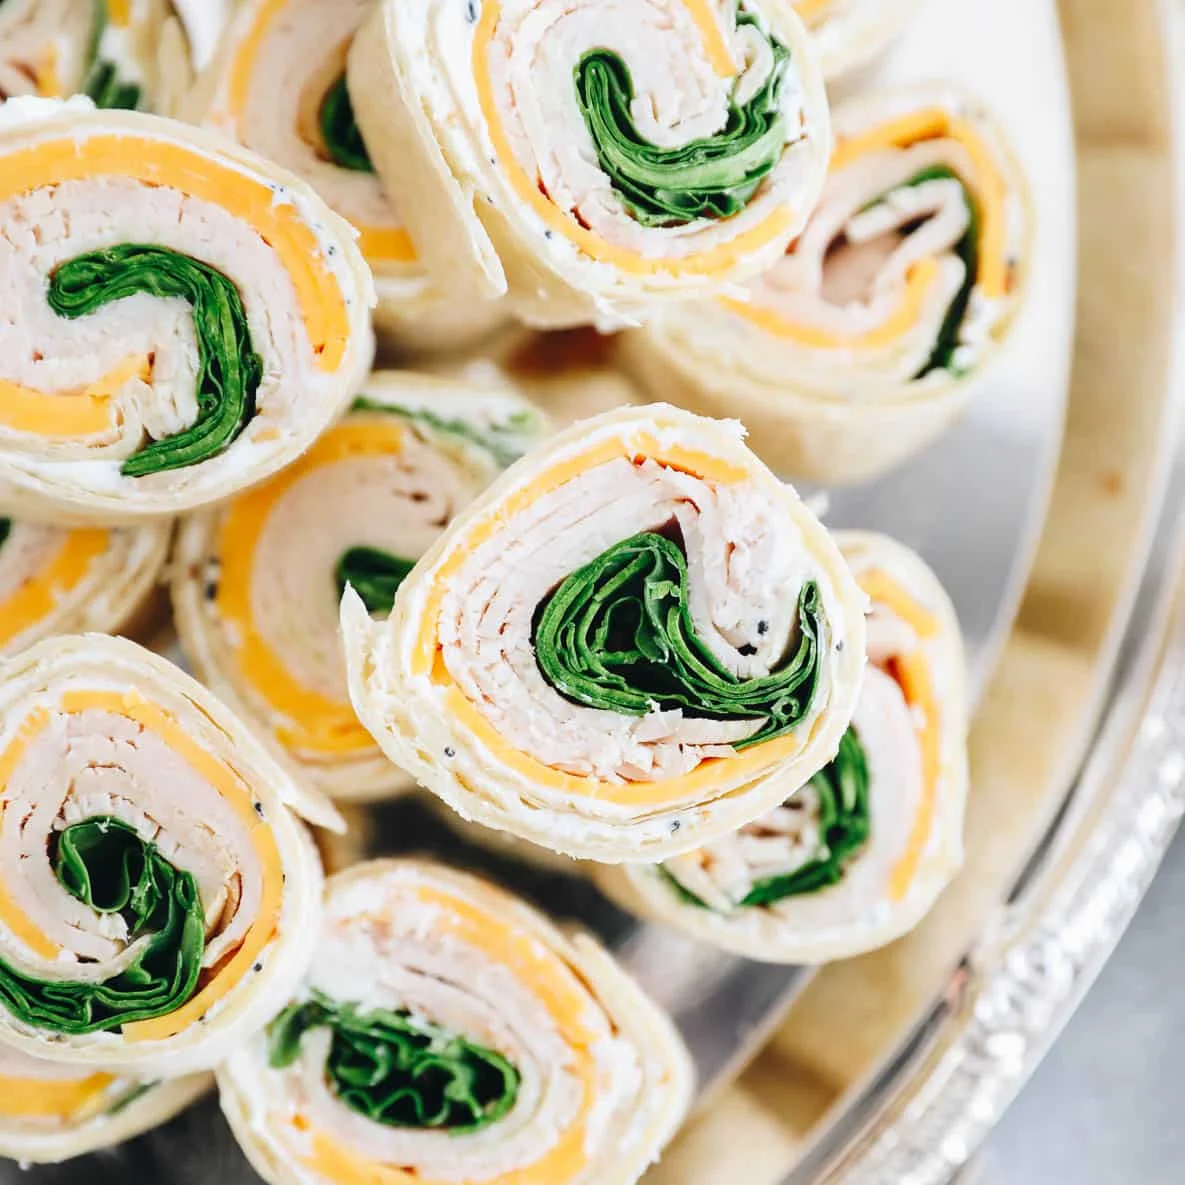
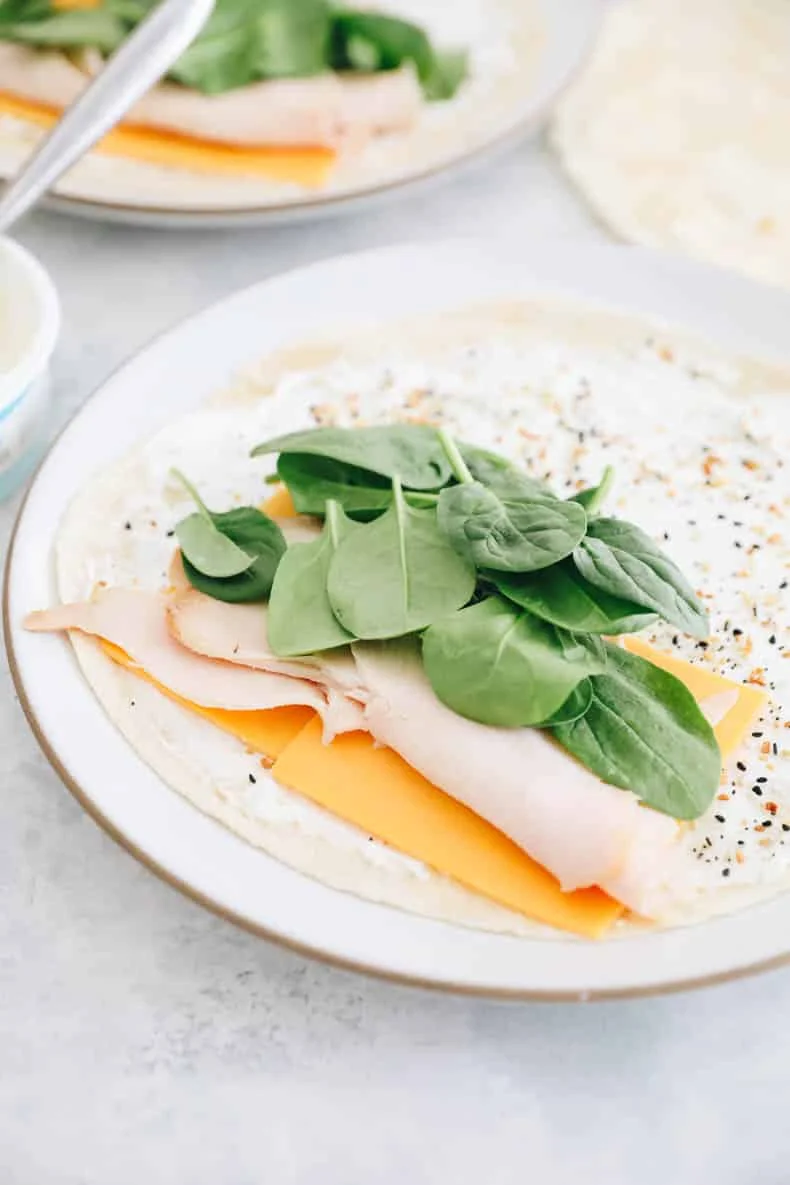
Along the bottom third of each tortilla, layer on 2 slices of turkey, 2 slices of cheese, and a small handful of spinach. Keep the fillings on one side — that’s what gives the roll its spiral.
3. Roll and slice
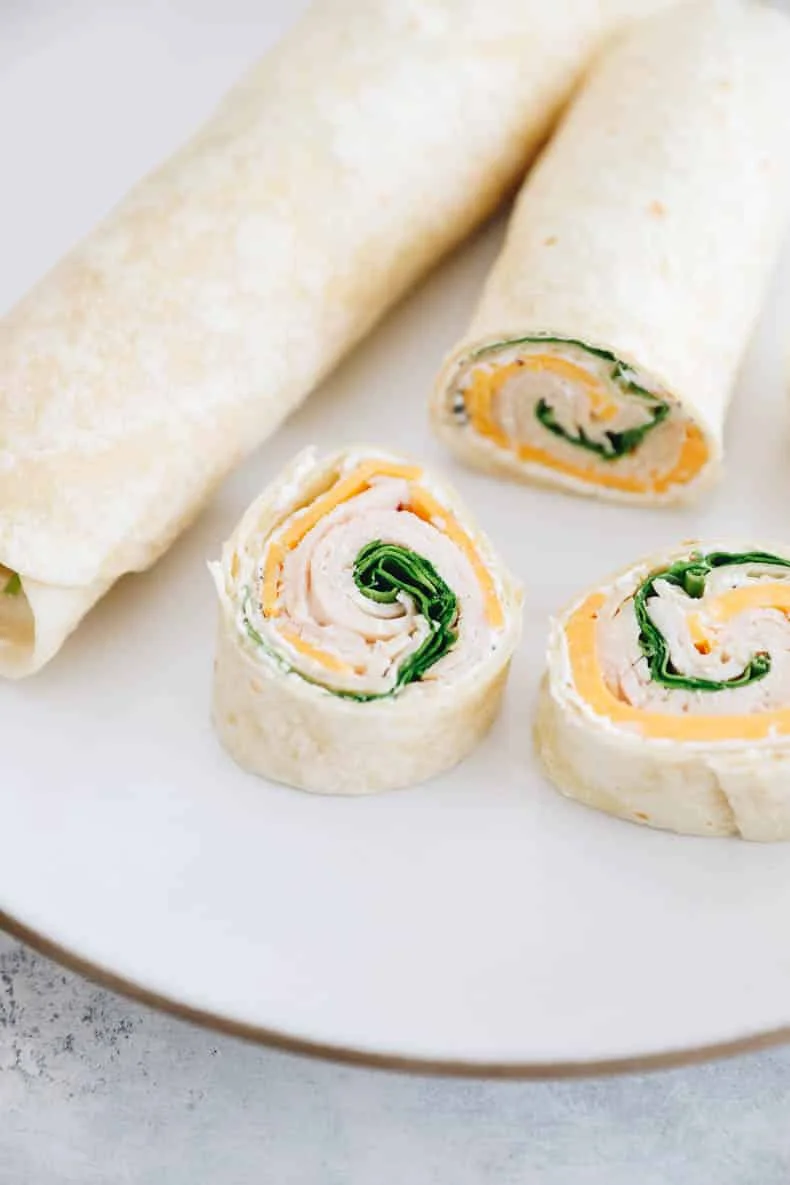
Starting from the bottom, roll each tortilla up into a tight log. Then slice it into 1-inch pinwheels. That’s it — you’re done.
If a roll ever wants to unroll on you, a toothpick straight down the middle holds it together without anyone noticing.
Easy swaps
Once you’ve made the base version a couple of times, the swapping is where it gets fun:
Meat: chicken, salami, or ham in place of turkey. Smoked salmon is a more creative (and more dinner-y) version.
Veggies: any leafy green works. Spinach is just my default.
Cheese: any sliced cheese. Change it up, no rules.
Spread: swap the cream cheese for hummus, tzatziki, pesto, or any other creamy sauce.
Pickles: I love the bright acidity of pickles in these. Sliced bread-and-butter pickles are the way to go.
Bacon: cooked, chopped bacon pushes these toward a cobb-salad flavor, and it’s a hit.
Frequently Asked Questions
What are pinwheel sandwiches?
Tightly rolled sandwiches made in a wrap, tortilla, or flatbread, then cut into rounds — which is how they got the name. They usually include some kind of meat, cheese, veggies, and a dip or sauce.
Can I prep them in advance?
Yes. They keep in the fridge for up to a day. They soften the longer they sit, so I don’t go past 24 hours.
Best bread for these?
I stick with flour tortillas, but spinach or sundried-tomato tortillas work too. Gluten-free wraps or lavash are fine as well — just soften them in the microwave before rolling.
Can I make them dairy-free?
Yes. Skip the cheese and use hummus in place of cream cheese to keep the rolls bound together.
Do I have to use ranch seasoning?
No. I just like the flavor it adds, so feel free to skip it entirely.
Storing them
Keep the pinwheels in an airtight container in the fridge for up to 24 hours. They’ll last a bit longer — around 2 to 3 days — but the wraps get soggier the longer they sit. I don’t recommend freezing them.
Recipe
Prep time: 10 minutes • Yield: 4 servings
Ingredients
4 large flour tortillas (or lavash or flatbread)
8 ounces softened cream cheese
1 tbsp ranch seasoning, or everything-bagel seasoning
8 slices smoked turkey (or any other deli meat)
8 slices cheddar cheese (or any other sliced cheese)
1–2 cups baby spinach
Instructions
Soften your tortillas in the microwave for 30 to 40 seconds.
Spread the softened cream cheese in an even layer over all 4 tortillas.
Sprinkle the ranch seasoning evenly over the tortillas.
Along the bottom third of each tortilla, layer on 2 slices of turkey, 2 slices of cheese, and a small handful of spinach.
Starting from the bottom, roll each tortilla into a tight log, then slice into 1-inch pinwheels.
Serve right away, or store in the fridge for up to 24 hours.
Note: the cream cheese holds these together well, but if any rolls are loose, a toothpick through the middle keeps them put.
Trade-It Tip: No cream cheese? Hummus does the same binder job — same hold, and it turns these into a lunch you can take to a dairy-free kid’s table.
That’s the whole thing: one tortilla, one knife, ten minutes. Make a batch the night before and your next few packed lunches are already handled.
If it doesn’t fit a Tuesday night, it doesn’t get published.
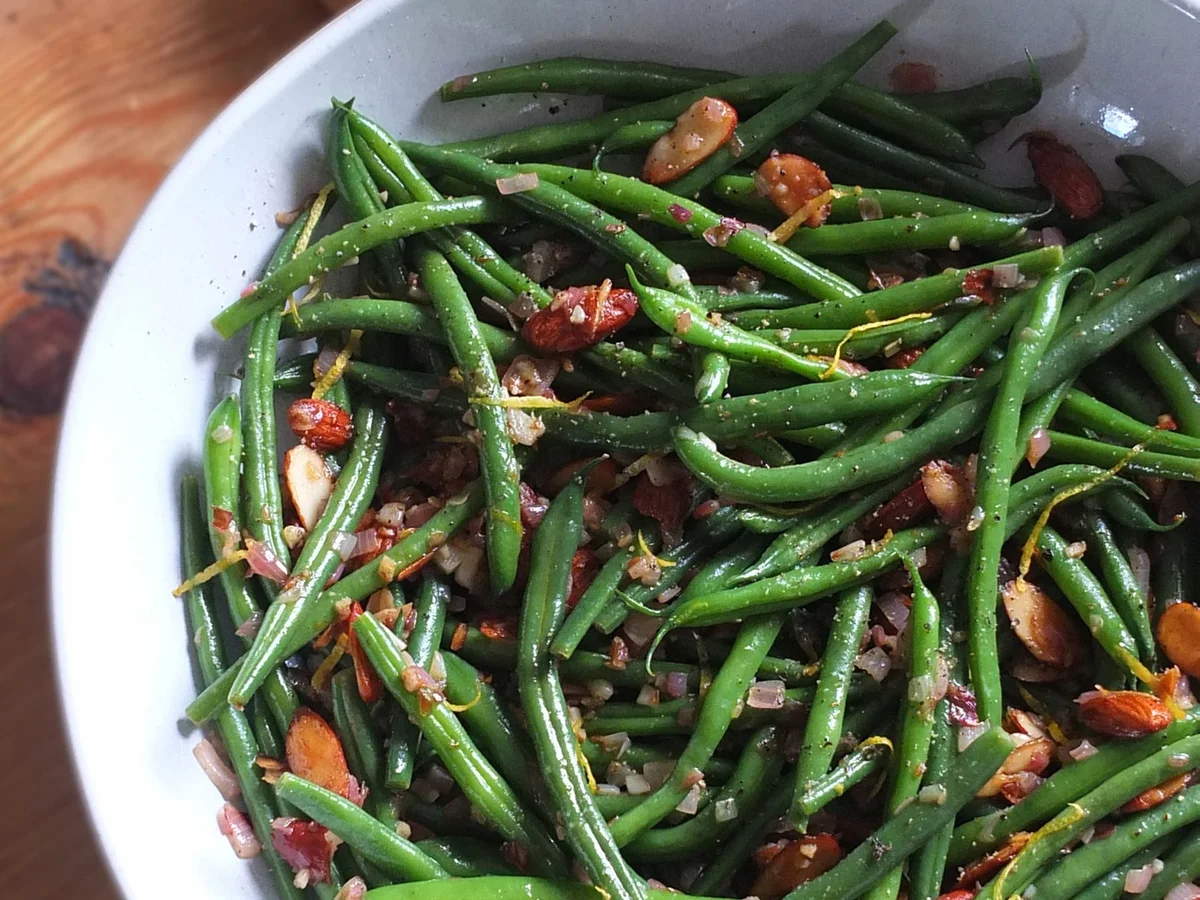
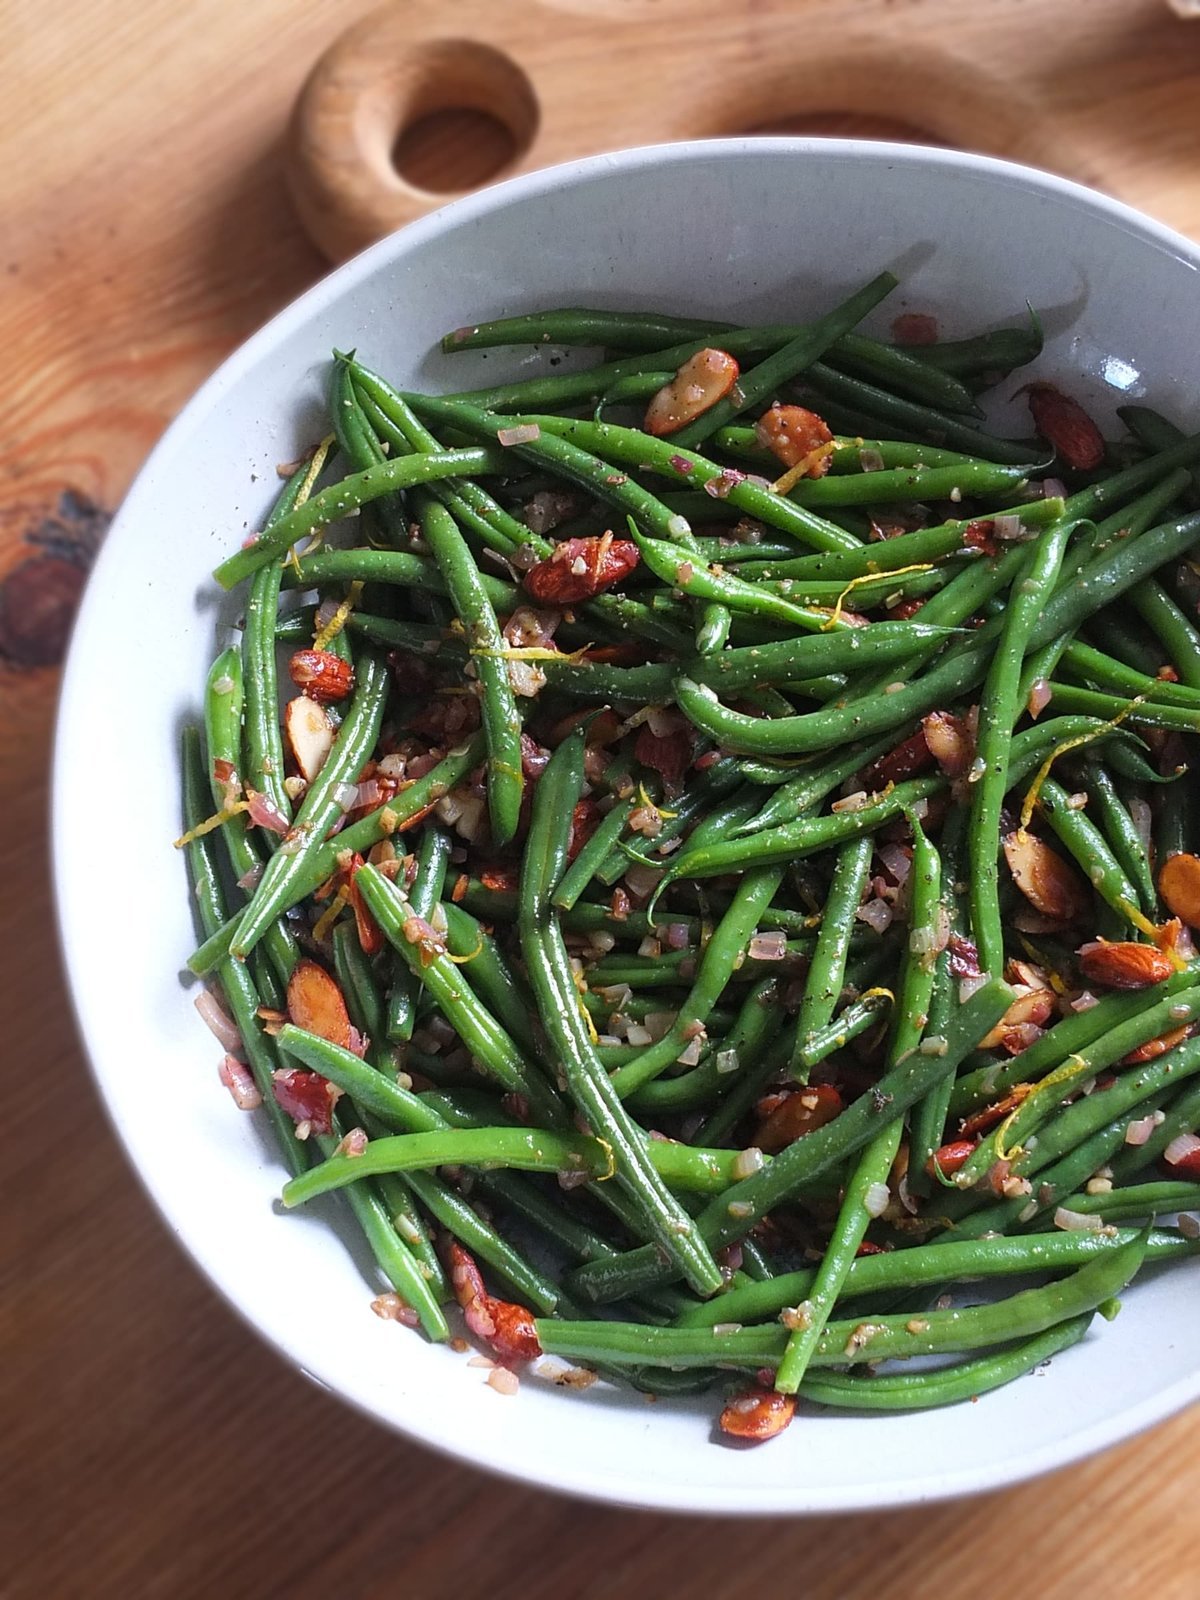
Here’s the thing about green beans. Half the people I cook for will quietly push them to the edge of their plate, and the other half will steal the last one off my own. This dish is for the first group. I make it when guests have confessed — usually over wine — that they ‘don’t really do vegetables’. By the time the second course is out, I’ve got a few new converts.
It’s a classic French side called green beans almondine, and ‘almondine’ (or amandine) is just the fancy French word for a garnish of toasted almonds. No technique, no special equipment — a pot, a pan, and a timer.
Why this works
Two small moves do all the work. Parboiling the beans in very salty water for exactly 4 minutes keeps them bright green and snappy, then a quick dunk in cold water stops the cooking dead. Toasting the almonds first builds a nutty, almost savory base that the beans and lemon finish off. The lemon is not optional — it’s what makes this taste like more than ‘just green beans’.
What you need
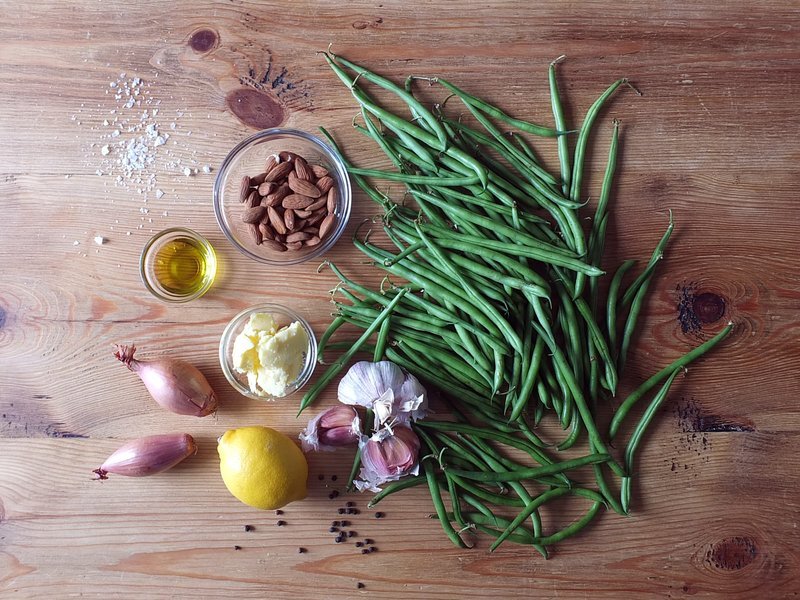
400 g (about 14 oz) fine green beans
40 g (about 1/4 cup) raw almonds, halved lengthwise
1 lemon — both zest and juice
2 shallots, finely chopped
2 garlic cloves, finely chopped
1 tbsp butter
Olive oil, to finish
Serves 4. Around 133 kcal per serving. Easy — it’s a side dish with five moving parts.
How to make it (25 minutes, start to finish)
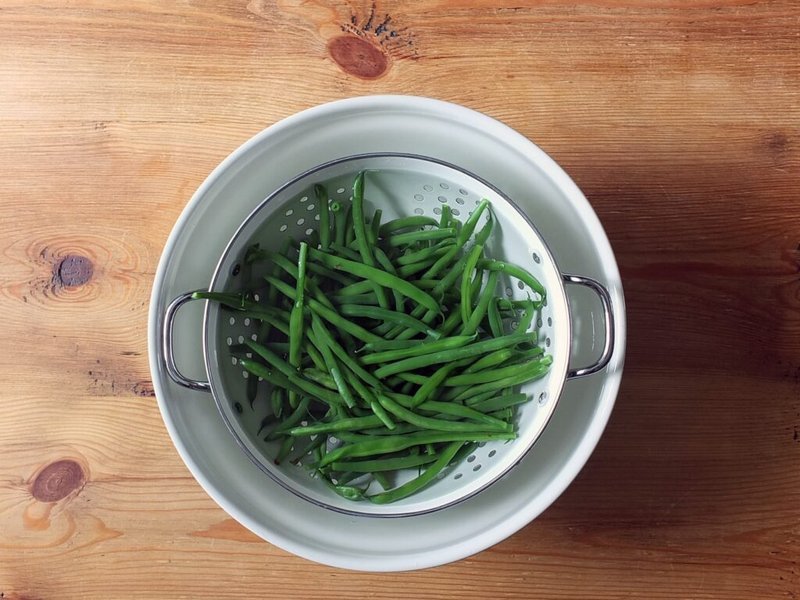
Bring a large pot of heavily salted water to a boil — salt it like the sea, because this is the only chance the beans have to taste good. Parboil the green beans for 4 minutes exactly. I set the timer. Using fine green beans; if yours are thicker, give them a minute or two more.
Drain the beans and plunge them into cold water to stop the cooking. Set them aside.
Heat the butter in a sauté pan over medium heat. Add the halved almonds and sauté until they start to brown, about 2 minutes. Keep an eye on them — browned is good, burnt is bitter.
Add the shallots and garlic. Cook until the shallots start to soften, a minute or two.
Add the parboiled green beans and toss to coat them in the butter and almond mixture. Stir in the lemon zest and juice, then season well with salt and black pepper.
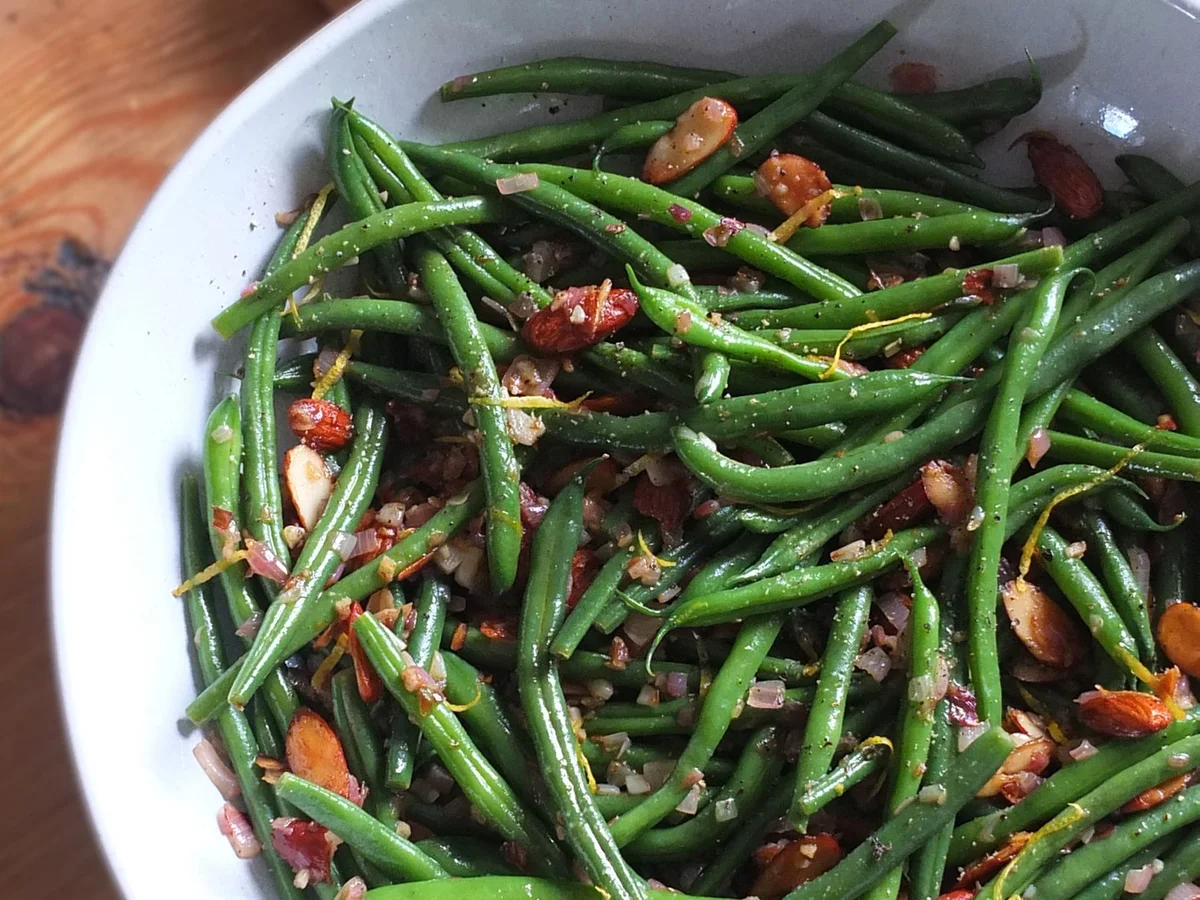
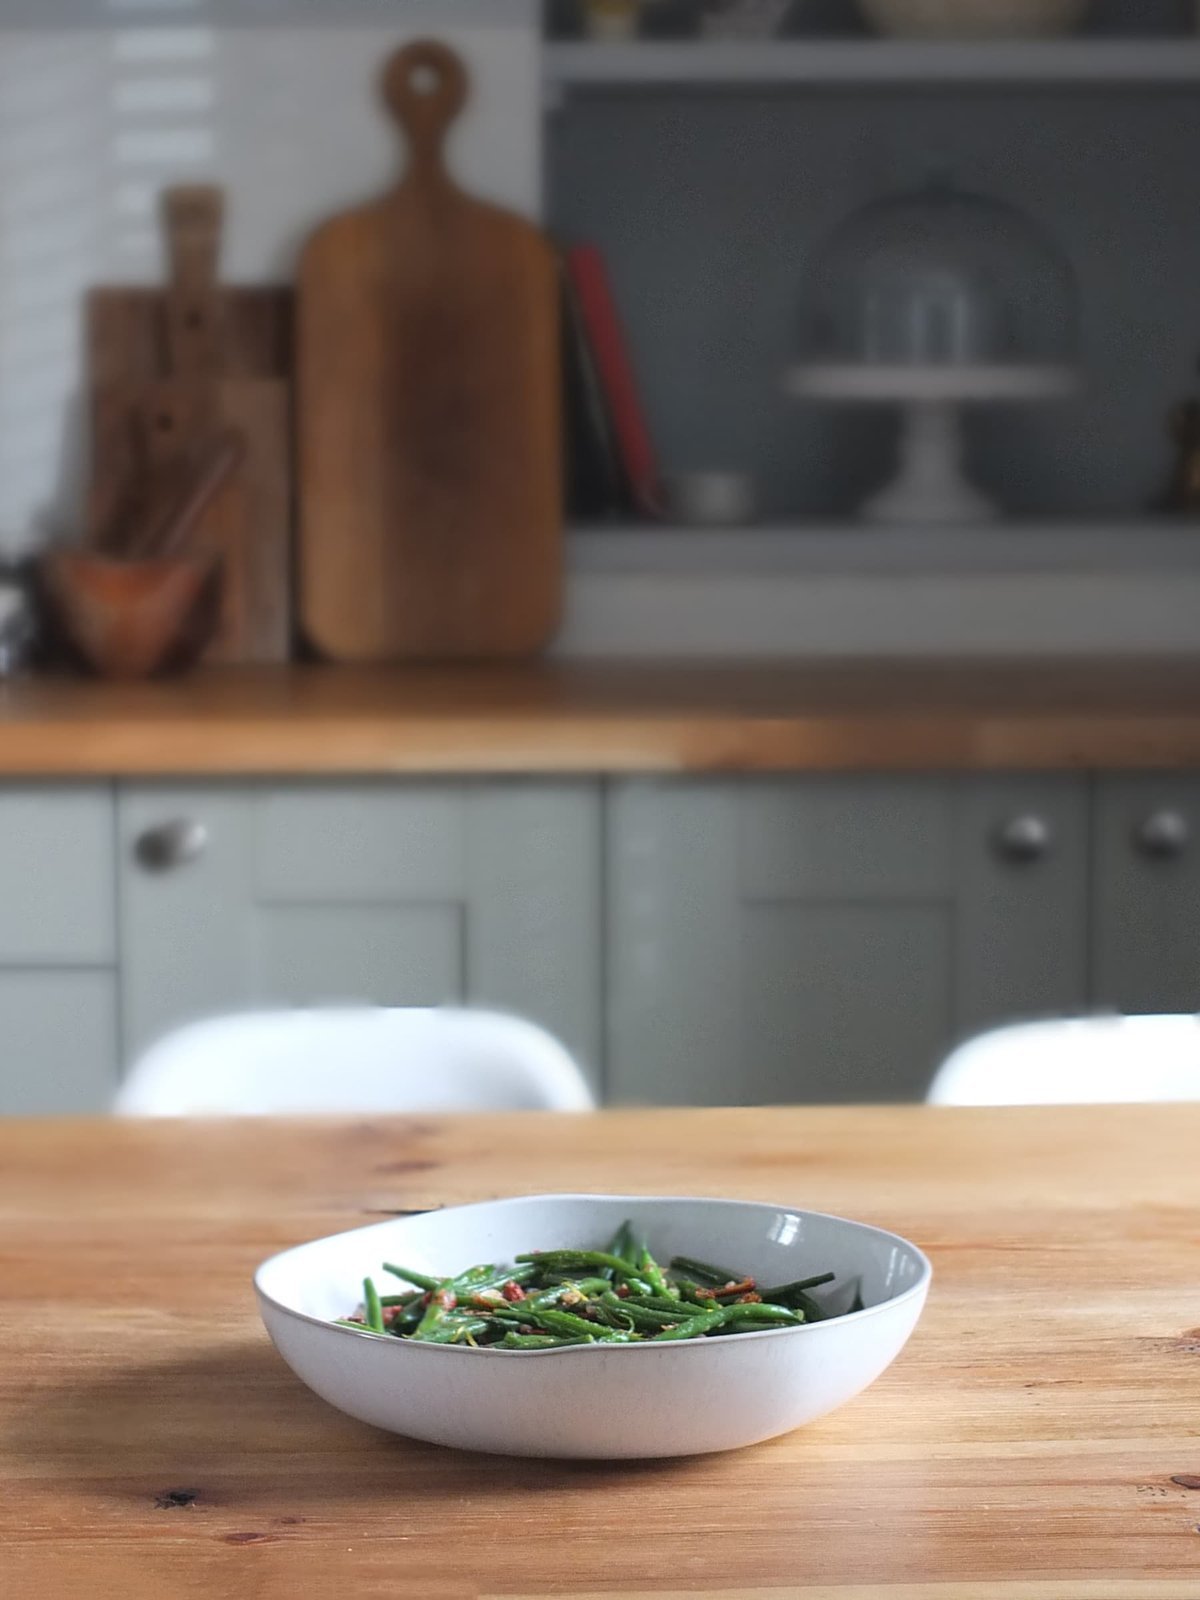
Arrange on a serving plate — pile the almonds on top, don’t be shy about it — and finish with a drizzle of good olive oil.
What to serve it with
This started out as my go-to side for beef bourguignon — the beans cut through the rich stew beautifully. It’s just as good with roast chicken, a simple pan of fish, or creamy mashed potatoes if you want the full French dinner without the effort. For a plant-based table, a mushroom bourguignon works as a stand-in.
Trade-It Tip: No shallots? A small onion, finely chopped, does the job — a touch sweeter, same job. And if you’re out of almonds, sliced ones toast just as well; you just can’t halve them.
That’s the whole dish. One pot of boiling water, one pan, 25 minutes. If it doesn’t fit a Tuesday night, it doesn’t get published.